I am sharing how to make flaky, crispy, melt-in-mouth shankarpali using deep frying, baking, or air frying techniques.
Recipe Ingredients
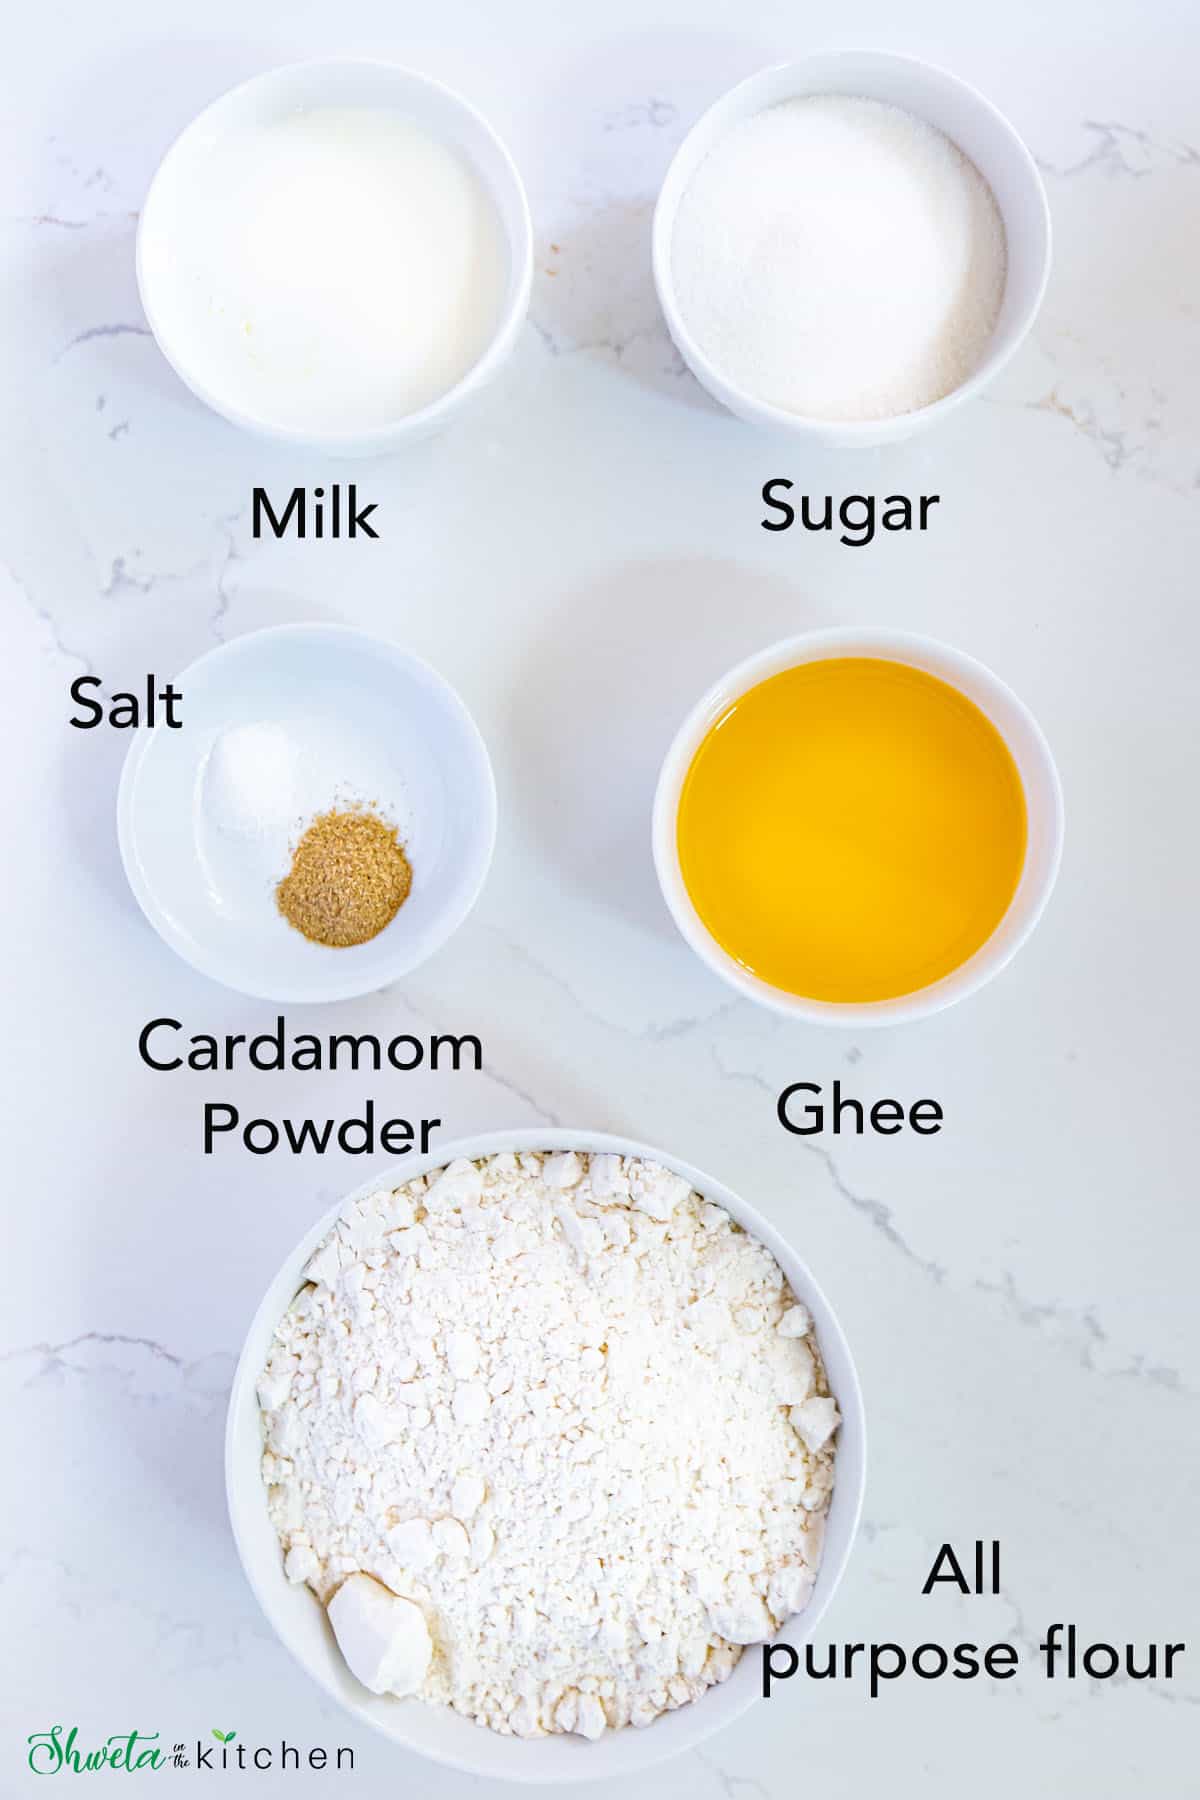
Flour - I use maida or all-purpose flour as that’s how traditionally these are made. You can substitute with whole wheat flour for a healthier version.
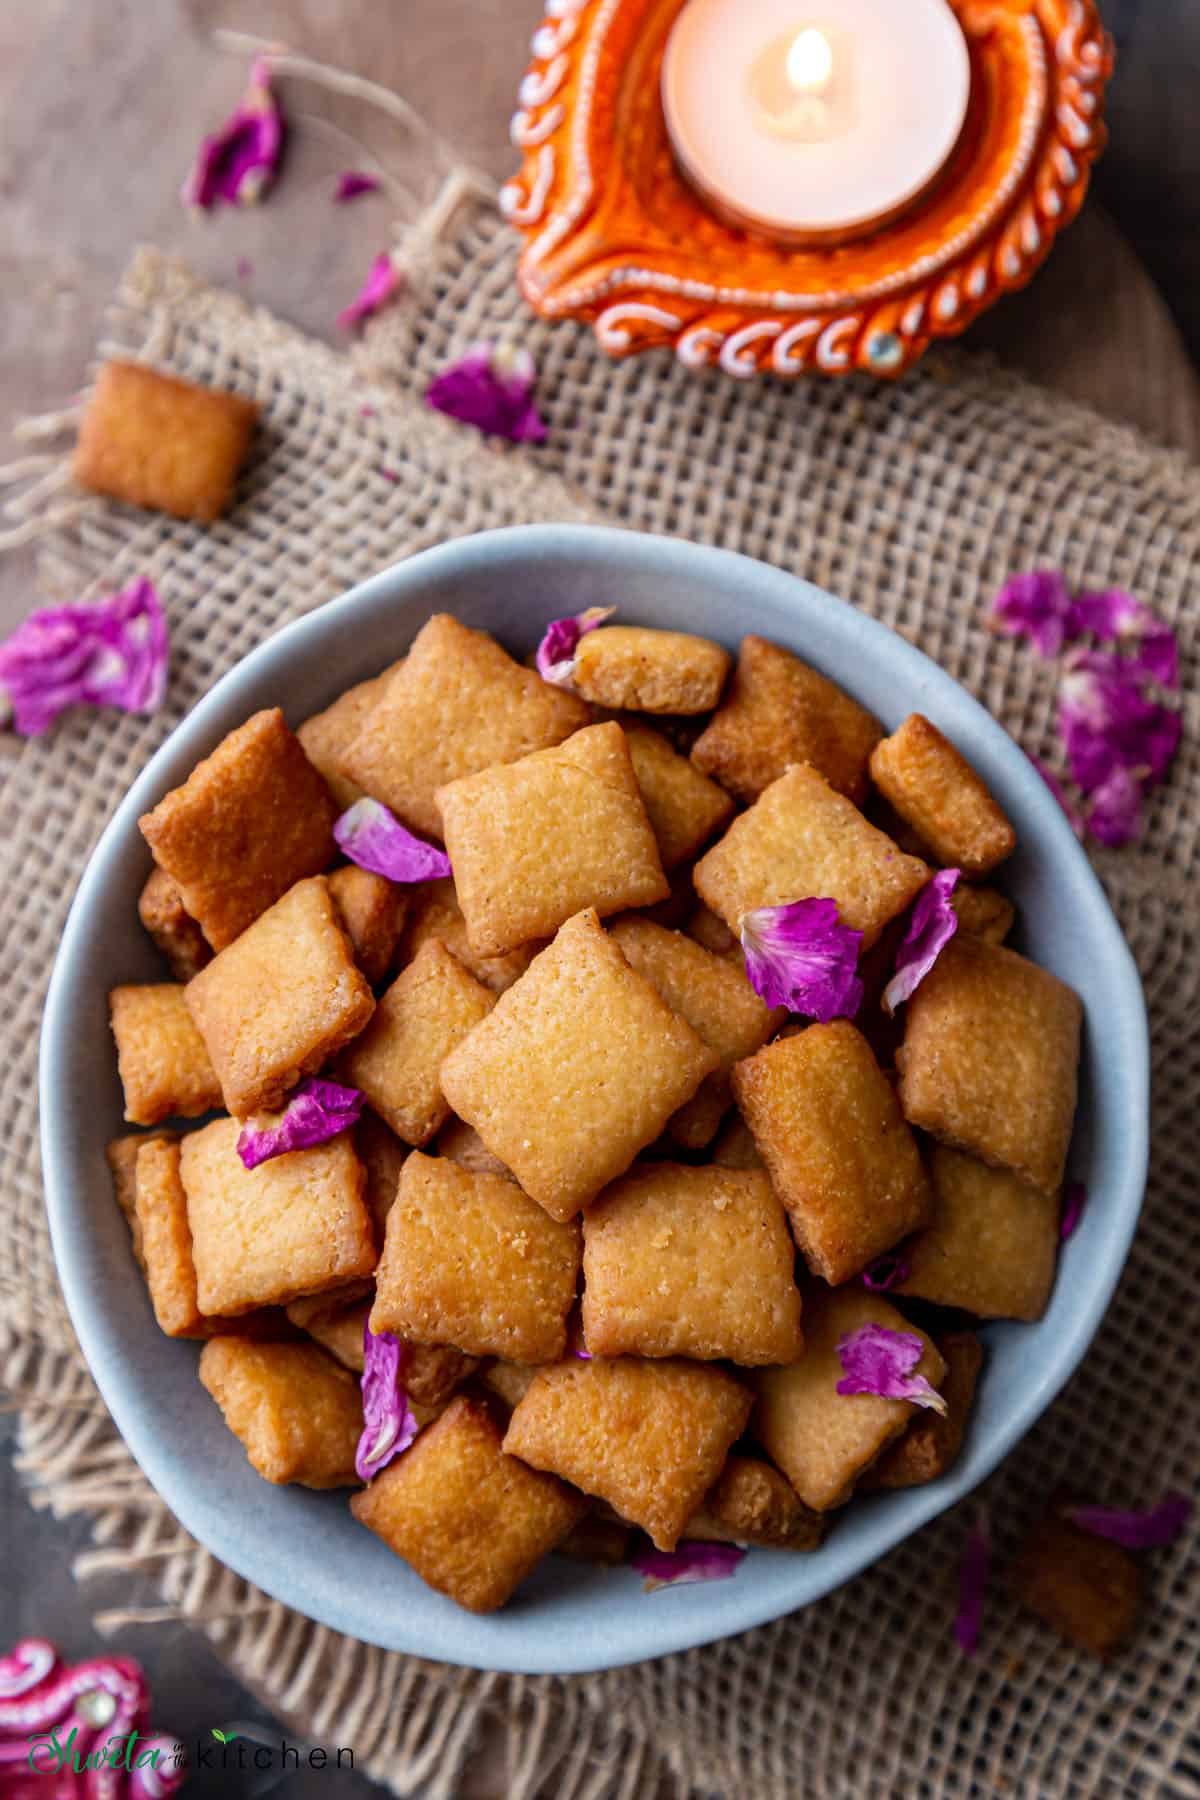
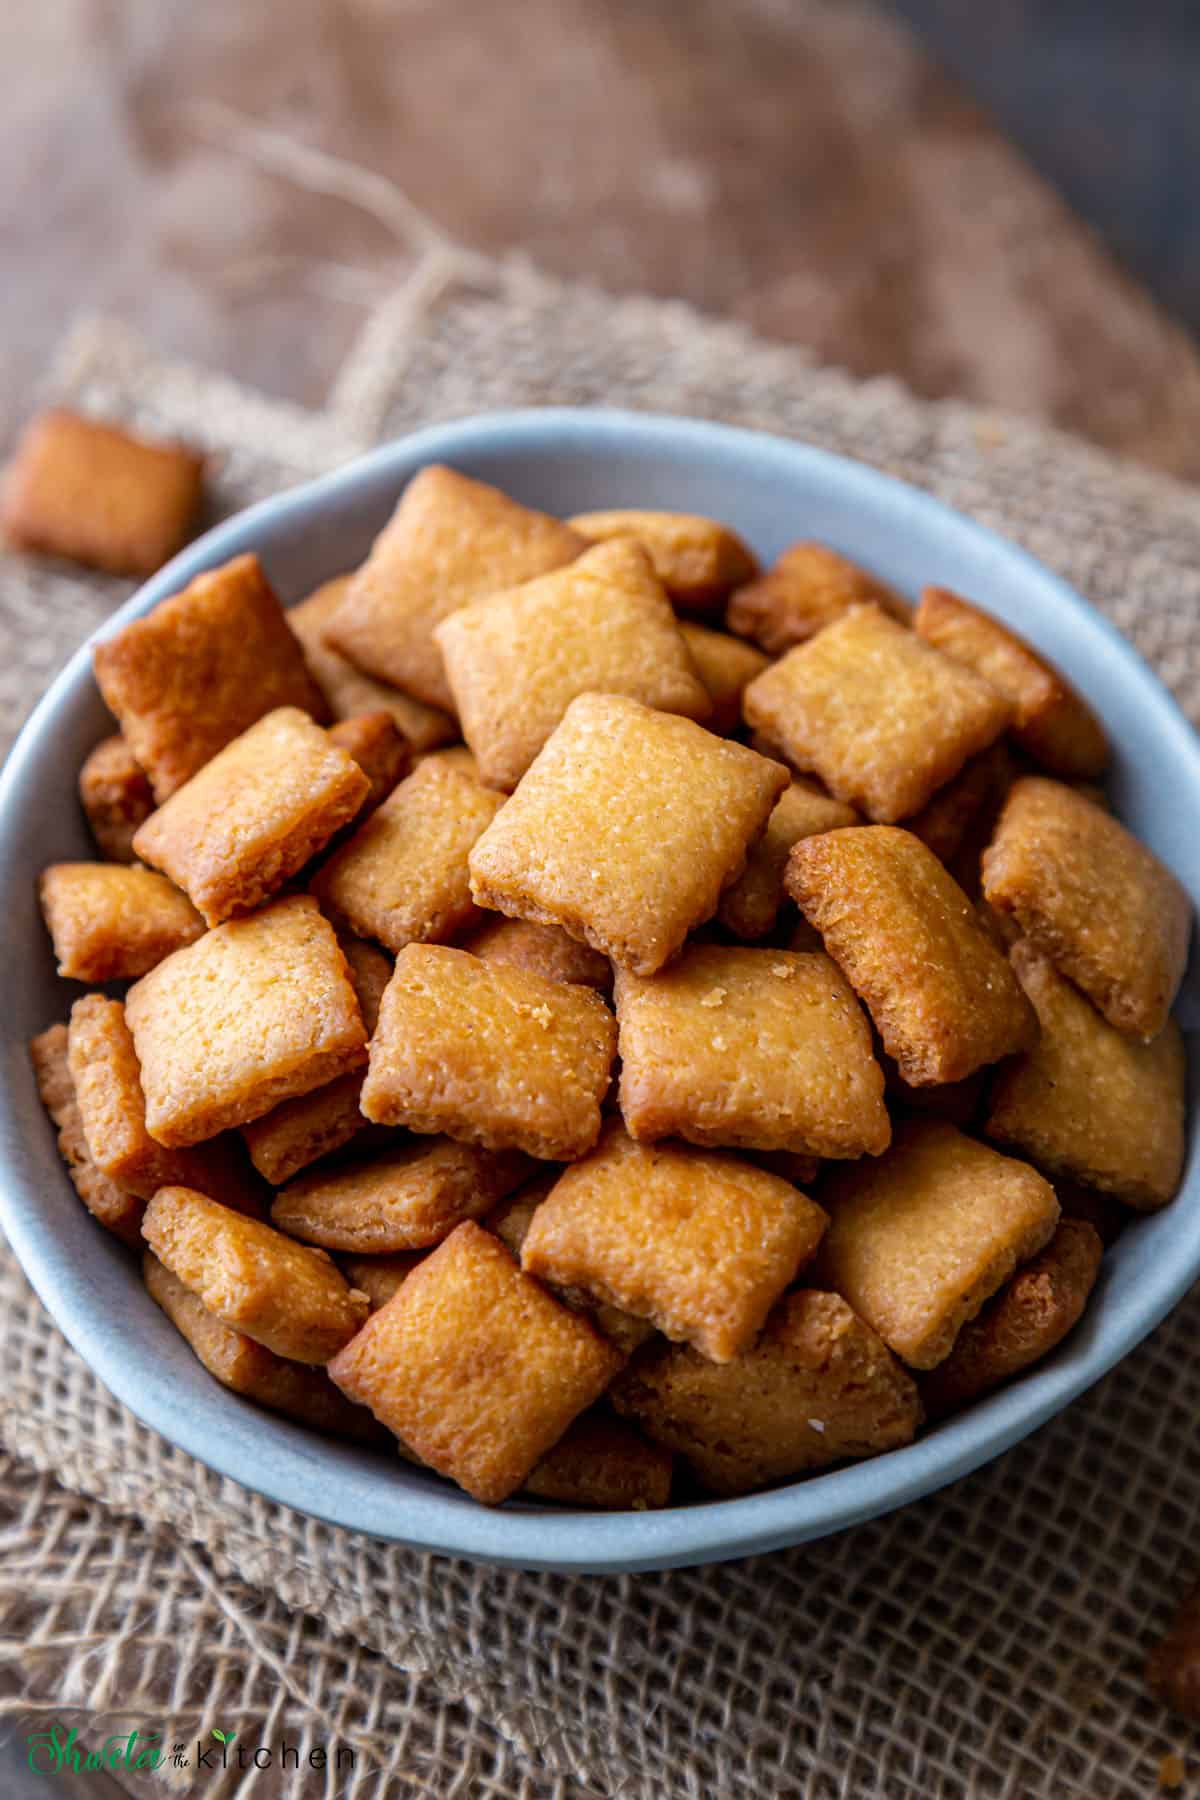
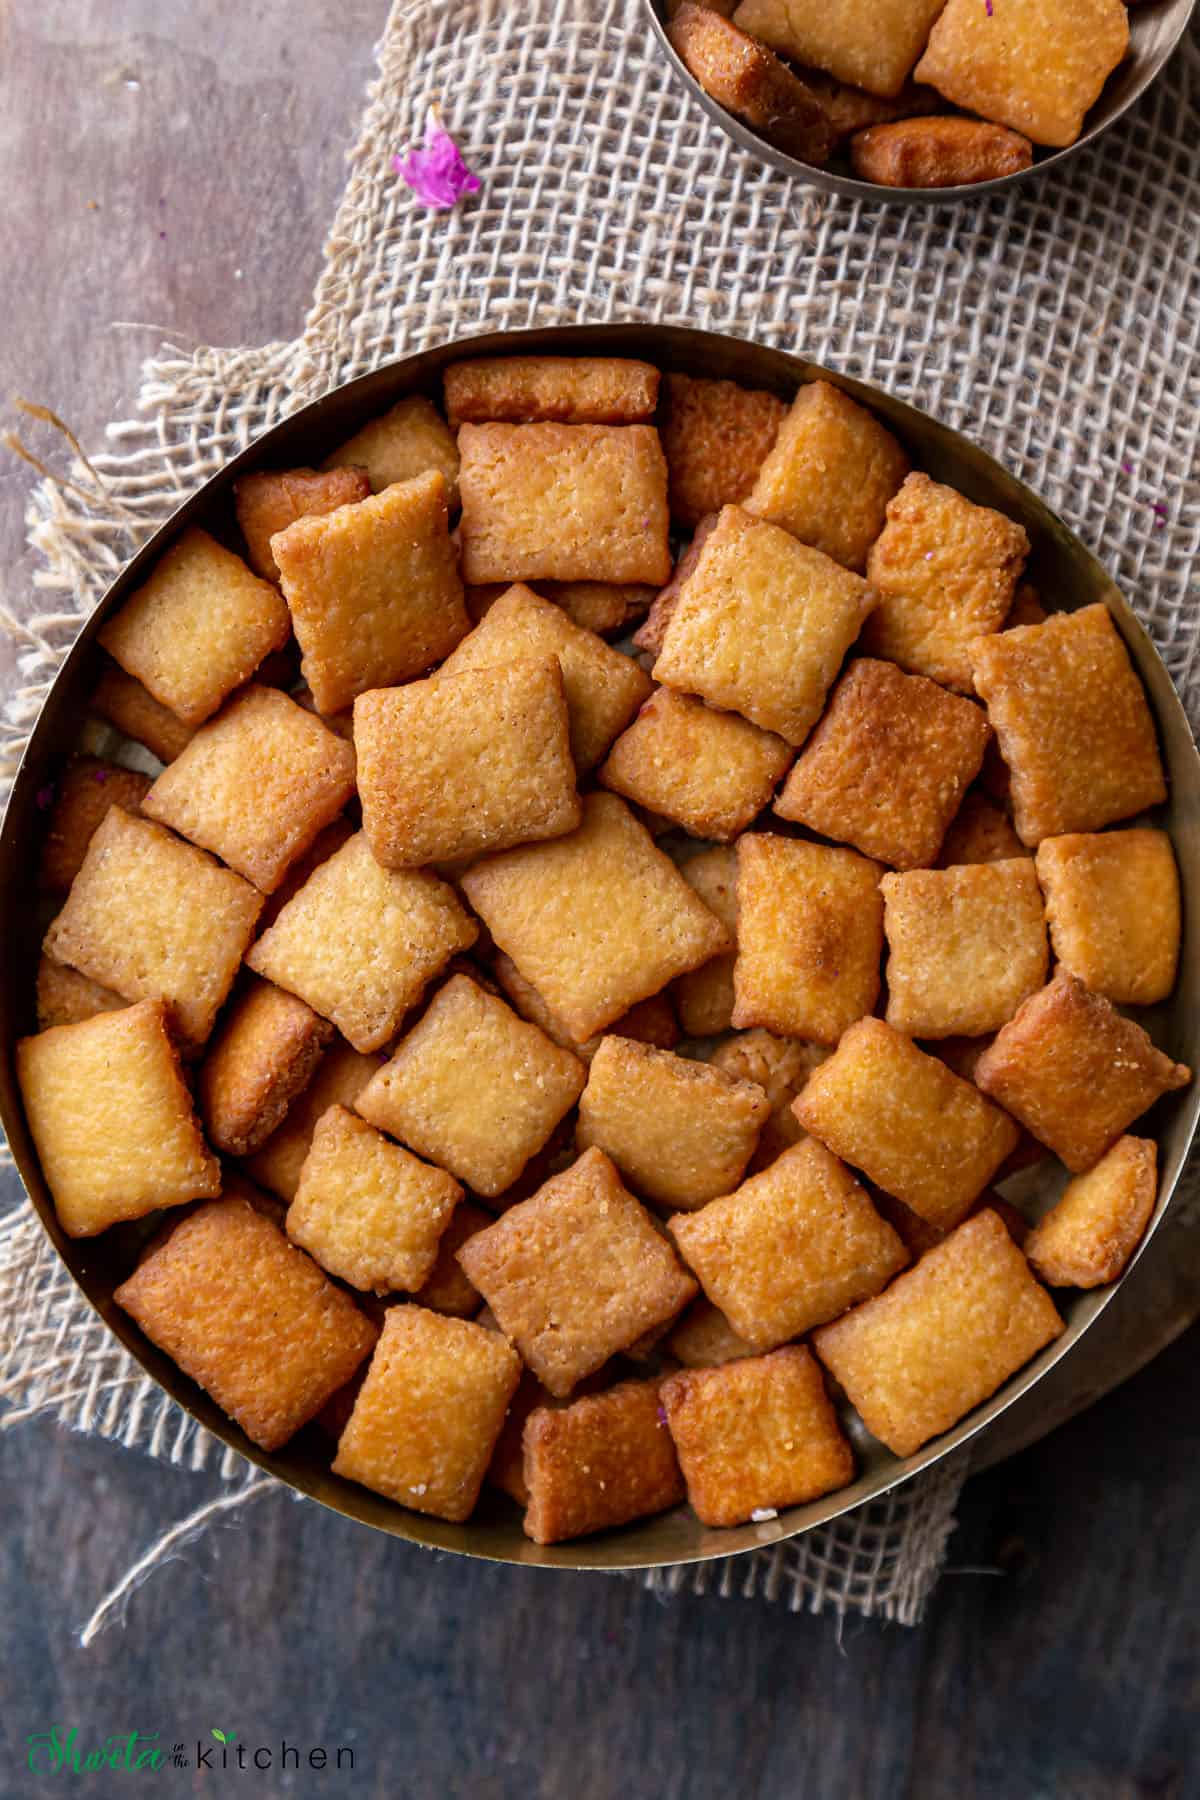
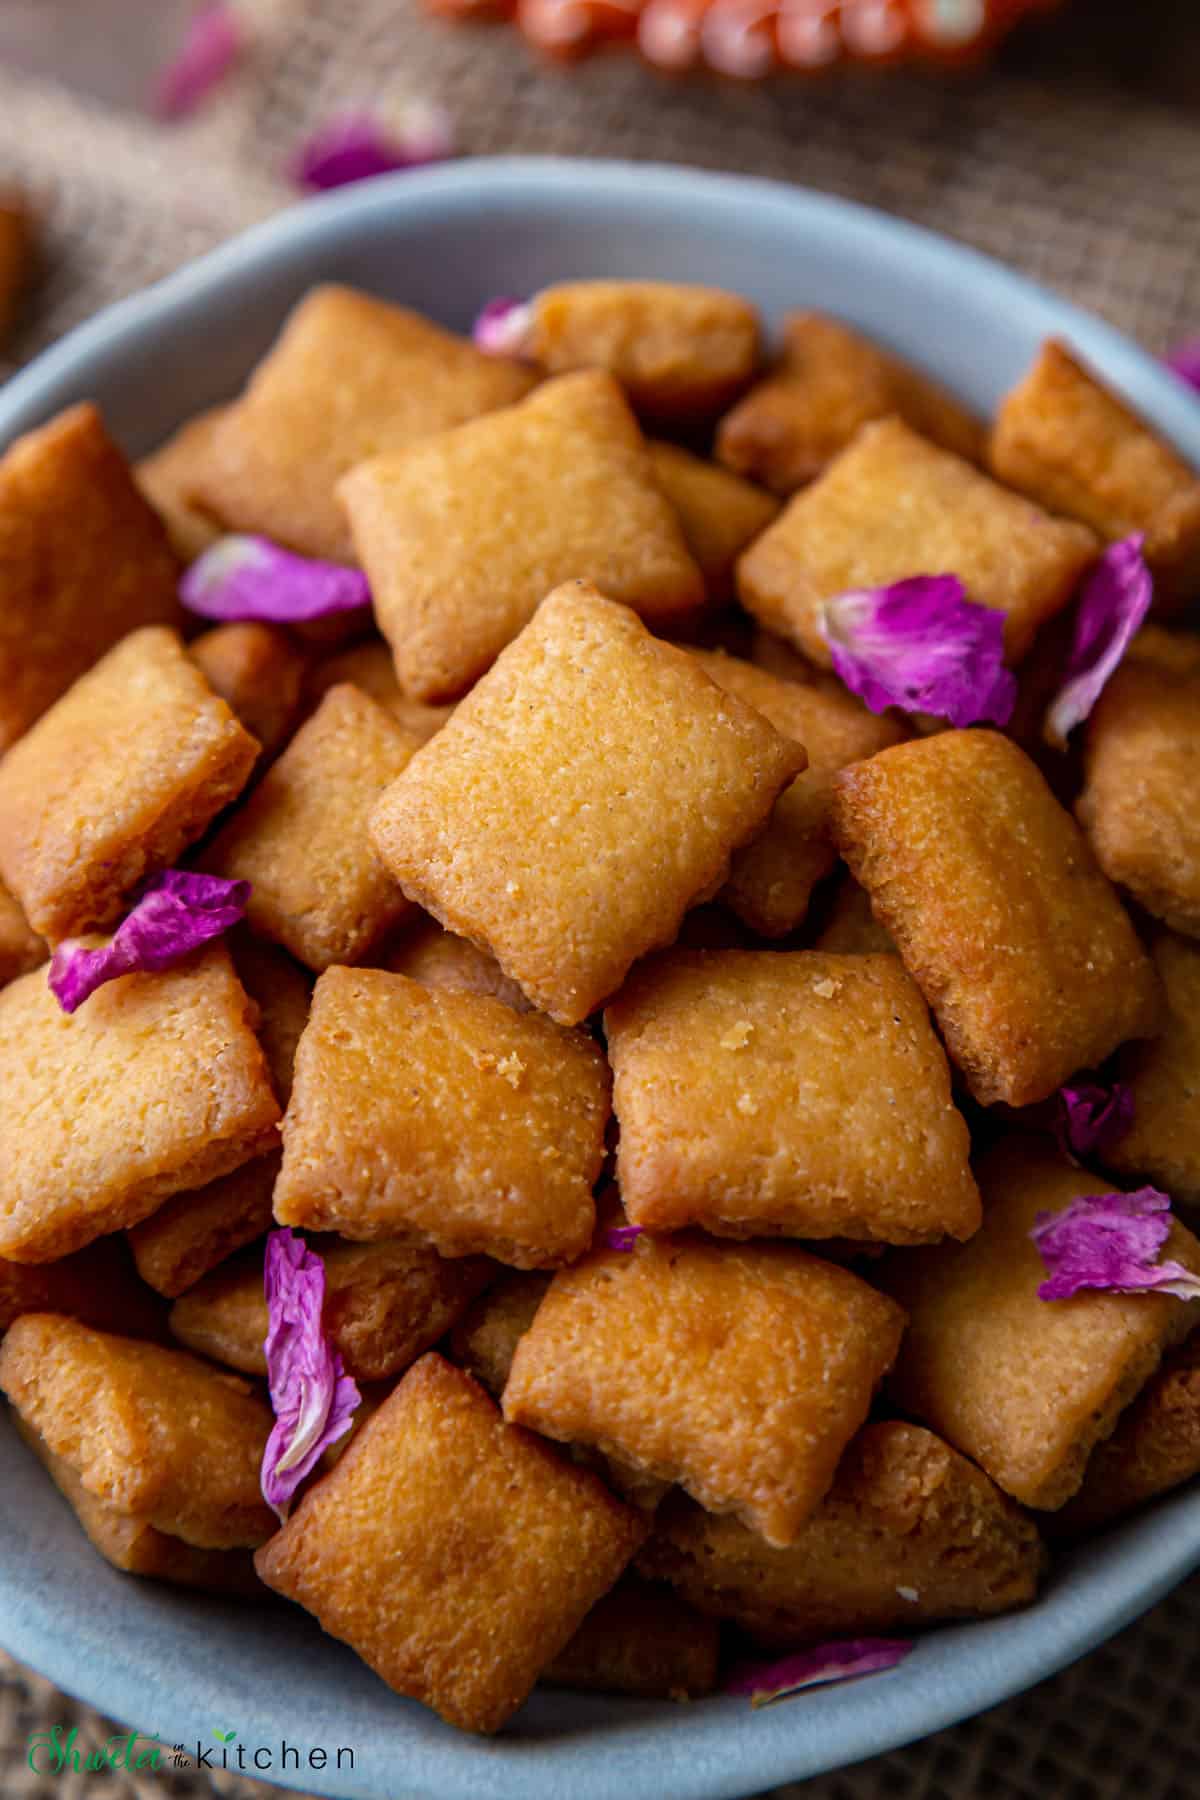
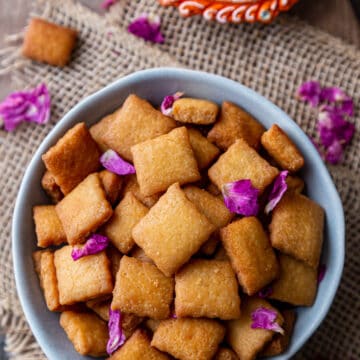
There is something so irresistible about these flaky, crispy, bite-size cookies that literally melt in the mouth and you just can’t stop! They are that addictive! These Shakarpare are now my kid’s favorite too so I make them often. They are perfect for lunchbox snacks and a definite must-have for Diwali! If you love savory more, try this spicy shankarpali which is the savory version of this sweet shankarpali. These are typically made during the Indian festival of Diwali but make great snacks with tea any time of the year! There are two variations of shankarpali, sweet and savory but today I’m sharing the sweet version. Sweet Shankarpali is also known as Shakarpara in Hindi and “god” shankarpali in Marathi where “god” means sweet. Whereas the spicy one is called namakpare (namarpara) or Tikhat Shakankarpali. It is easy to make Shankarpali, all you need to do is melt sugar in warm milk and ghee and use it to knead a soft stiff dough. You then roll the dough slightly thick (not too thick or thin) and cut it into diamond (or square) shapes. Traditionally these are deep-fried but nowadays you can also bake or air fry them. Shakarpare can stay fresh for weeks so you can make them in bulk and store them in an airtight container. So let’s see how to make khuskhushit shankarpali.
Why You’ll Love This Recipe
They are crispy, flaky, and truly addictive! Not overly sweet and melt in the mouth delicious! You need just basic pantry ingredients to make them. They can be made in advance and stored at room temperature. They are loved by all, kids and adults.
Ghee - We will need some ghee for making the dough. I love to use homemade ghee for the best flavor and texture. Don’t skimp on this if you want that melt-in-the-mouth, flaky, crispy (khuskhushit) shankarpali. In addition, we will also need ghee or oil for frying the shakkapara.
Sugar - This is to sweeten the shankarpali. I use regular granulated white sugar. You can substitute with jaggery too.
Milk - I prefer using whole milk to bind the dough, as it makes it richer and adds more flavor but you can replace it with water too.
Flavor - I use cardamom powder for that traditional warm aroma and salt to balance the flavors. You can also use vanilla extract in place of Cardamom.
Please refer to the recipe card for exact measurements of ingredients.
How To Make Shankarpali (Stepwise Method)
To make the dough
1 - In a saucepan heat milk, ghee, and sugar on medium heat until sugar dissolves. Keep aside to cool. You can also microwave it for 30-45 seconds. 2- In a large mixing bowl, sift the all-purpose flour, salt, and cardamom powder. Mix to combine. 3 - Add the cooled ghee milk sugar mixture to the flour bowl. 4 and 5 - Mix and knead to make a soft dough but not sticky. The dough might feel wet and like it needs more flour. Keep kneading and it should turn nonsticky and soft. Rest the dough for 5-10 mins. The dough will firm up and become stiff/tight as the ghee starts to solidify.
Shape Shankarpali
6 - Knead the rested dough once again and divide it into 2-3 parts, knead each part and form a ball.
7 and 8 - Take one ball and roll it into a slightly thick 5-6 inch circle. If the rolled dough looks not smooth, don’t worry. Cracked edges are normal, and due to the addition of ghee.
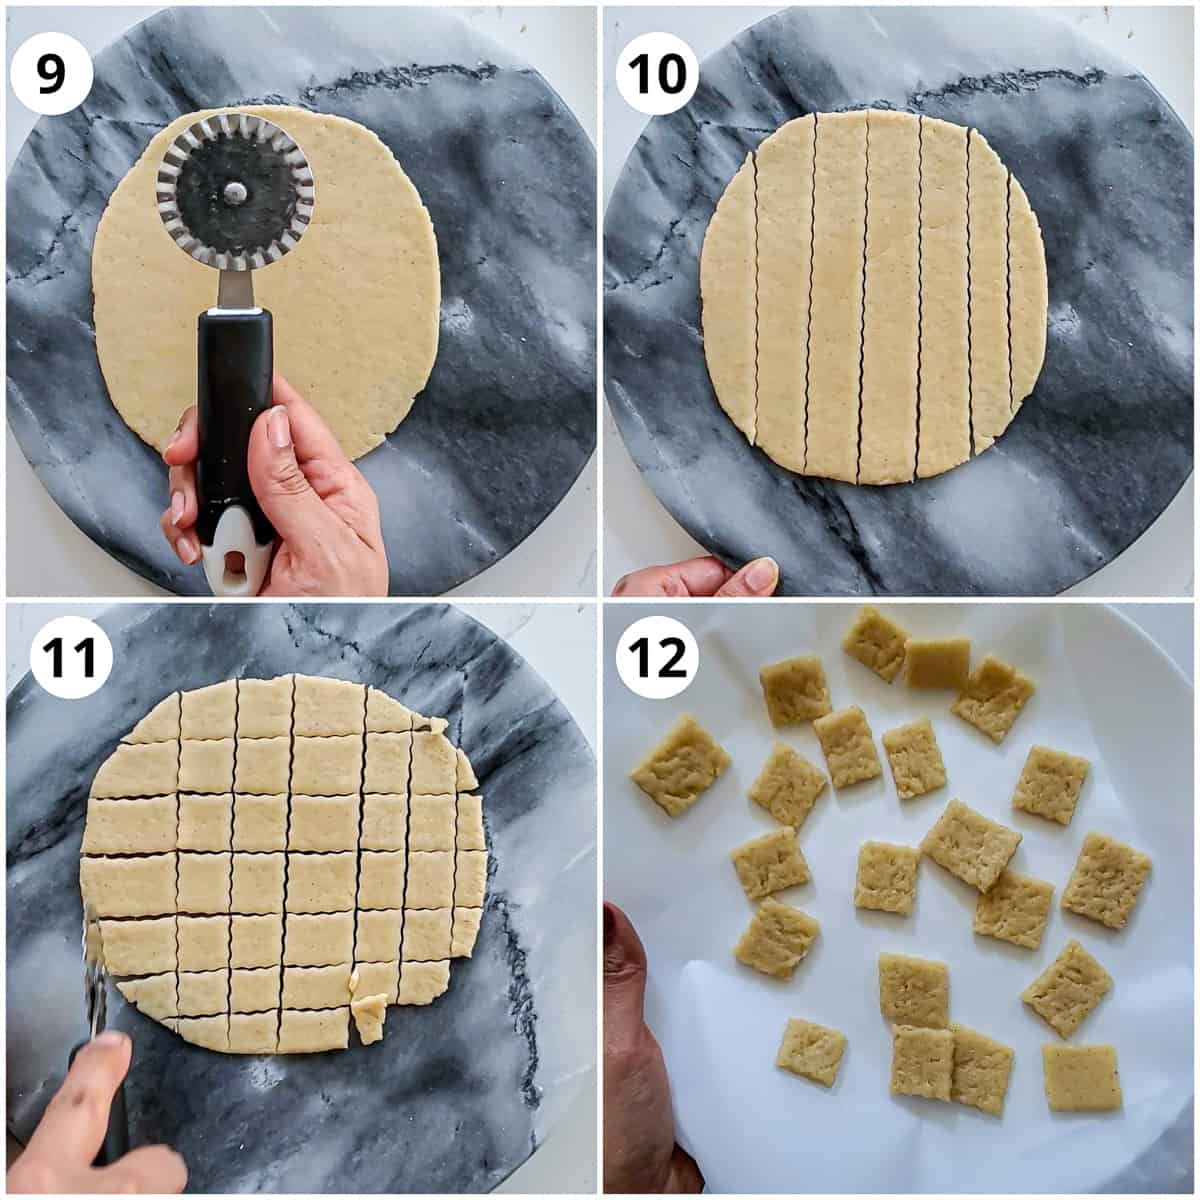
9 to 11 - Using a karanji cutter or knife or pizza cutter, make 1-inch apart vertical lines and then horizontal to make squares (or diamonds)
For a diamond shape, cut horizontally 1 inch apart at an angle.
12 - Discard the edges and join them to form another ball. Transfer the perfect square or diamonds to a plate lined with parchment paper, make sure they are separated and not sticking.
Keep them covered with a wet cloth to prevent them from drying.
You can either fry them in batches or make all the remaining balls in a similar manner and then fry them all at once.
Frying Shankarpali
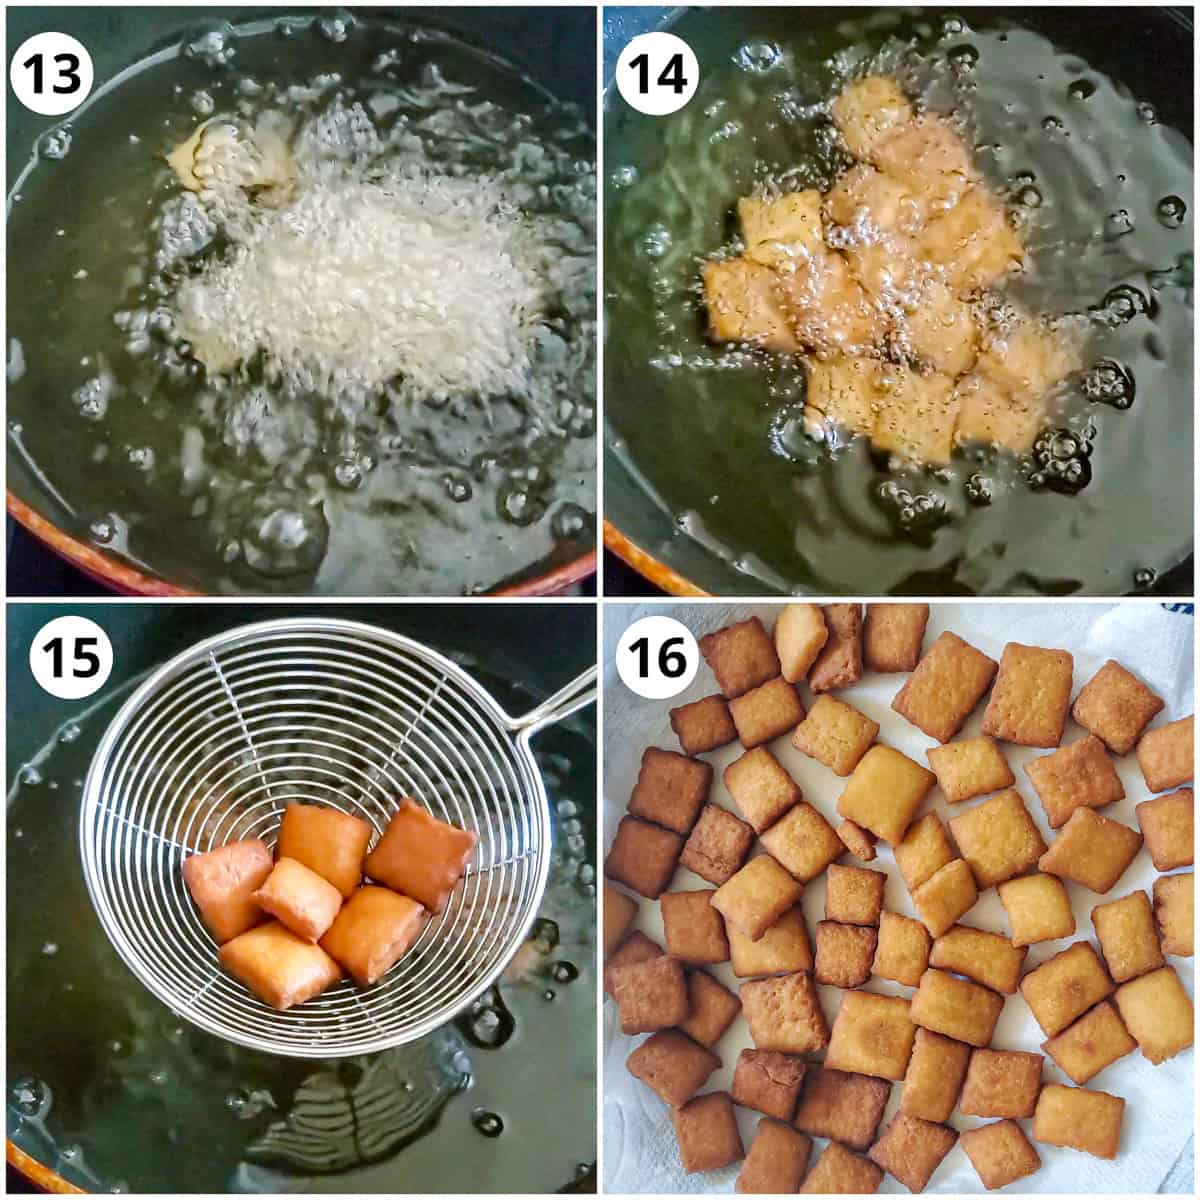
Test oil by adding one small dough. It should rise up slowly if it doesn’t then heat it more. If it turns brown too quickly then reduce the heat and let the oil cool and bit and test again. 13 - Heat oil on medium heat and fry in batches. Do not overcrowd. If they are browning too quickly reduce the heat to medium-low. Keep adjusting as needed. 14 - Fry stirring frequently until they are golden brown on both sides. 15 - Drain using a slotted spatula to make sure all the oil drains off. 16 - Remove on a paper towel-lined plate and continue frying the remaining batches. Khuskhushit shankarpali (shakarpare) is ready!!
Storage Instructions
Allow the Shankarpali to cool completely and then store it in an airtight container. These stay good at room temperature for 3-4 weeks but they will be gone way before!
Recipe Tips
Ghee is an important ingredient that makes shankarpali crispy, and flaky and gives that melt-in-mouth texture so don’t skip it or substitute it. At the same time, don’t add more than 3-4 tablespoons of melted ghee to this recipe. Too much ghee can cause shankarpali to be too greasy and can even melt or break while frying.
While making dough, don’t add hot liquid, cool it to lukewarm, and then use.
The dough should be soft or pliable yet stiff. It shouldn’t be too dry (it’s okay to have cracks) or wet. If the dough is too soft, shankarpali won’t be crunchy.
Adjust the flour/liquid quantity as required so it forms a soft stiff dough. If the dough feels dry, add a touch (a teaspoon) of milk or water and knead. Similarly, if it feels too wet, add a touch of flour (a tablespoon) and knead until the right consistency is reached.
This shankarpali is mildly sweet and we like it this way. If you prefer more sweet adjust the sugar quantity.
Roll the dough slightly thick, not too thick or thin.
Fry in batches (do not overcrowd) and on medium-low heat for those crispy flaky shankarpali.
Frying on high heat will cause them to brown quickly from the outside and the inside will remain uncooked. Keep adjusting the heat as needed while frying.
Hope you enjoy this Shakarpara or Sweet Shankarpali recipe! If you try this recipe, please rate it by clicking stars ⭐️ on the recipe card. Thank you ❤️! You can also follow me on Facebook and Instagram to see what’s cooking in my kitchen!!
Recipe Card
Update Notes: This post was originally published on Oct 28, 2013, but was republished with, step-by-step instructions, ingredient details, new photos, tips, and a video in Oct of 2022.