In this post, sharing three stepwise methods to make Poha chivda using either deep frying, baking in oven or air-fryer method. Diwali without Faral is as incomplete as Diwali without lights. I always try to make something sweet and savory each Diwali.
Although I make both sweet and savory Diwali faral recipes, I prefer the savory ones. Among savory, my Mom’s Poha Chivda recipe is my absolute favorite. It’s a keeper and super easy one so had to share it with you all.
More Diwali Snacks:
Rava LadooSweet ShankarpaliKurmura Chivda Karanji (Gujiya)Milk Peda Recipe
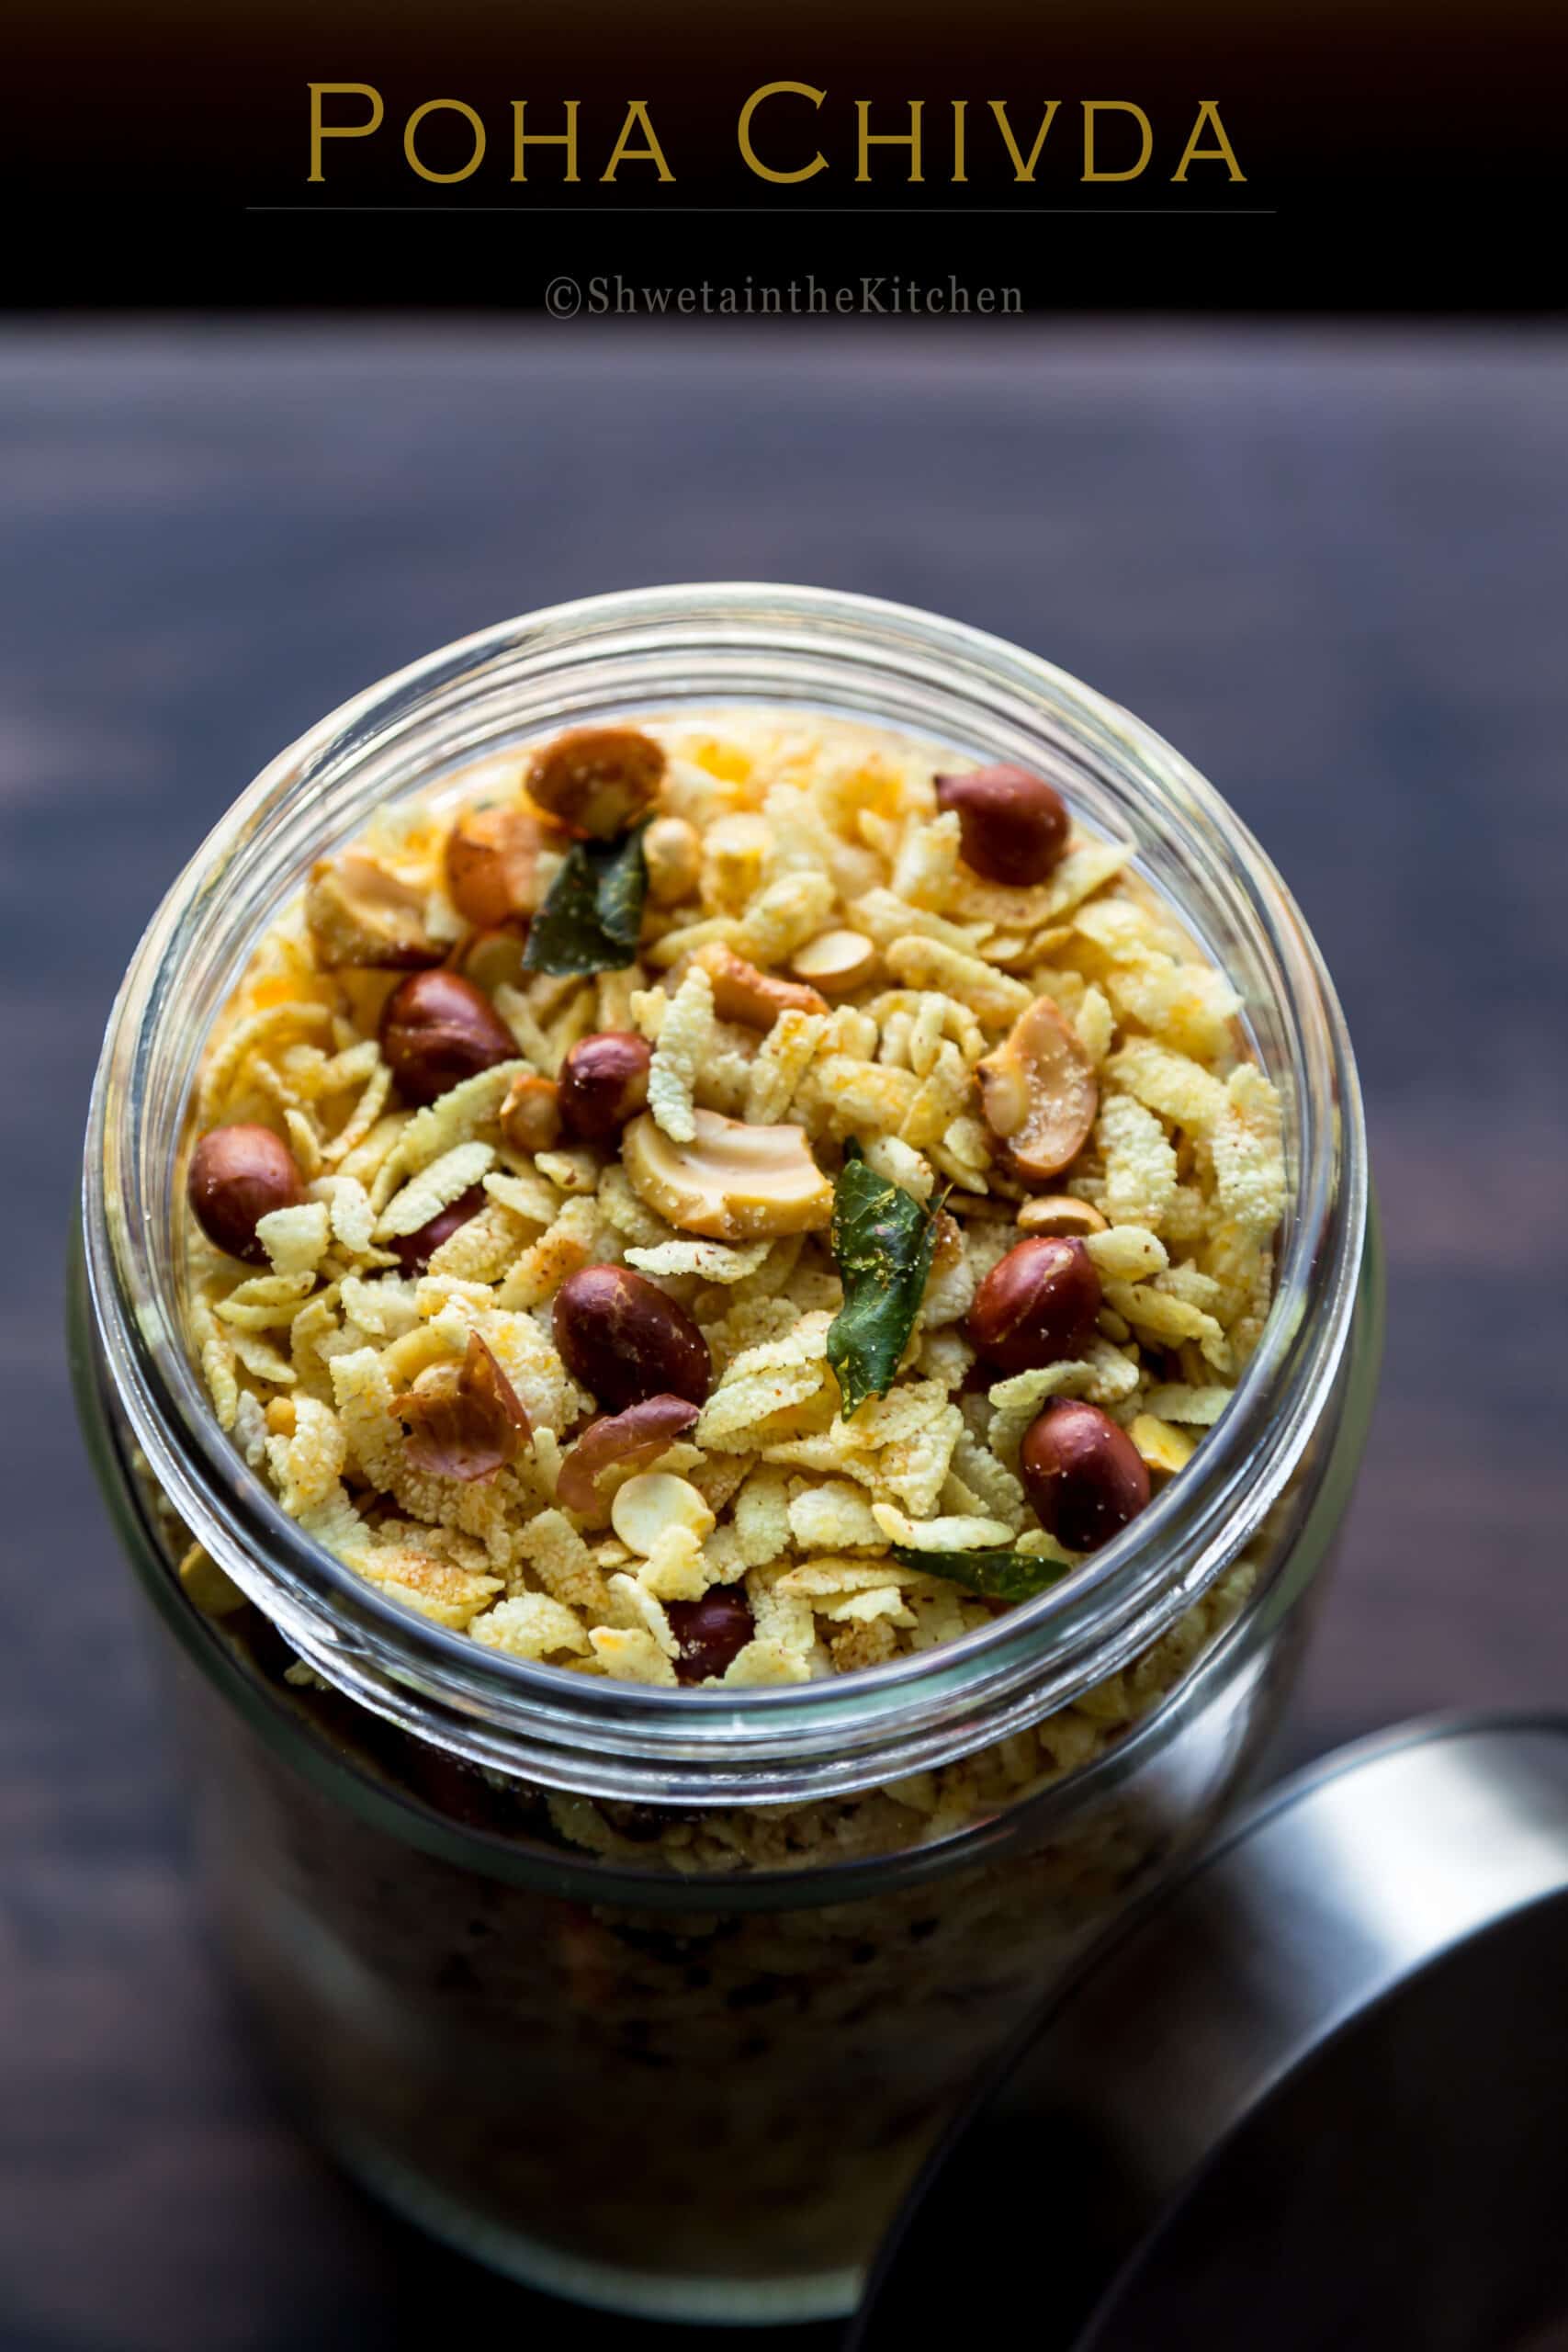
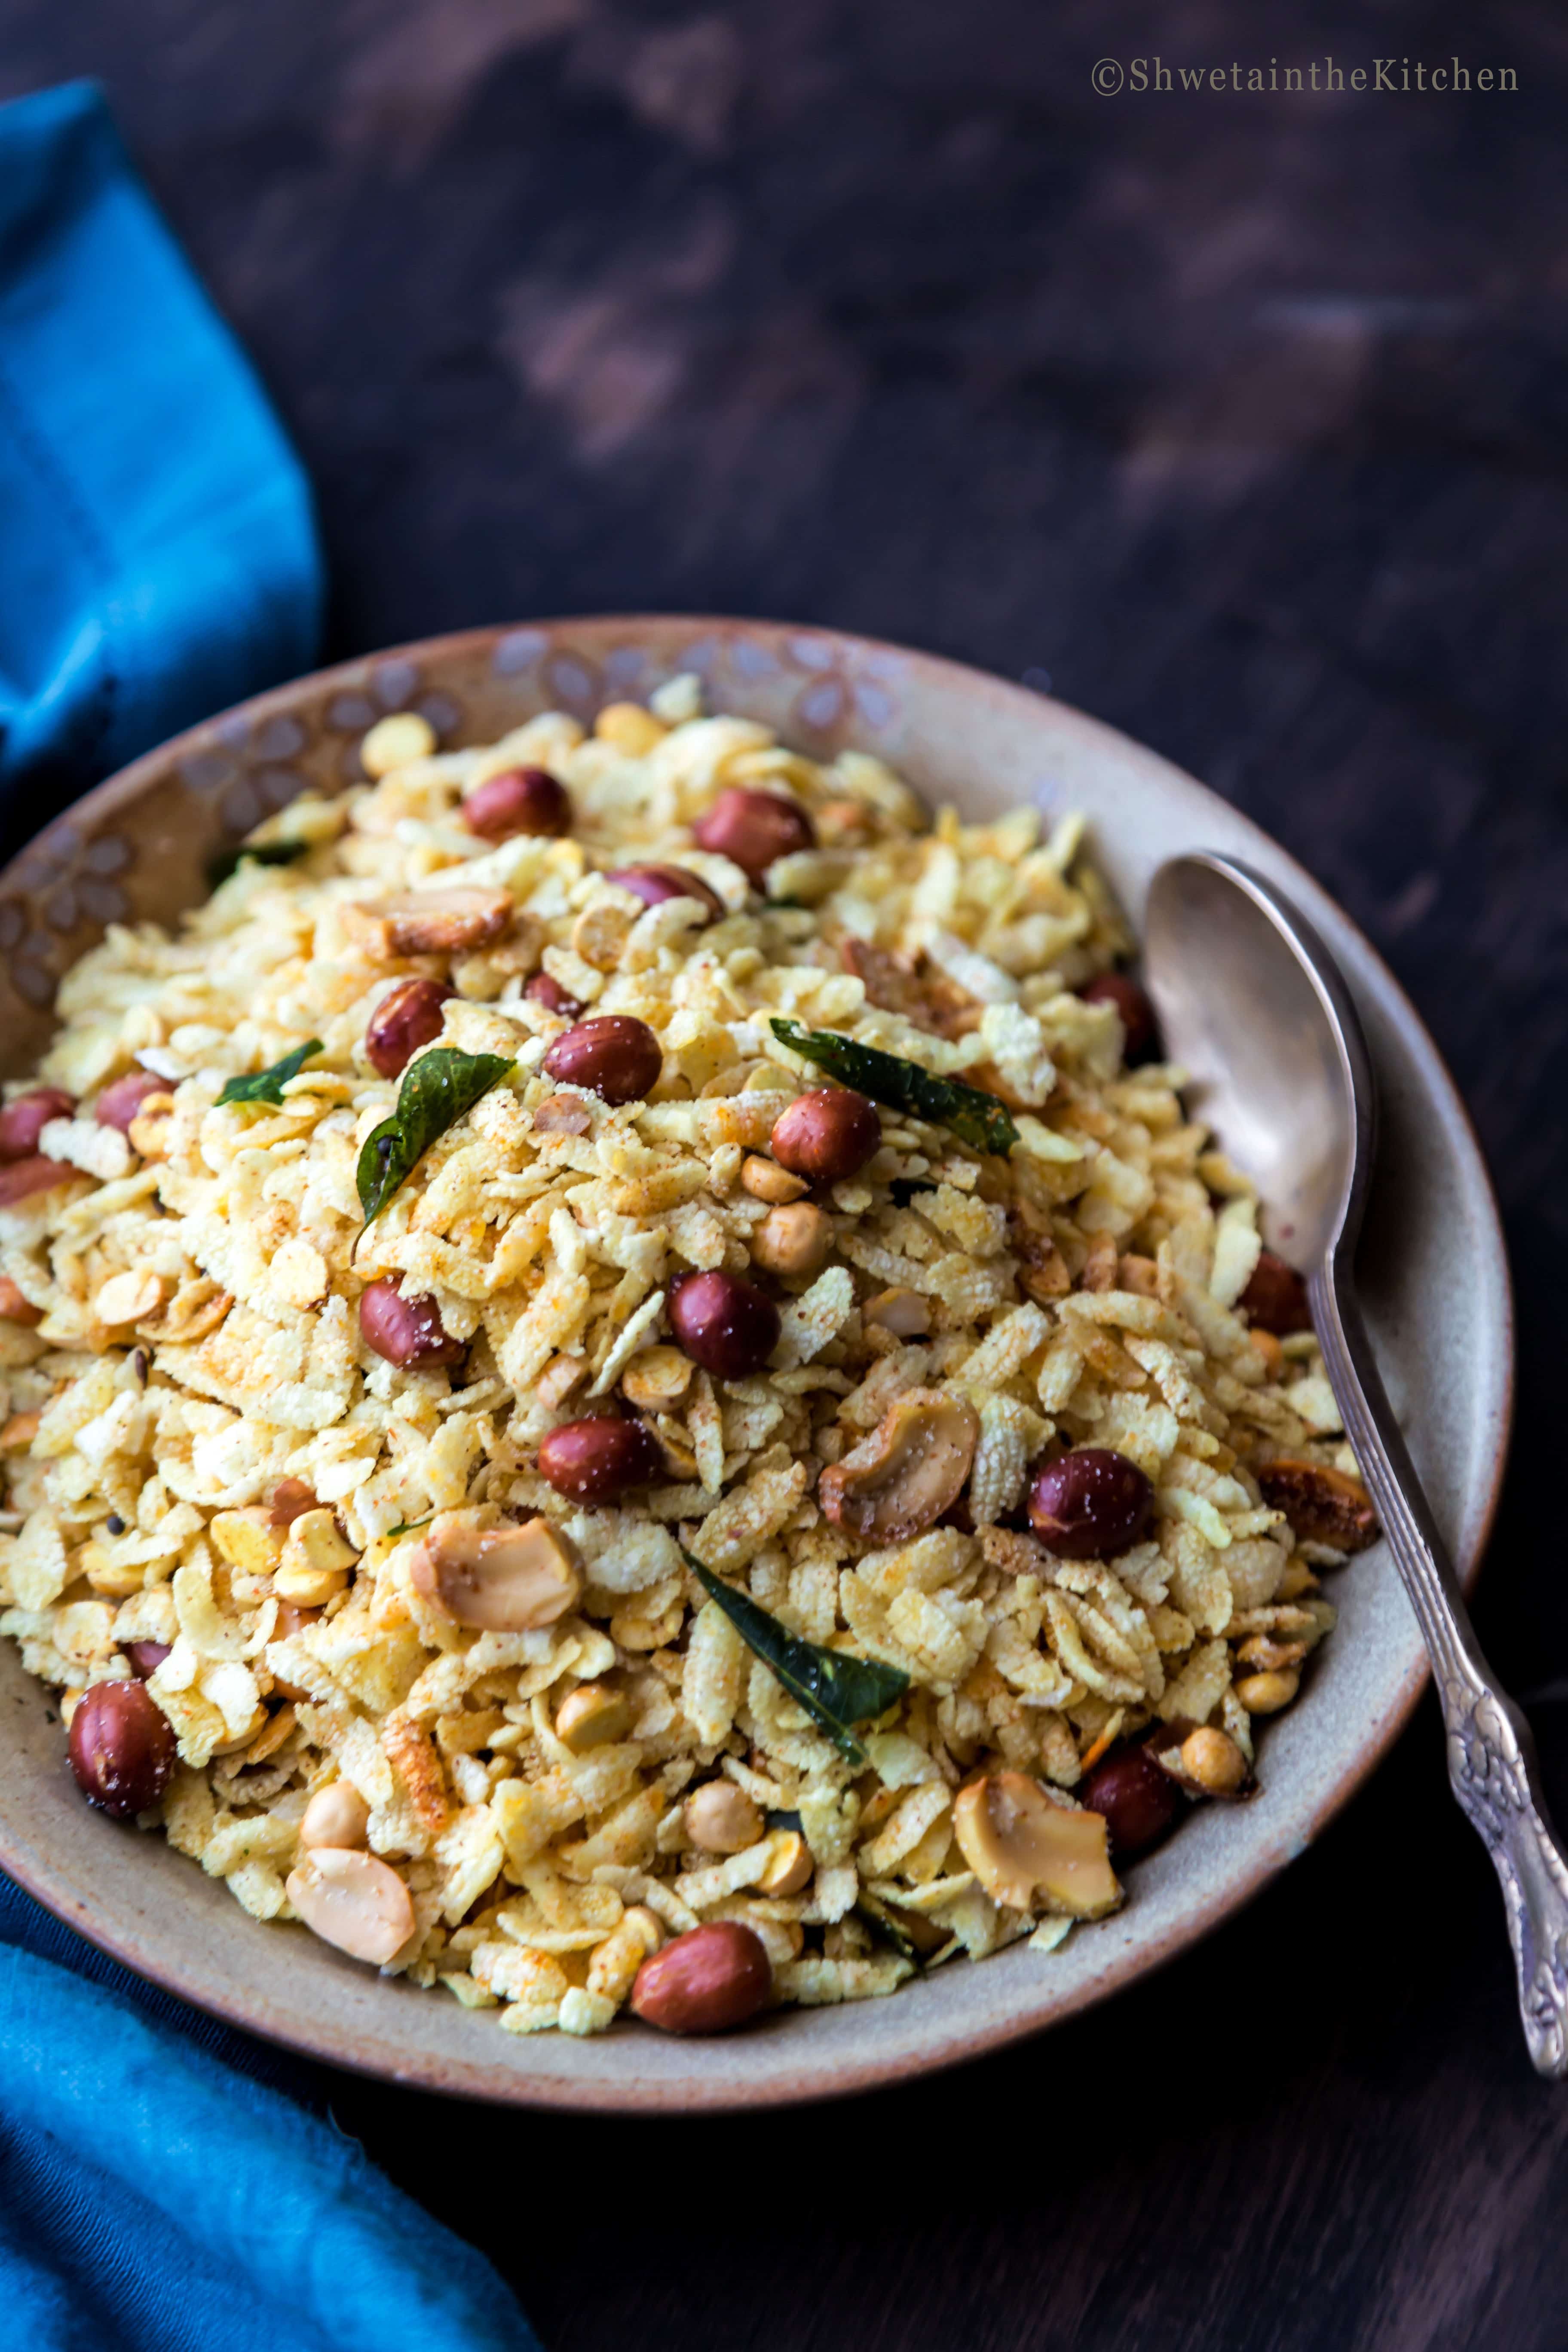
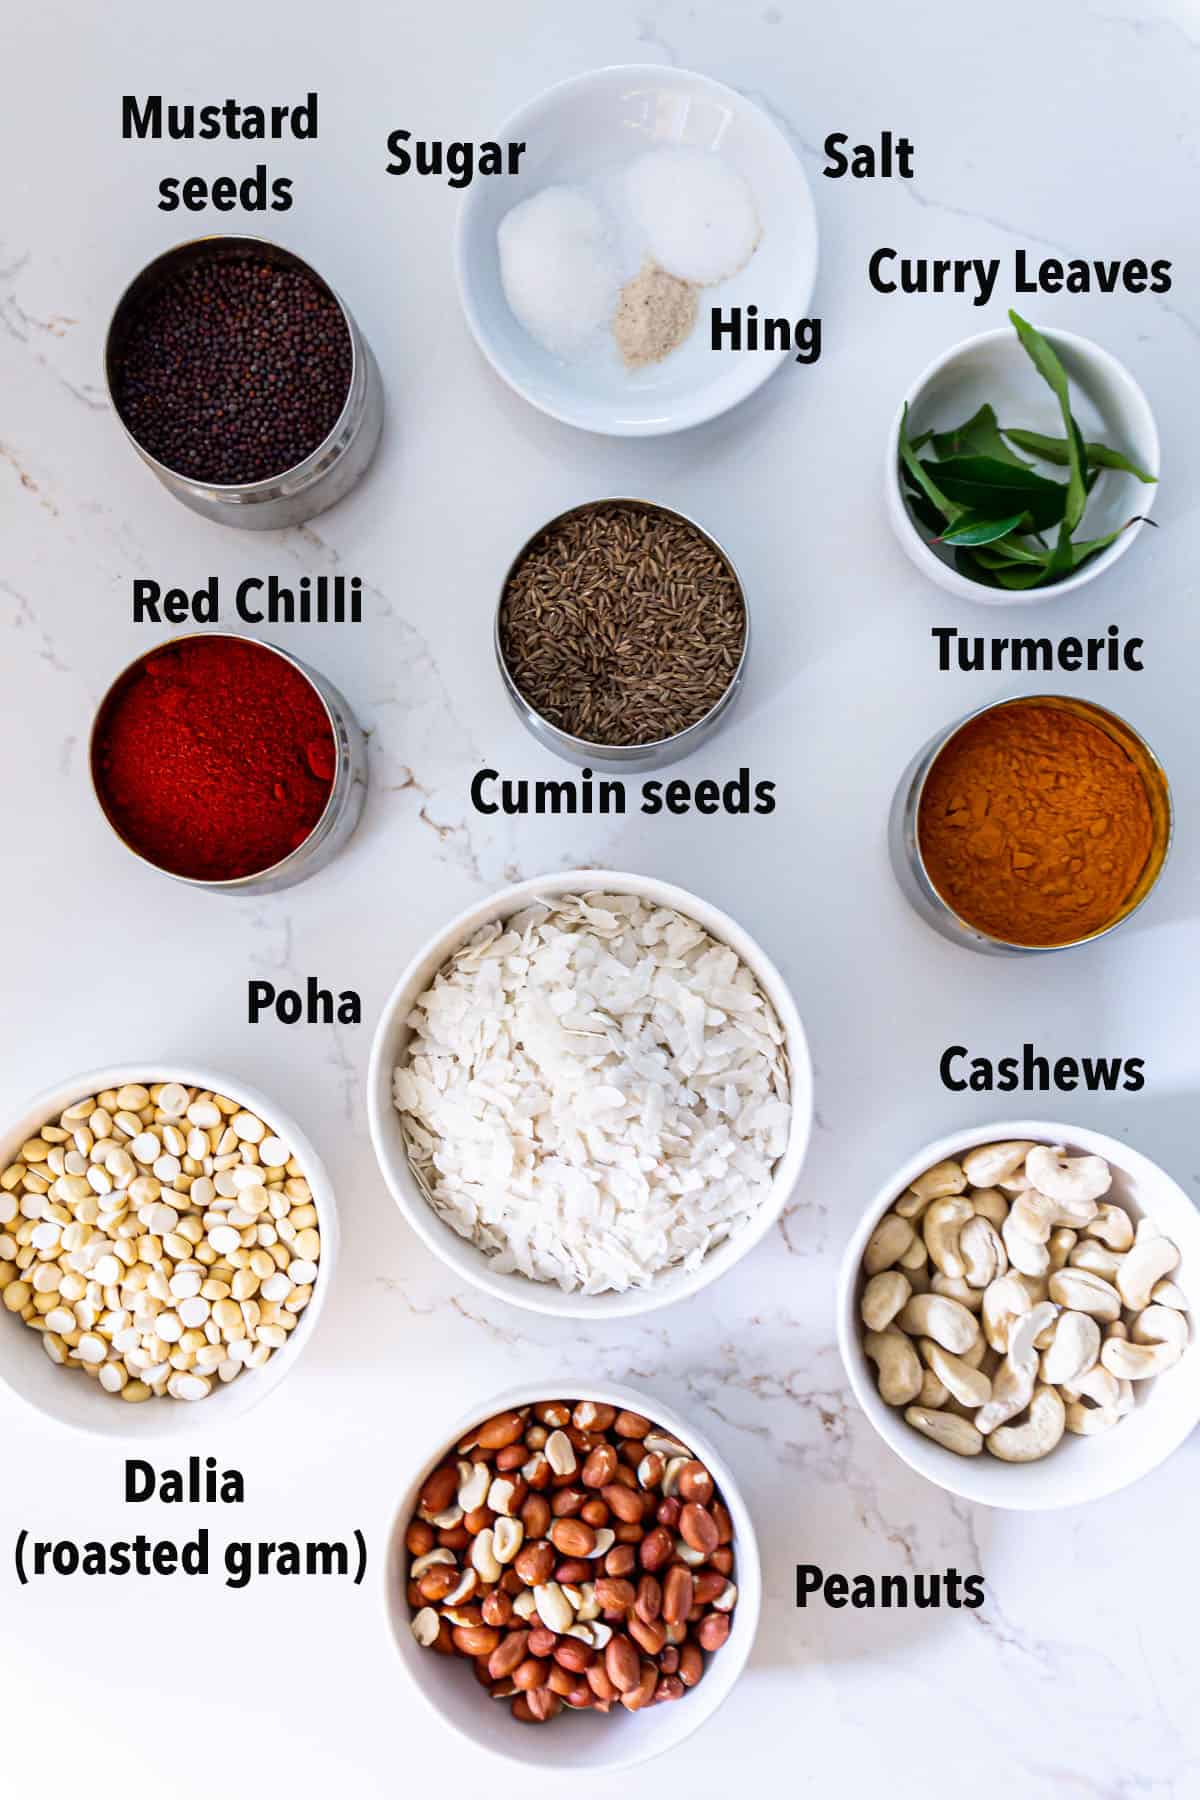
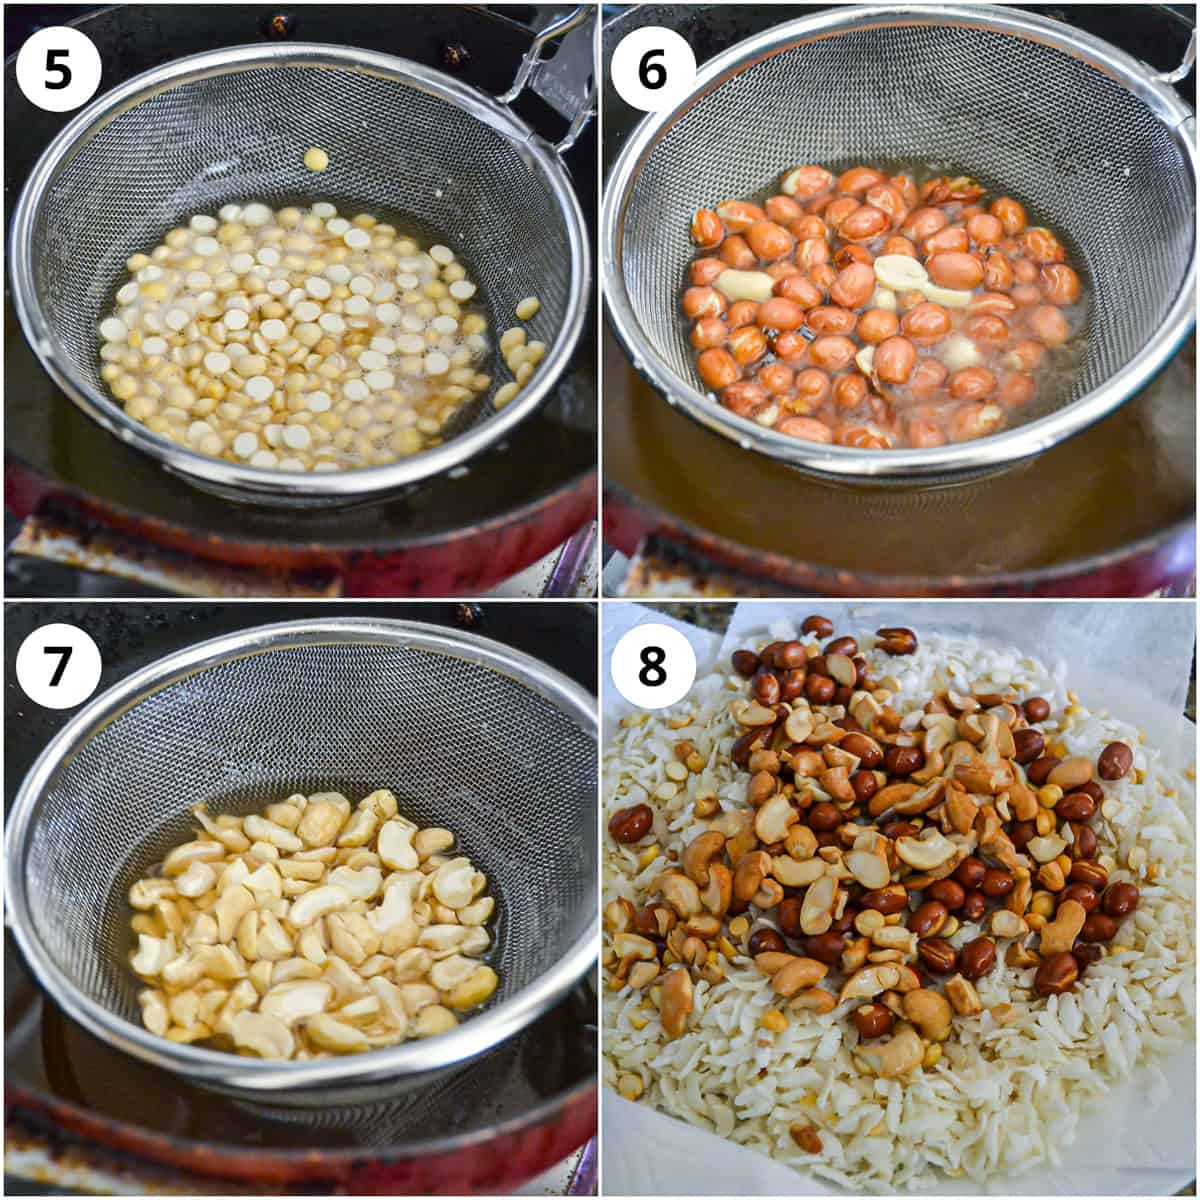
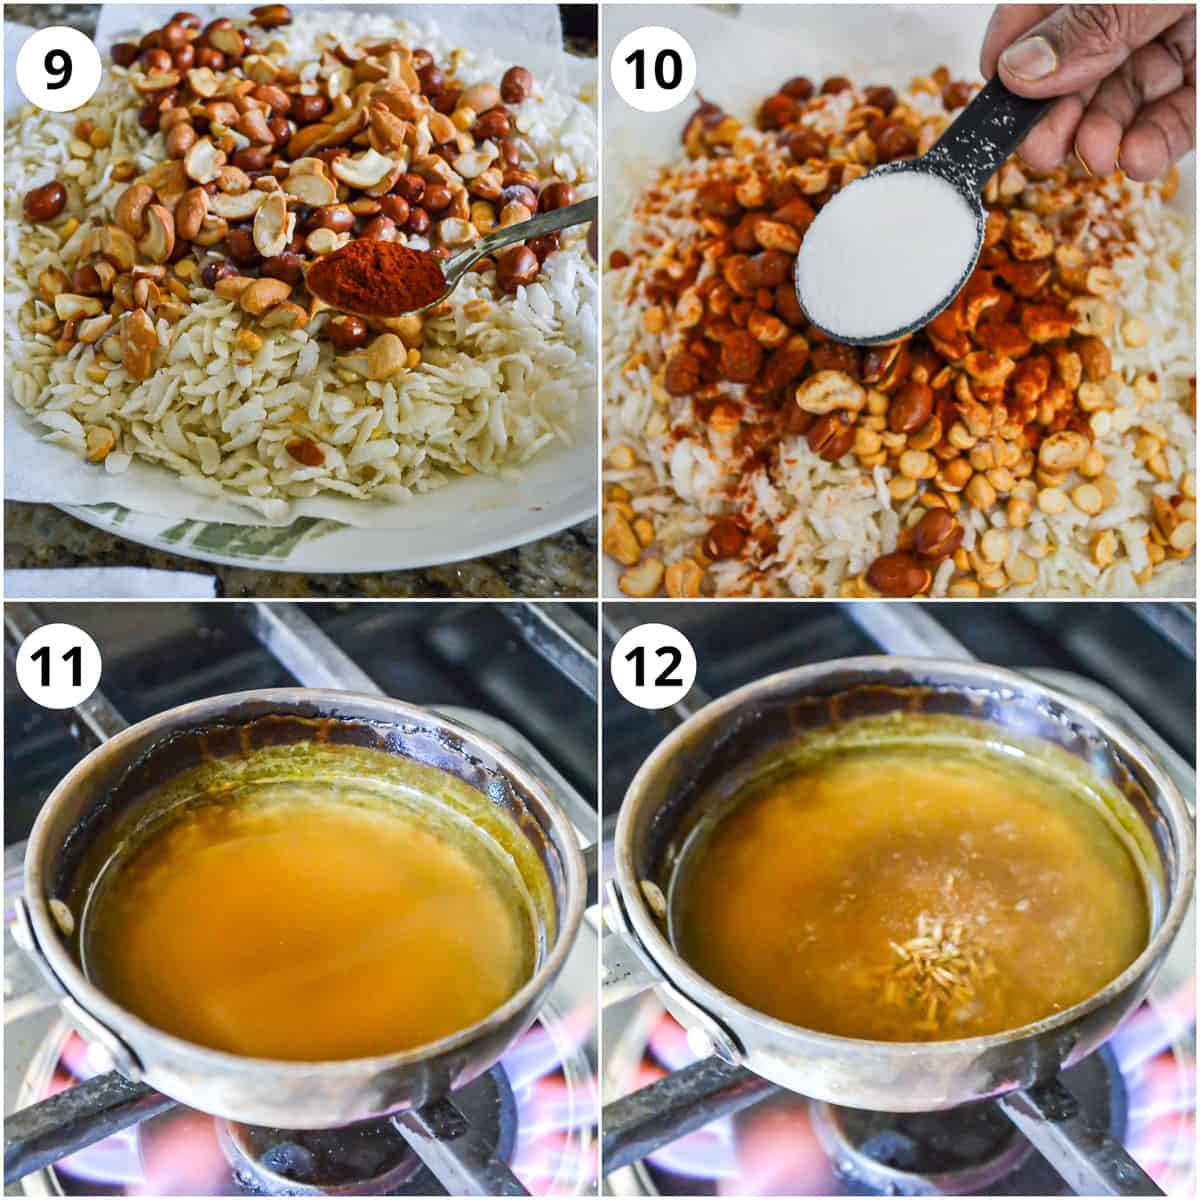
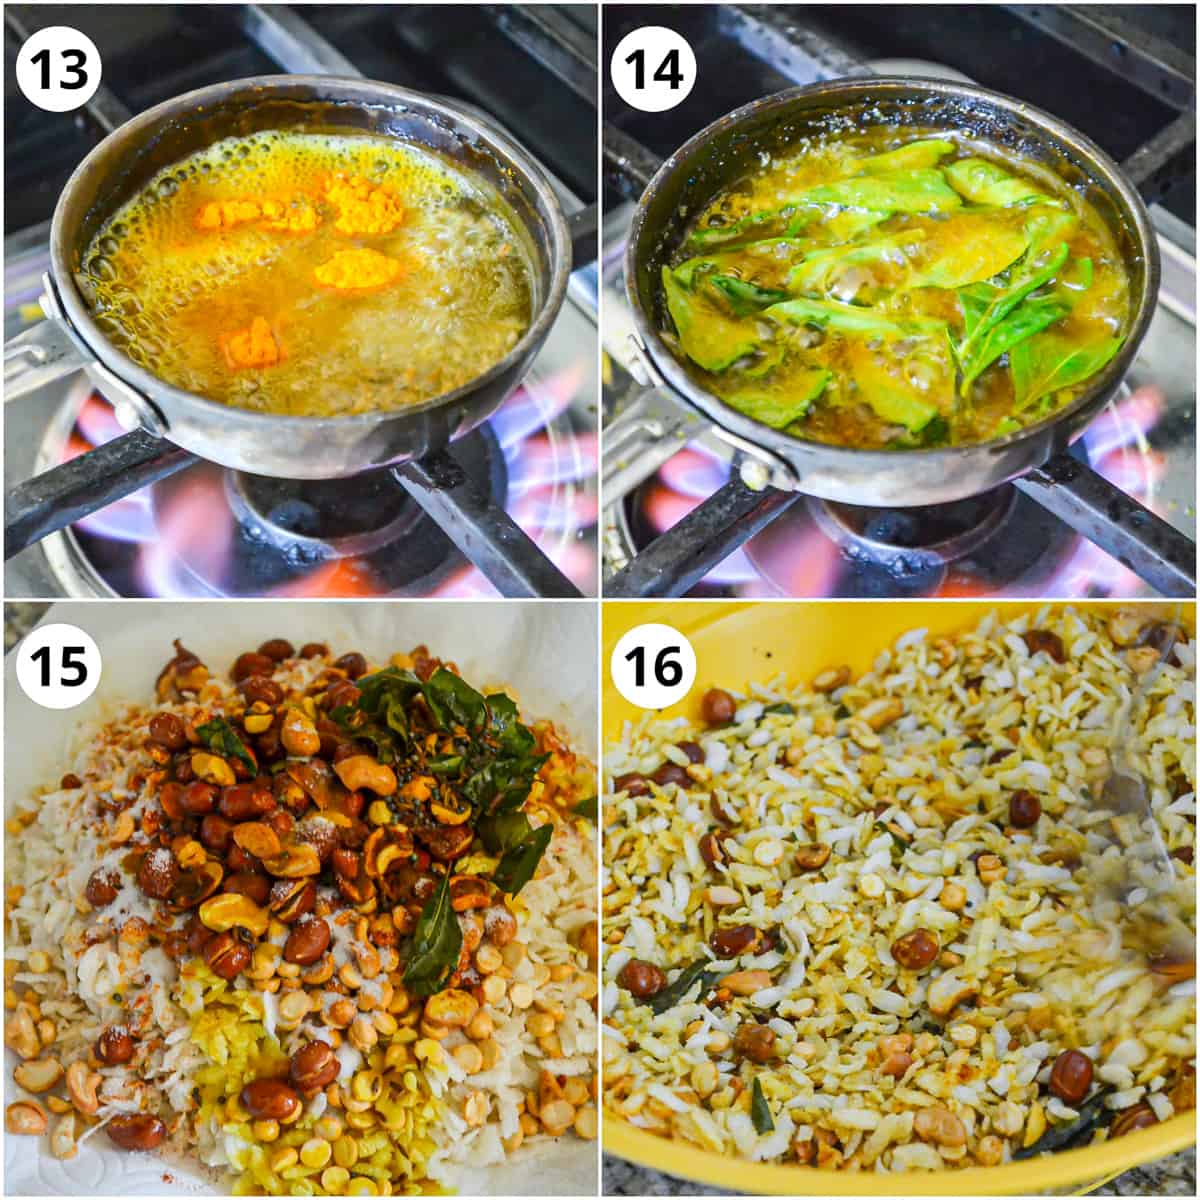
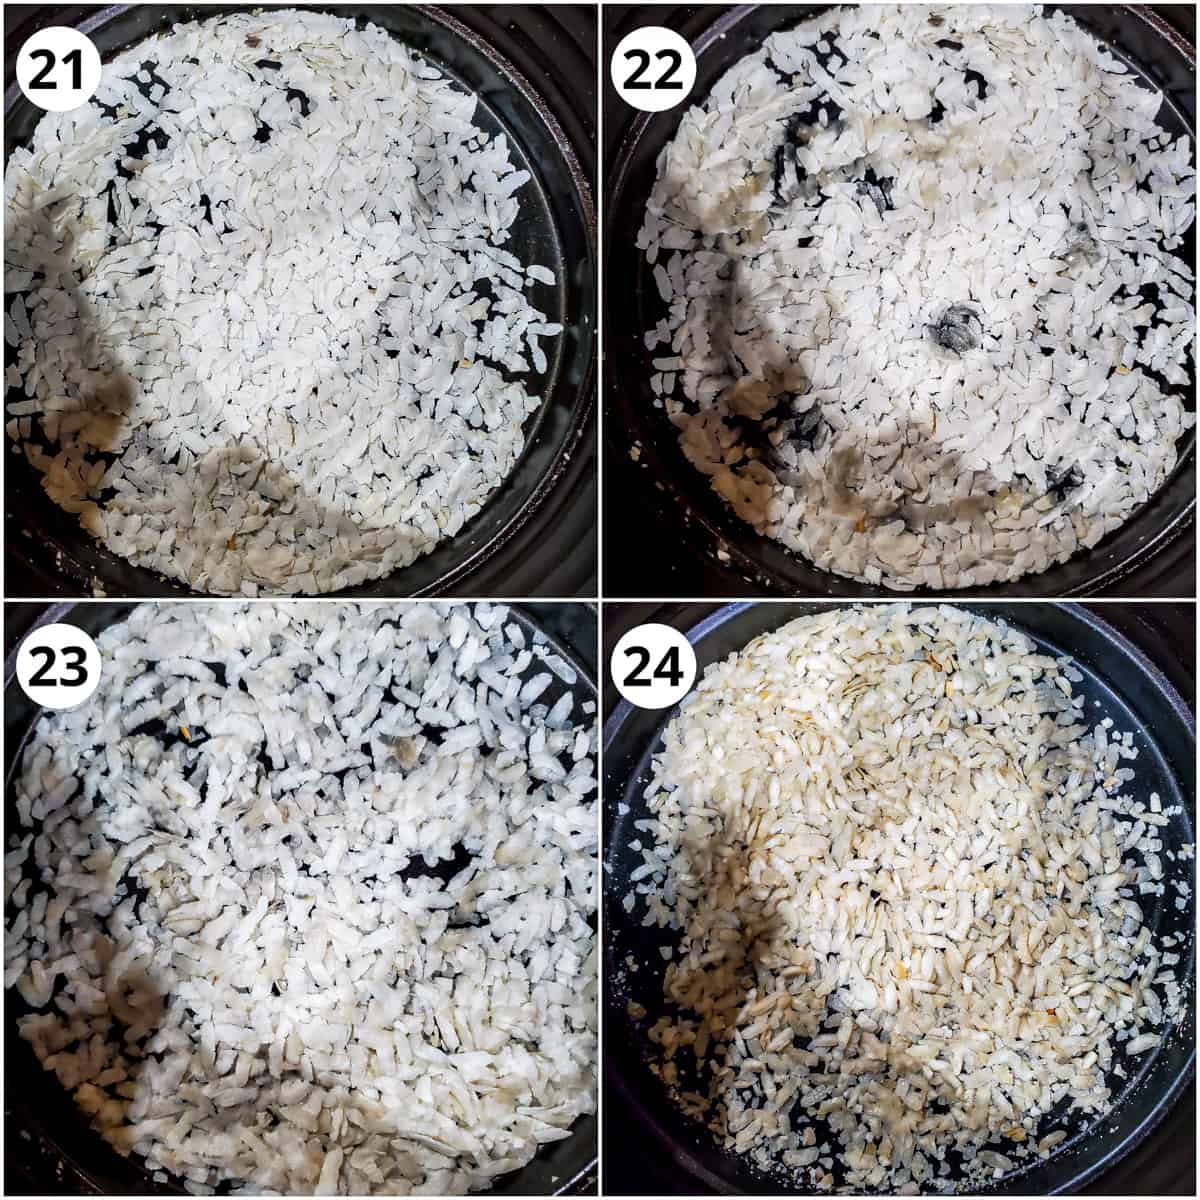
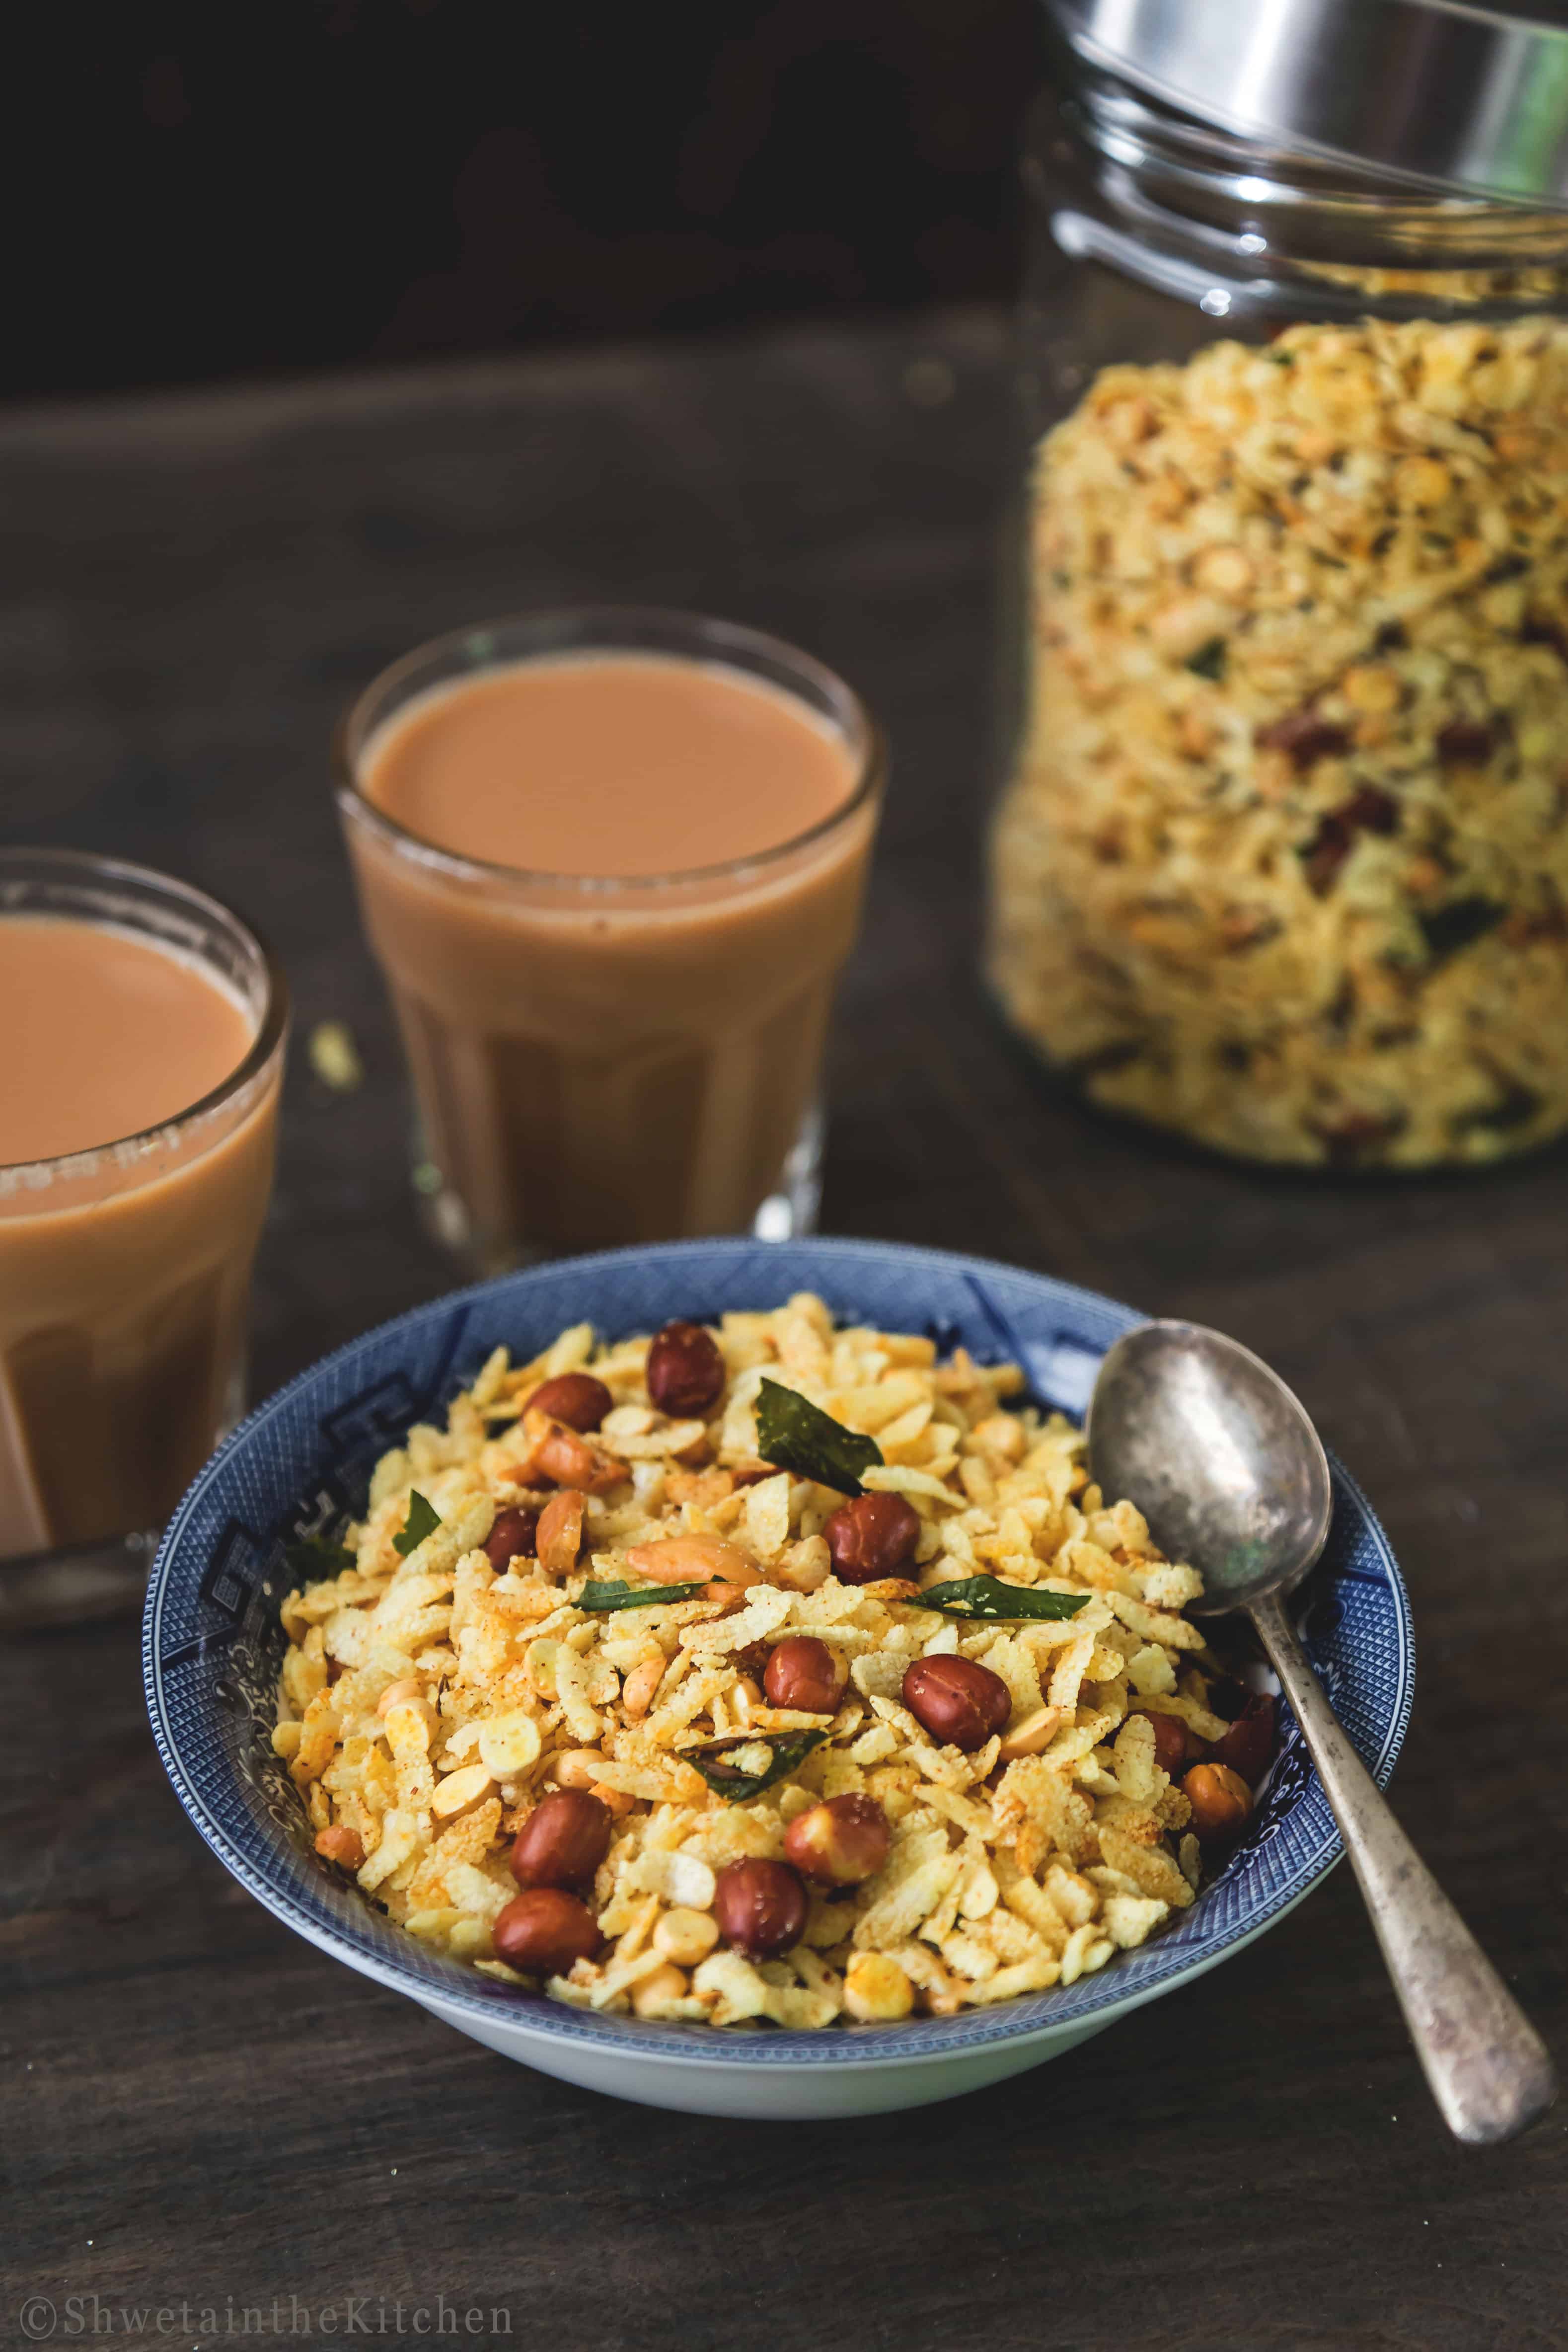
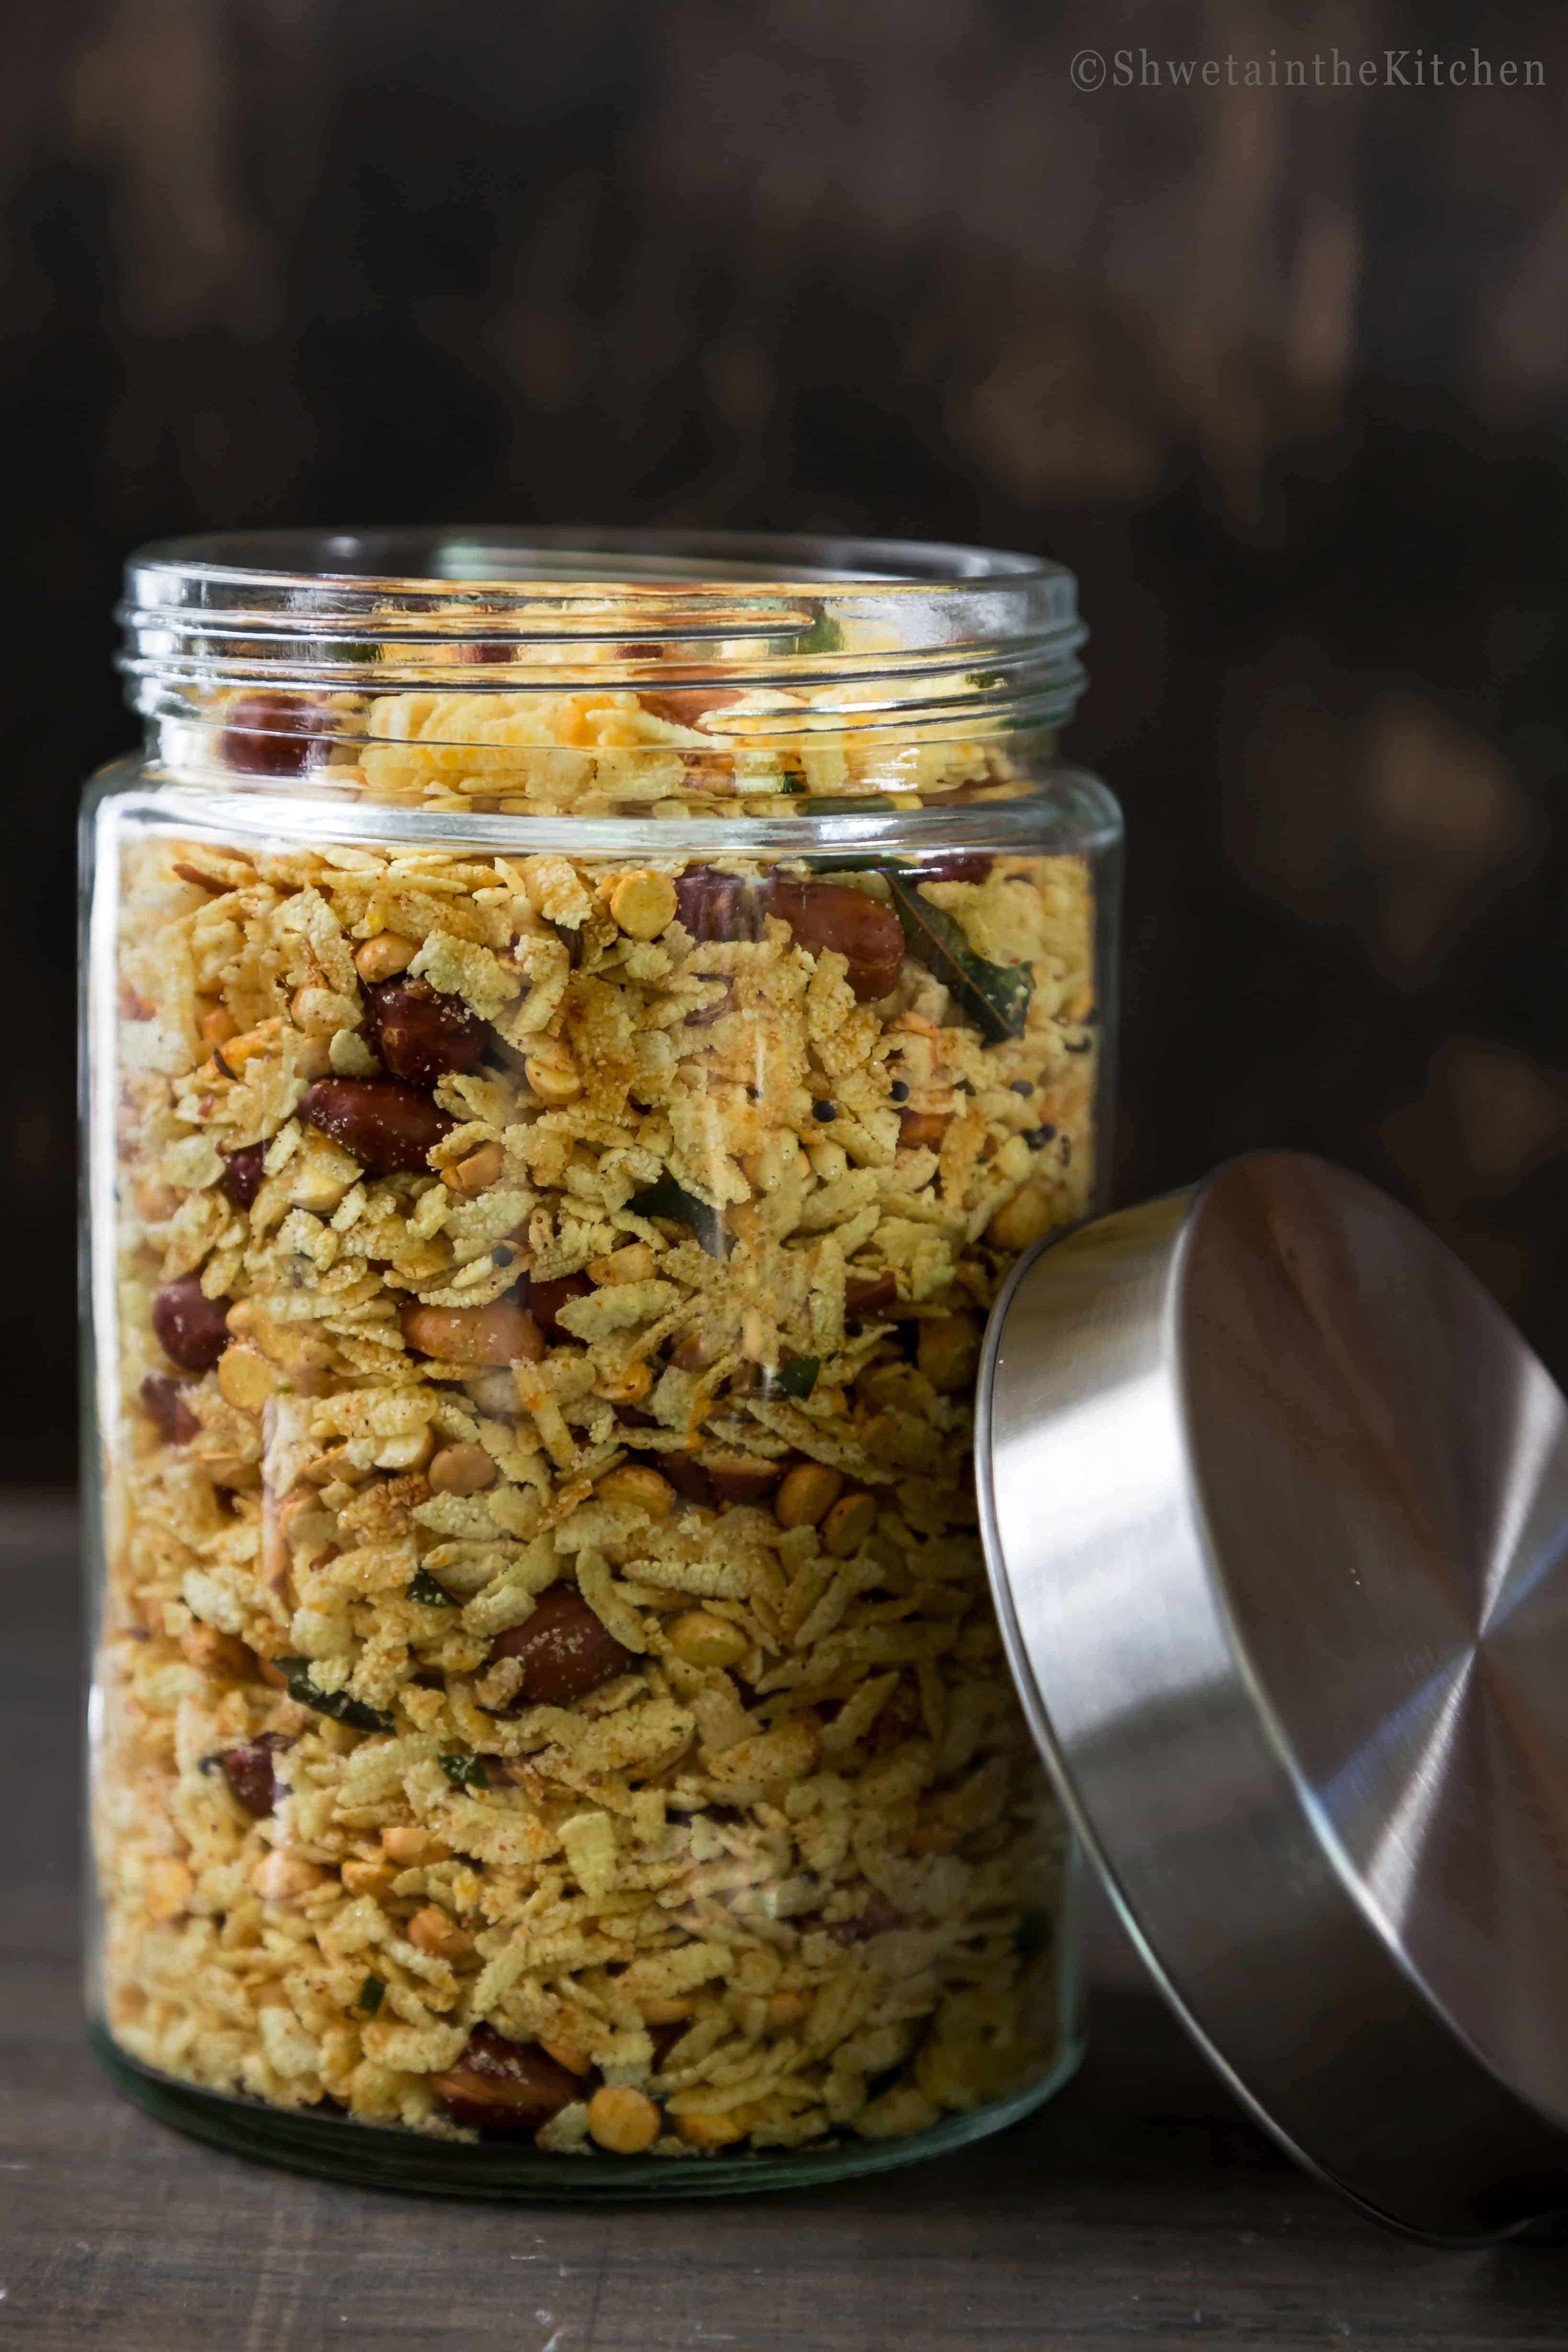
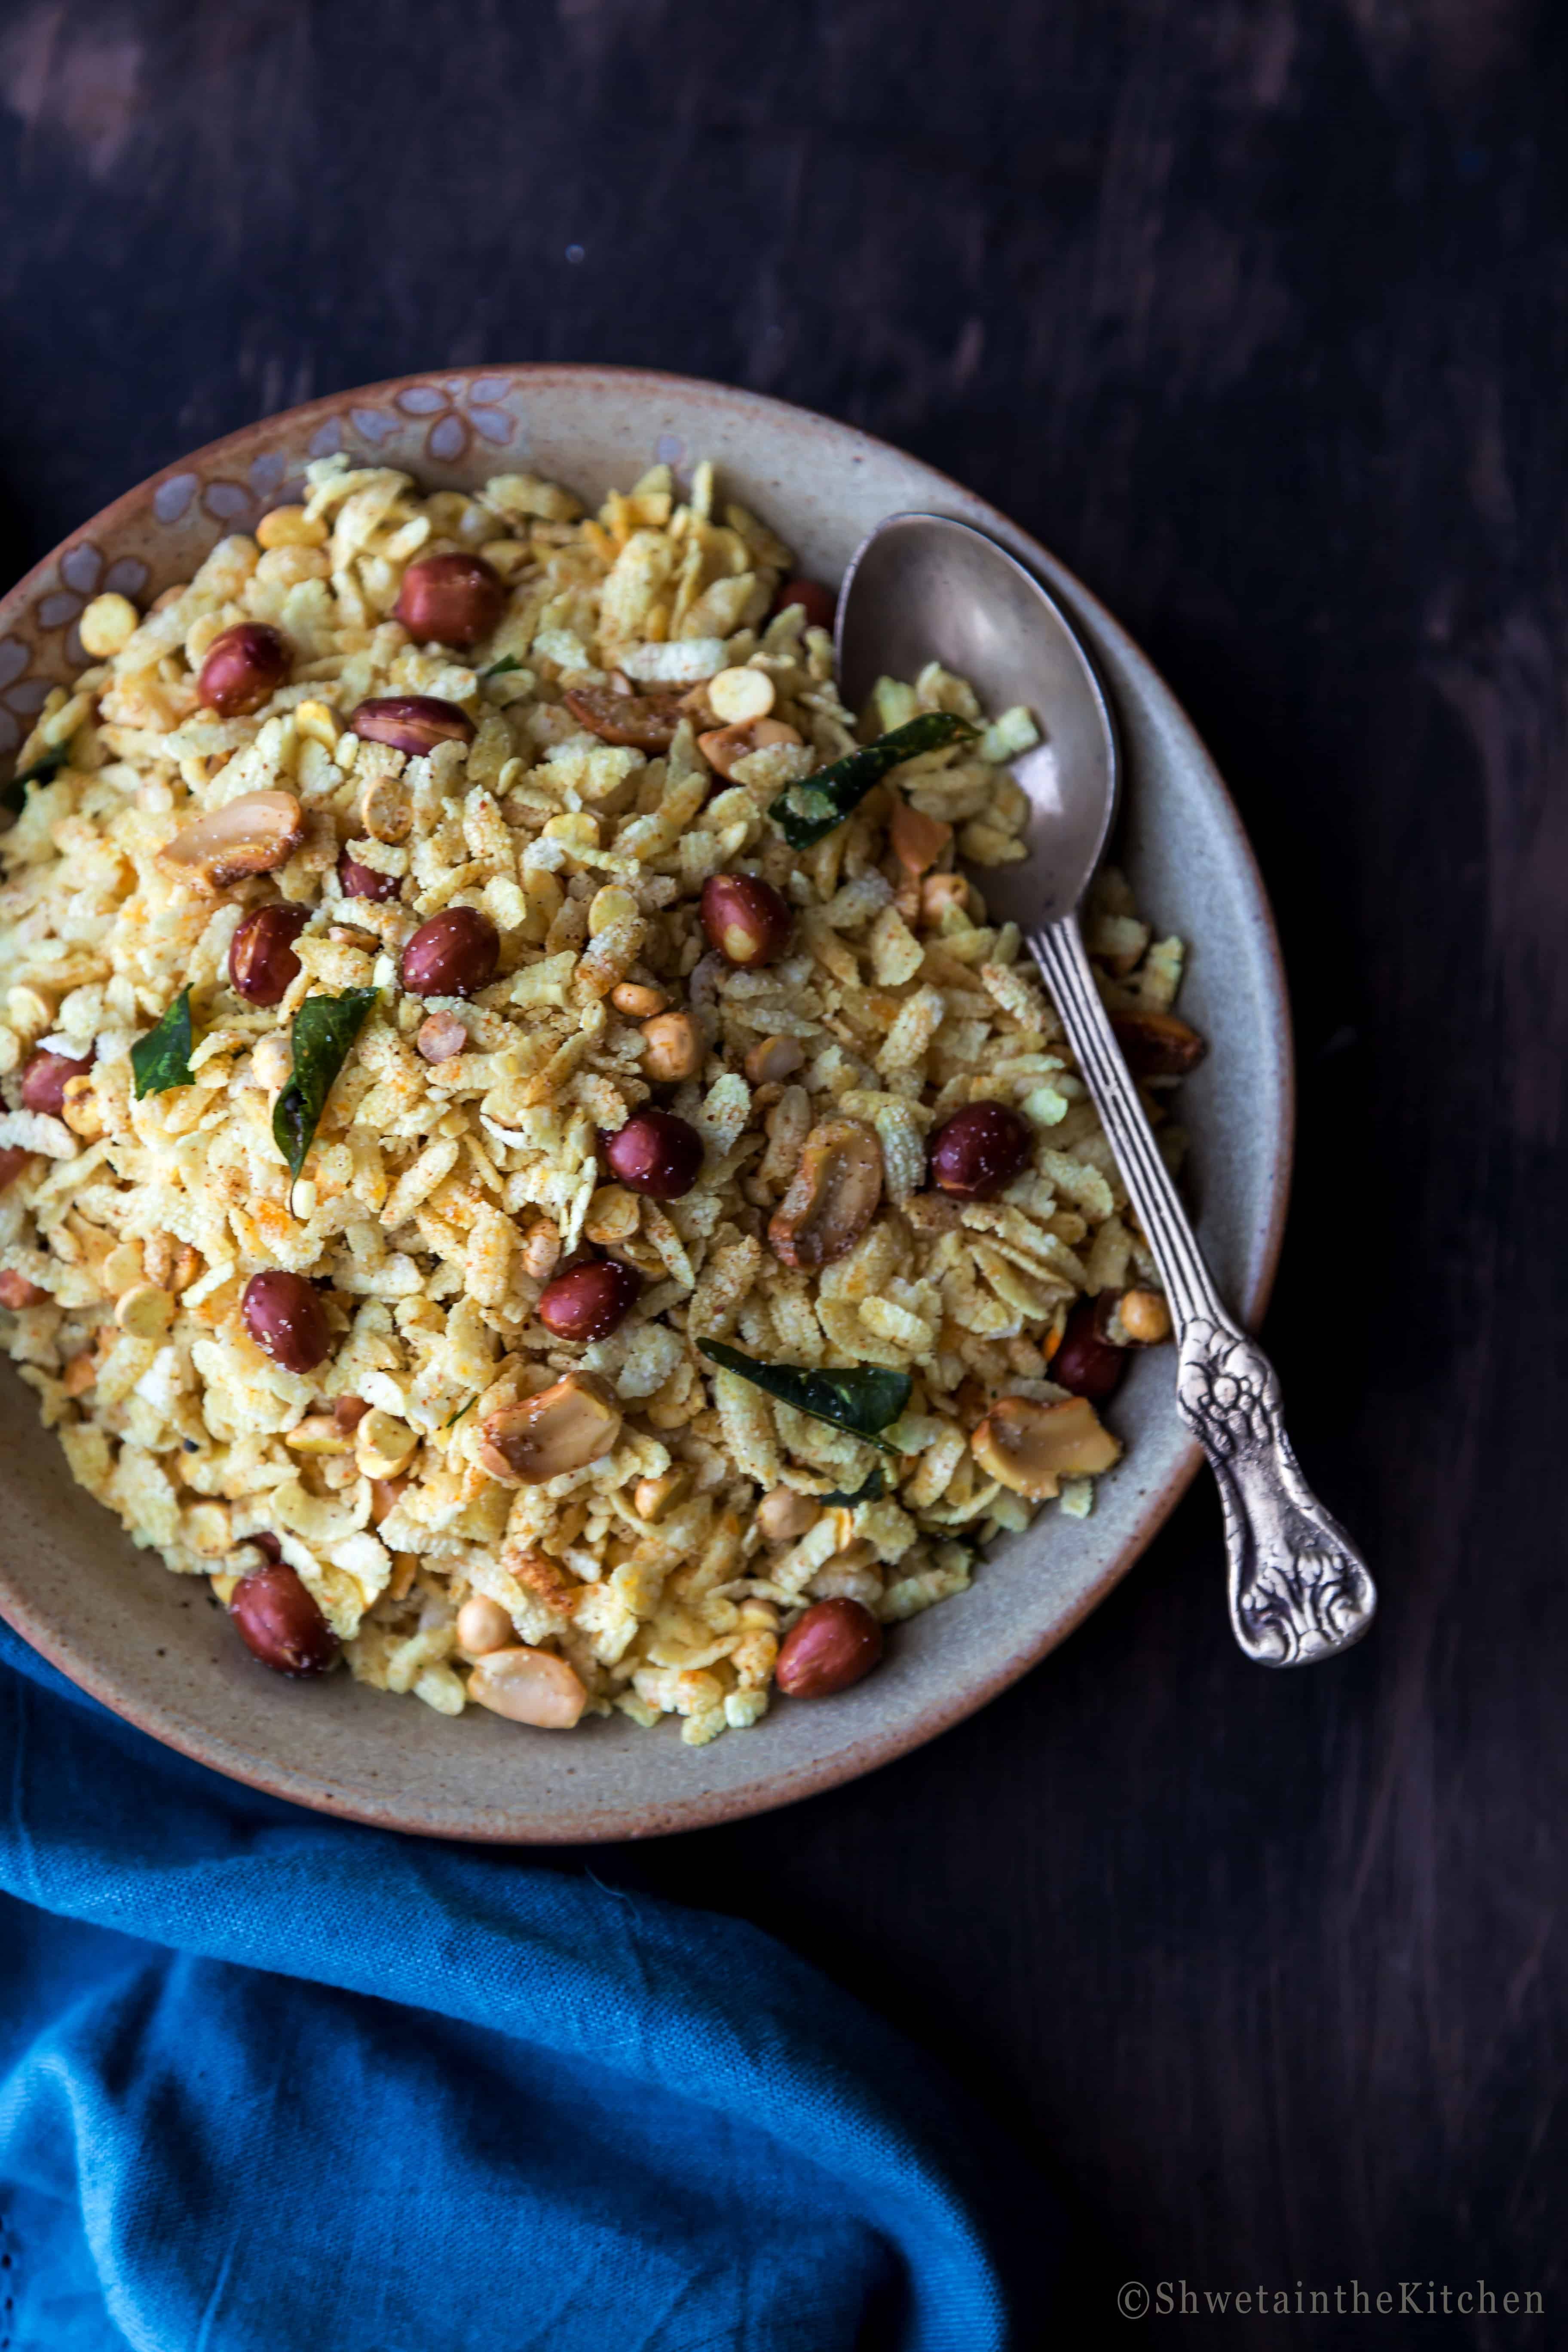
Hope you enjoy this Thick Poha Chivda as much as we do!! If you give this recipe a try, we did love to hear your feedback ❤️ Please rate by clicking stars ⭐️in the recipe card. Thank you! You can also find me on Facebook Instagram Pinterest It usually a mix of dry fruits, nuts, some more fried crispy ingredients and the main ingredient which can be either oats, cornflakes, rice flakes tossed together and tempered with spices and curry leaves. Today’s post is a quick and easy Maharashtrian chivda recipe made from poha, and hence the name Poha Chivda. Poha is also known as beaten rice, rice flakes, or flattened rice and is flat, dry, and light. It is naturally gluten-free. There are three varieties of Poha - thin, thick, and dagdi but we will be using thick poha for this recipe. So lets see how to make thick poha chivda Using a sieve that can comfortably fit in your wok start frying. Line a plate with paper towel and have it ready! 1 - Begin with poha, add about ½ cup at a time to the sieve (or as much it can hold). 2 - Insert the sieve with poha into the hot oil and fry until they expand and get crunchy, a minute or less approximately. Do not brown them. 3 - Remove from oil and hold above the wok for few seconds to drain the access oil. 4 - Transfer to the paper towel-lined plate. Repeat these frying steps for the remaining poha. 5 to 8 - Similarly fry the peanuts, Dalia, and cashews and remove them on the same plate as poha. 9 and 10 - While all these fried things are still warm add the salt, sugar and red chilli powder to them. You can either transfer to a bowl or on the same plate and stir to combine. 11 and 12 - For Tadka (tempering)- heat oil in a small pan for tadka. Once hot add the zeera and allow to splutter. 13 and 14 - Quickly add the turmeric followed by curry leaves. Mix and turn off the heat once the curry leaves are crisp. 15 and 16 - Add this Tadka tempering to the poha in the bowl and give it a good mix so that everything is well combined. Let it cool and come to room temperature at which you can store this in an airtight container. 17 - Add thick poha to the lined baking tray. Work with 1 to 1.5 cups or as much the baking tray can hold at a time without overcrowding. So you will need to bake poha in multiple batches. I baked mine in two. 18 - Drizzle some oil (about 1 tbsp). 19 - Mix well so the oil is evenly distributed and spread into an even layer. 20 - Bake at 350°F for 15 mins stir/mix after 5mins. Remove from the oven and allow to sit in the pan for 5-10 mins which should help them crisp up further. Bake at 350°F - cashew for 10-12 mins, peanuts for 15-20 mins and dalia for 20 to 25 mins or until crisp. Follow the same steps as mentioned for tadka (steps 9-16) in deep-frying section. 21 - Work with half to 1 cup or as much the air fryer tray can hold at a time without overcrowding. Air fry in multiple batches. 22 and 23 - Drizzle some oil (1 tsp) and mix well so the oil is evenly distributed. spread into an even layer. 24 - Air fry at 370°F for 5-7 mins or until crisp. Shake it up once. Remove and allow to sit in the air fryer for 5 min. That should crisp them further. Repeat for the remaining poha. Air fry at 370°F - cashew for 2 mins, peanuts for 3-5 mins and dalia for 5-7 mins or until crisp. Follow the same steps as mentioned for tadka (steps 9-16) in deep-frying section. Our crunchy and spicy Poha Chivda is ready! Serve it as a side with your evening tea. Enjoy!
Recipe Card