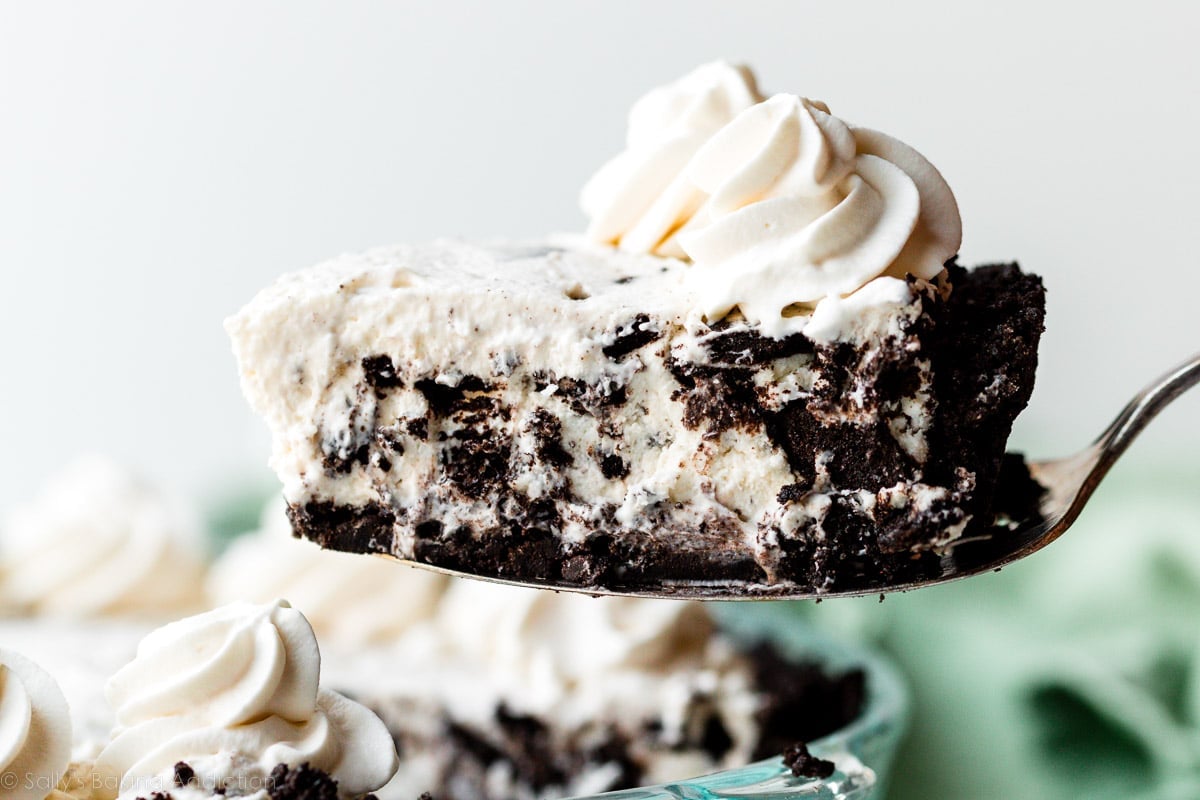
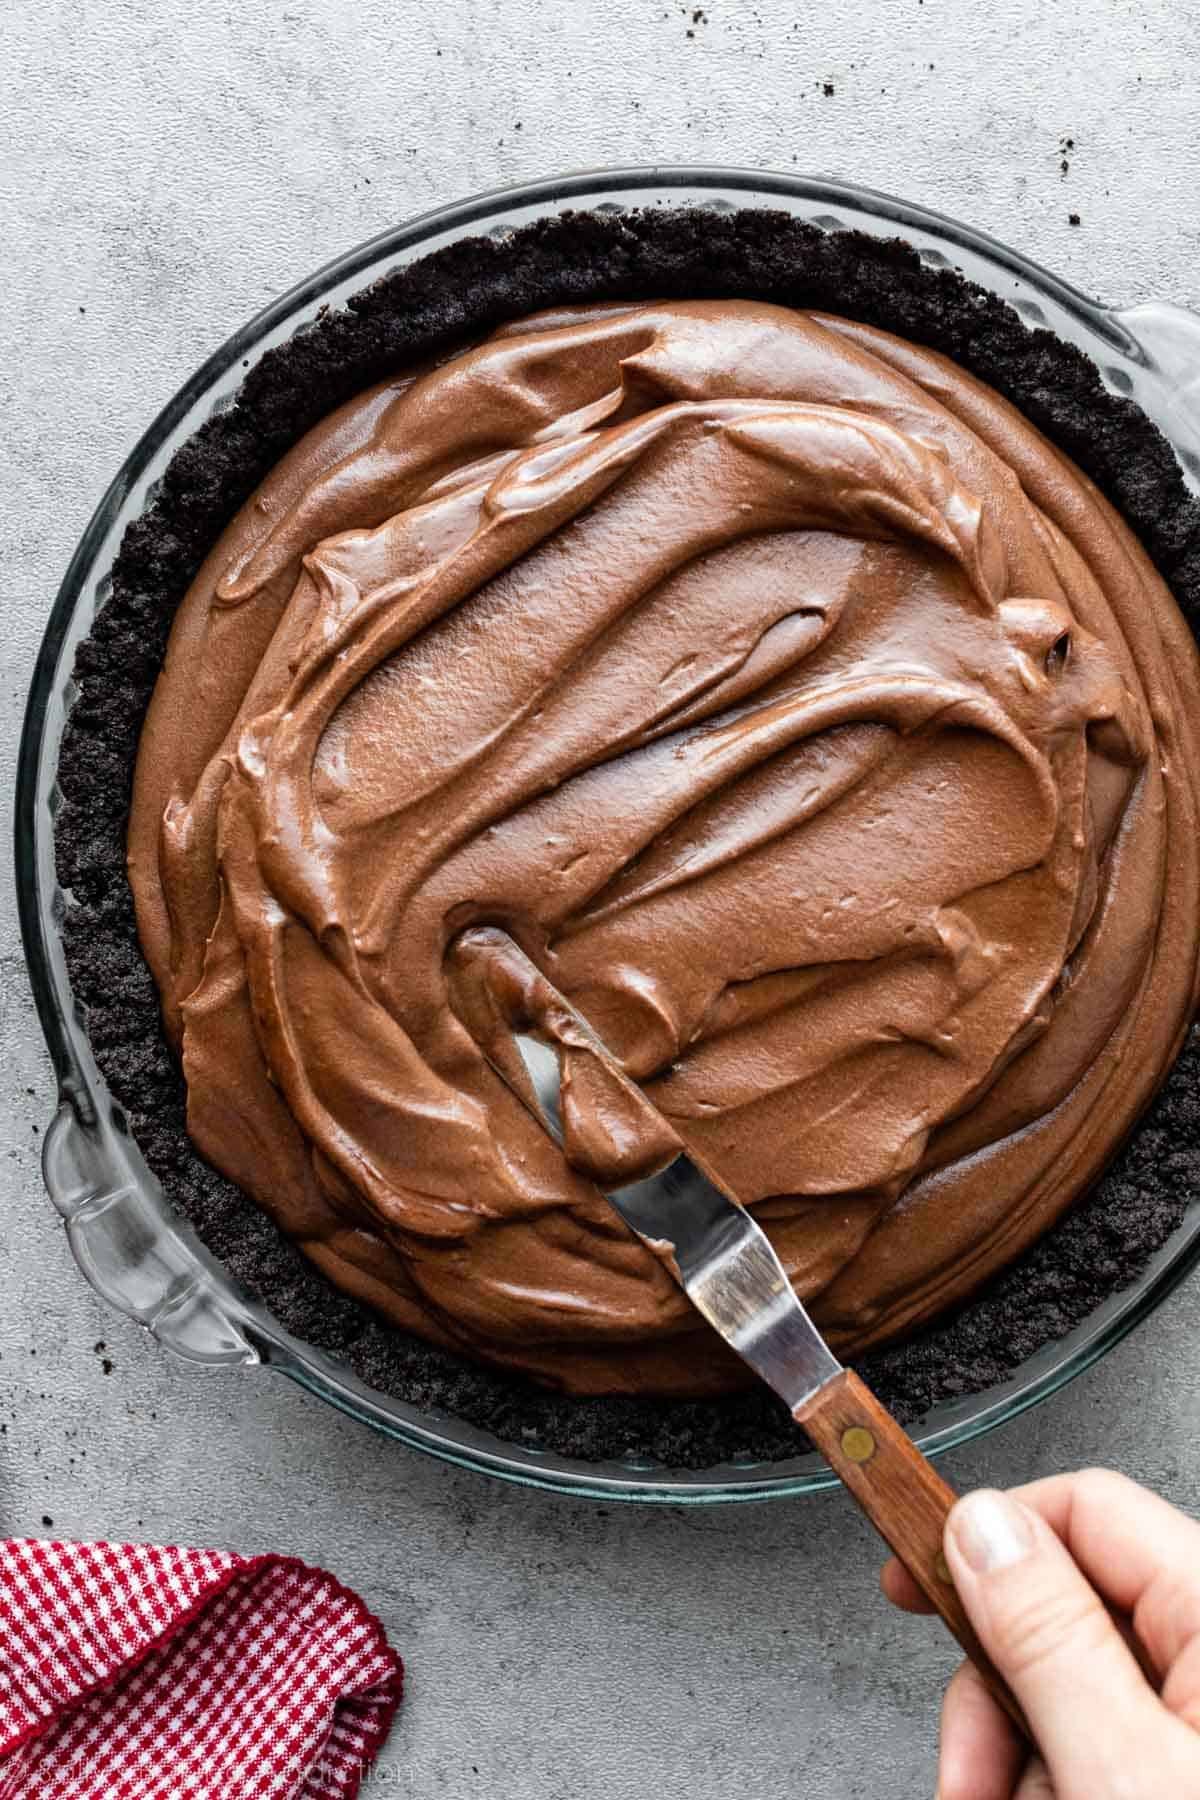
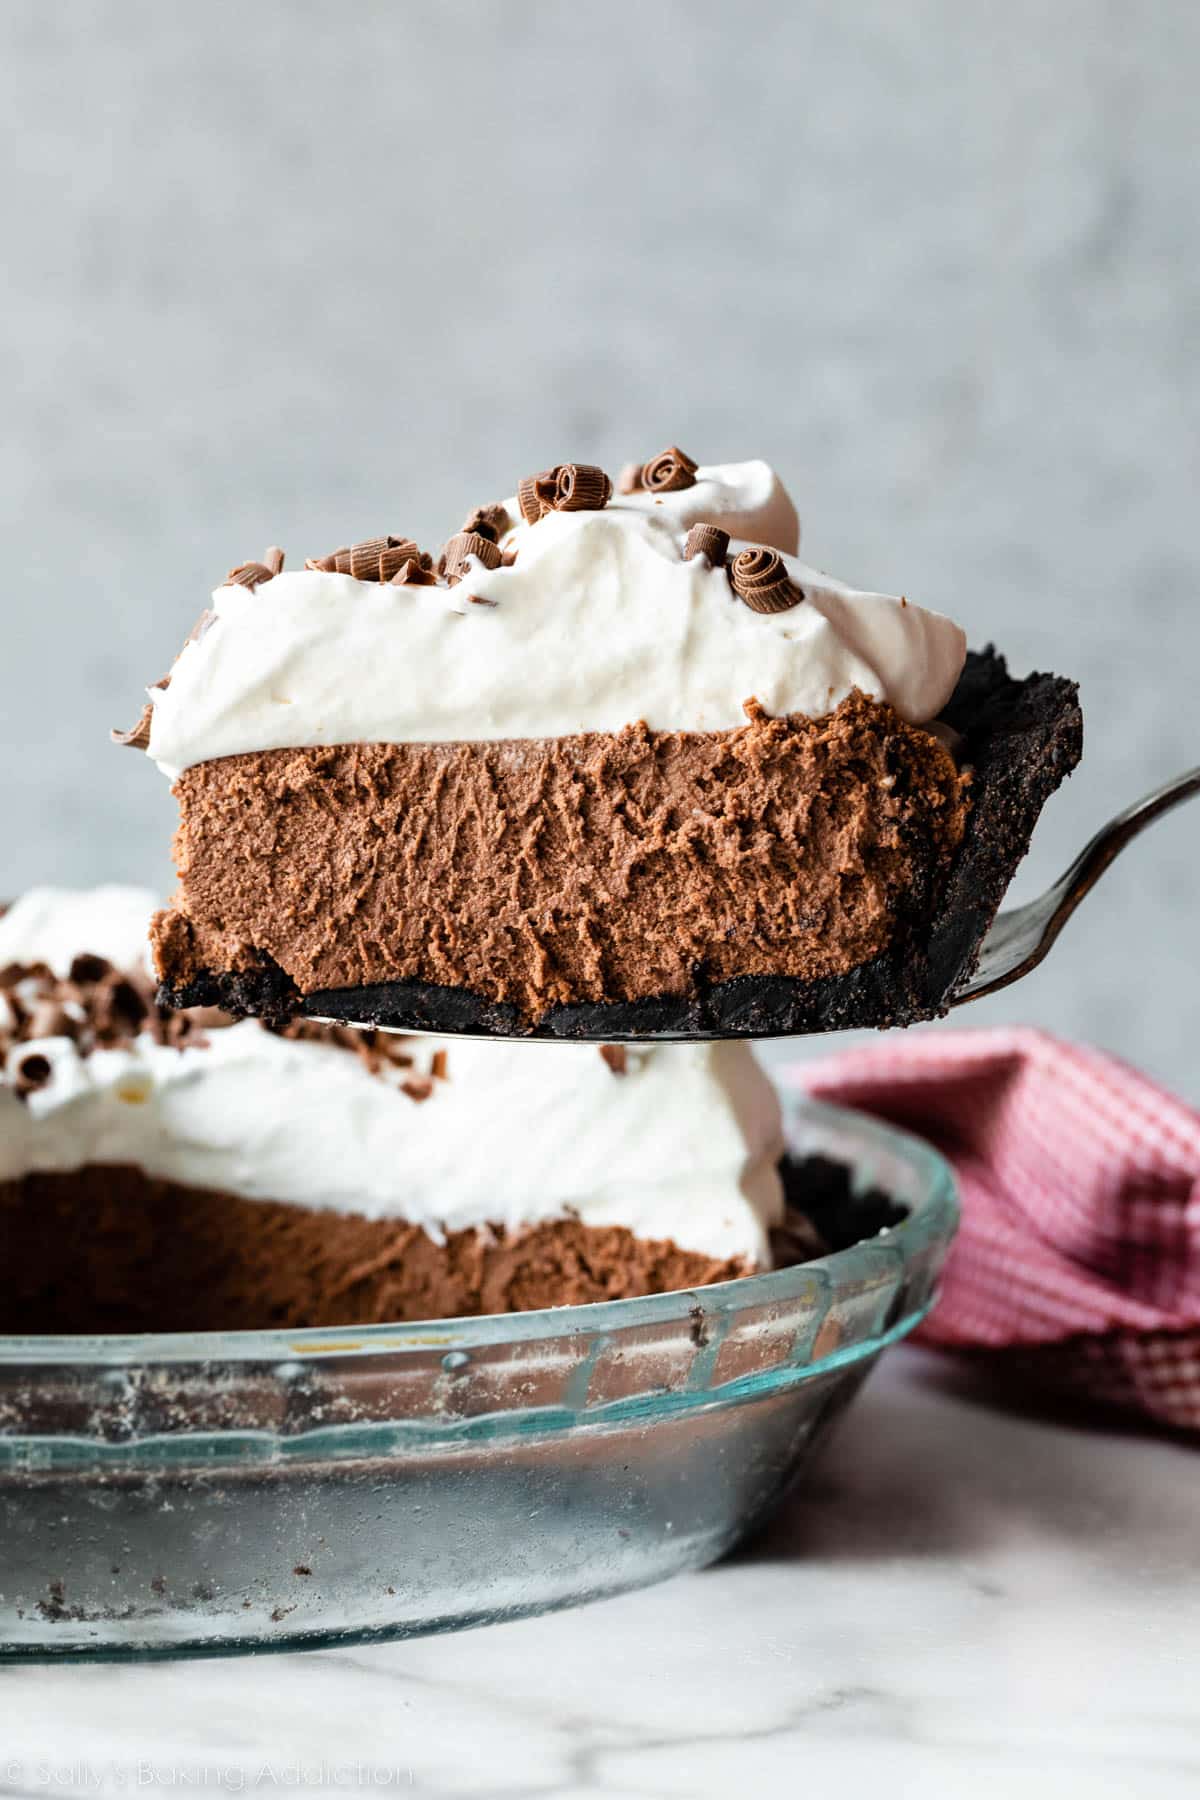
Today we are taking a deep dive into the dark shallows of an Oreo pie crust. This chocolate cookie crust is the base of so many wonderful desserts, like this cookies and cream pie (pictured below), chocolate mousse pie, and these white chocolate raspberry cheesecake bars. Another reader, Chrissy, commented: “The crust turned out like the picture! I cannot wait to put cheesecake filling in this and top it with mixed berry compote! Thank you so much for a super simple recipe! ★★★★★“ It can also be swapped out for traditional pie crust or graham cracker crust in recipes such as French silk pie, cheesecake, coconut cream pie, and cheesecake pie.
Can’t I Just Buy a Pre-Made Oreo Crust?
Of course you could. But this homemade Oreo crust is really easy to make and tastes approximately 1,200x better. And it’s much thicker too. It weighs over 11 ounces, vs. the packaged crust, which is just 6 ounces. That’s a significant difference!
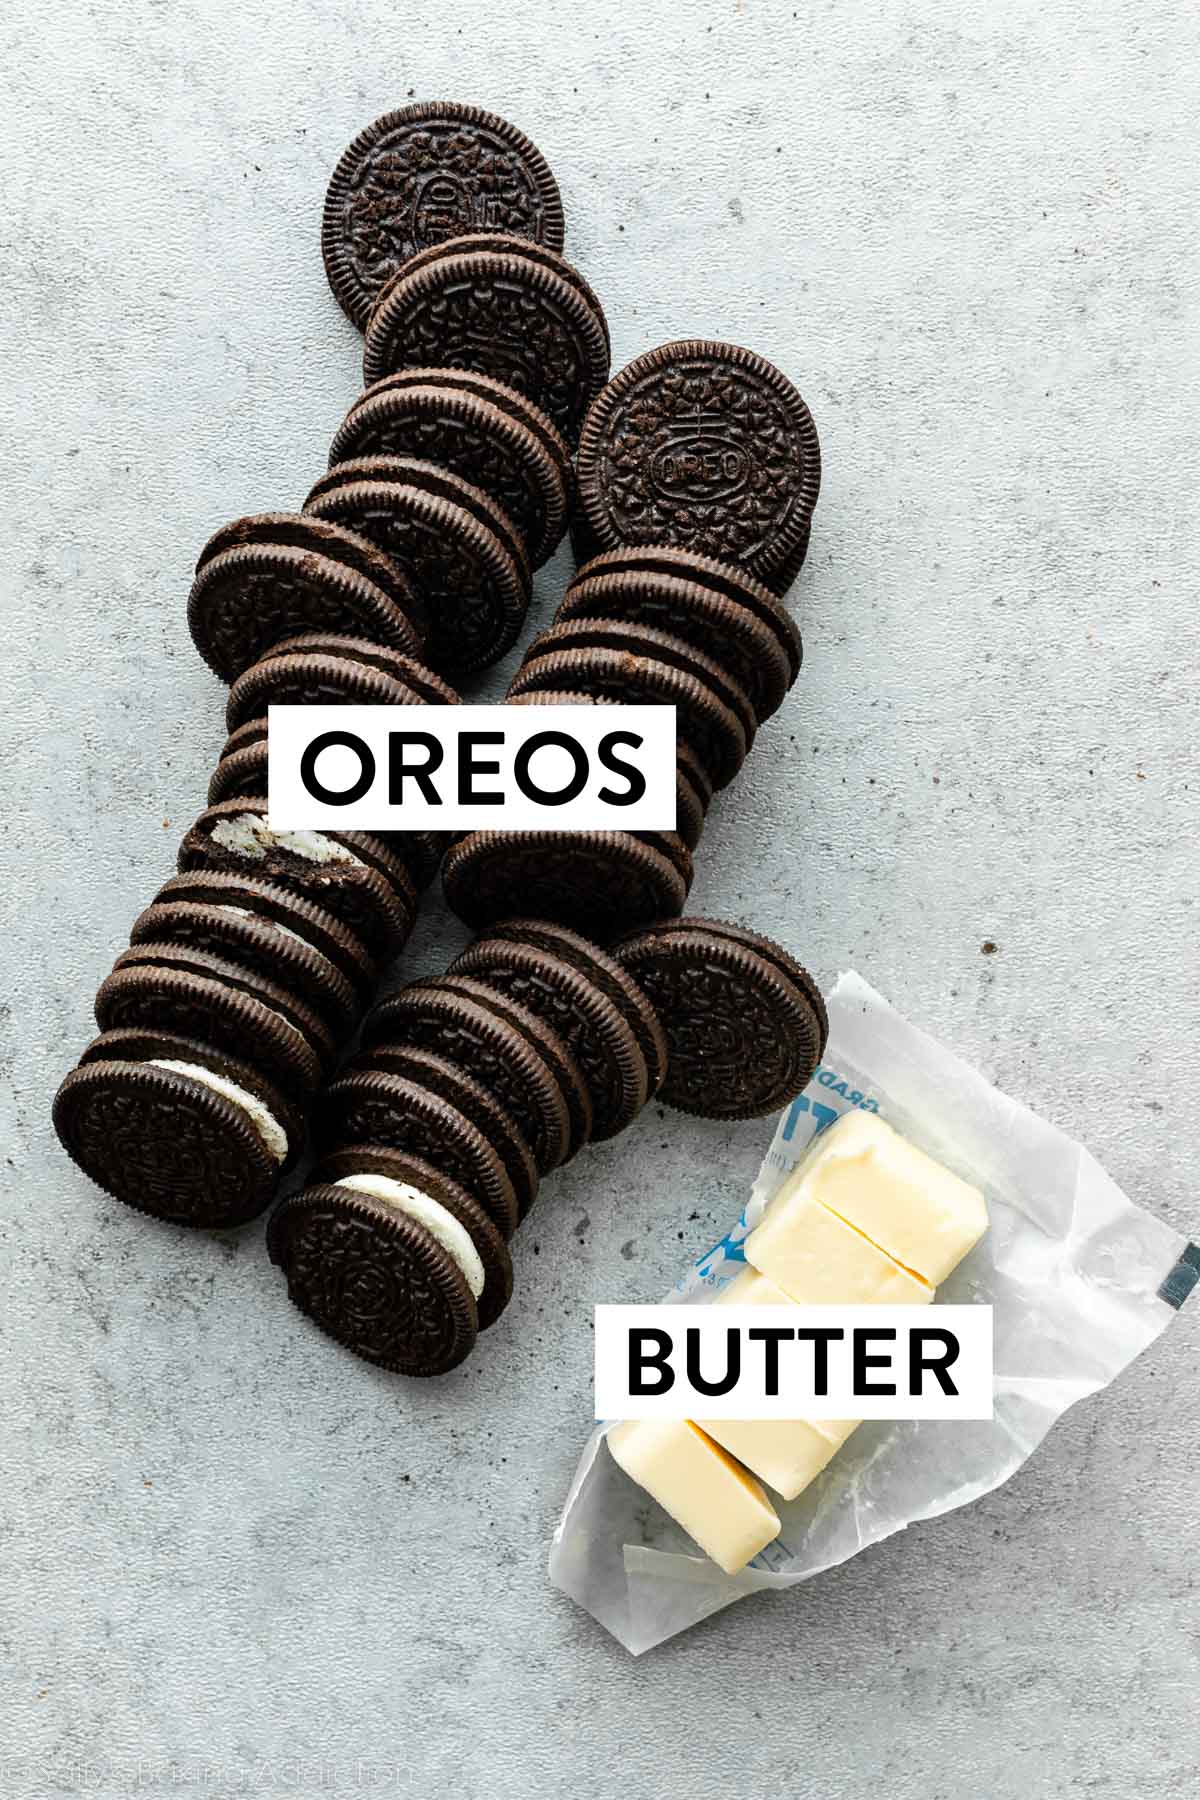
You Need Only 2 Ingredients
Can I Use Other Flavor Oreos? Oreos come in so many different flavors. For best results, stick with regular Oreos, and I know peanut butter Oreos or mint Oreos work too. I keep testing a Golden Oreo crust, and it always bakes into mush. You need a lot more cookies if making a Golden Oreo crust.
Oreo Cookie Math
Oreos come in many different size packages, containing different numbers of cookies, which also varies depending on where you are in the world. And—perhaps just to mess with us—occasionally manufacturers change the size of the cookies themselves or the number of cookies you get in a package… which means my team and I have to go through all my recipes that use Oreos and update them. (In case you’re wondering why your printed recipe may no longer match the recipe on the website.) I used my trusty food scale to do some Oreo math for you (which is, without a doubt, the tastiest kind of math). According to the standard Oreo package nutrition label, a serving size of 3 cookies = 34g. Therefore, 1 Oreo = 11.333333333333g… oh boy. Measuring the crumbs can also cause confusion because how finely you grind the crumbs makes a difference. And if you spoon and level the crumbs into a measuring cup, like we do with flour, it’s a lot different than if you pack the crumbs into the cup, like we do when measuring brown sugar. Use the packed-into-the-cup method for measuring Oreo crumbs for a crust. Here’s what my team and I determined in our lab (aka my messy kitchen counter):
If a recipe calls for 1 cup Oreo crumbs, you need 11 standard-size Oreos to yield 1 cup, or about 125g, of crumbs (packed). For a typical Oreo pie crust, you need 2 cups of Oreo crumbs (packed), so grind up 22 Oreos, which should yield about 2 cups crumbs (250g). If a recipe calls for chopped Oreos (not crumbs), like this cookies and cream cake, use 8 Oreos for 1 cup chopped (90g).
How to Make an Oreo Cookie Crust
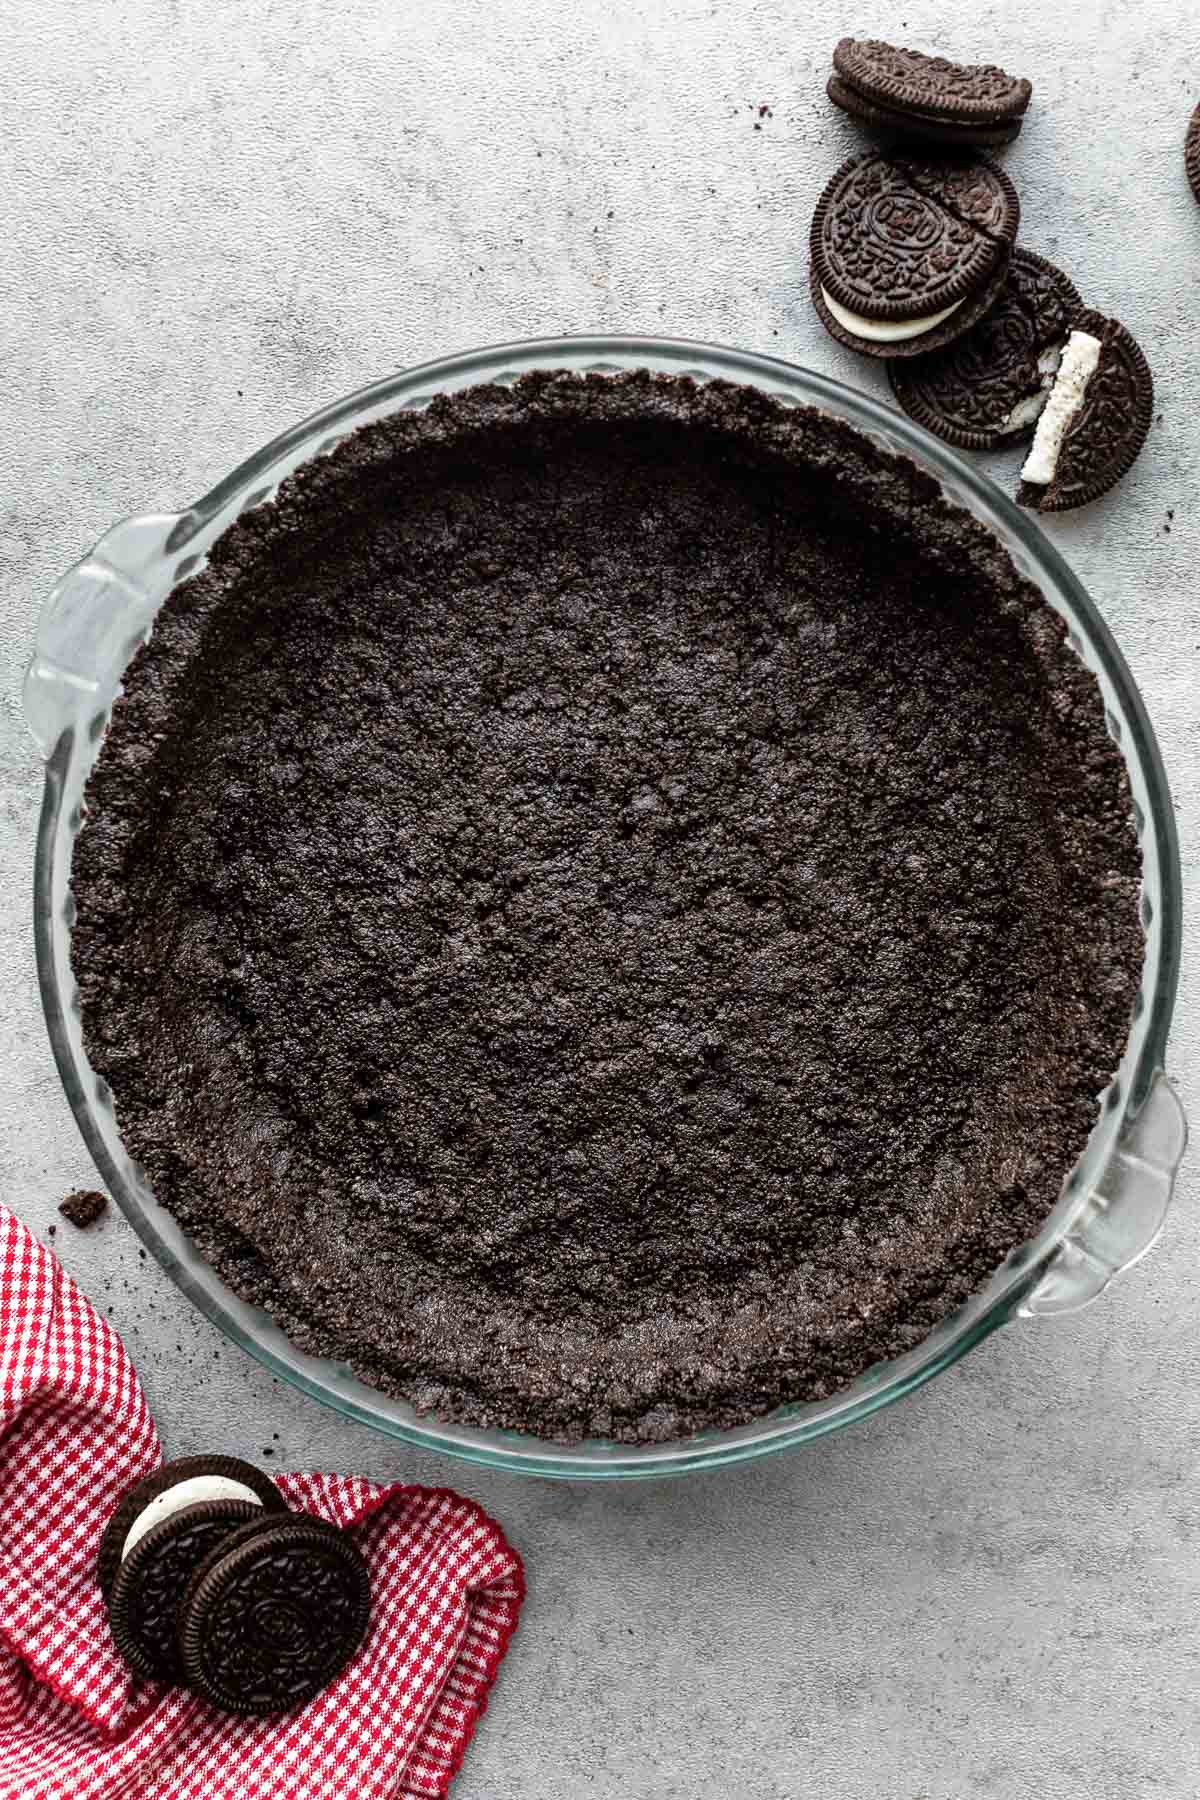
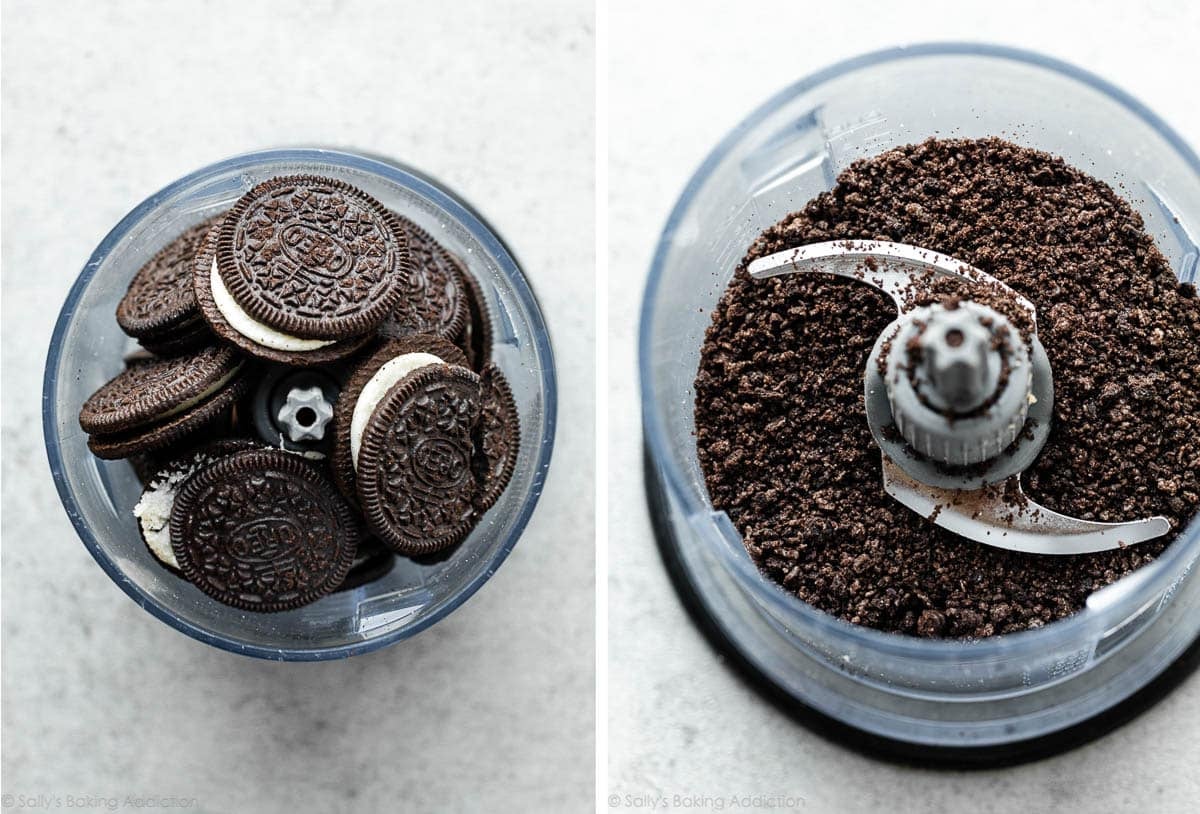
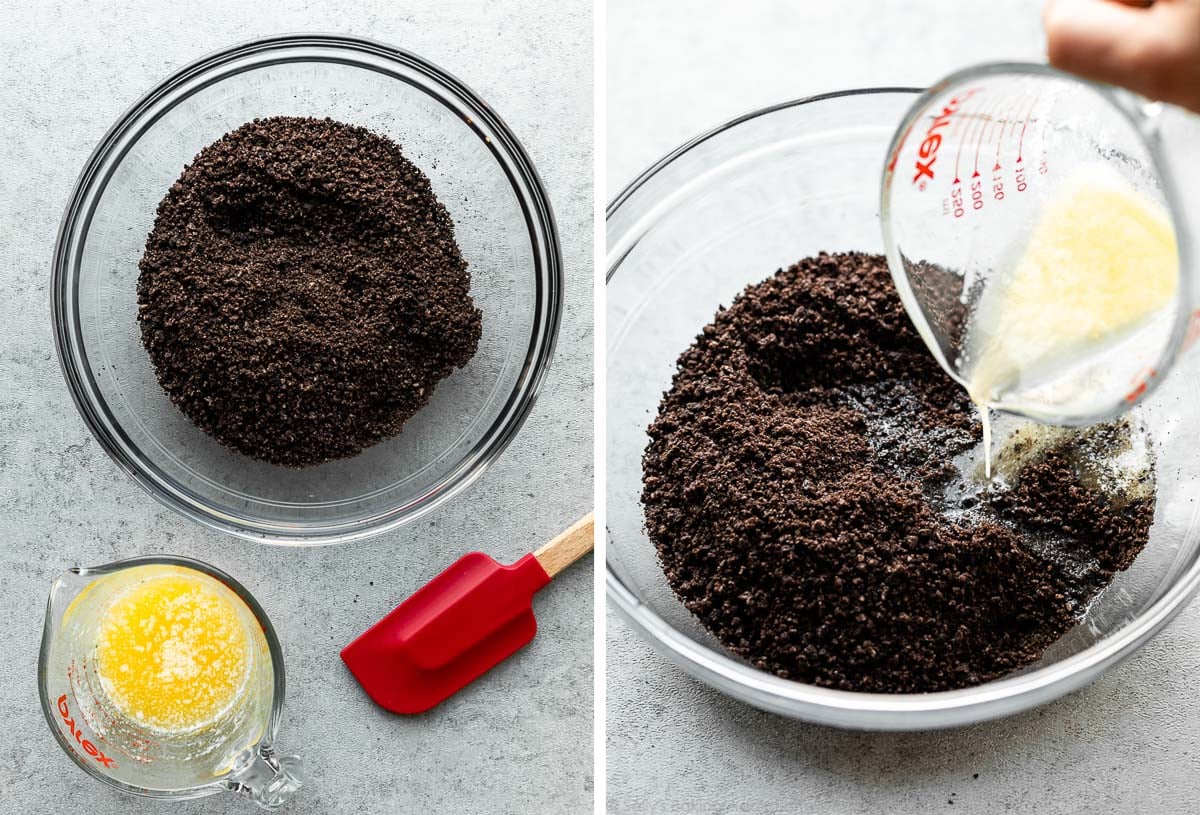
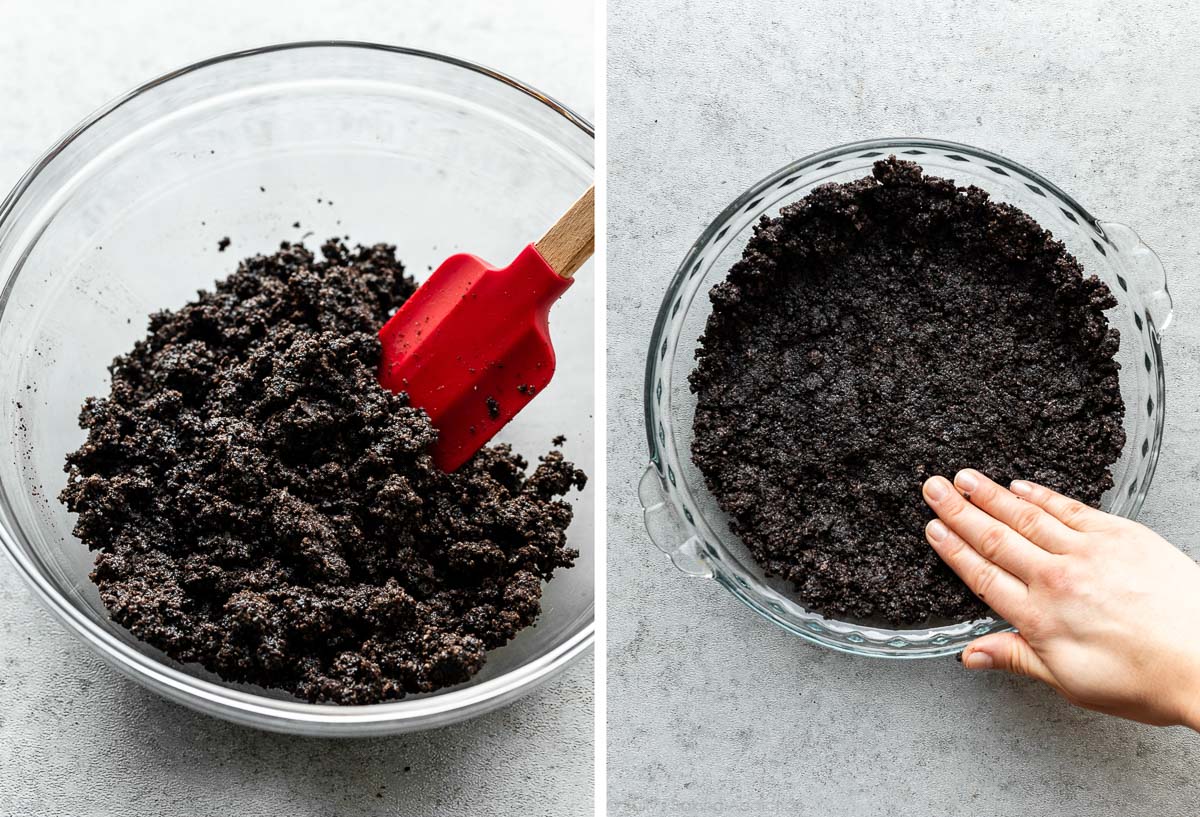
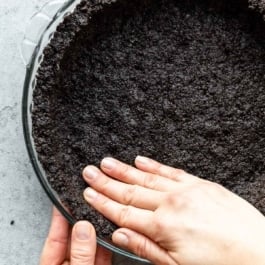
Grind 22 whole Oreo cookies (including the cream filling) into crumbs. You can use a food processor or blender for this, but if you don’t have one, just put them in a zipped-top bag and crush them with a rolling pin. Keep in mind that the finer the crumb, the better the crust will hold its shape. You should get about 2 cups of crumbs (packed), or about 250g. Stir in the melted butter, and then press the mixture tightly into a pie dish. See below for some shaping tips. The Oreo crumb crust will feel more moist than a graham cracker crust; that’s expected, because of the cream filling.
Oreo Cookie Crust Shaping Technique
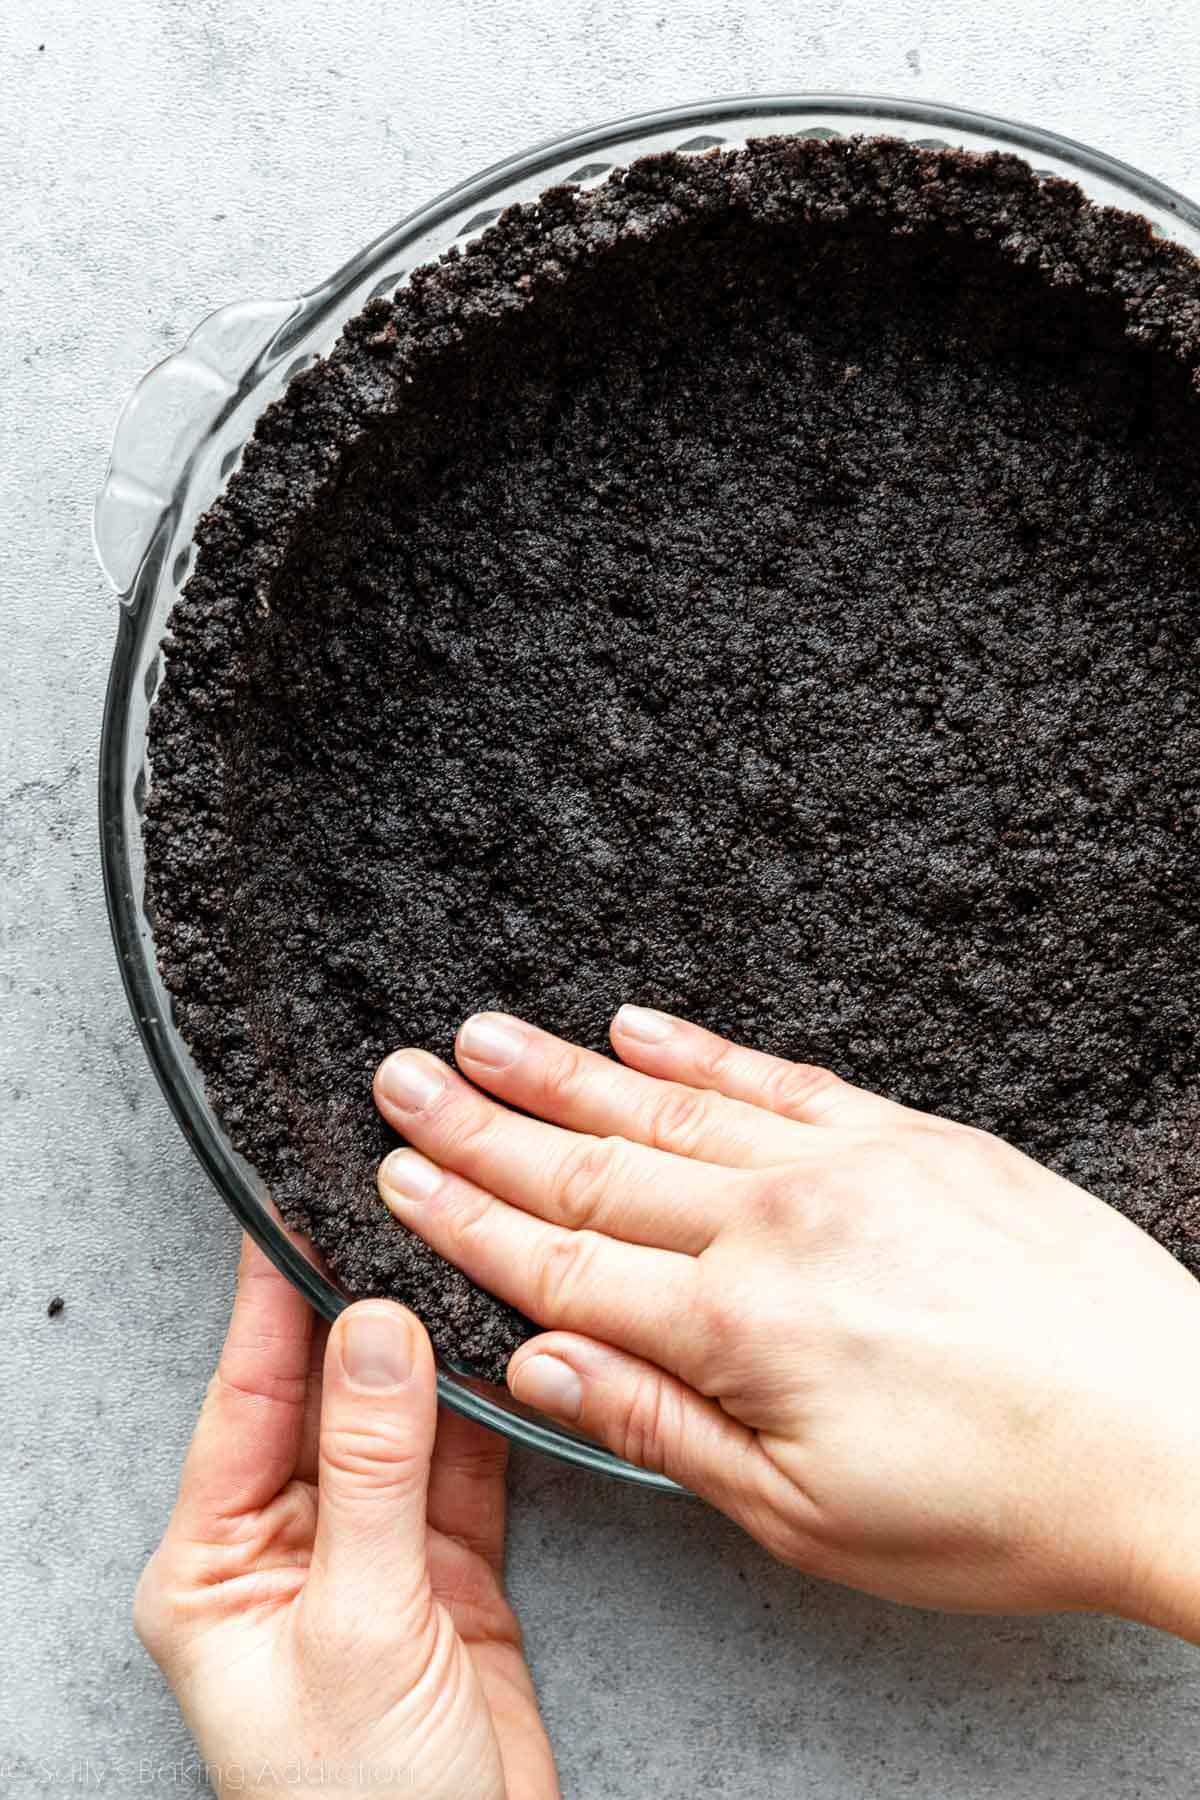
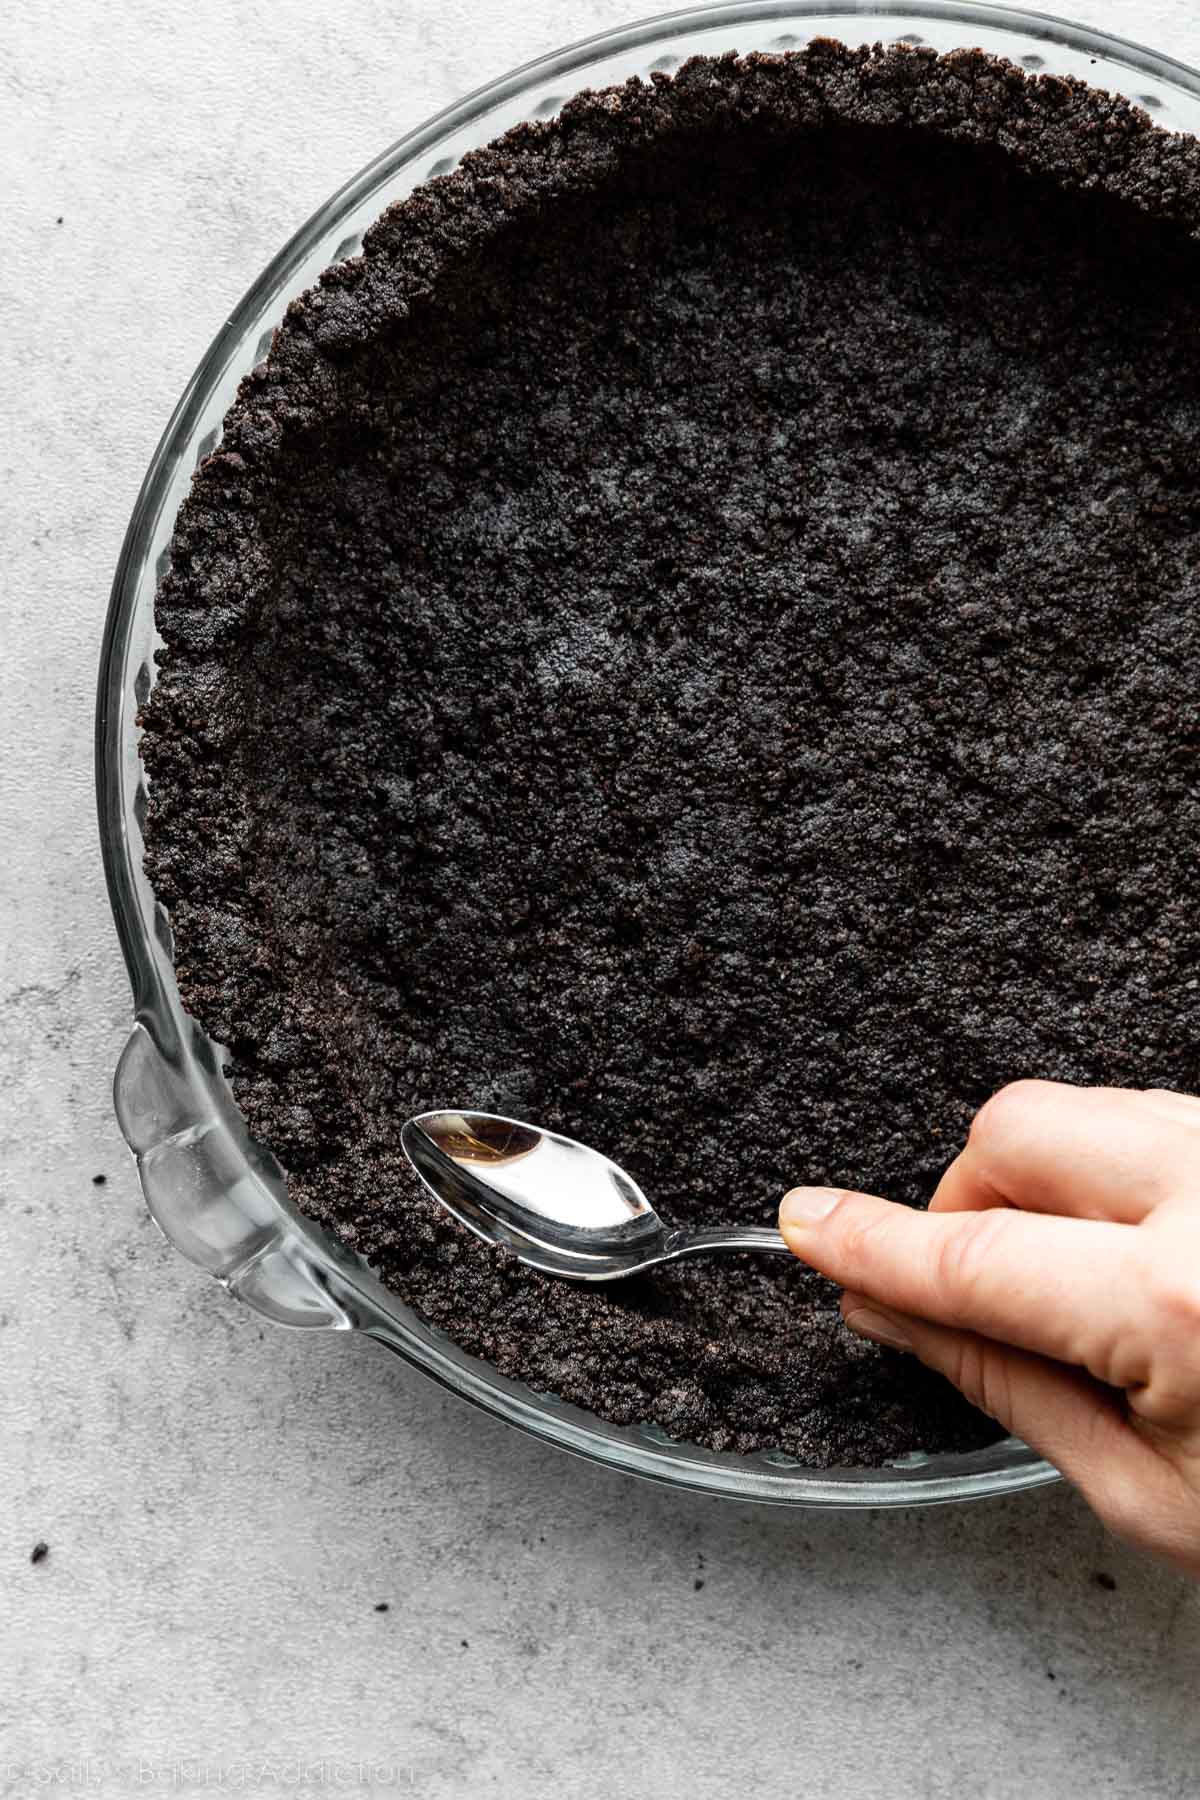
Pack the crust tightly: Using your hands, press the bottom and around the sides with medium-firm pressure until the crumbs aren’t moving around anymore—you don’t want any loose crumbs. You can use a small flat-bottomed measuring cup to help smooth out the surface if you like. Make a flat-top edge: I use my thumb on one hand and 4 fingers on my other hand to go around the top and sides. And, finally, use a spoon to round the inside of an Oreo pie crust: This sounds a bit odd, but you don’t want a right angle at the bottom edges where the sides and the bottom meet. Instead, you want it a little bit rounded so it stays connected when you slice into it—so the side crust doesn’t immediately separate from the bottom crust. Slide the back of a spoon around the inside of the crust where the sides and bottom meet, to get that slightly rounded shape.
Crust Feels Too Greasy
If you are having trouble getting the crust to come together when pressing it into your pie dish or pan, and it’s feeling too moist and sticking to your hands more than to the dish, it’s helpful to add more crumbs. Transfer the mixture back to the mixing bowl, grind up 2 more Oreo cookies, stir them in, and then try again. This recipe makes enough for an 8-inch, 9-inch, or 10-inch pie dish, round cake pan, springform pan, or square pan. It’s not enough for a 9×13-inch baking pan. If you’re making a 9×13-inch dessert, such as these chocolate peanut butter cheesecake bars, I recommend using 30 Oreos (340g) + 8 Tablespoons (1/2 cup, or 115g) butter. Unless your filling/topping recipe specifies otherwise, you should bake the Oreo crust. Cheesecake and baked pies usually instruct you to pre-bake the crust, which is around 8–10 minutes before adding your filling. (Follow your filling’s recipe instructions.) Side note: I do not pre-bake the crust for my caramel turtle brownie pie. The filling is so heavy that it really helps set the crust; pre-baking is unnecessary. Some frozen pie/dessert recipes may instruct you to freeze the crust instead of baking it, like this peanut butter ice cream pie. If you’re using this crust for a no-bake dessert, such as this cookies & cream pie or mocha chocolate pudding pie, bake it for 10–12 minutes. You usually need to wait for the crust to cool before adding a no-bake filling. You can absolutely use this Oreo crust with many of my no-bake pie fillings, such as banana cream pie, coconut cream pie, and French silk pie (pictured below). Simply skip all the regular pie crust steps in those recipes, use the Oreo crust recipe below, bake it for 10–12 minutes, cool completely, and then add the filling!