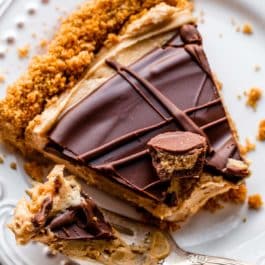
Are there 4 more beautiful words than “giant peanut butter cup?” Honestly. This dessert is always fun for holidays, and I’ve served it along side Father’s Day recipes, Mother’s Day recipes, Valentine’s Day, anniversaries, a random Sunday (why not?), you name it. It’s always devoured!
Tell Me About This Peanut Butter Cup Tart
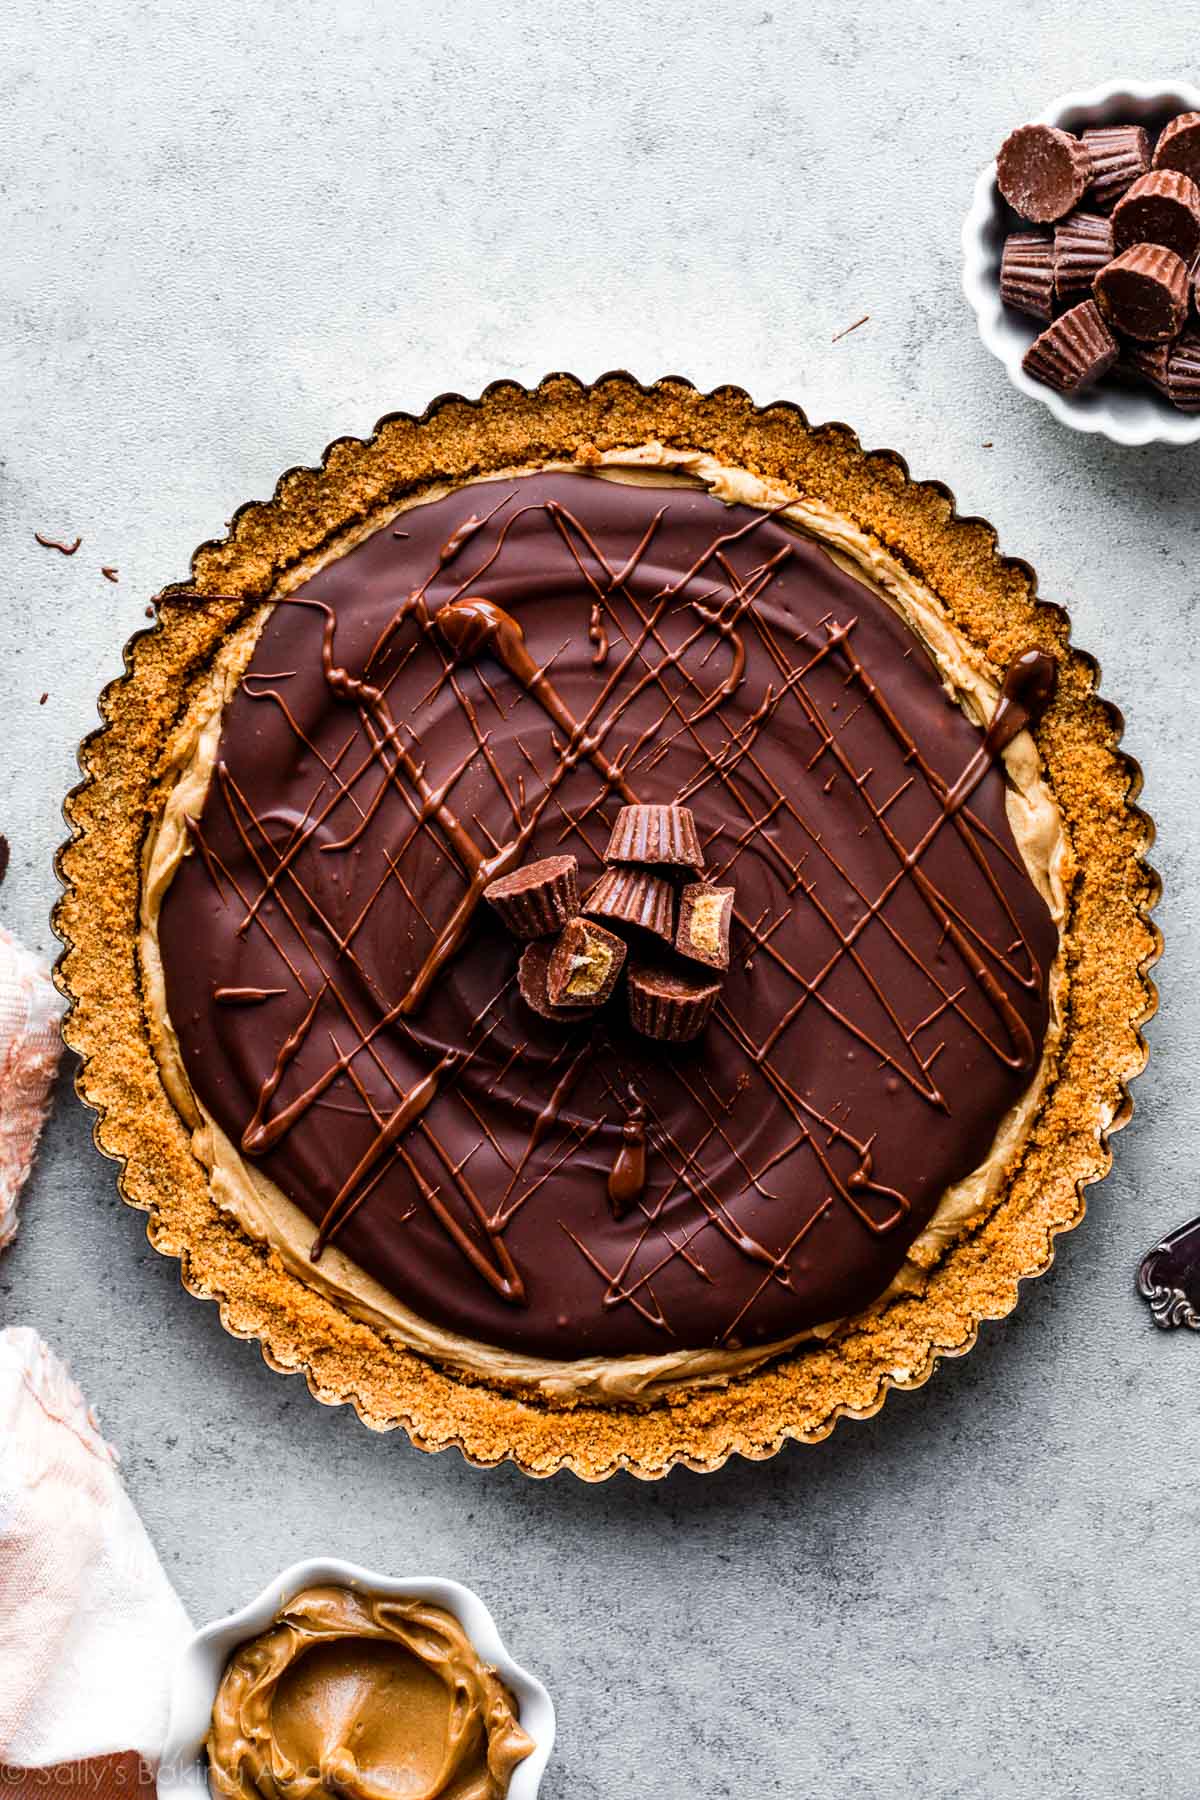
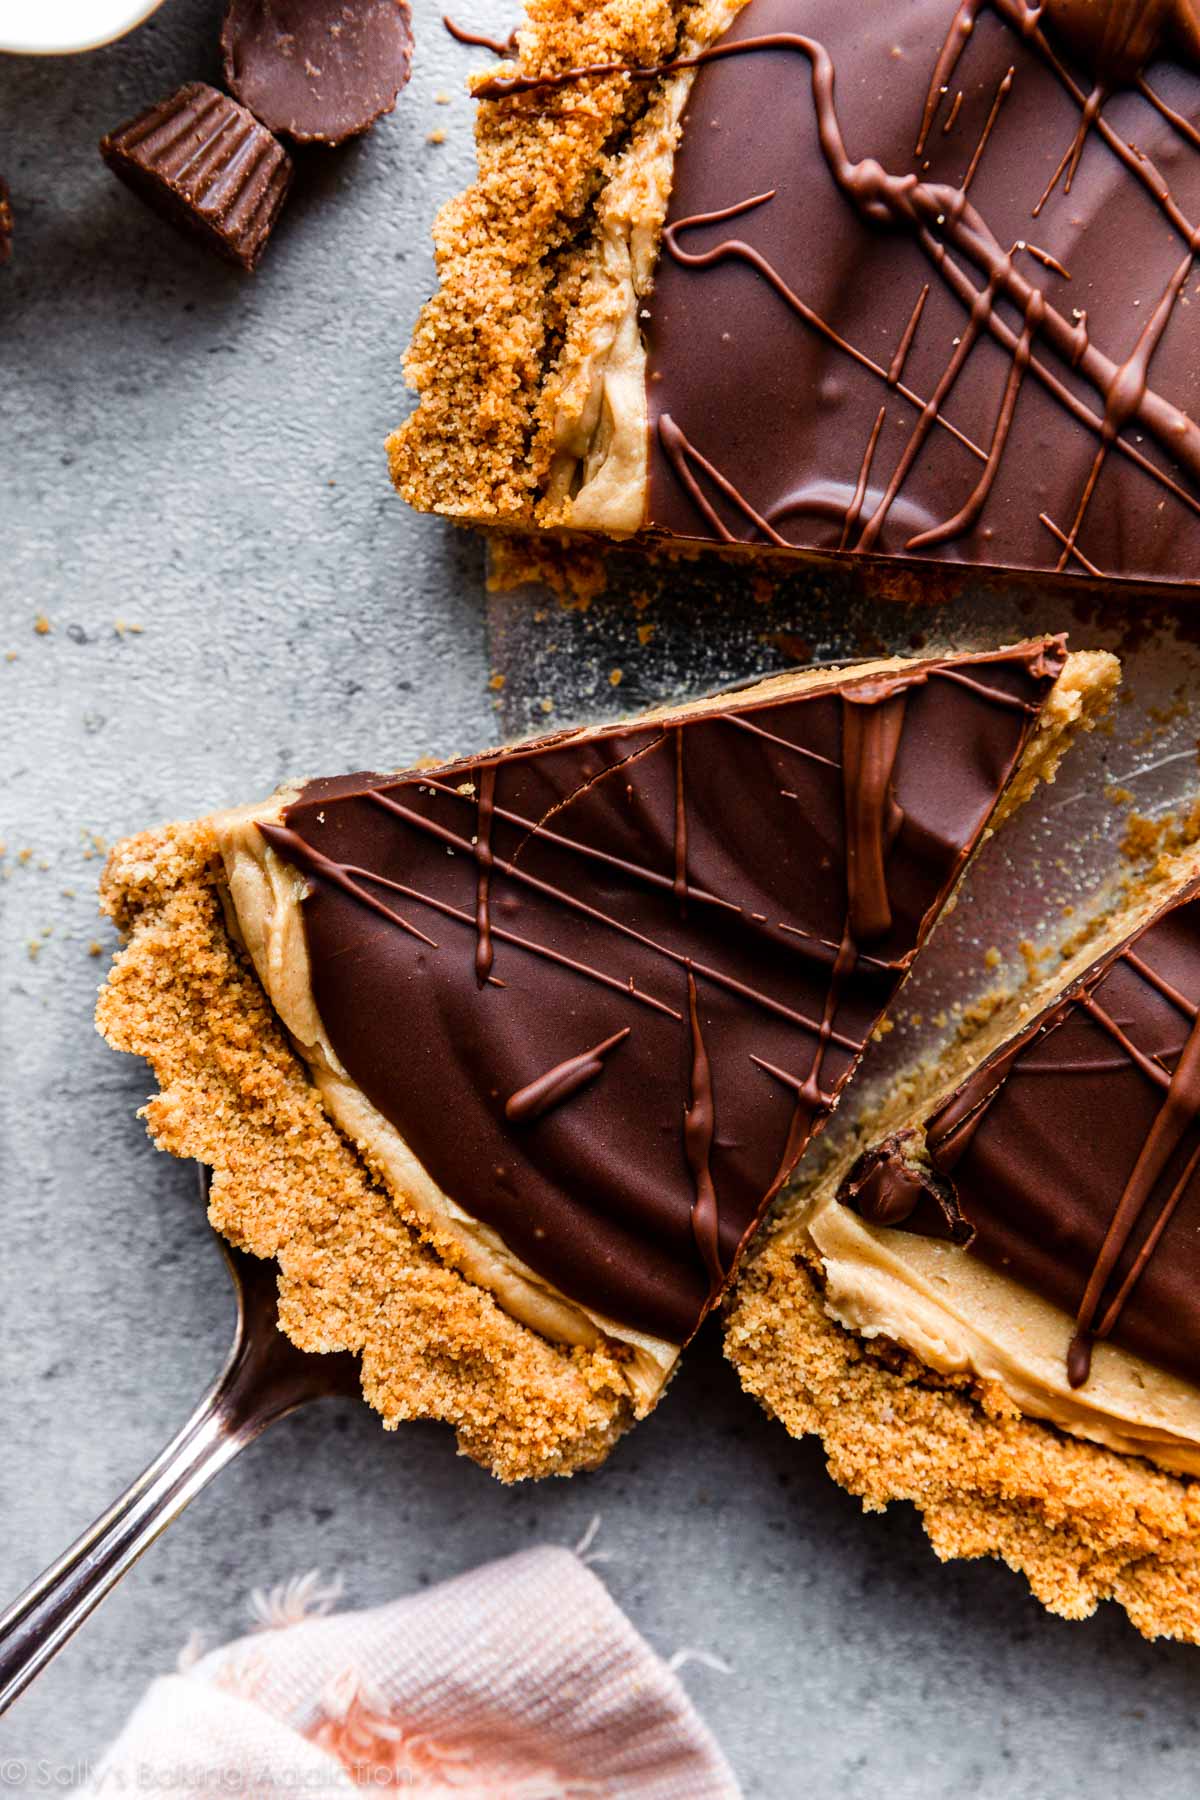
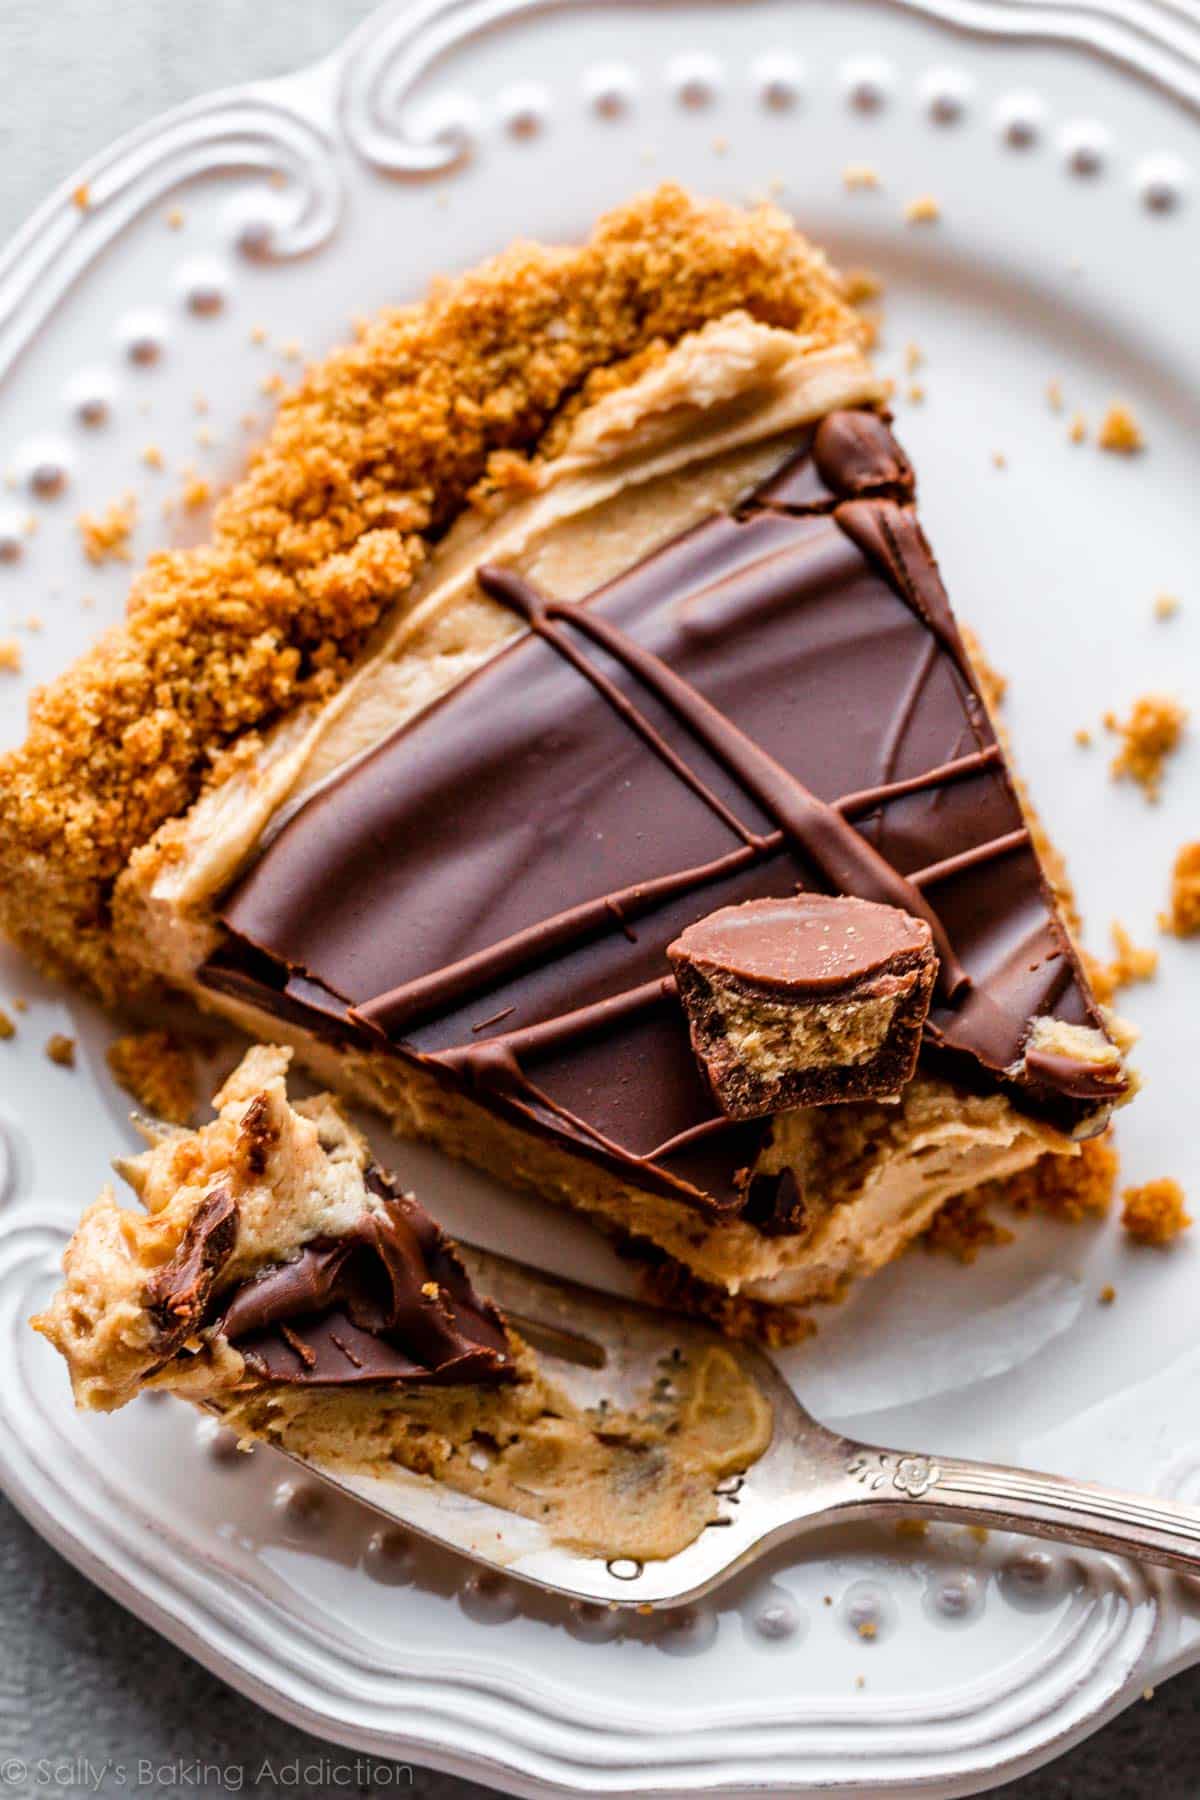
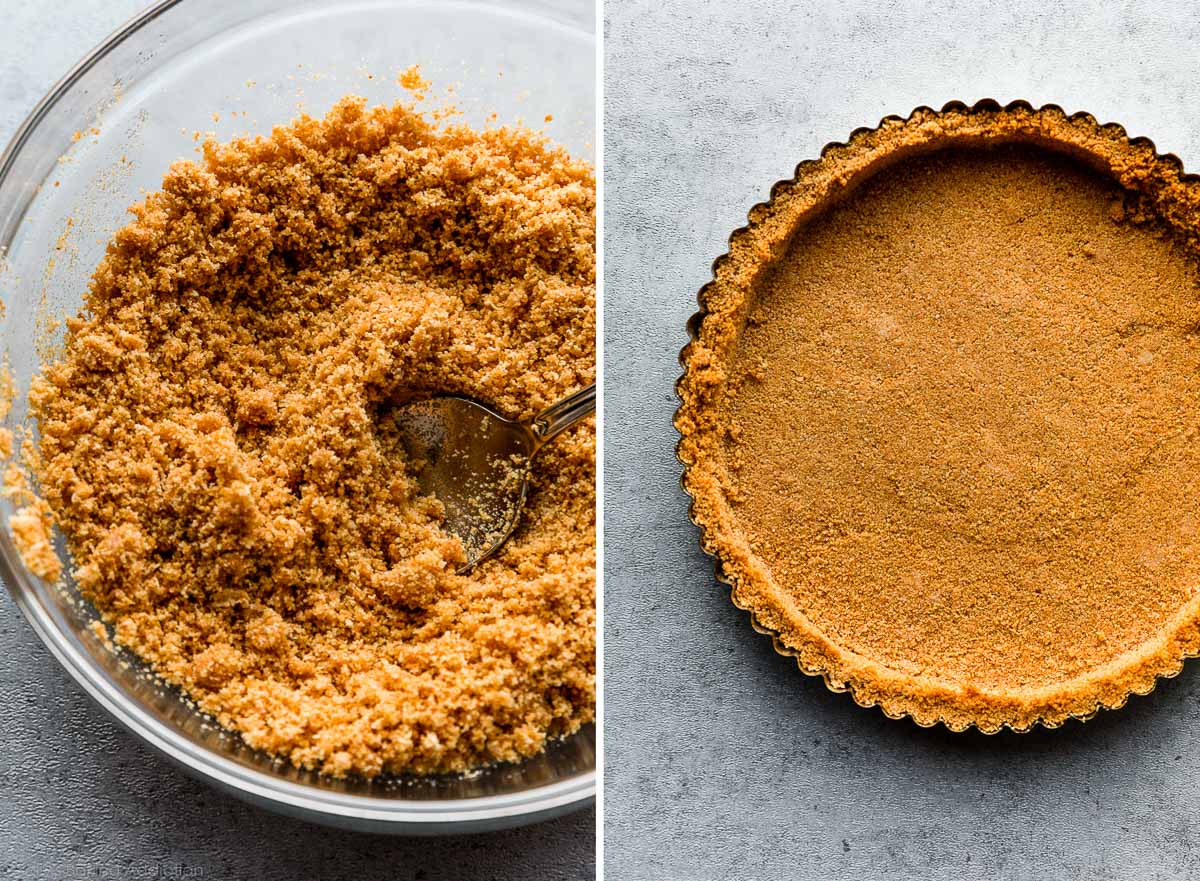
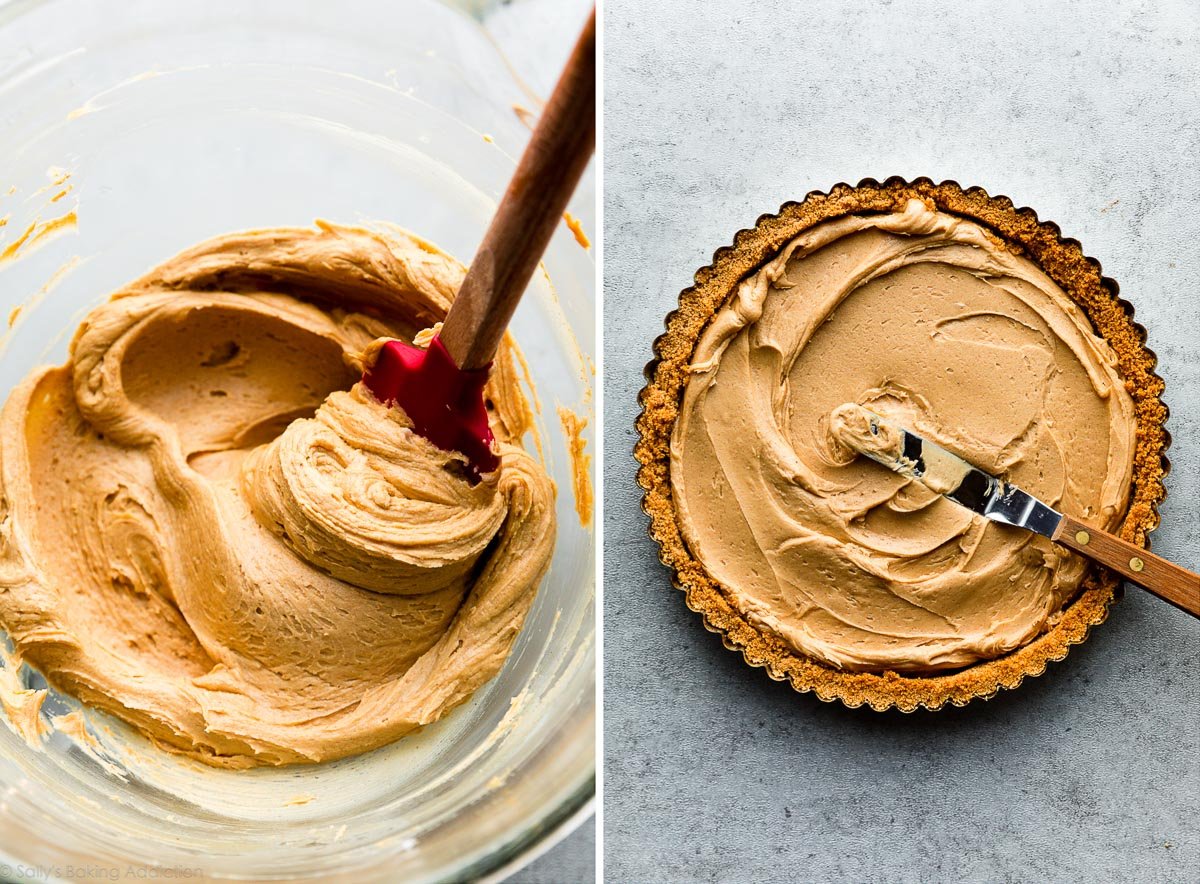
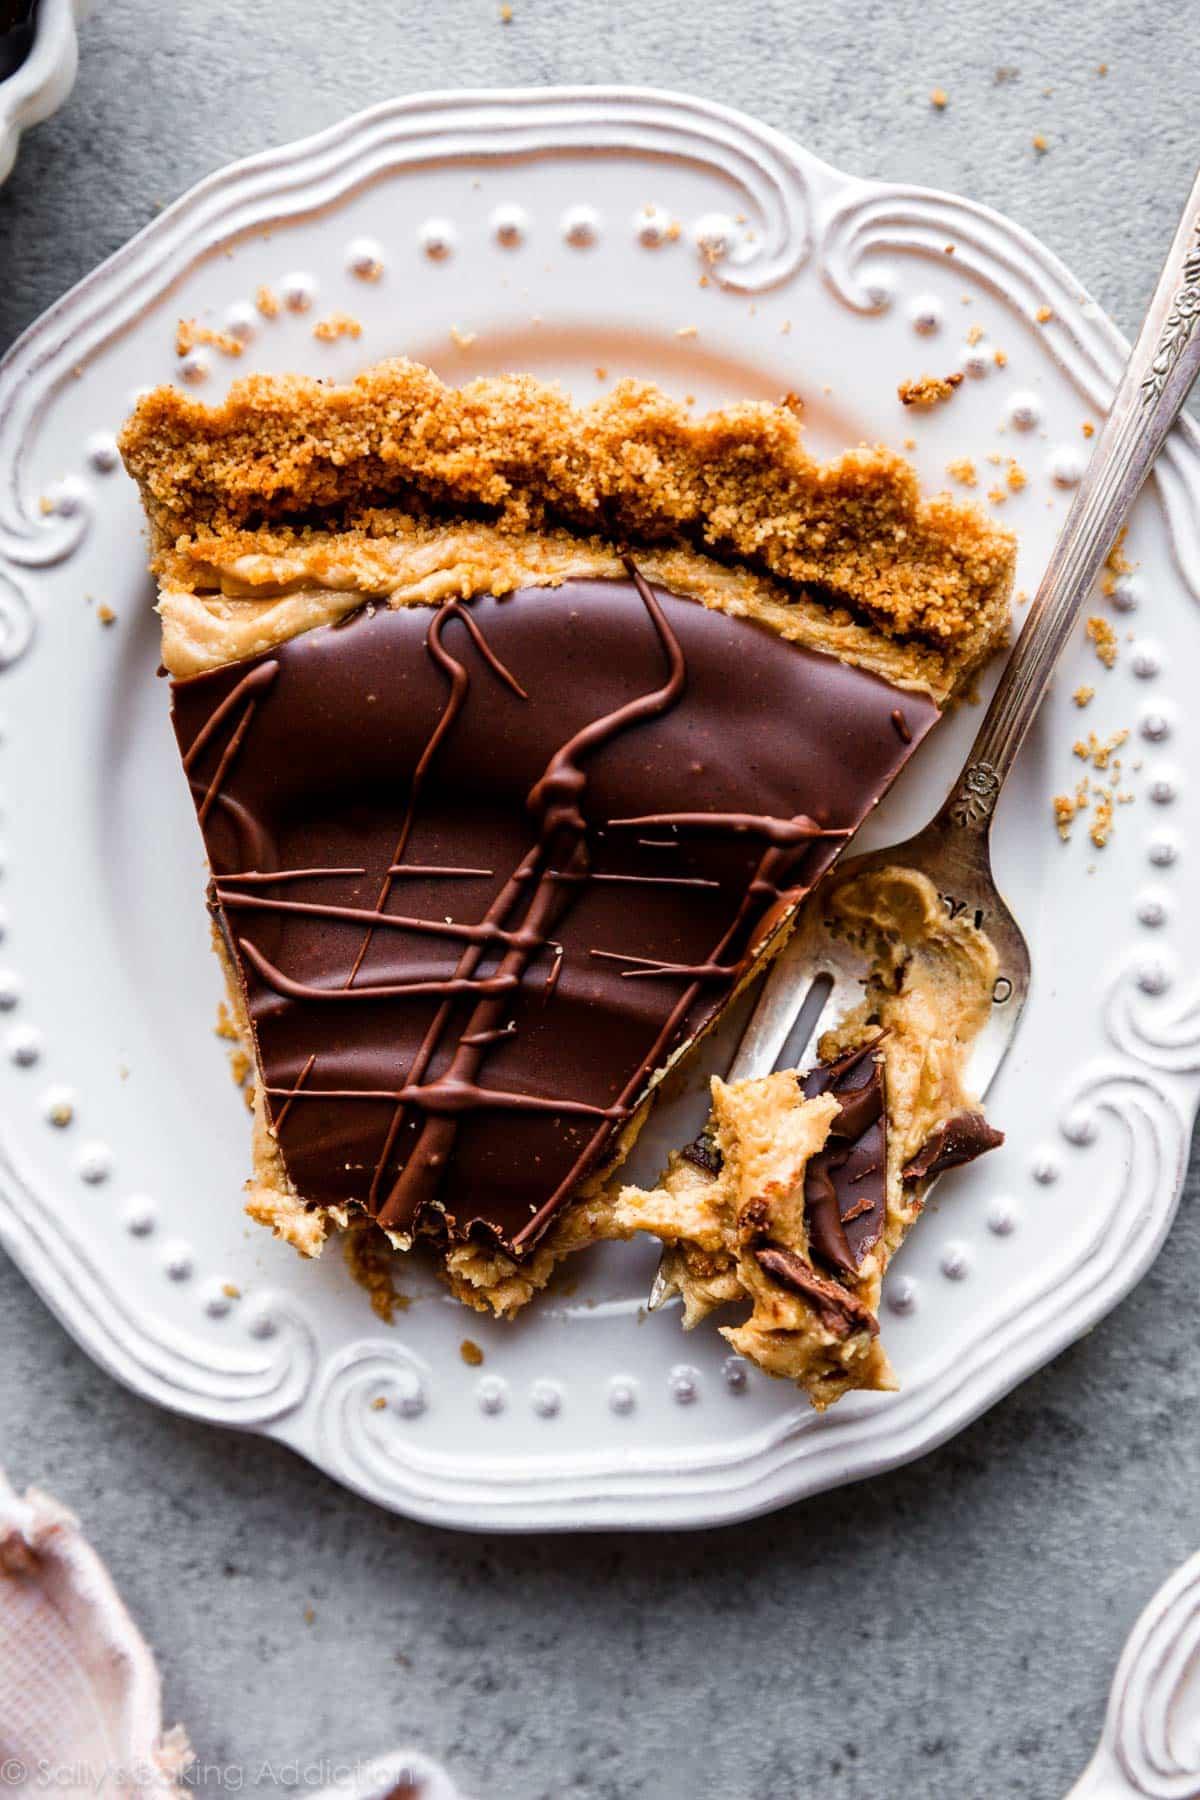
Texture: It’s like eating a giant peanut butter cup, only the filling is much creamier and you have a delightful crunch from the crumbly crust. Ease: I’m confident a beginner could do this. Mix the crust together with a spoon, use a mixer for the 5-ingredient peanut butter filling, then melt chocolate and peanut butter together for the topping. Simple to assemble, too. Baking: The filling and topping are no-bake, but the crust does require a short visit to the oven. Bake it for 13–15 minutes to help it set. Cool it, then spread in the filling and pour on the topping. Time: What it lacks in bake time, it makes up for in refrigerator time. The tart must chill in the refrigerator before slicing and serving. 4 hours is good enough, but 6 hours is ideal. Torture I tell ya!
Best Ingredients to Use & Why
Graham Cracker Crumbs: I tested this recipe with an Oreo crust at first. It was incredible, as you can imagine, but I prefer it with a graham cracker crust. Oreos almost overwhelmed the peanut butter flavor. Graham crackers are more neutral and take on a toasty flavor after baking. Keeping that in mind, feel free to substitute with Oreo cookie crumbs if you’d like. See recipe note. Or try making my peanut butter Butterfinger cheesecake recipe instead. Lots of the same great flavors we love here! Butter: Use melted butter in the crust and softened butter in the filling. Sugar: Granulated sugar melts down and binds the crust together. Confectioners’ Sugar: Just as we do when making peanut butter bars and peanut butter balls, use confectioners’ sugar in the filling. Vanilla Extract & Salt: Both add flavor. If you love the slightly salted peanut butter filling of peanut butter cups, you’ll flip for this. Peanut Butter: Peanut butter is the main ingredient and we use it in both the filling and topping layers. For best texture, I suggest a processed creamy peanut butter such as Jif or Skippy. Natural style peanut butter works, but the tart may take longer to set up in the refrigerator. Chocolate: Use pure baking chocolate, chocolate melting wafers, or high quality chocolate chips. More on this next.
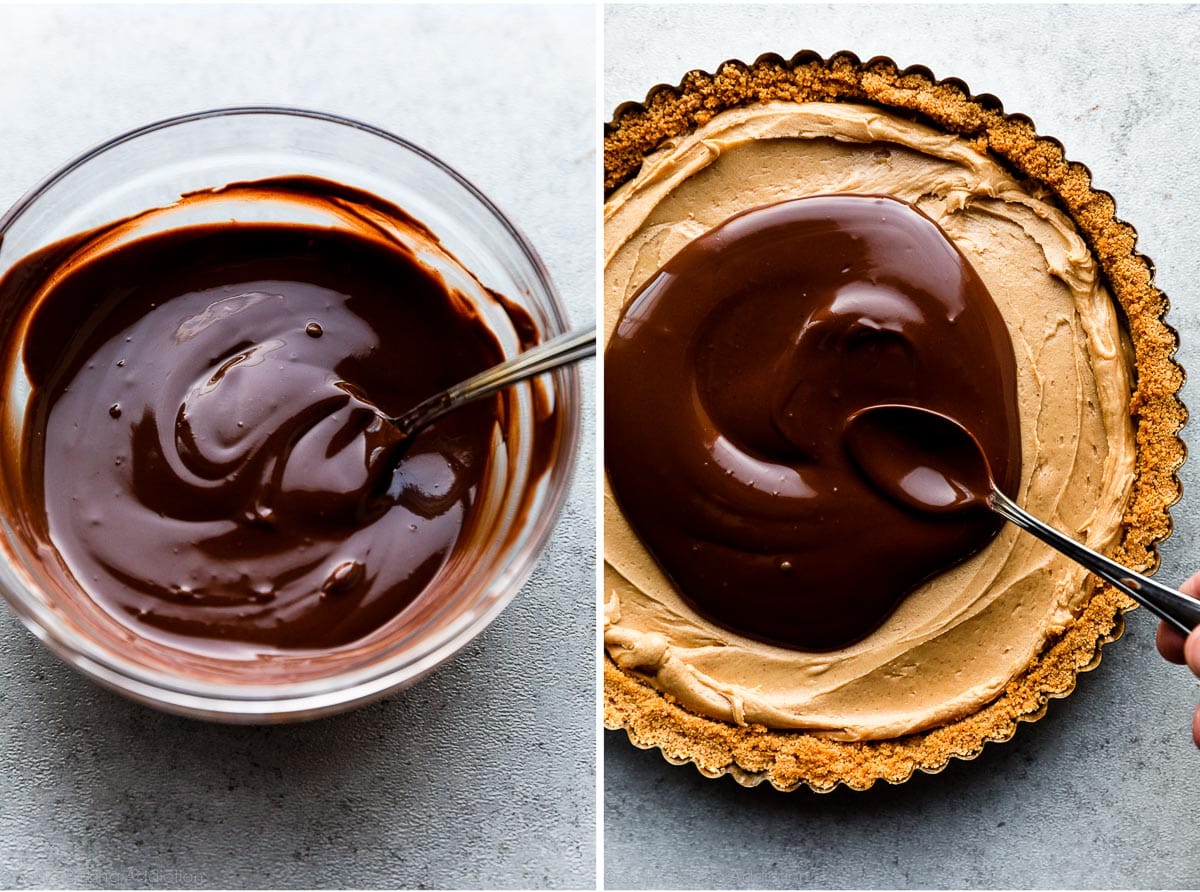
Peanut Butter Cup Tart Chocolate Topping
I make a tart similar to this—my snickers caramel tart. Have you ever tried it? When I first tested that recipe, I used melted chocolate (by itself) as the topping. When pure chocolate sets, it becomes pretty hard. As I cut the slices, all the filling squished out the sides. By melting the chocolate with a little fat (peanut butter), the topping is softer. It still sets, but isn’t a rock hard shell on top. It’s how we make the chocolate topping for peanut butter bars, too.
I recommend 6 ounces of pure chocolate, such as 1.5 4-ounce baking bars (Baker’s or Ghirardelli brands are great) or use 3/4 cup chocolate melting wafers or chocolate chips.
Can I Make This Without a Tart Pan?
You need a (affiliate link) 9-inch tart pan for this recipe. I don’t recommend making this recipe in a regular pie dish because the tart will be very difficult to cut and remove from the pan. Instead, try my creamy peanut butter pie, peanut butter ice cream pie, or try the mini peanut butter cup tarts, detailed next. A 9-inch springform pan would likely work, though I haven’t tested it.
How to Make Mini Peanut Butter Cup Tarts
Don’t have a tart pan or maybe you don’t need a full size tart on your hands? Try using this recipe for about 12 mini tarts either in a mini tart pan or use a lined muffin pan. Divide crust mixture between each, press firmly into the bottom of the mini tart pans or muffin liners, and bake for 8 minutes to help set the crust. Cool completely, then fill each nearly full with filling and spread chocolate topping on top. Chill for at least 2-3 hours before serving. This recipe is part of Sally’s Pie Week, an annual tradition where I share a handful of new recipes that fit into the pie/crisp/tart category. Join the community below!