Oh what fun! We’re dressing up traditional vanilla and chocolate checkerboard cookies with a refreshing minty flair. These cookies are impressive and take a bit of precision. Nothing you can’t handle though. Let’s walk through the process together.
Tell Me About these Mint Chocolate Checkerboard Cookies
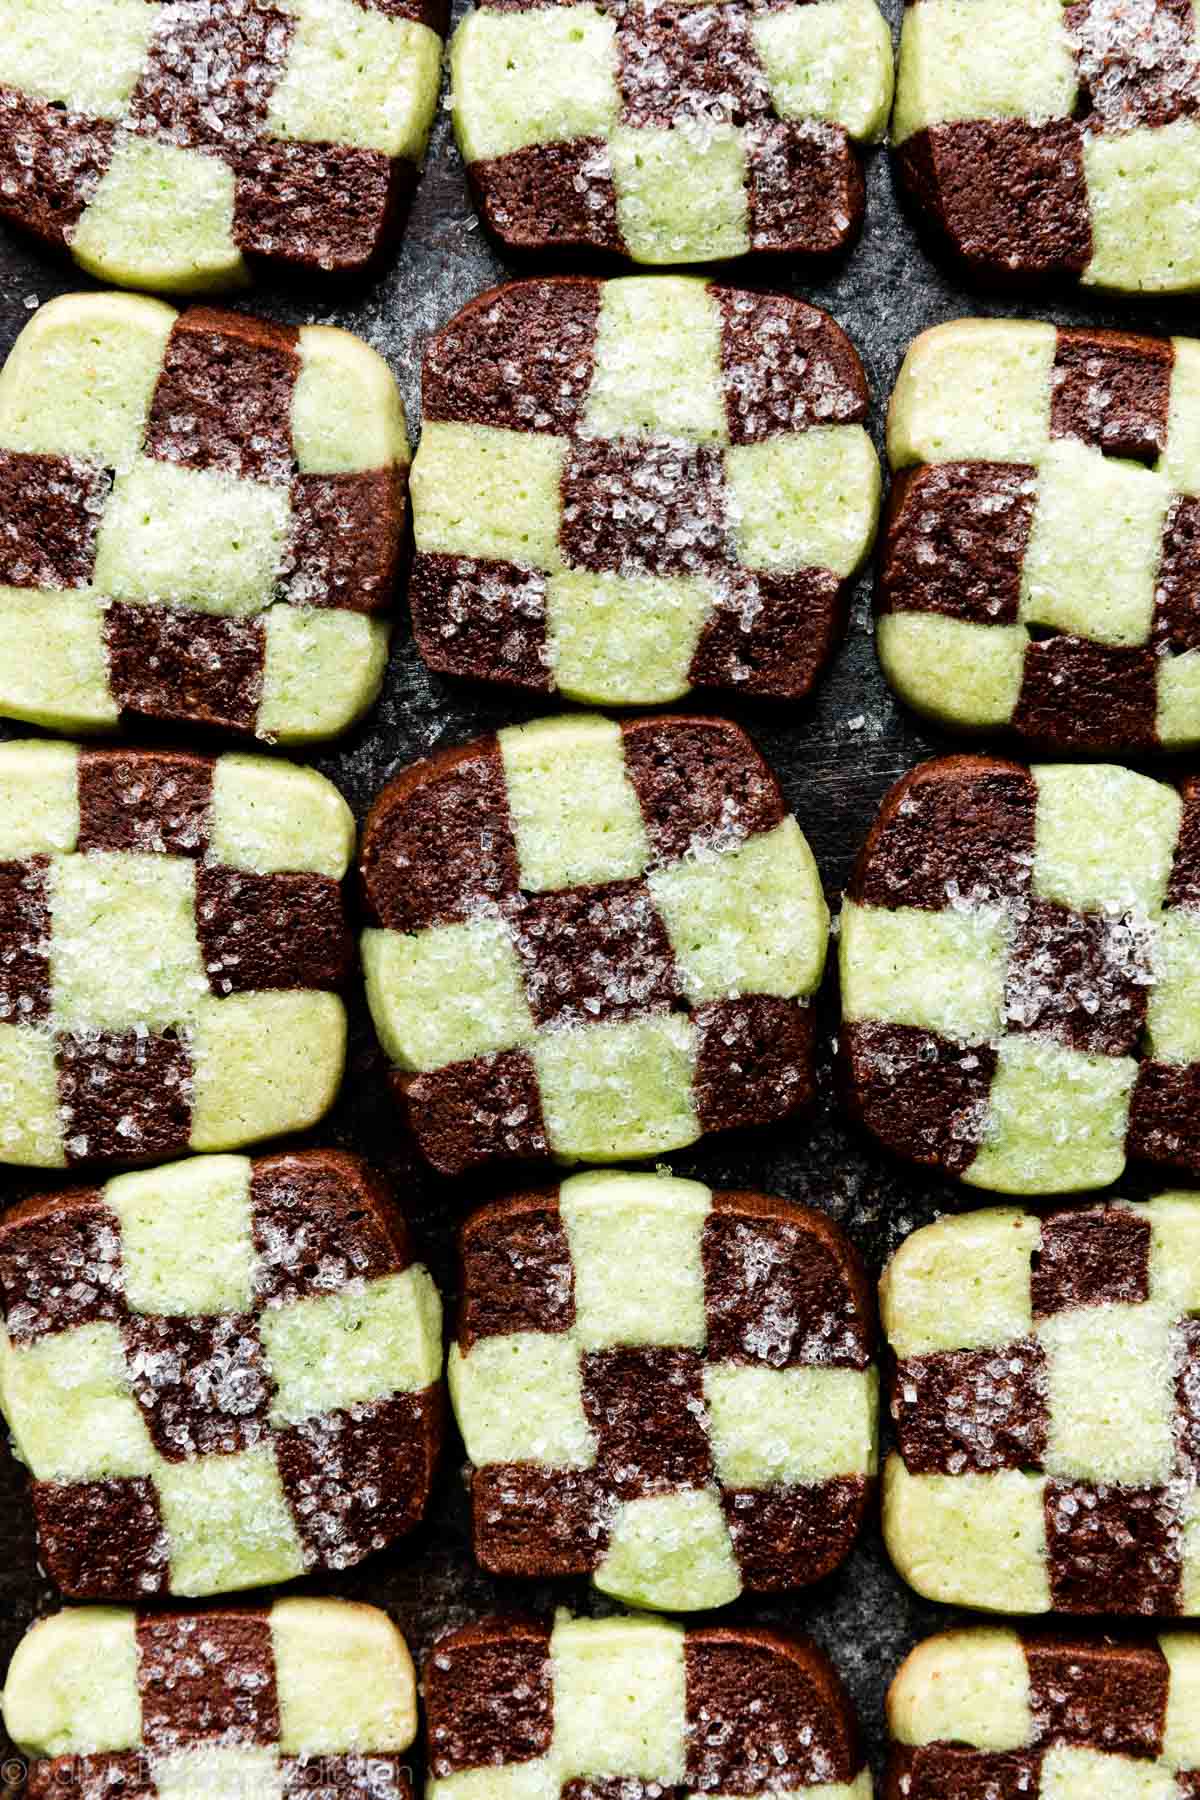
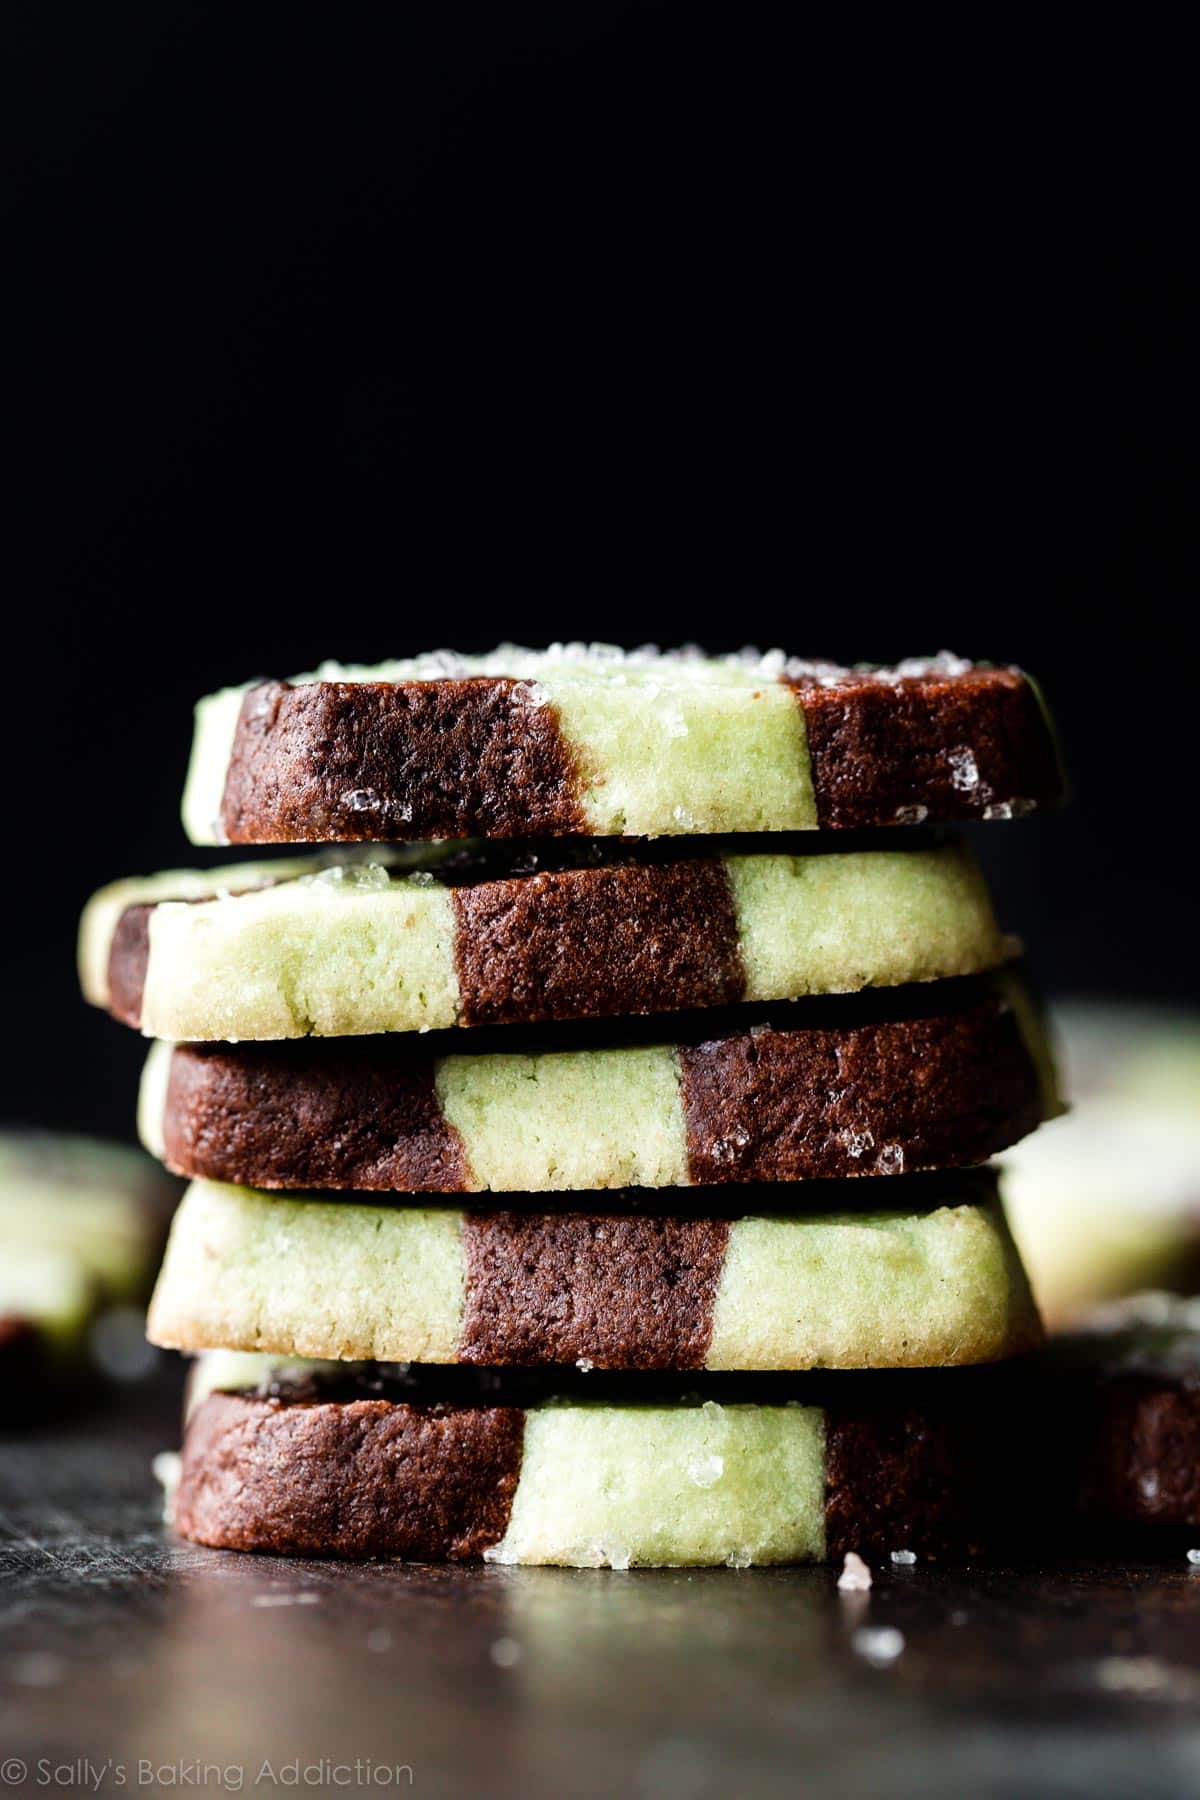
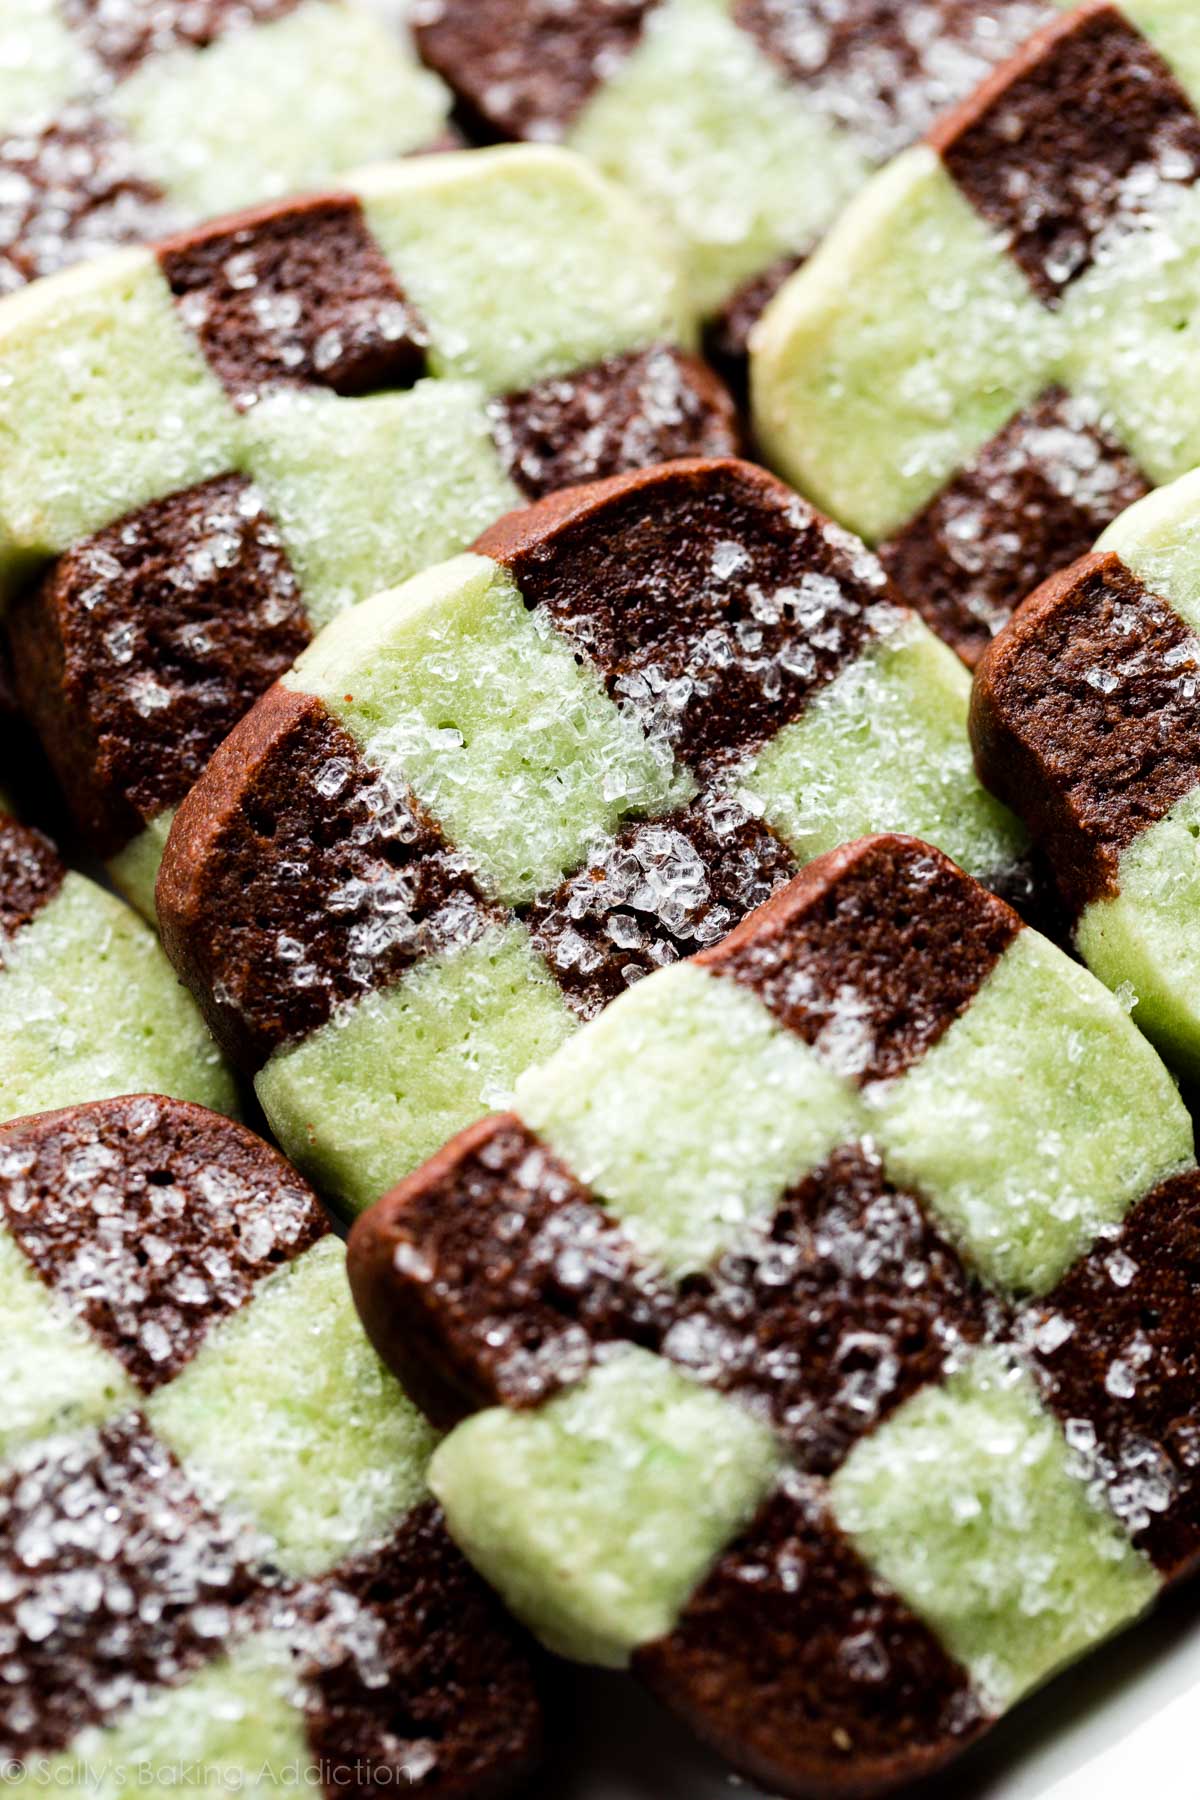
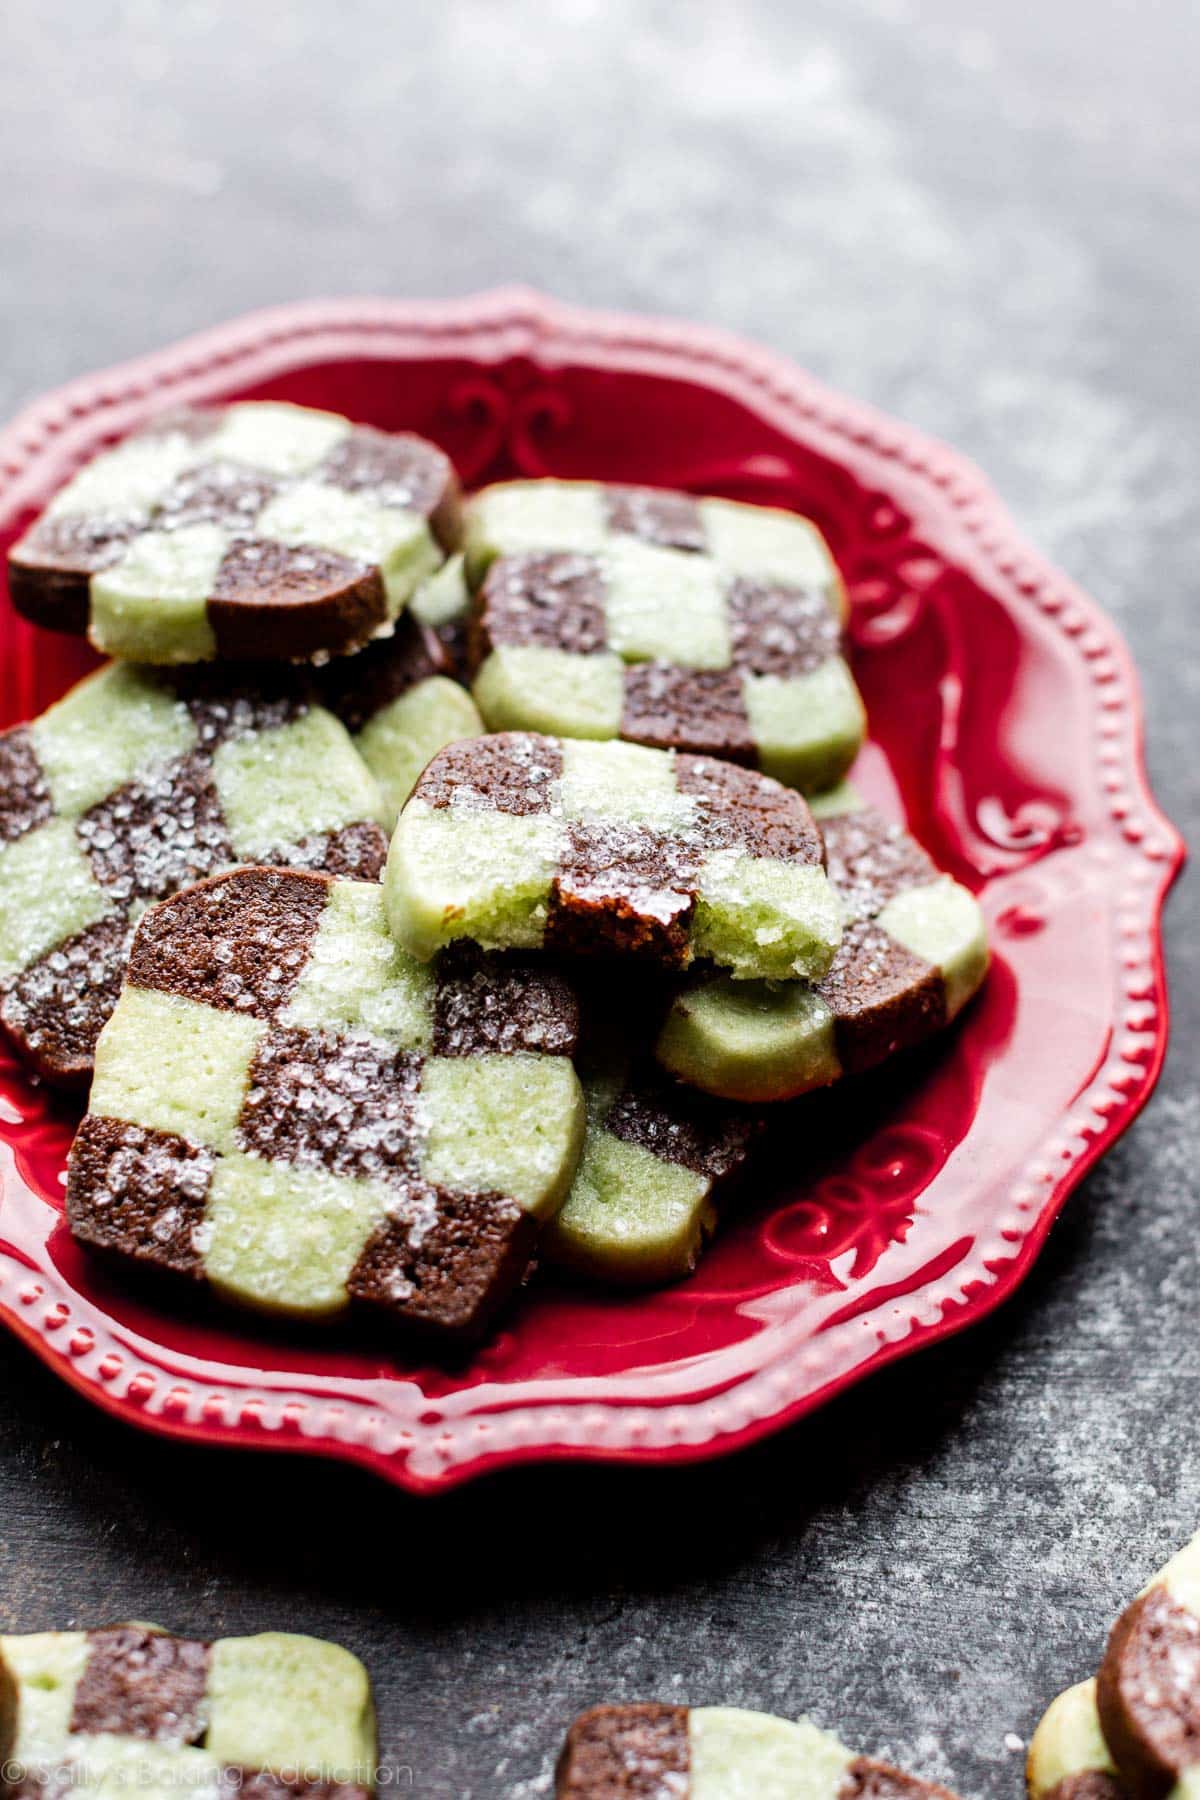
Texture: These mint chocolate checkerboard cookies are slice and bake cookies, also known as icebox cookies. If you slice them thick enough—I recommend 1/2 inch thick—they’ll be wonderfully soft in the centers with crisp edges. The sparkling sugar on top is optional, but adds another layer of sparkly crunch. Flavor: Checkerboard cookies are typically vanilla and chocolate, but the addition of peppermint extract gives them a festive flavor. You could easily leave the mint dough plain or replace the peppermint extract with strawberry extract and a drop of pink/red food coloring instead. Cocoa powder adds the chocolate flavor, but I love adding a little espresso powder to the chocolate dough as well—deepens that chocolate flavor. Ease: Shaping these two doughs into a playful checkerboard pattern can be a little tricky, but use my step-by-step photos and detailed instructions below. Take your time and make sure you chill the cookie dough for the recommended times. Yield: This recipe yields 24 cookies if you slice each to be 1/2 inch thick. For 36 cookies, you can slice each to be 1/4 inch thick. I prefer the thicker cookies because they’re a bit softer in the centers.
Start with 1 Dough
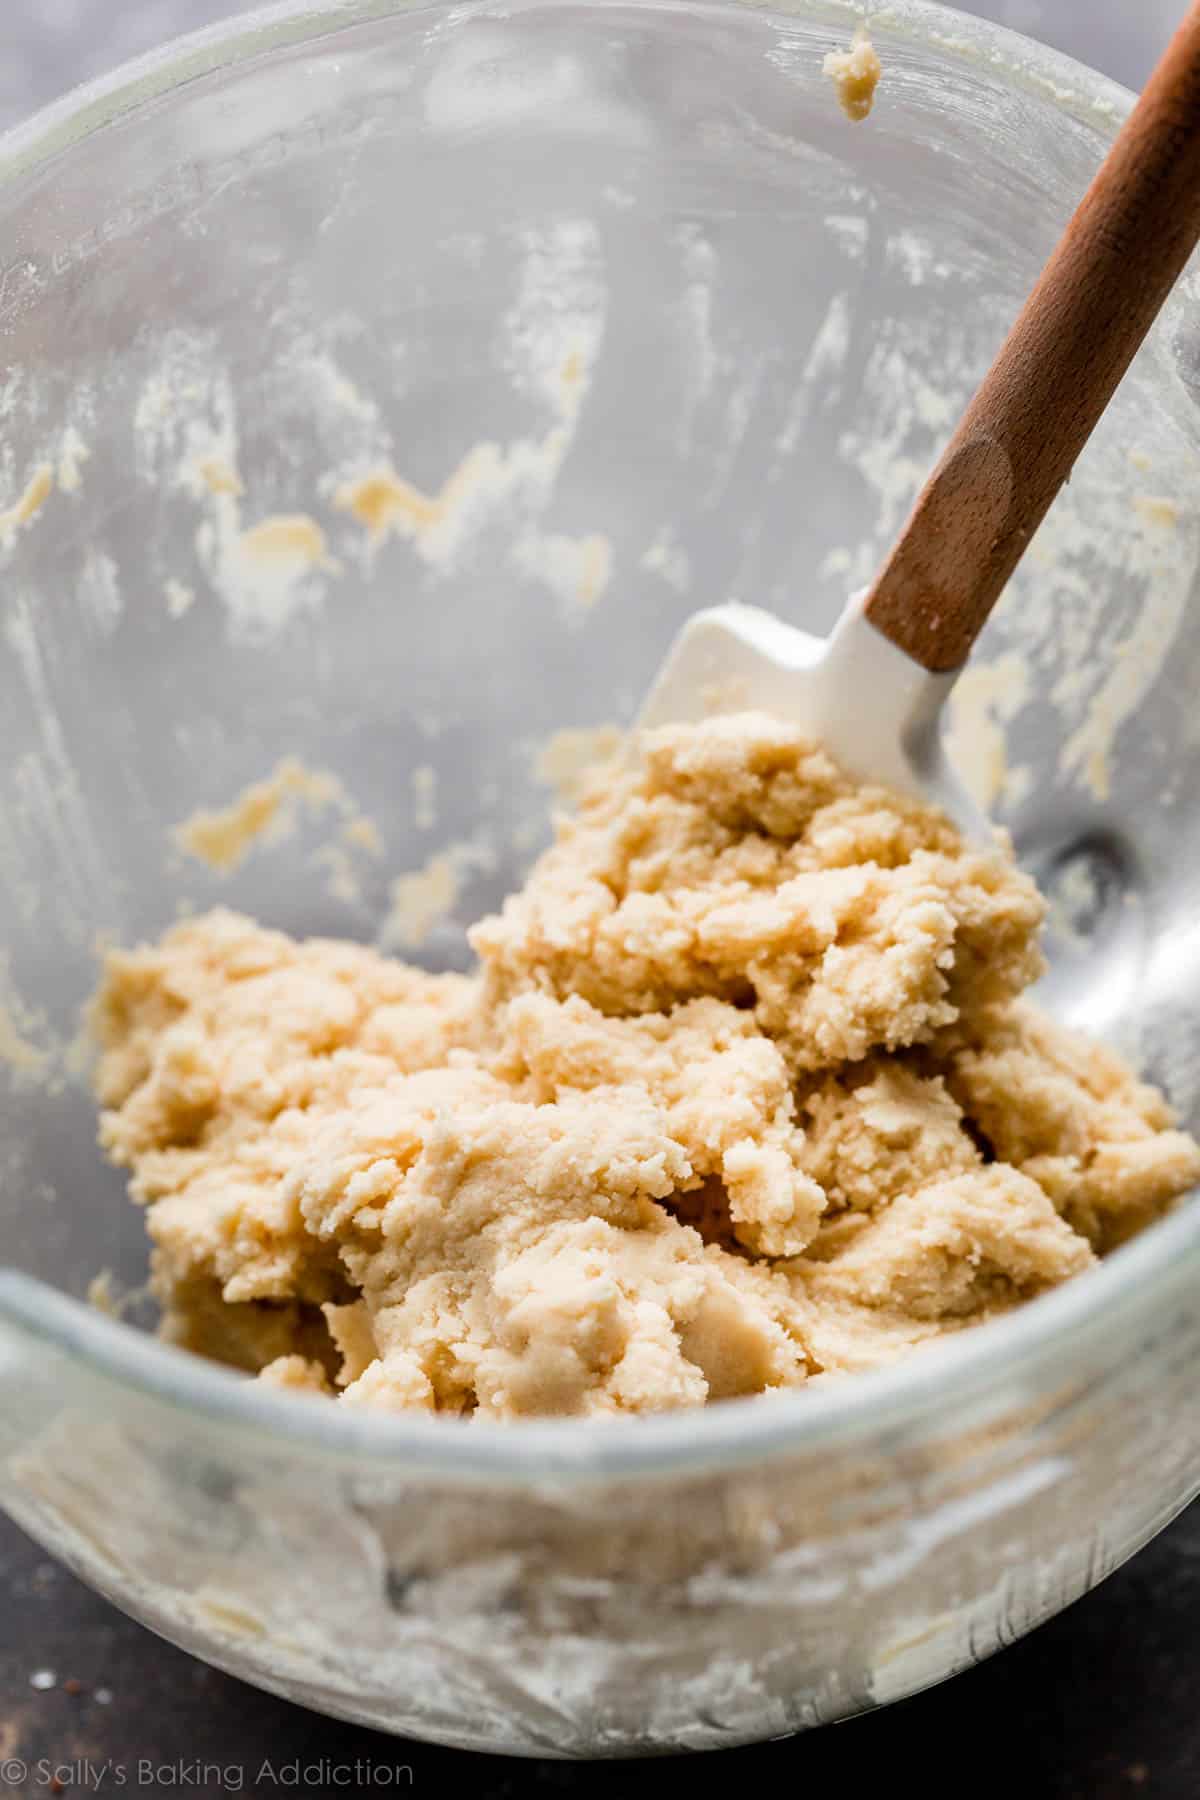
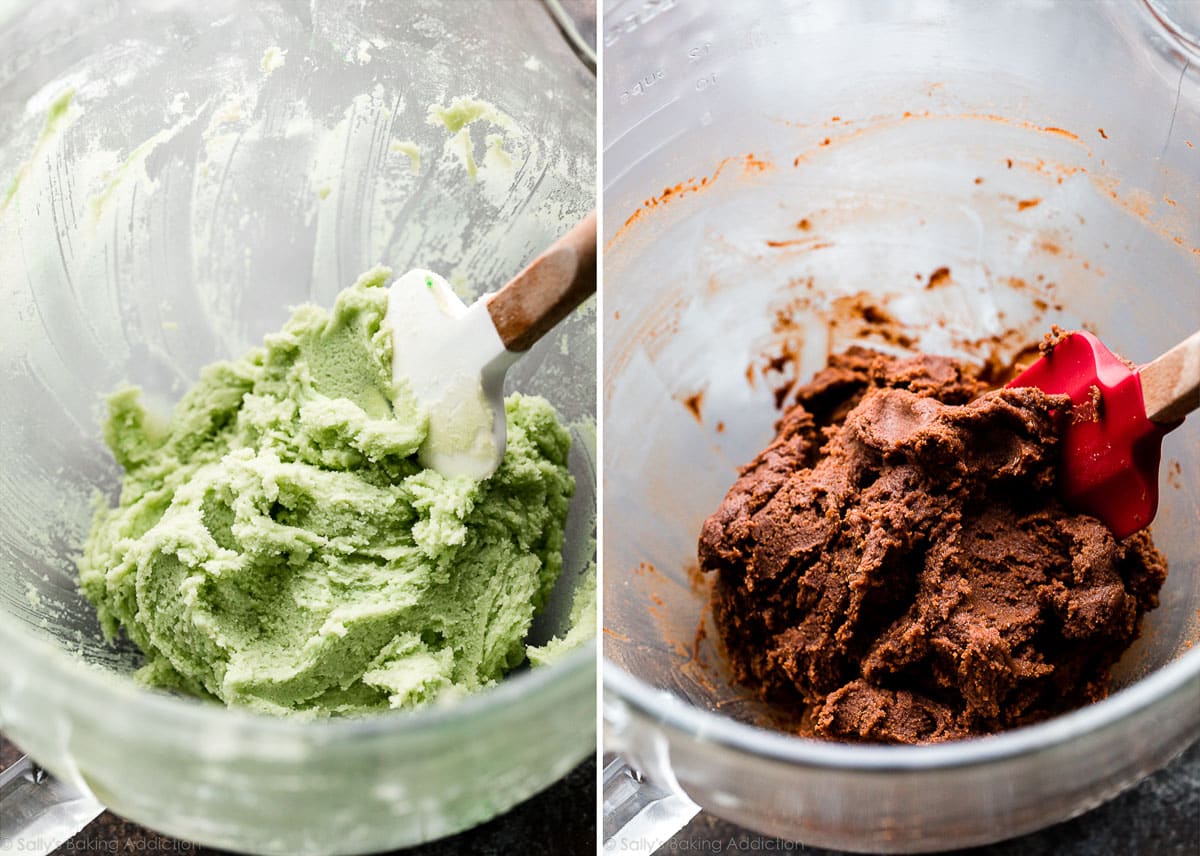
When I wrote Sally’s Cookie Addiction cookbook a few years ago, I tested a basic vanilla butter cookie recipe. This recipe, written below, includes a handful of basic baking ingredients like flour, butter, sugar, and eggs. I turned the vanilla butter cookie recipe into pinwheel cookies, a recipe you can find on page 62 if you own a copy. I love this basic cookie dough and you can flavor it, shape it, and layer it in so many ways including my neapolitan cookies, pinwheel cookies, and today’s mint chocolate checkerboard cookies. Convenient! Compared to my plain butter cookies and chocolate butter cookies, these buttery cookies are a bit lighter (addition of baking powder) and sweeter (more sugar). And the dough is a bit firmer since there’s precise shaping involved (more flour). Prepare the base cookie dough, then divide it in half. One is mint, one is chocolate.
Photo Overview: How to Shape Checkerboard Cookies
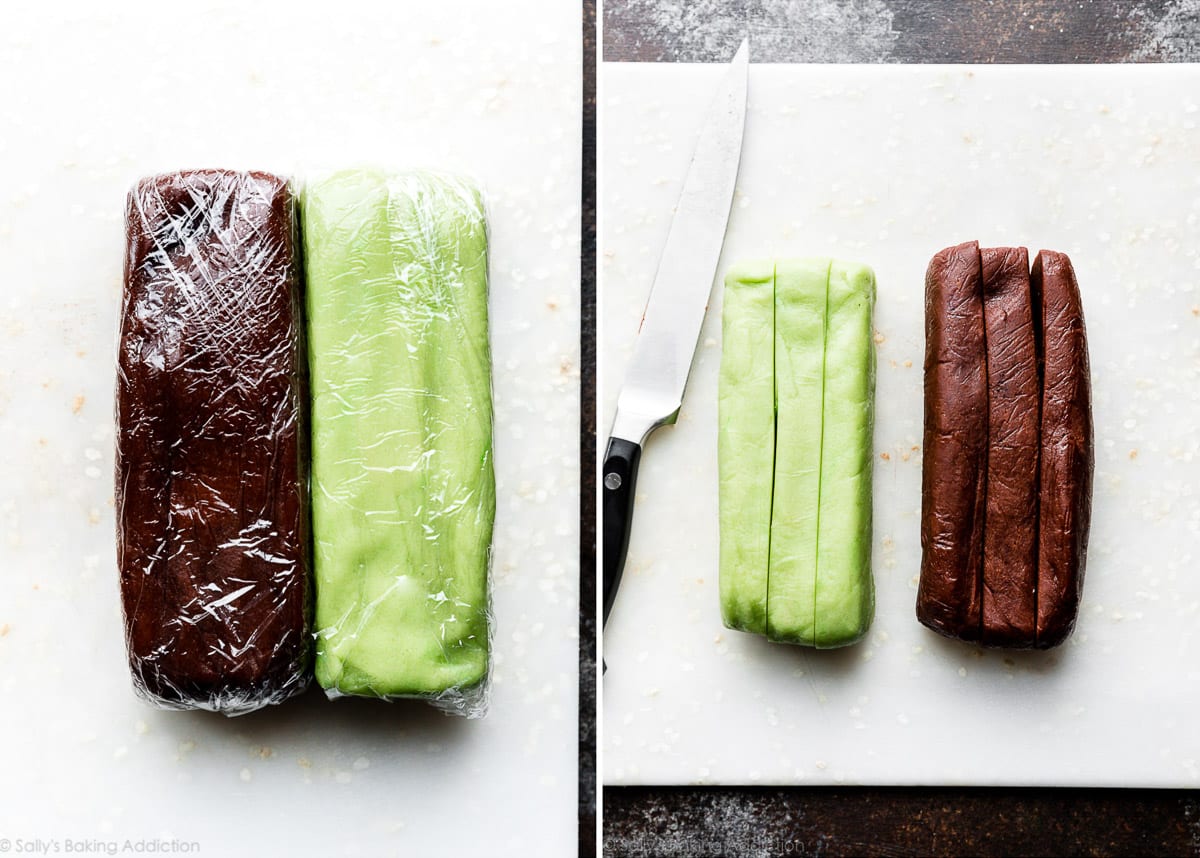
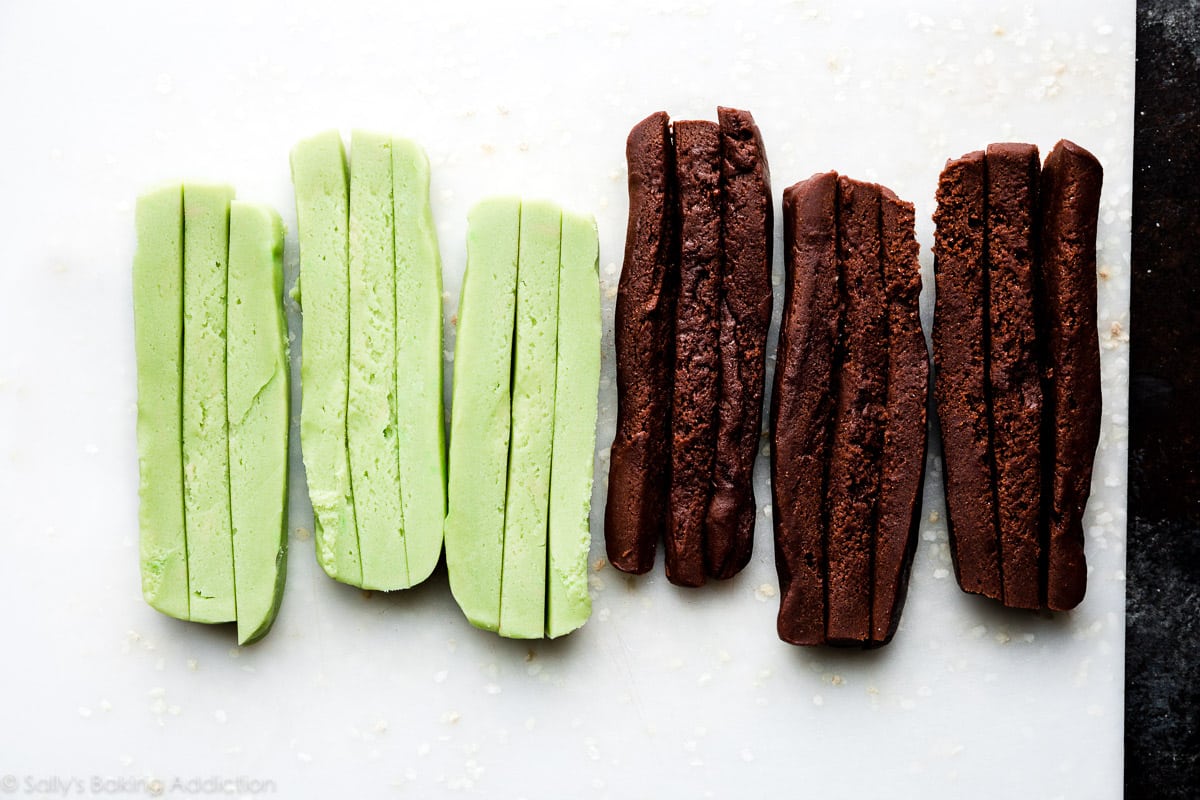
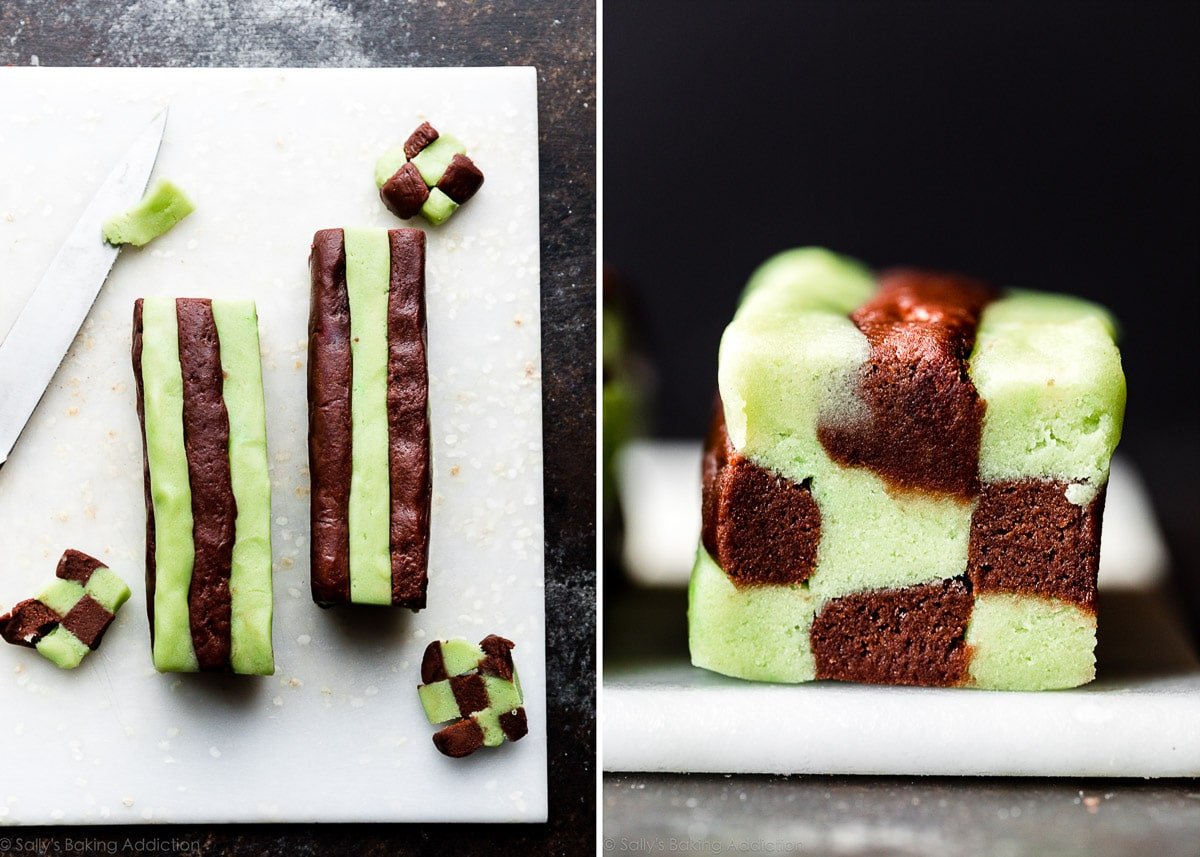
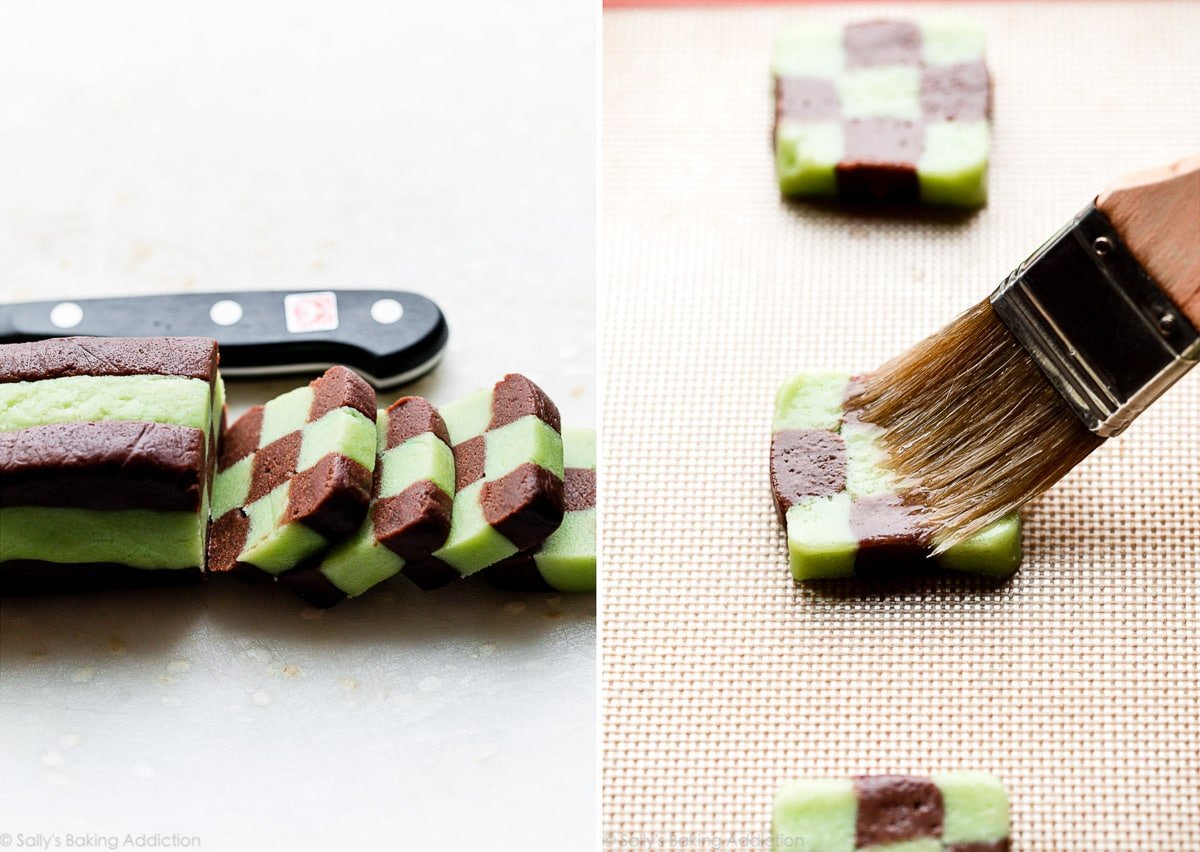
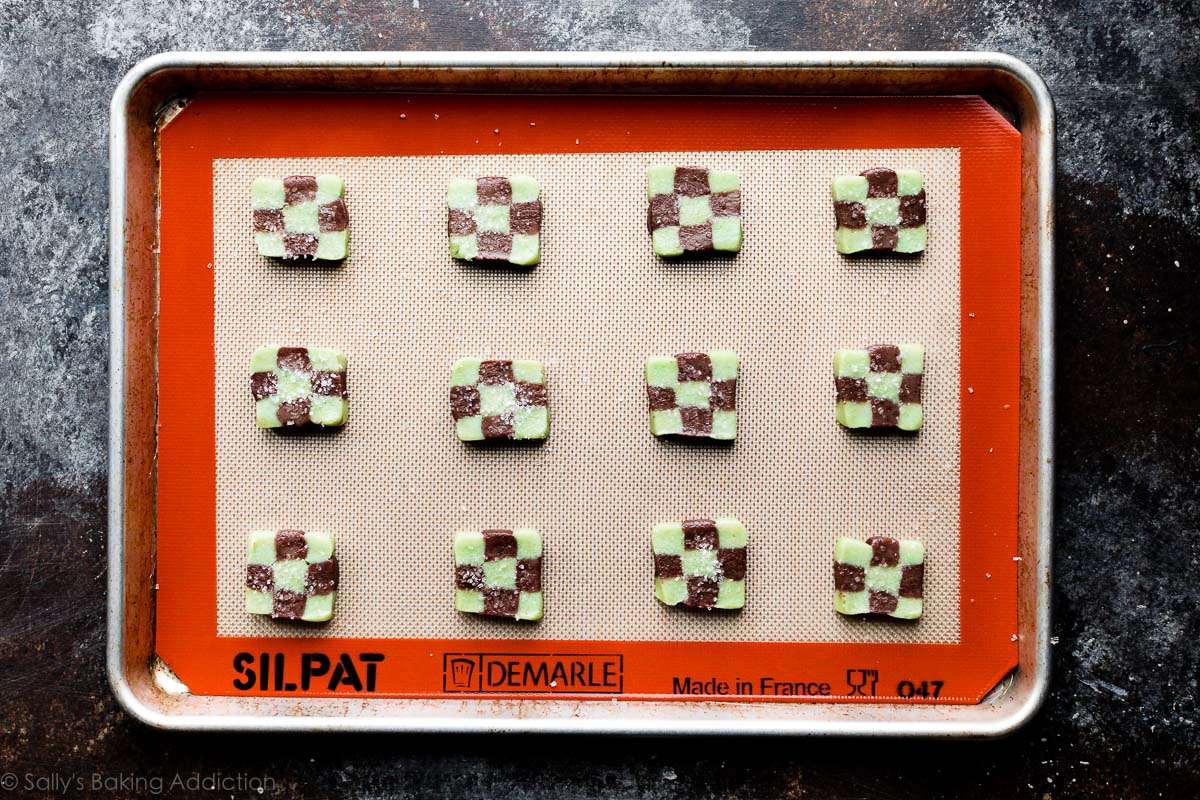
The full written recipe is below, but let me lay out the shaping process into photographed steps right now. You’ll find this helpful when you begin. Grab a ruler or measuring tape because precision is helpful. After you make your mint and chocolate cookie doughs, pictured above, carefully form into 6 inch rectangle blocks. Each block will be 2 inches tall and 2 inches wide. Wrap both dough blocks up in plastic wrap or cover on a plate (see left photo below). Refrigerate for just 1 hour. The key is to only refrigerate until the dough is less sticky, but still pliable enough to bend and shape. Chilling any longer will make it difficult to form a neat checkerboard pattern. Now let’s start the checkerboard pattern. Remove doughs from refrigerator and unwrap. Using a sharp knife, cut each block lengthways into 3 even strips (see right photo above). Then cut each strip into thirds again. You’ll have 9 thin strips from each dough block: As you can see in the photo above, my dough strips are a little uneven and messy, so for a neat checkerboard pattern, I like to trim off the rounded edges. Save your dough scraps because you can make extra cookies. See recipe note below. Place 1 mint dough strip on your work surface. Line up a chocolate dough strip next to it. Line up a mint dough strip next to that. Top each with a row of alternating flavored dough strips, then top that with another row of alternating dough strips. Repeat with 2nd block, starting with a chocolate dough strip this time. As you’re working, press the strips tightly together to rid any gaps. This is why it’s important the doughs are still a bit soft and pliable. If desired to keep the checkerboard pattern neat, trim off any rounded edges of your blocks. Cover or wrap your checkerboard blocks up tightly, then place back in the refrigerator for at least 2 hours. This chill time is imperative and helps (1) firm up the dough you just handled and (2) set the checkerboard design. A crucial step! After that, all you have to do is slice and bake. Brush with a little egg wash—1 egg white mixed with water (convenient because you use 1 extra egg yolk in the cookie dough)—then sprinkle with coarse sugar. The egg white/sugar topping is optional, but adds a glistening touch on these pretty cookies. I always use Wilton brand white sparkling sugar which is a product you can find online or in the baking aisle of most grocery stores. If you can’t find it, Sugar in the Raw works too!
Checkerboard Design Success Tips
Before I leave you with the detailed recipe, let me summarize my 3 best success tips:
Use measuring tape or a ruler. It’s important that your blocks of dough are equal size in step 7 because it makes shaping the checkerboard blocks easier in step 8. Take the time to be precise. Trim edges. For squared off cookies, trim any rounded edges with a sharp knife. In steps 8 and 11 below, trim the dough strips, checkerboard blocks, and sliced cookies. This is all optional, but it helps create neat looking checkerboard cookies. Don’t stress though—the cookies still taste awesome even if your pattern is messy. Chill for the recommended times. 1 hour in step 7 and 2 or more hours in step 9.
Hot Cocoa Cookies (with Marshmallow) Mint Chocolate Brownies Pinwheel Cookies Cranberry Orange Cookies Soft Molasses Cookies
And here are 75+ Christmas cookies with all my best success guides & tips.