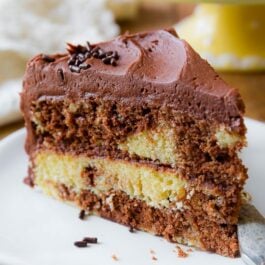
It’s been a long time coming, but I finally have a marble cake recipe to share with you! This recipe is years in the making—in fact, I wanted to publish a marble cake in my first cookbook but couldn’t perfect a recipe in time. (Though there is a marble pound cake recipe in that book!) Three years, 2 cookbooks, and 23 mediocre marble cakes later, here we are. To say I’m excited is an understatement. Things are about to get awesome.
Tell Me About This Marble Cake
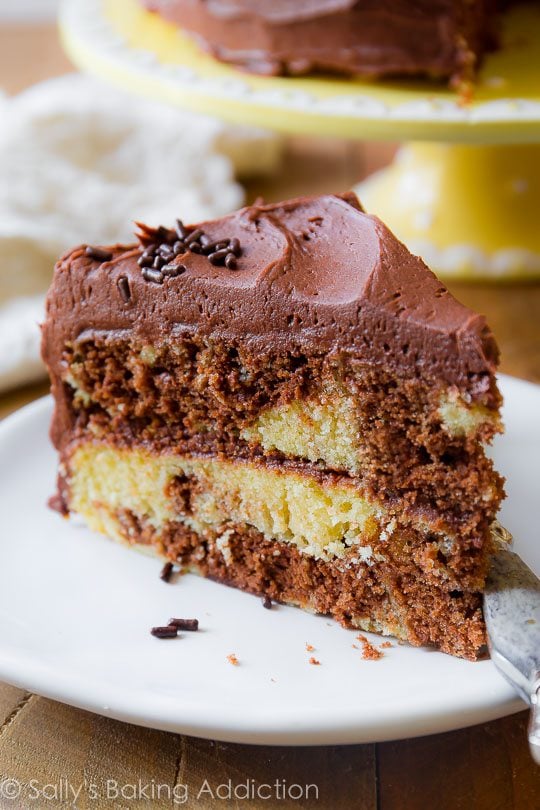
Simple and straightforward Tender and moist Soft and cakey Infinitely buttery Classic birthday cake status! Better than a box Slathered with milk chocolate frosting
This marble cake is not:
Difficult to make Dry and bland From a box Lacking chocolate flavor like most marble cakes do Boring!
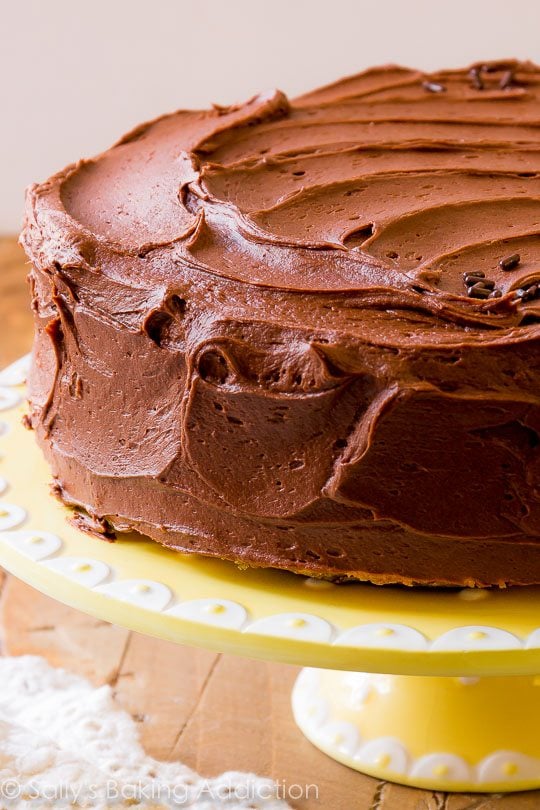
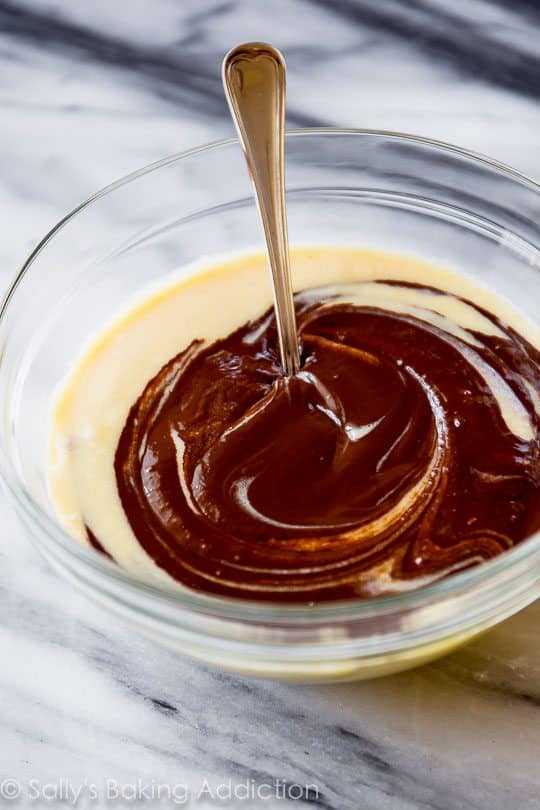
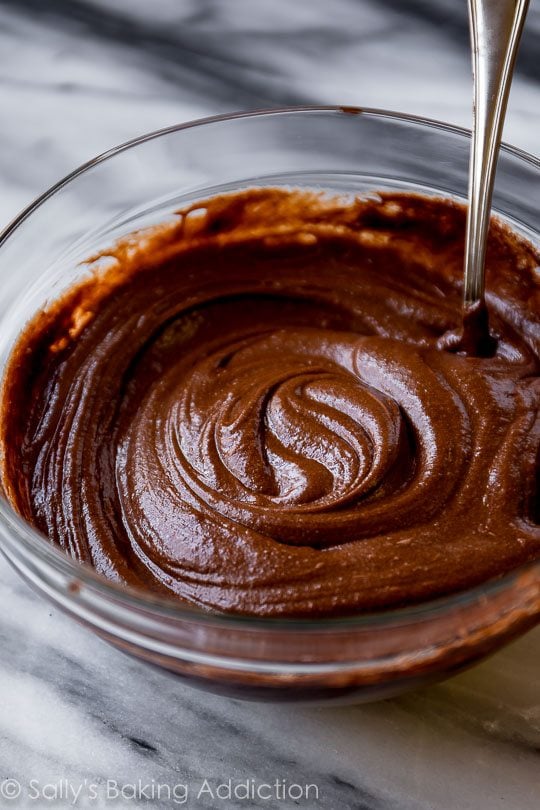
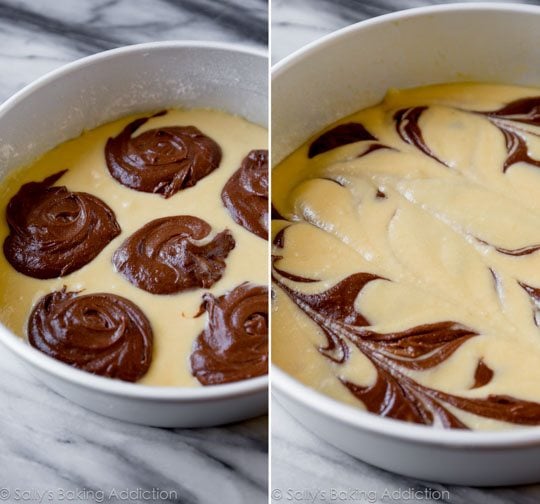
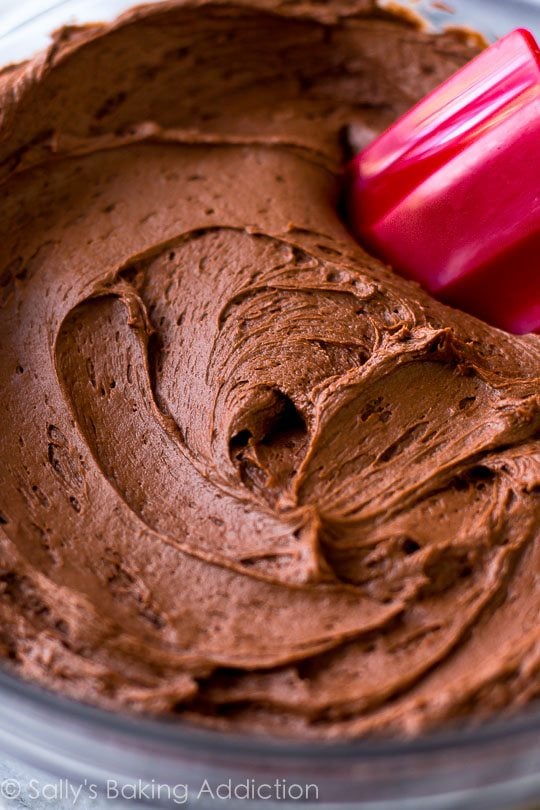
Let’s walk through the steps real quick so you know exactly what you’re doing in the kitchen. An overload of step photos in your scrolling future. The first thing we’re going to do is prepare a basic yellow cake batter (photo above, right). You only need 1 batter for this marble cake recipe. The chocolate batter is made from the yellow batter. So, it all starts out the same! The yellow cake batter can also be left plain to make a traditional yellow layer cake. But since I’m on a chocolate binge with my recipes lately (sorry?), we’re adding chocolate to the batter to make it a marble cake. Like, real chocolate. More on that in a sec. The basic yellow cake batter is super straightforward. Let’s discuss the ingredients. You need cake flour, not all-purpose flour. Cake flour has a lower protein content than all-purpose, which correlates to a lighter crumbed cake. Like the light, airy cakes from box mixes. All-purpose flour will make your cake heavy, dense, and bread-like. In a pinch, you can make your own cake flour substitute. Baking powder gives the cake its lift. Even though we will be using buttermilk as the liquid in the batter, we are using baking powder. Buttermilk (an acid) is usually paired with baking soda, but the purpose of buttermilk in this marble cake recipe isn’t for its acidity. Rather, it’s for flavor and moisture. Buttermilk is the secret to the super moist texture. Whole milk makes a wonderful substitution. Like most traditional cakes, creamed butter and sugar is the base of the entire marble cake. (Photo above, left.) And, like usual, I use a mix of granulated sugar and brown sugar in today’s recipe. You know I can’t live without my beloved brown sugar. Moisture! Flavor! You’d be silly not to use it in a giant cake like this. Eggs. Everything! Specifically, egg yolks. Have I drilled it into your head yet? Egg yolks (fat) give baked goods their moisture, tenderness, richness, and flavor. Not to mention its color. Yellow egg yolks = yellow cake. You’ll need 2 whole eggs, plus an additional 4 egg yolks. You’ll have 4 egg whites leftover, so make yourself a super healthy egg white omelet to balance out all the slices of marble cake you’ll be eating. Is that genius or what? Once the yellow cake batter is prepared, set 1 cup of it aside. Mix in 4 ounces of pure, high quality chocolate. We’re talking the real chocolate, not chocolate chips (save those for chocolate chip cookies) or even cocoa powder. Pure chocolate bars—the kind you find in the baking aisle, like Lindt or Ghirardelli. You can also use Trader Joe’s pound plus bar. In my recipe testing, I tried several marble cakes using cocoa powder and the results just do NOT compare to marble cake made with pure chocolate. Pure chocolate makes the chocolate swirls taste like decadent chocolate cake. All you’ll do is melt the chocolate and stir it into 1 cup of the yellow batter. Photo above: poured in. Photo below: stirred together. The chocolate batter will be quite thick. Now let’s create that marbled beauty! It’s so easy. Pour a base of yellow batter into each cake pan. Spoon chocolate batter on top. Spoon remaining yellow batter on top of that. Grab a knife and swirl it all around. Like so: It doesn’t have to be neat or perfect. The haphazardness of the batters swirled together makes the cake extra charming. Now it’s time to bake. The cake layers take anywhere from 22-27 minutes, give or take. All ovens are different, so I suggest using an oven thermometer to ensure your oven is at the correct temperature (my oven runs hot; thermometer saves the day!) and use a toothpick to test the cake’s doneness. Once the cakes are baked and cooled, it’s time to assemble and frost. Speaking of, I’m sure you’ve tried my legendary milk chocolate frosting by now. It’s made several appearances in both cookbooks and on my blog as well. I’m completely obsessed. It’s like the old-fashioned chocolate buttercream my grandmother used to make. Smooth and creamy, rich and thick. Smothered between and all around homemade marble cake, it’s nothing short of extraordinary. If you prefer, vanilla buttercream would also be fantastic here. Welcome to my happy place. As always, straying from the written recipe and instructions will yield different results. There’s a reason this cake took me so long to perfect… it’s all in the precision and ratio of specific ingredients and mixing techniques. I advise you to follow the recipe as directed first then make any adjustments you see fit next time. Plenty of recipe notes for you in case you have questions. Enjoy this classic beauty!