I’ve studied, tested, and retested plenty of homemade pastry dough the past month. (And I’ve gone through a few pounds of butter in the process!) The resulting dough is a quick-method to real Danish pastry. It’s an adaption of several trusted sources: Cooking Illustrated, Joy of Cooking, and pastry master Beatrice Ojakangas. I mish-mashed all of the recipes I studied and made my own version of this flaky, buttery dough.
What is Danish Pastry?
Danish pastry is made from flour, yeast, milk, eggs, and copious amounts of butter. The texture is similar to croissant dough, but tastes sweeter (and has the addition of egg in the dough). Like croissants, typical Danish pastry dough is rolled out thinly, then folded with a layer of butter to form multiple layers.
This is a Shortcut Homemade Pastry Dough
This is a shortcut version—it’s not the traditional method of making real danish pastry. Here we are working the butter directly into the dough using a food processor. We’re still rolling it out and folding the dough, just as you do when you laminate dough with butter, but we’re not folding it up with a separate layer of butter. Does that make sense? I use the term “shortcut” loosely. This dough still takes at least 5-6 hours total with 2 rounds of refrigeration. Pastries made from this dough are just as buttery, tender, and flaky. You could compare this to store-bought puff pastry, but it’s worlds better. Crispier, more buttery, flakier, and—of course—homemade.
What Can I Make With This Dough?
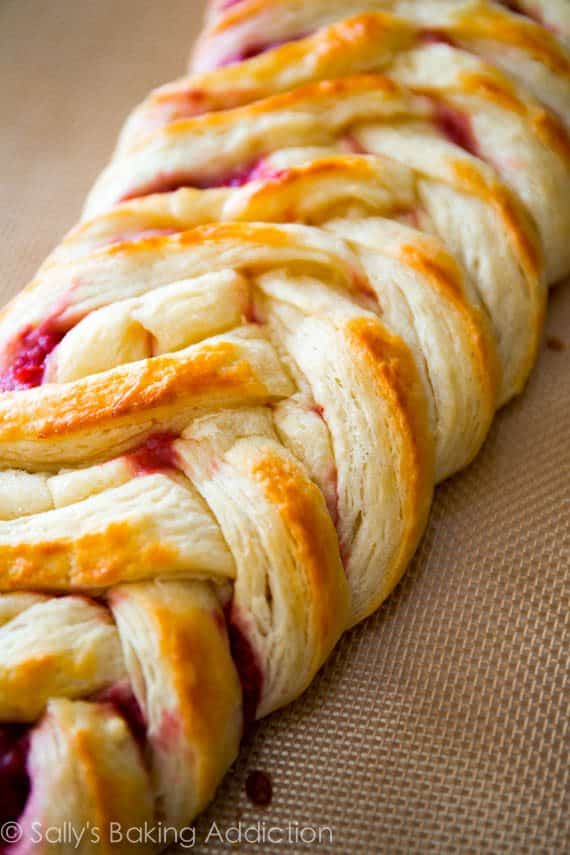
I stick to breakfast pastries like pastry braids and individual breakfast pastries. You’ll love my raspberry pastry braid (pictured above) and blueberry cream cheese pastry braid (pictured below). You’ll also love these breakfast pastries (pictured below).
Overview: Homemade Pastry Dough Ingredients
This yeasted pastry dough comes together with 8 basic ingredients.
Homemade Pastry Dough Success Tips
Use cold butter. If the butter isn’t cold, the dough will melt before it even hits the oven. Expect some butter to leak as the pastries bake. That’s completely normal! The dough must be sufficiently chilled whenever you are working with it. Because of all the refrigeration, this dough is a wonderful recipe to get started ahead of time. You can easily make this dough in 1 morning or over the course of 3 days. The temperature of your ingredients is imperative to this pastry’s success. Make sure you take the time to warm the water and bring the milk to room temperature. I do not recommend any substitutions in this carefully formulated dough, though a lower fat or nondairy milk works in a pinch. Use a food processor for the butter/flour in step 3. If needed, a pastry cutter works in a pinch. (Affiliate links—any processor or pastry cutter works, but both linked options are what I own and love) Read through the recipe, recipe notes, and see the visuals below. Take your time!
Video Tutorial
Do NOT be overwhelmed by all these steps. I break everything down into detail. Be sure to use the photos below this recipe as a visual guide. Step-by-step photos below!
Step-By-Step Photos
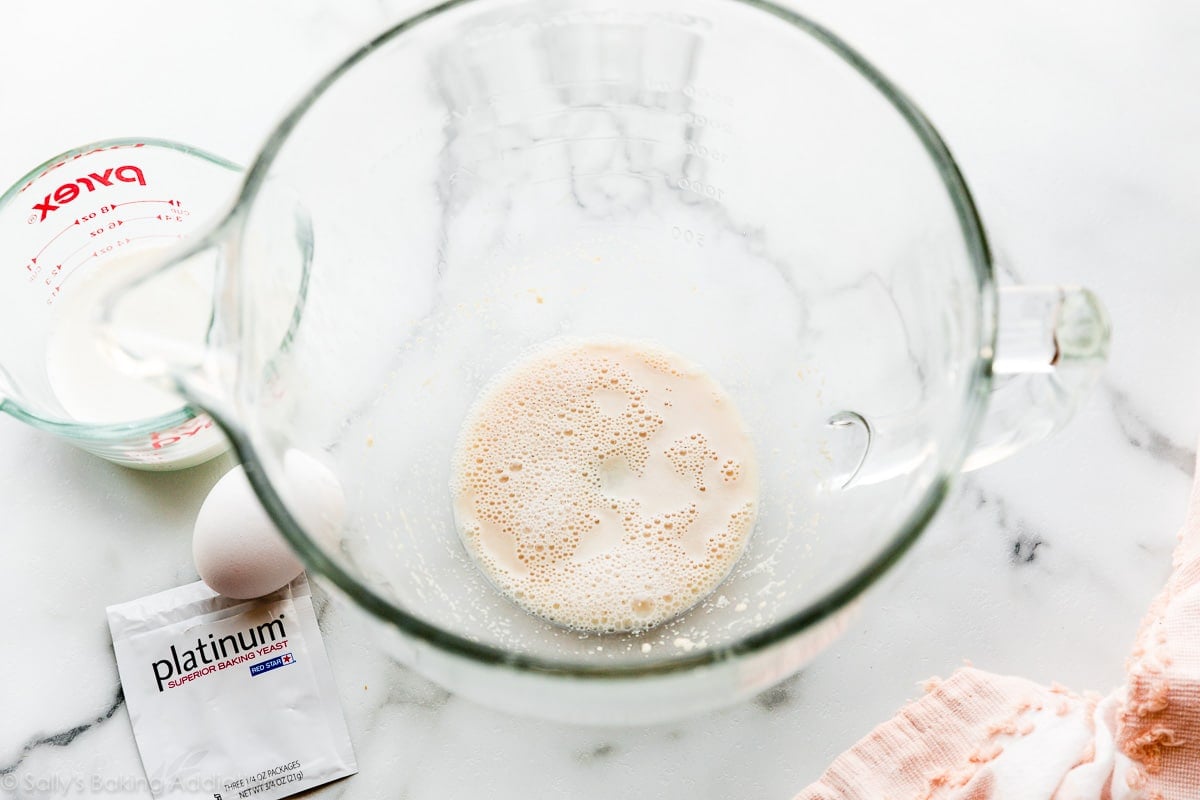
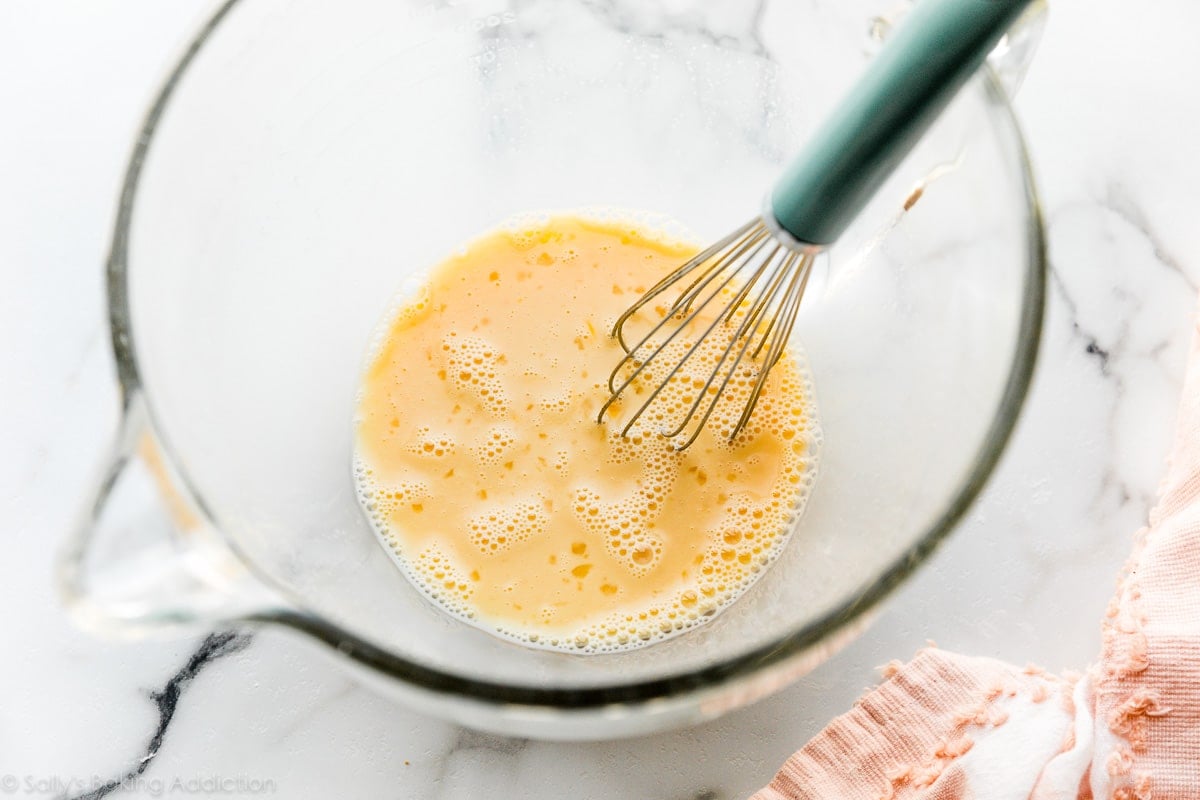
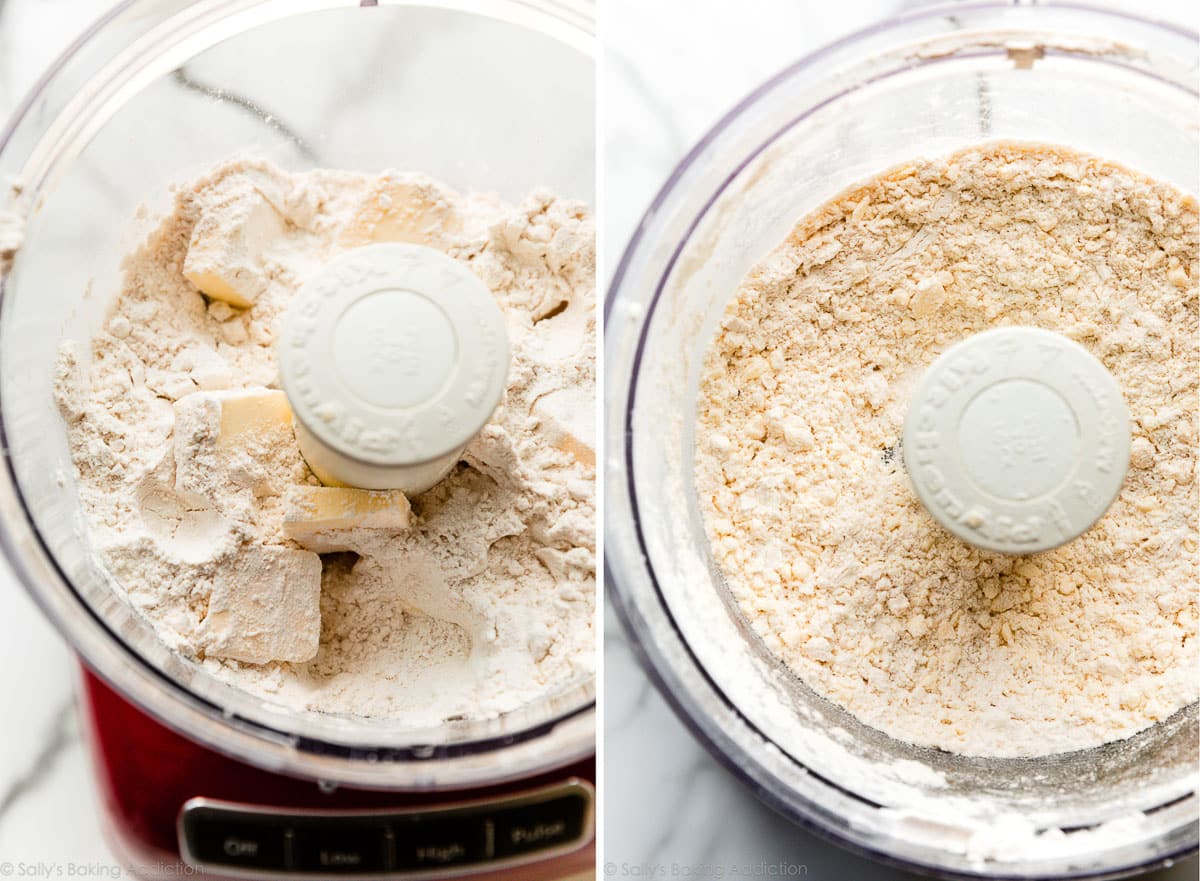
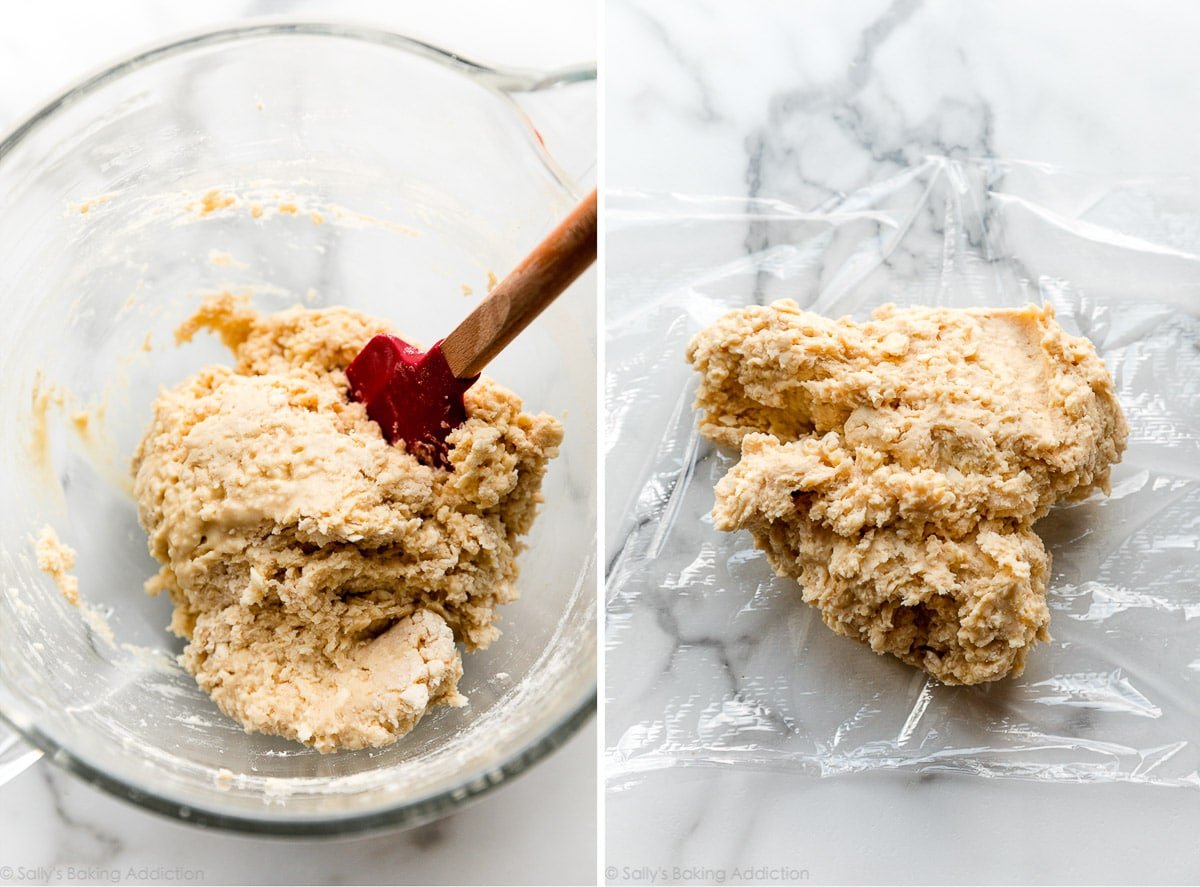
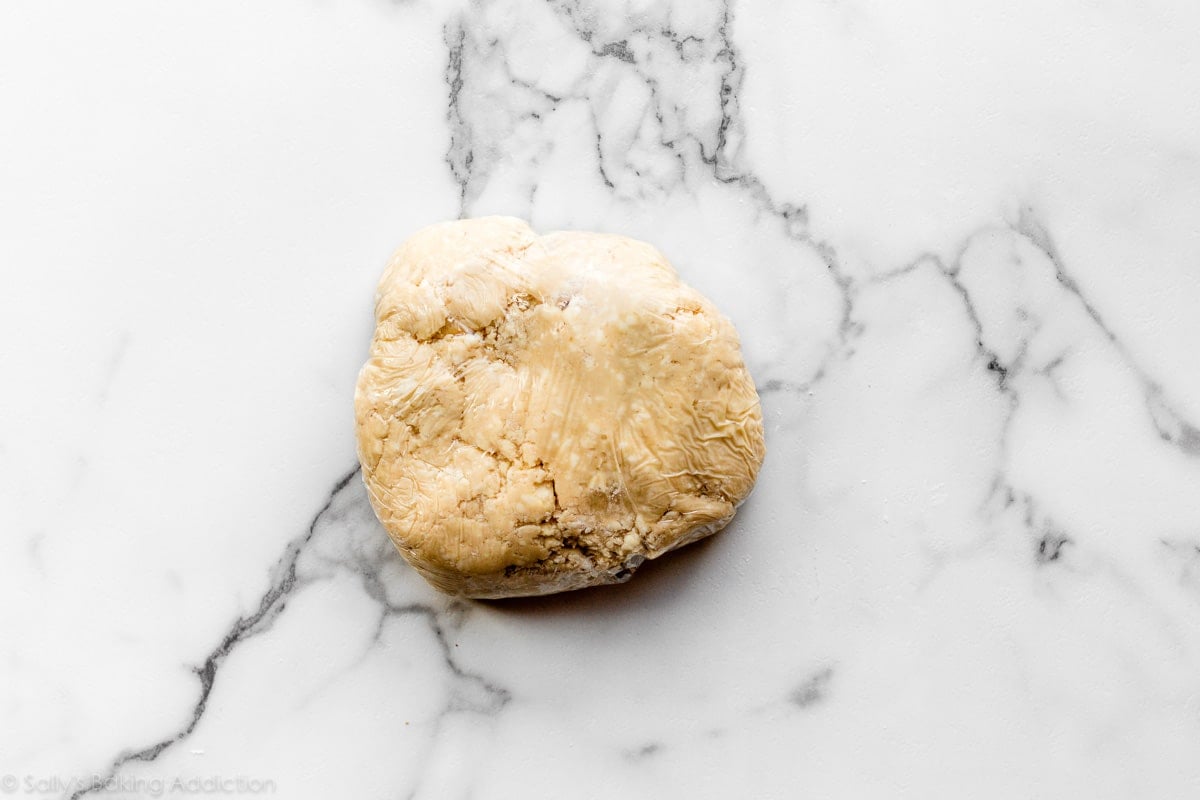
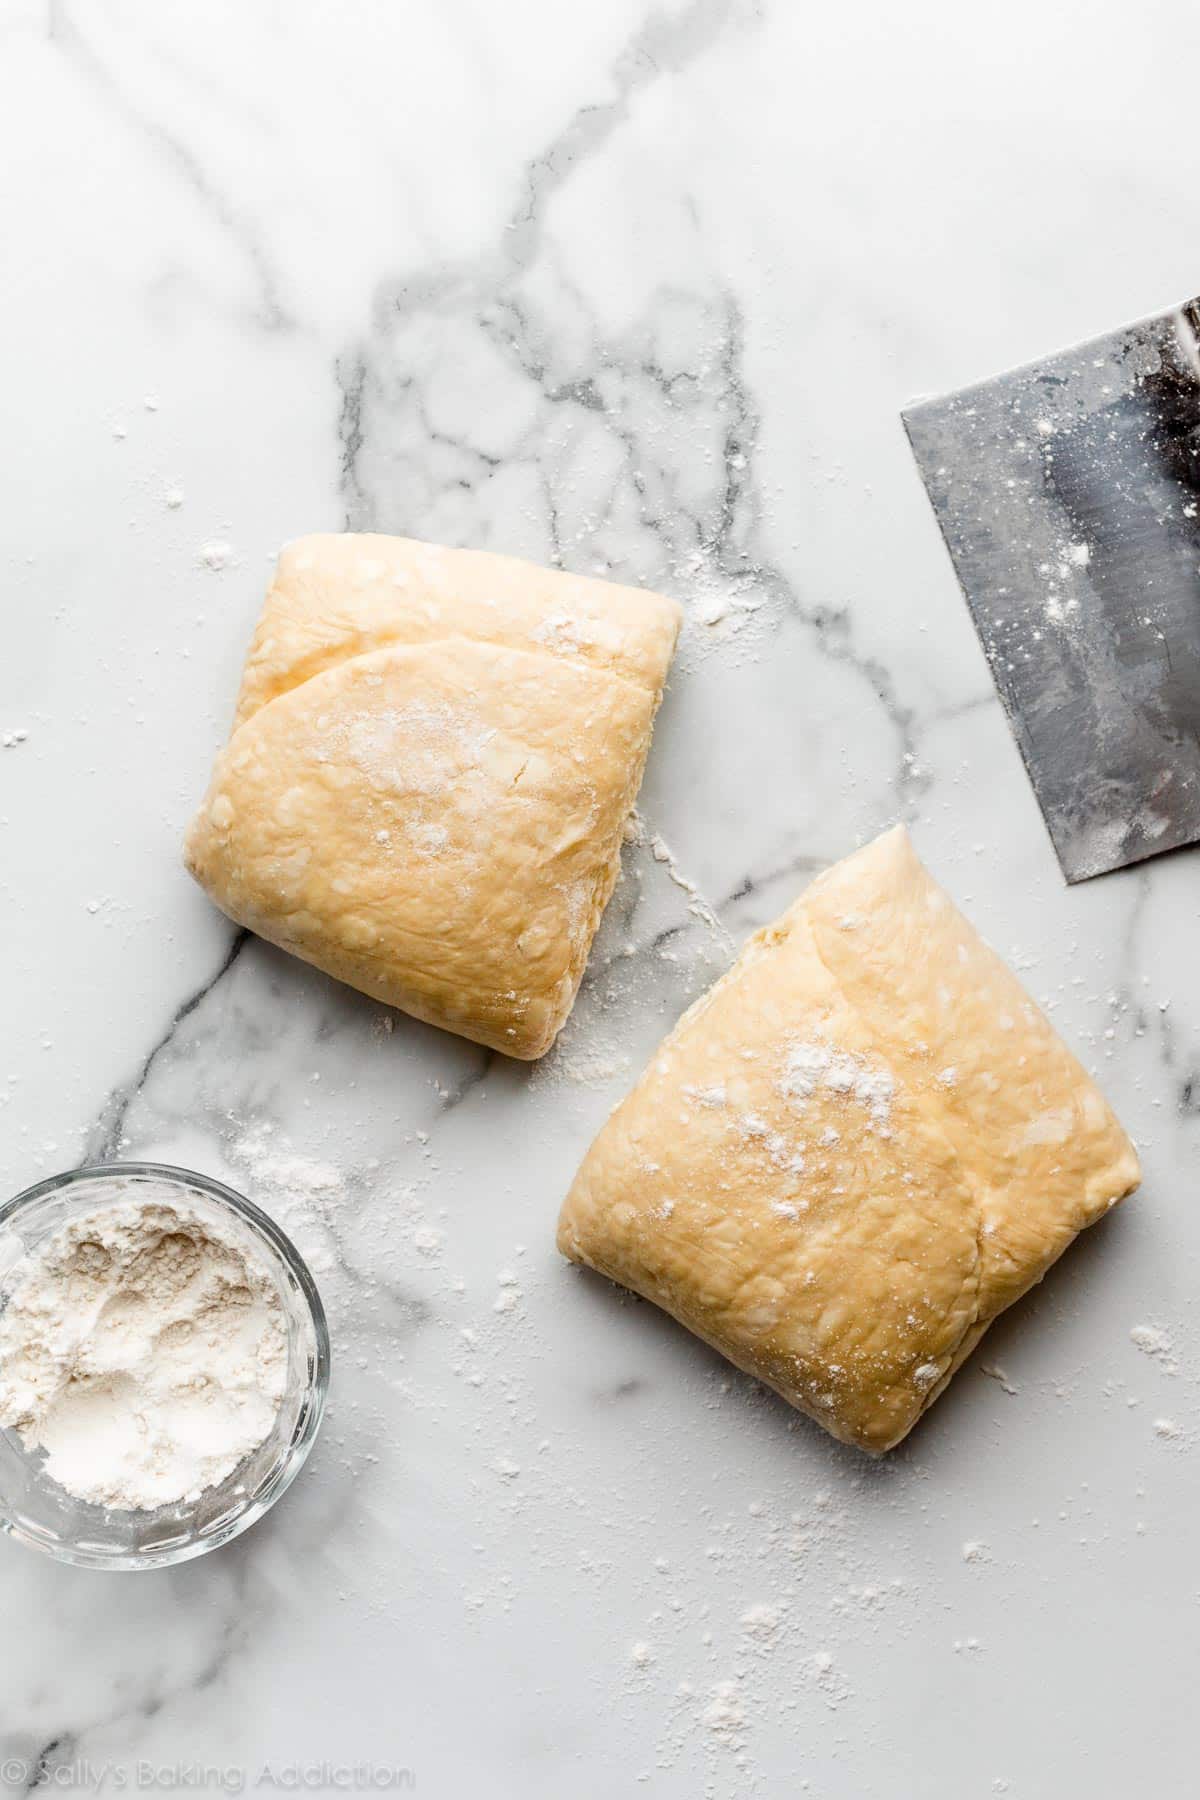
Whisk the warm water, yeast, and 1 Tablespoon of sugar together. Cover and allow to rest until foamy/bubbly on top: Whisk in the rest of the sugar, the milk, egg, and salt. We’ll call these the wet ingredients: You need a food processor blender for this recipe. If you have neither, use a pastry cutter to cut the cold butter into the flour. An electric mixer will not work for this step. You are looking for pea-size crumbles of flour coated butter. This step is only possible if the butter is cold. Pour the butter/flour crumbles into the wet ingredients and fold it together using a wooden spoon or silicone spatula. It is very sticky. Since this dough is so sticky, I do not recommend using an electric mixer. It will create a huge mess! There is minimal mixing required anyway—we don’t want to overwork this dough. You’ll notice many bits of butter still visible in the dough—that’s a GOOD thing! Wrap the dough up tightly and refrigerate for at least 4 hours and up to 48 hours. This is the 1st refrigeration.
Shortcut Lamination
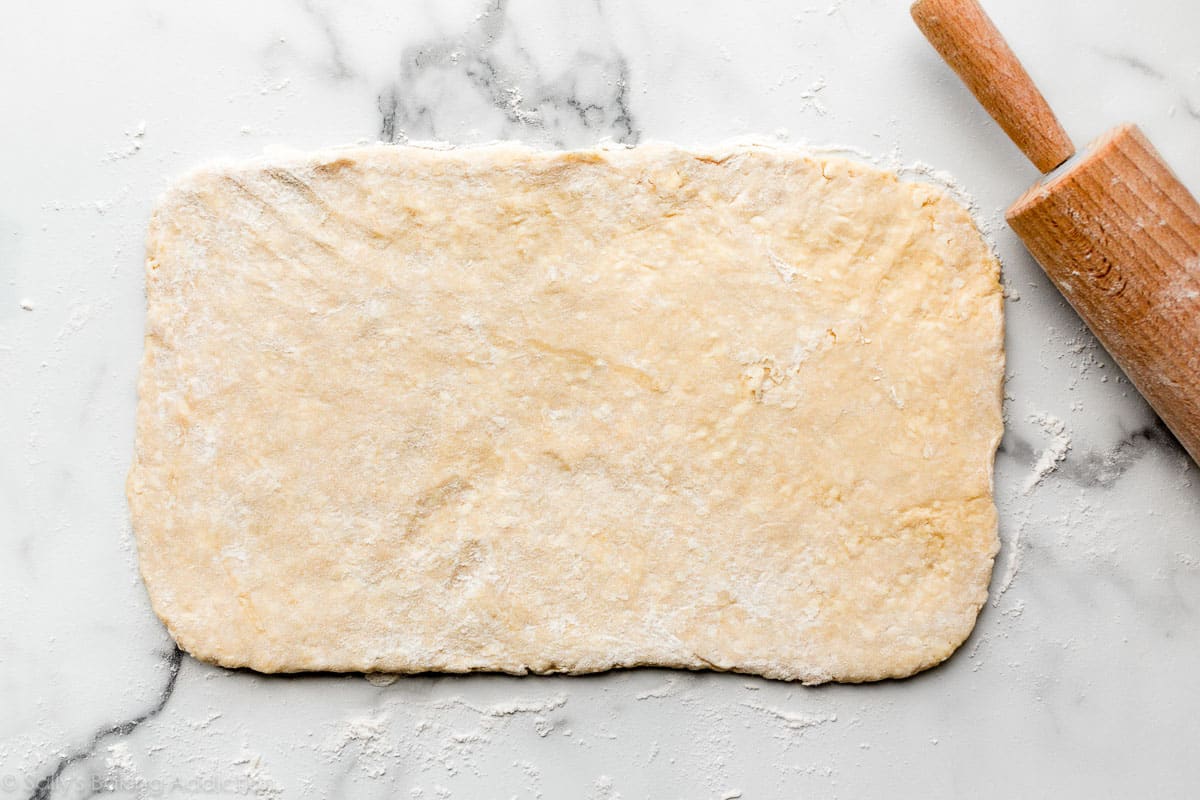
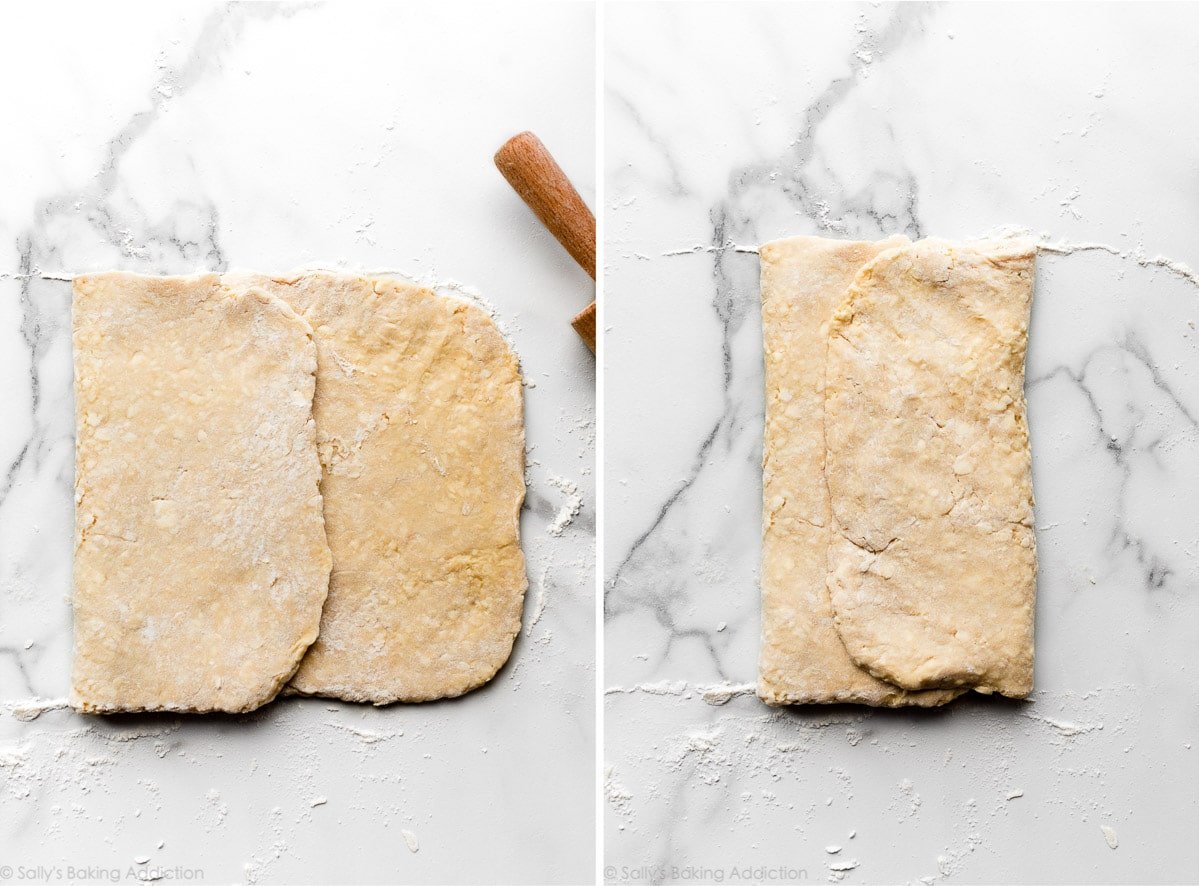
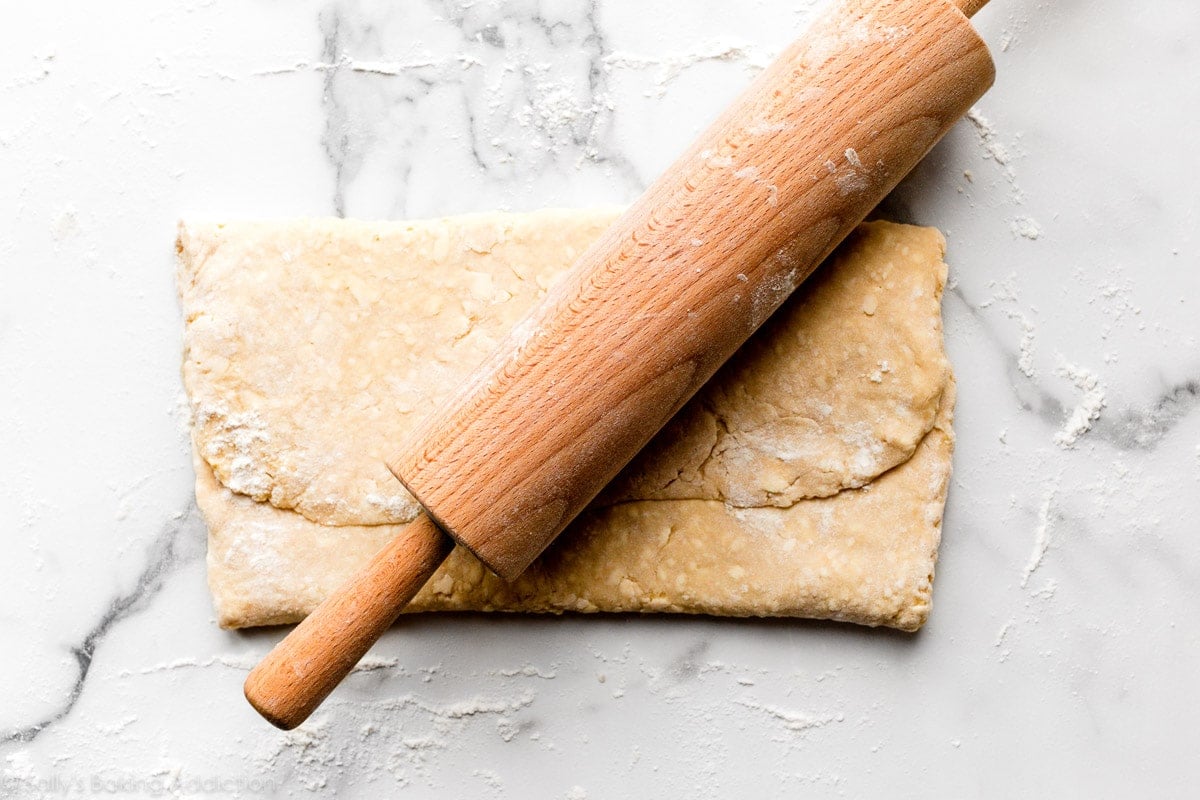
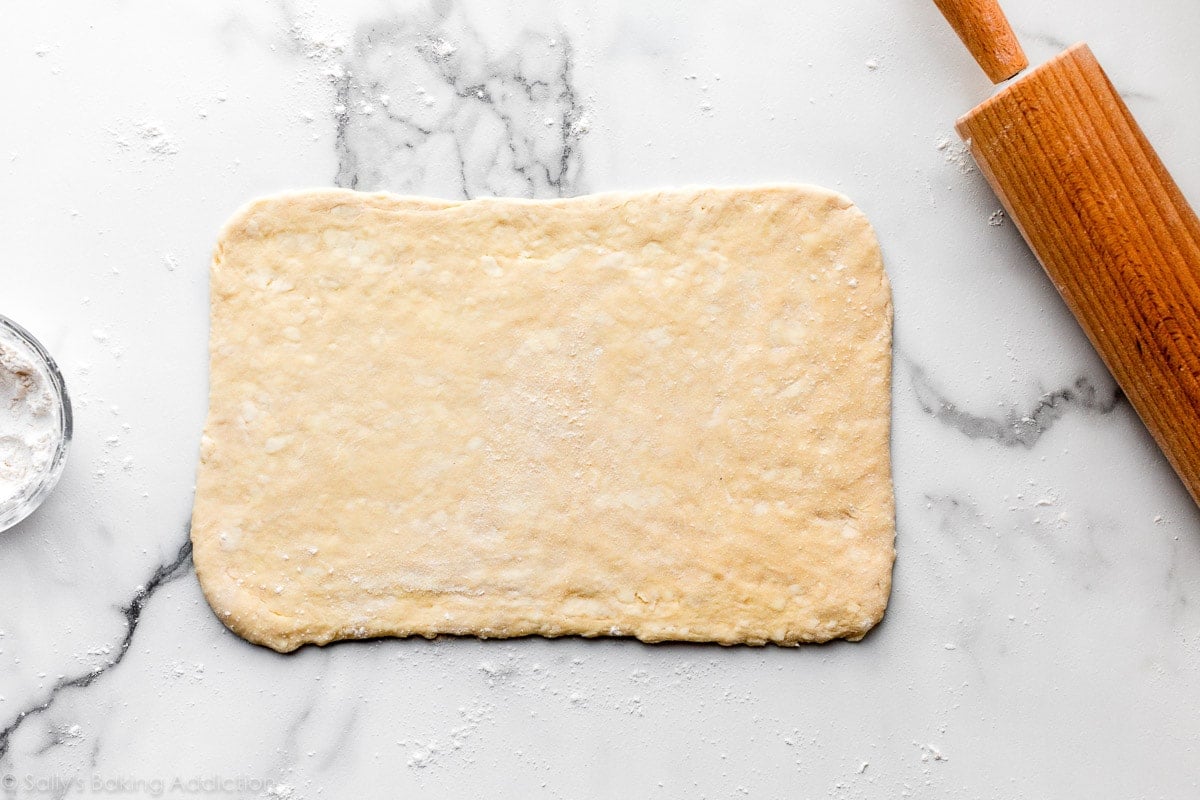
Now let’s do a variation of laminating aka rolling and folding dough and butter together. Remember when we made croissants and laminated the dough with a sheet of butter? The butter is IN this homemade pastry dough. So, instead, we’re just rolling and folding the dough itself. Roll it out into a 15×8-inch rectangle: Fold it in thirds like a letter: Turn it clockwise: Then roll it out into a 15-inch rectangle again. Repeat the folding. Turn it clockwise again. Repeat rolling and folding 1 more time for a total of 3 times. Wrap the laminated dough up tightly and refrigerate for at least 1 hour and up to 24 hours. This is the 2nd refrigeration. After this 2nd refrigeration, you can move on to shaping your dough based on what you’re making like individual danishes or pastry braids. The full written recipe above includes the steps you need to make a pastry braid. Here’s how to make individual breakfast pastries.
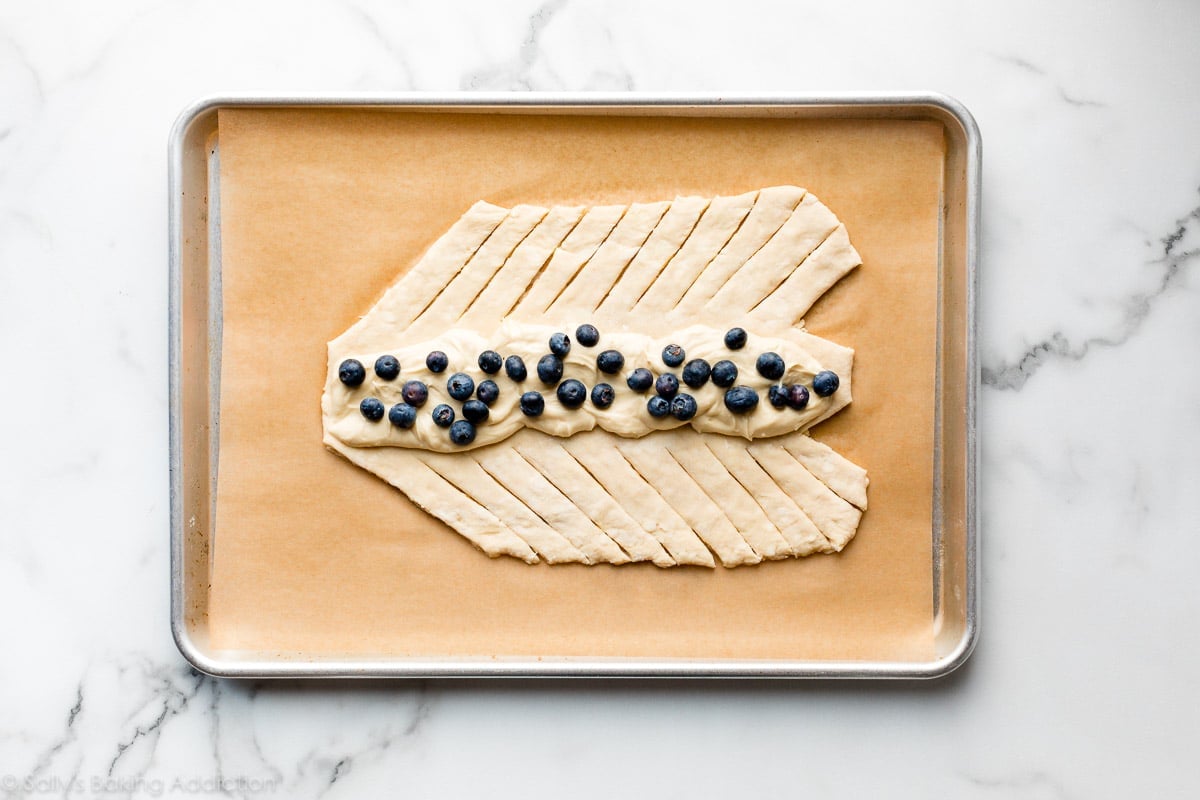
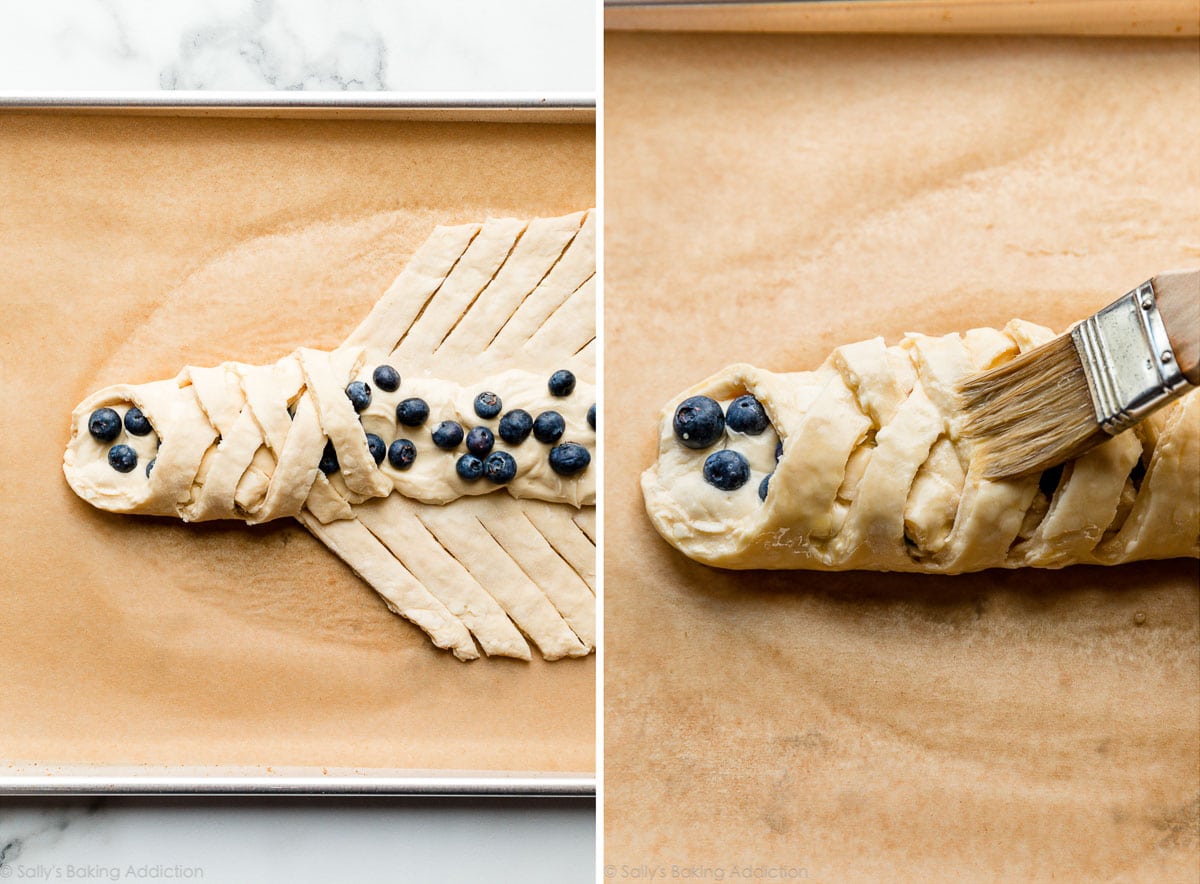
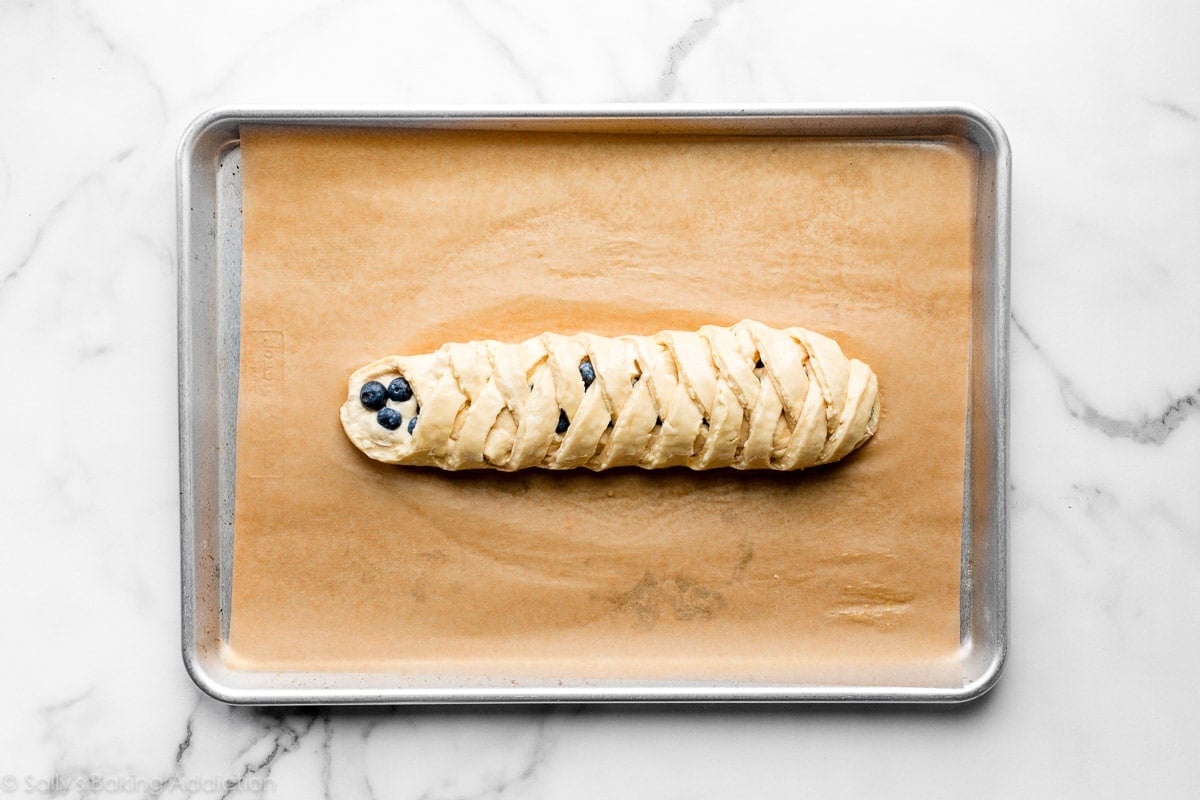
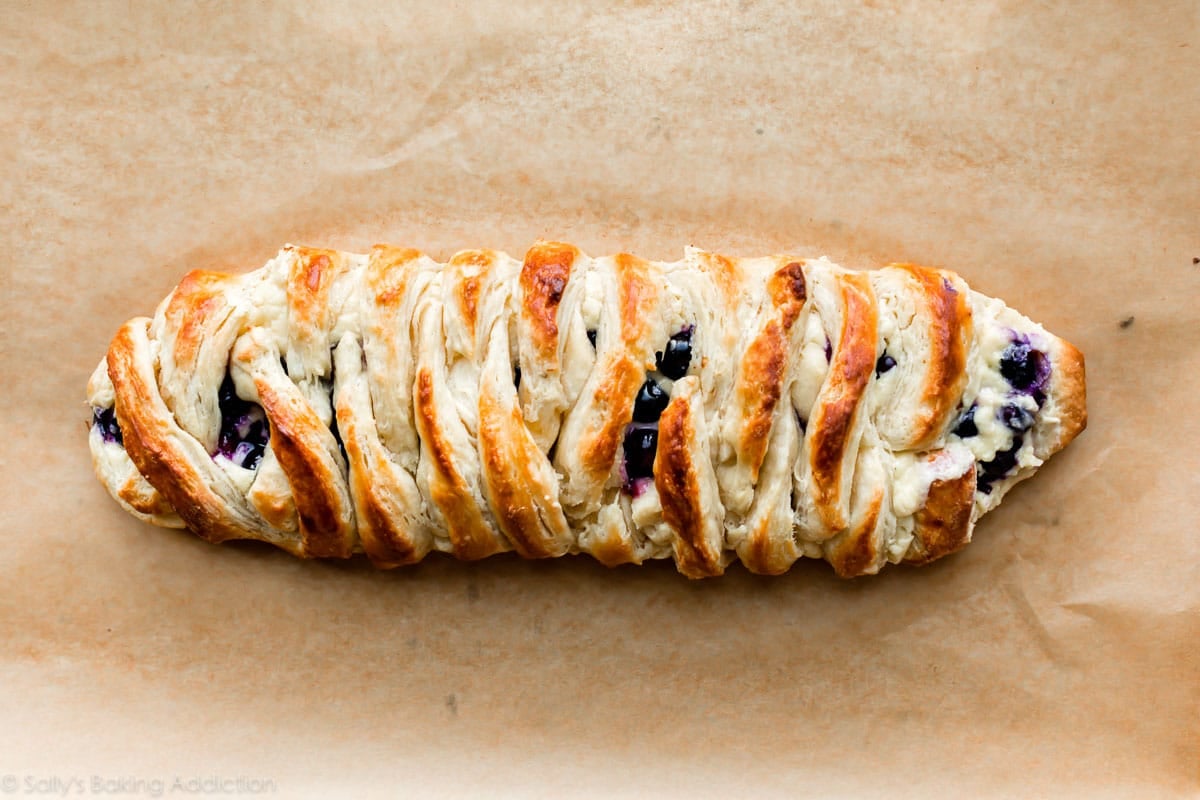
Shaping the Pastry Braid
Cut the dough in half. This recipe yields 2 lbs of dough, which equals 2 braids. 1 braid serves 5-6 people. If you don’t need that many tempting pastries around, freeze the second half of the dough for a later time. All make-ahead and freezing instructions in the recipe above. Work with only half the dough at once. Wrap half up and refrigerate until ready to use. Roll the half of dough into a 12×8-inch rectangle. Transfer to a lined baking pan. Using a sharp knife, cut off two corners of the dough (on one 8-inch side) and then two small triangles 3 inches apart from each other on the other end (the other 8-inch side): Spread 1/2 of the filling (from raspberry pastry braid or blueberry cream cheese pastry braid) down the length of the center of the strip. Using a sharp knife, pastry wheel, or pizza cutter, cut 10 slanting strips along both sides. Fold strips over dough, alternating each side to resemble a twist or a braid. Fold the bottom end up to seal the filling inside. The braids may seem very narrow, but they puff up and out as they bake. Brush the shaped dough with egg wash, which is a combination of 1 egg and milk. What is the purpose of an egg wash? It guarantees a shiny and crisp golden crust. To help guarantee the braids hold their shape, chill them in the refrigerator as the oven preheats and even up to 1 hour. Bake until golden brown.