This recipe is brought to you in partnership with Red Star Yeast. I originally published this recipe in 2014 and have since added new photos and a video tutorial, as well as more detailed instructions and success tips. After making countless batches of these cinnamon rolls since I published the recipe many years ago, plus answering readers’ comments and questions, I thought it would be beneficial to update the post with more helpful information and success tips. Homemade cinnamon rolls are a popular breakfast choice, so I want to make sure you have all the resources you need for this classic recipe. By the way, if you love this dough, be sure to try it as raspberry sweet rolls or strawberry sweet rolls with lemon glaze next. Or for a sprinkle loaded treat, my birthday cake cinnamon rolls use the same dough, too!
Tell Me About These Homemade Overnight Cinnamon Rolls
Texture: This is one of my richest homemade doughs, so you’re already promised a soft, springy, and fluffy texture. I usually use all-purpose flour, but if you use the optional bread flour, your rolls will be a little chewier. I find that these homemade cinnamon rolls are even fluffier than my easy 1 rise cinnamon rolls (and that’s because there’s the additional rise here!). Flavor: The smell of warm cinnamon rolls is oh-so-irresistible and inviting. Once you take that first bite, you’ll enjoy a fresh homemade dough that’s swirled with endless pockets of (Cinnabon style!) sweet and gooey cinnamon. Ease: Homemade dough and shaped breads require more precision and effort than making say, a coffee cake. But the dough is pretty straightforward and simple to shape, as long as you have enough flour nearby for your hands, work surface, and rolling pin. Time: This dough requires 2 rises. Once you understand the assembly process, the prep moves pretty quickly. Set aside at least 4-5 hours from start to finish or divide between 2 days with the overnight option. Whichever method you choose, keep in mind most of that time is hands off as the dough rises.
If you are craving cinnamon rolls right now, and just can’t wait for dough to rise, try these no yeast cinnamon rolls!
What Readers are Saying:
7 Crucial Ingredients in These Homemade Cinnamon Rolls
Feel free to skip straight to the recipe. But if you’re new to making bread, the following explanations are points that I’ve learned over the years and will be massively helpful. “Delicious and easy to follow! This was my first time cooking with yeast and my first time making homemade cinnamon rolls and this was a great recipe to start with. Everyone at brunch was blown away. ★★★★★” – Hannah “Delicious! I have tried many cinnamon roll recipes, and this is my new favorite. I prefer a roll that is large, more fluffy than dense/gooey, and buttery without being overly sweet. This fit the bill! ★★★★★” – Brice Note: You’ll notice that I use more yeast in this recipe compared to my easy cinnamon rolls. Why? These are much fluffier and larger—about twice the size.
Step-by-Step Photos
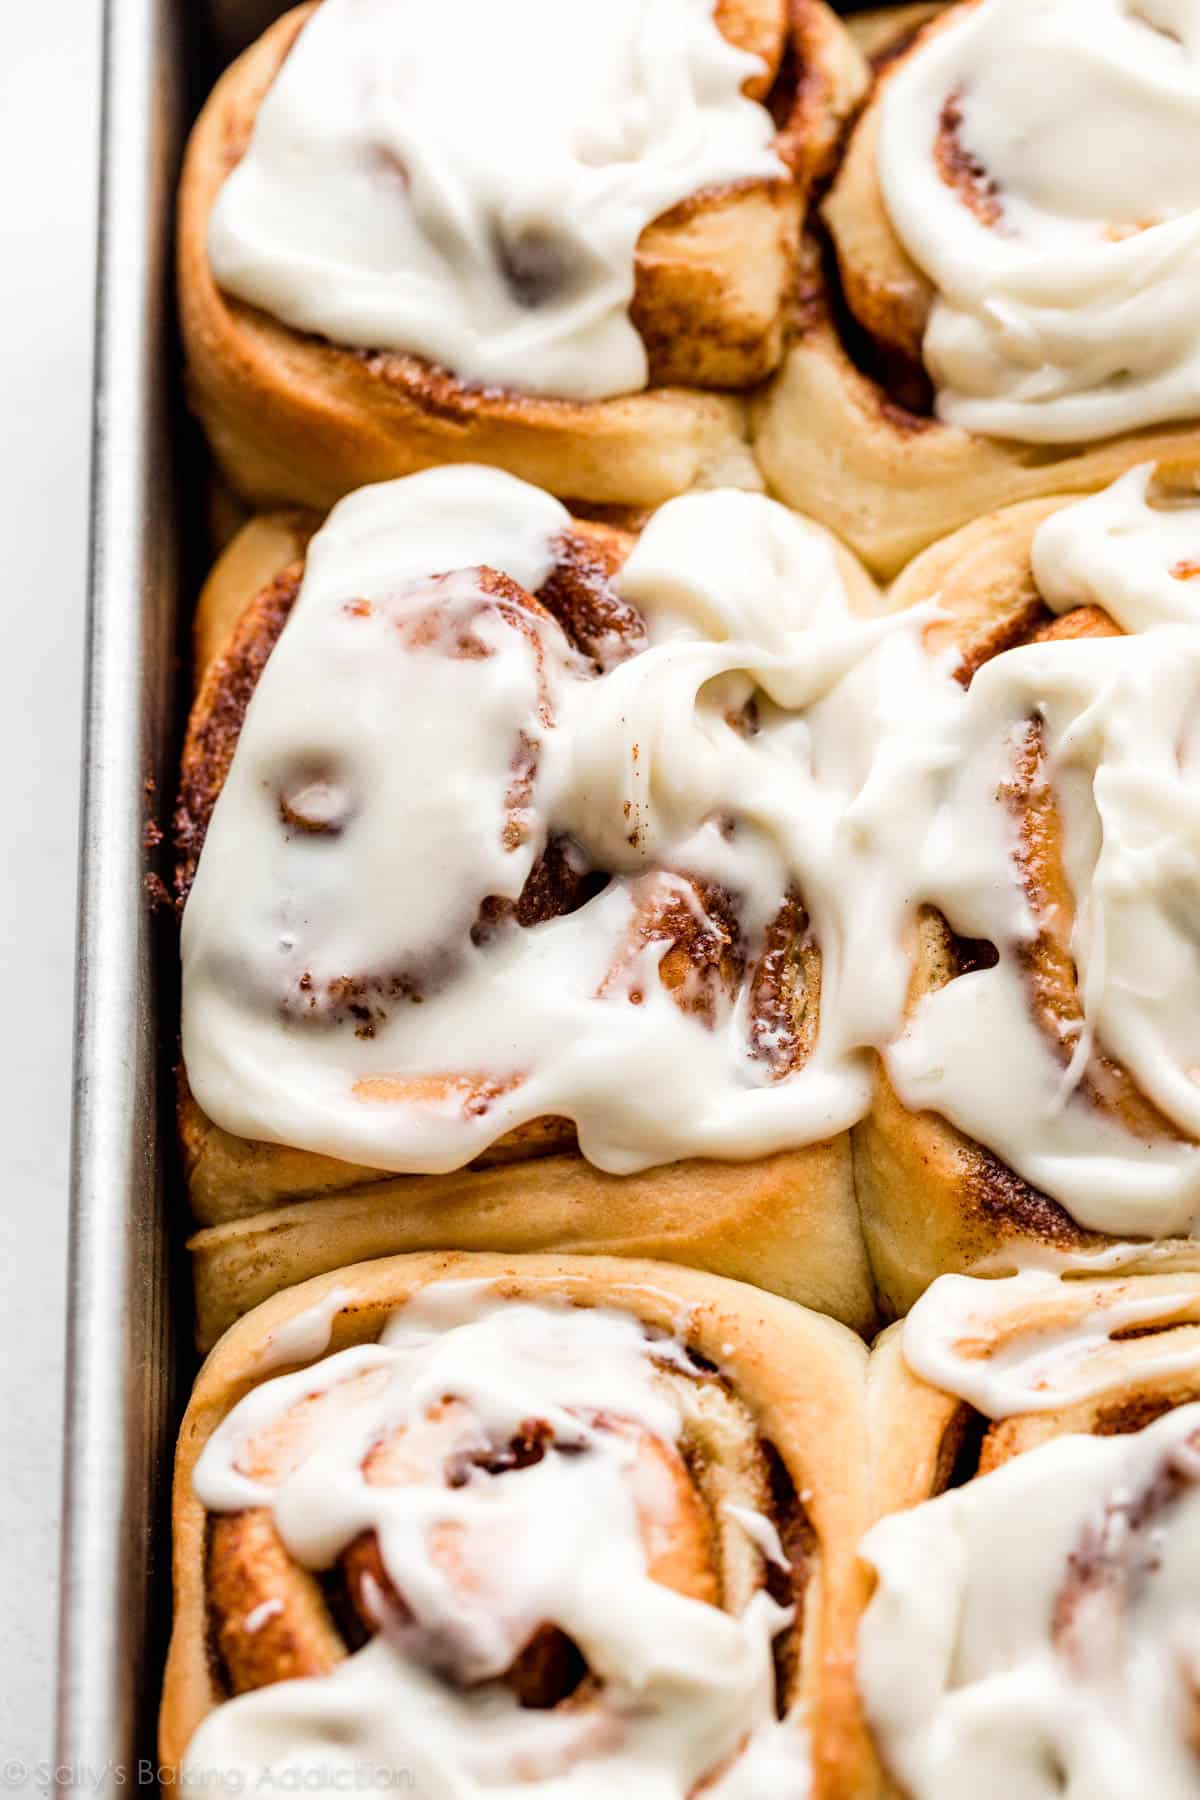
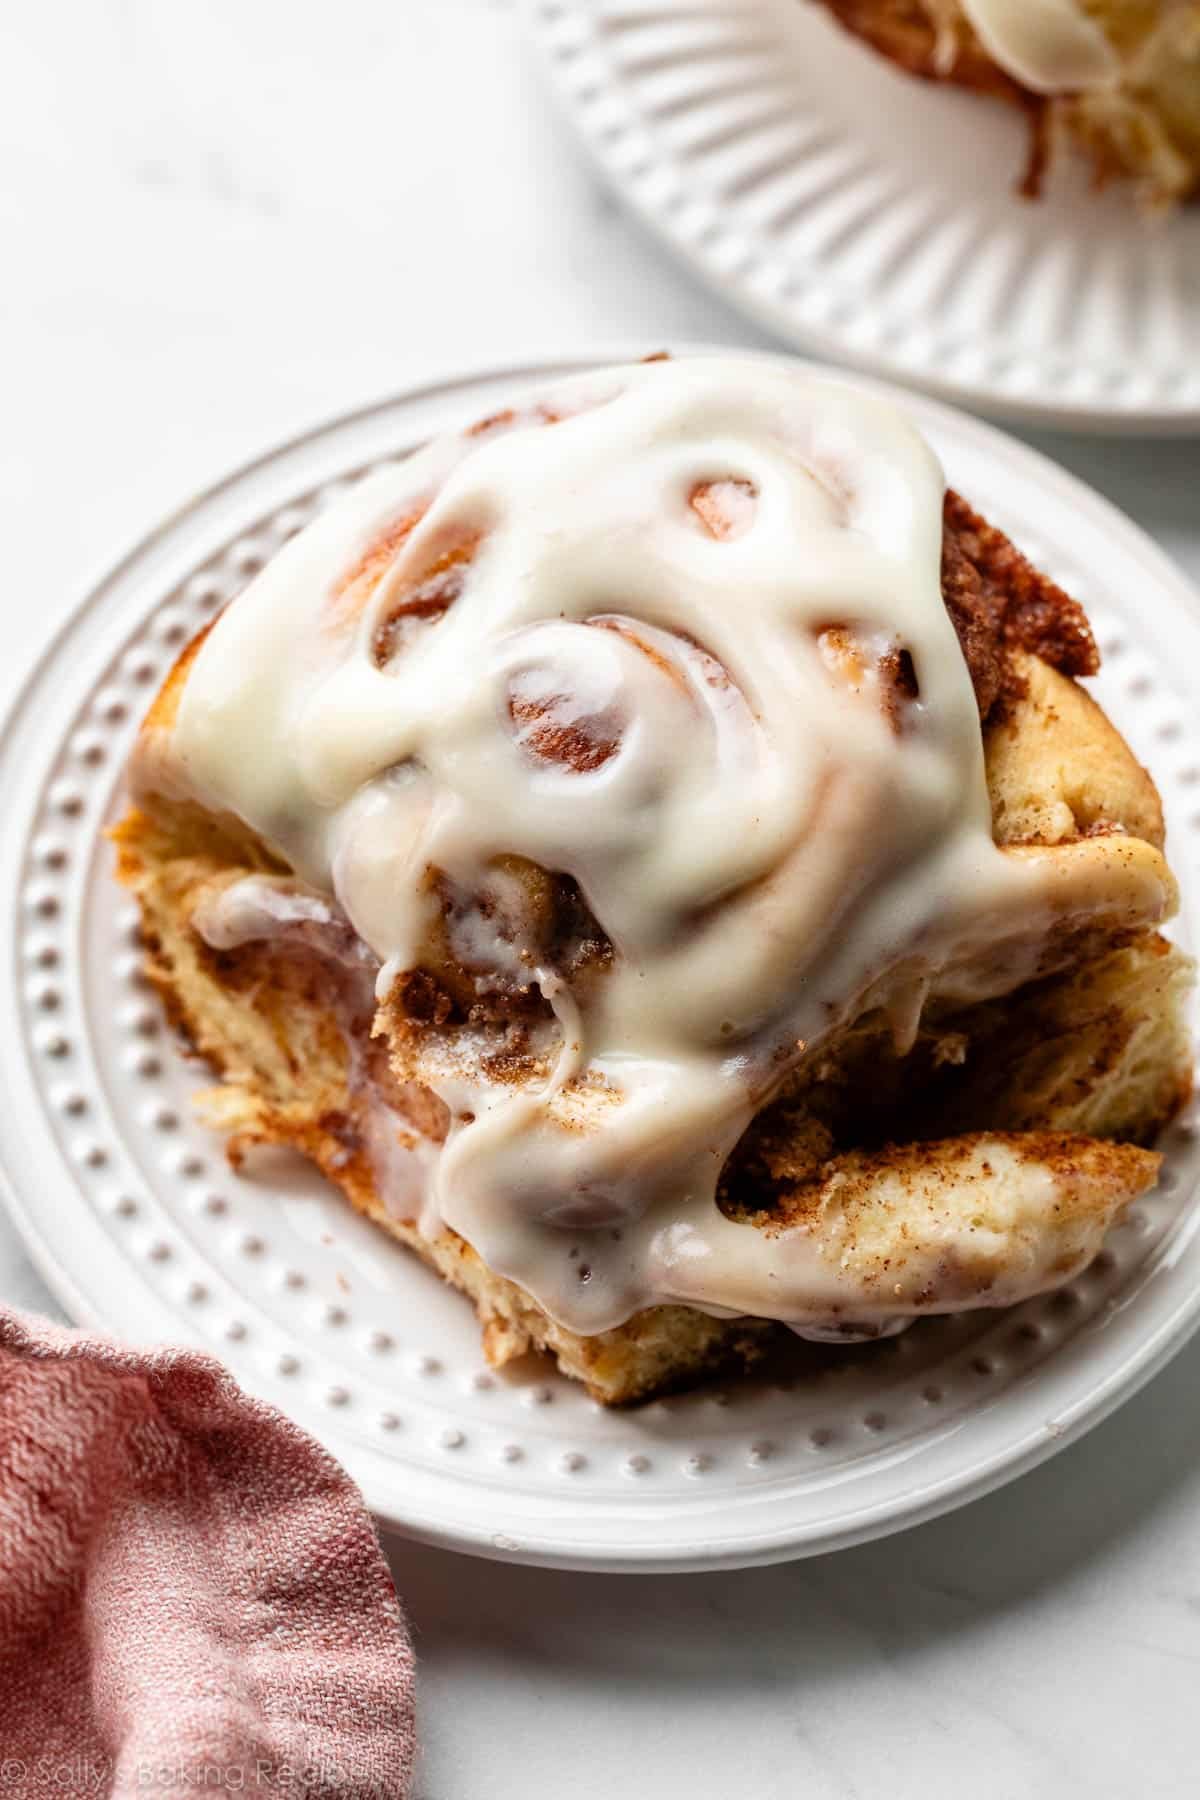
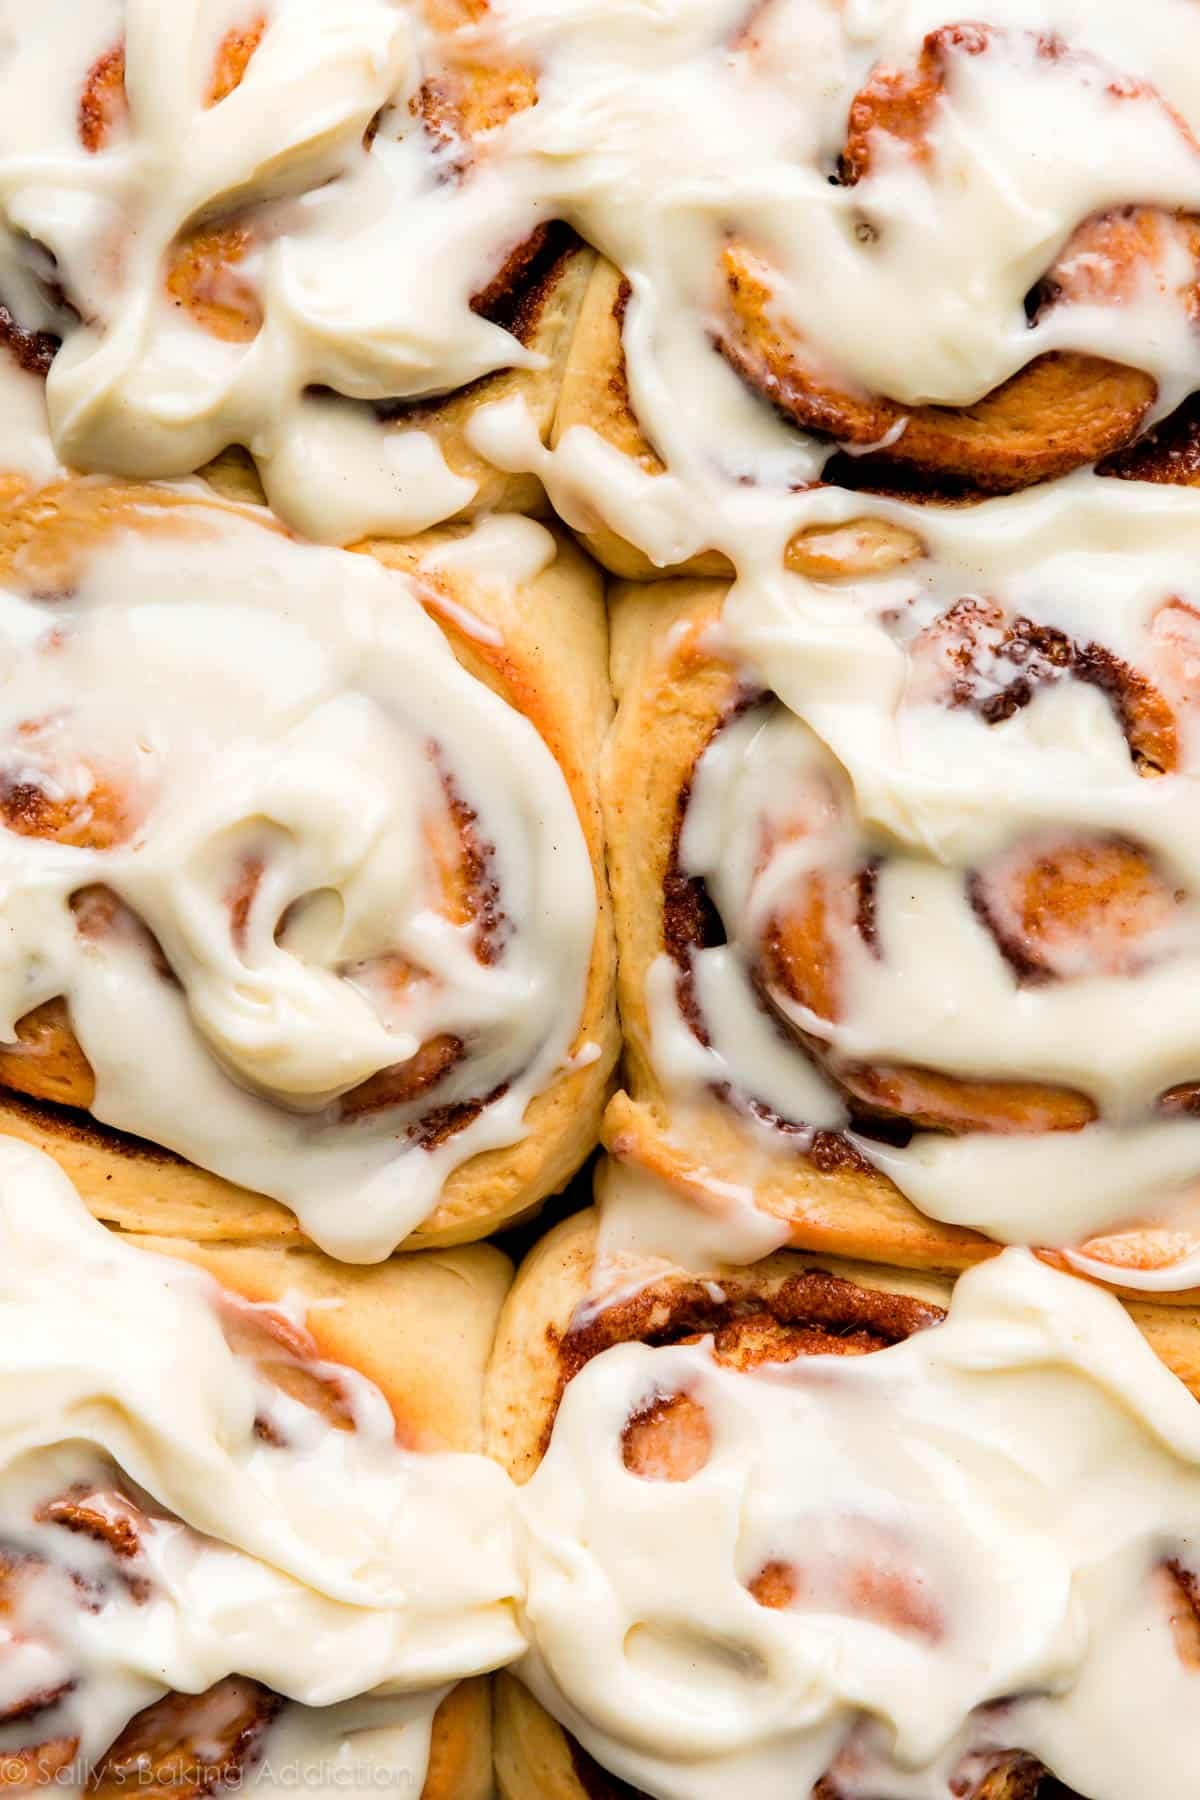
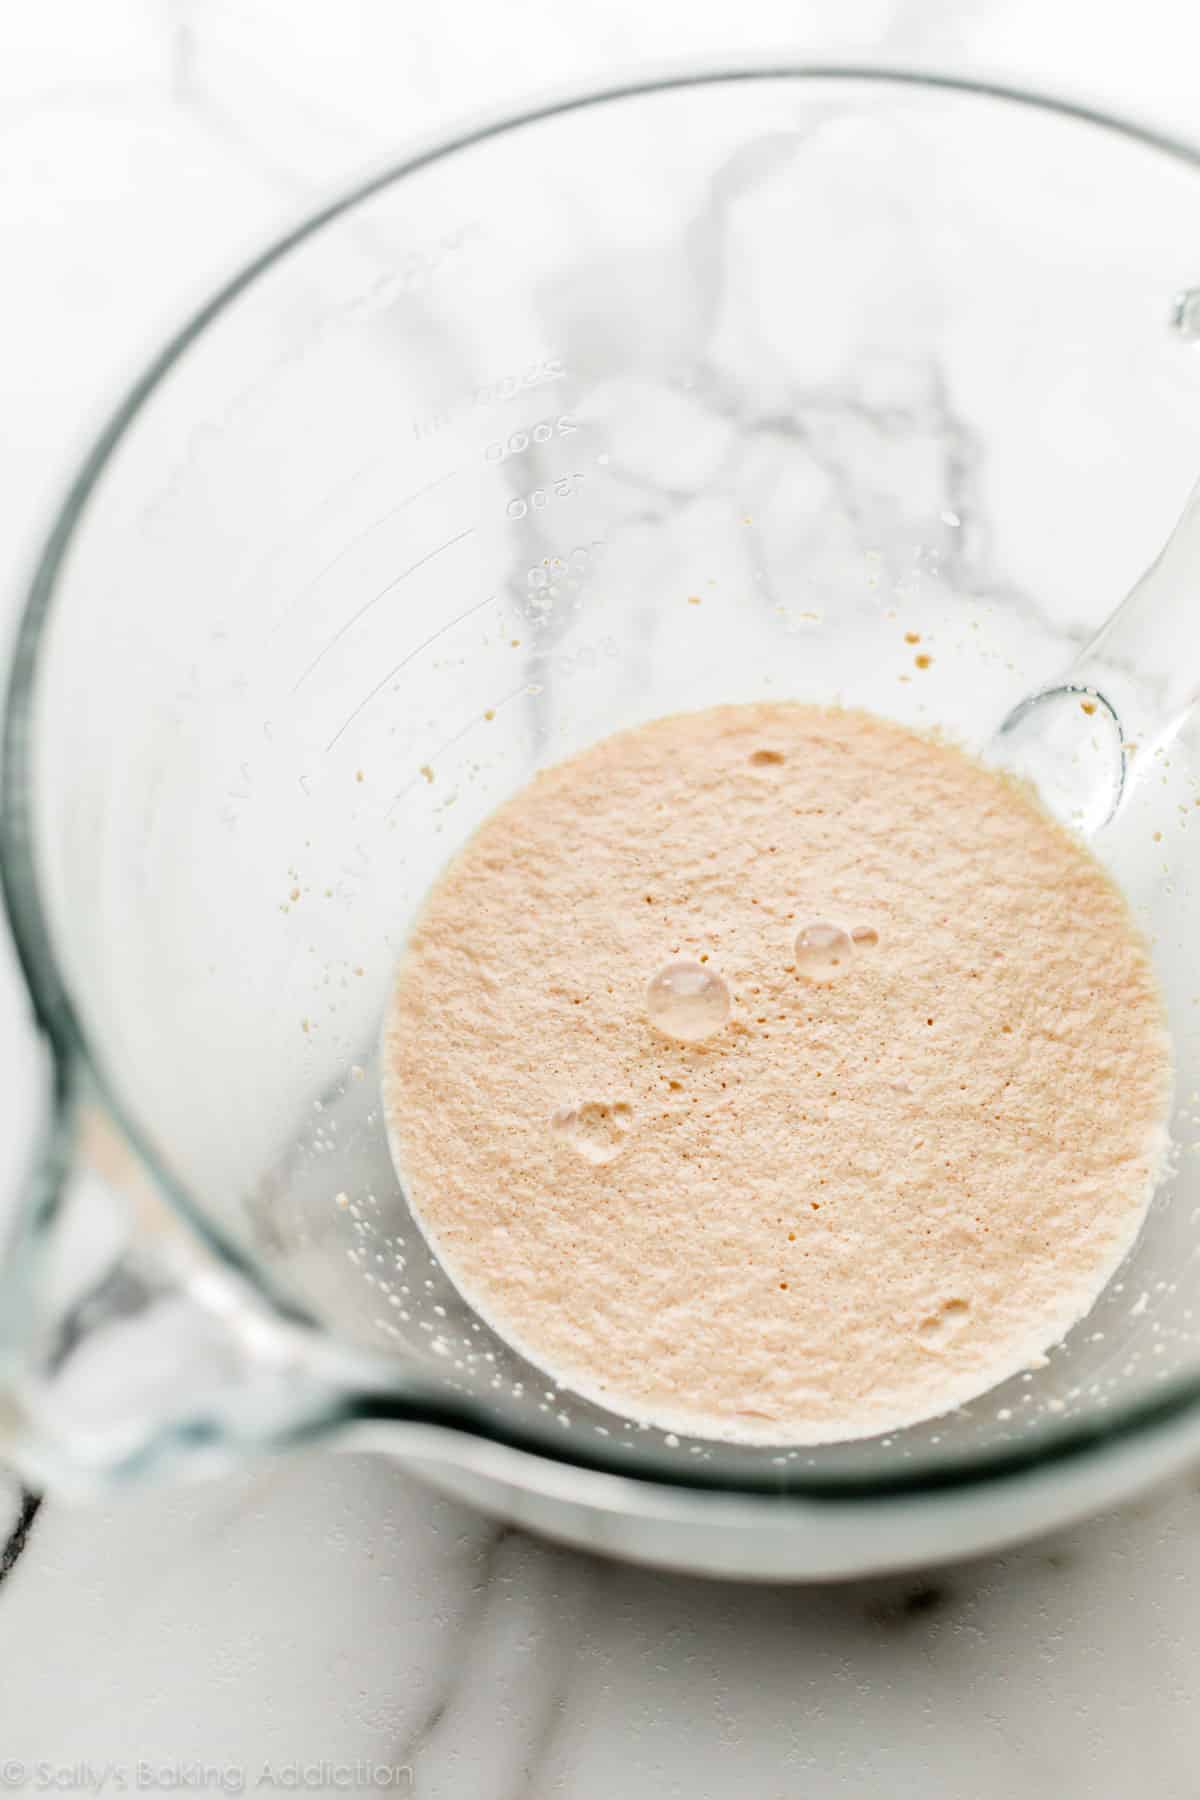
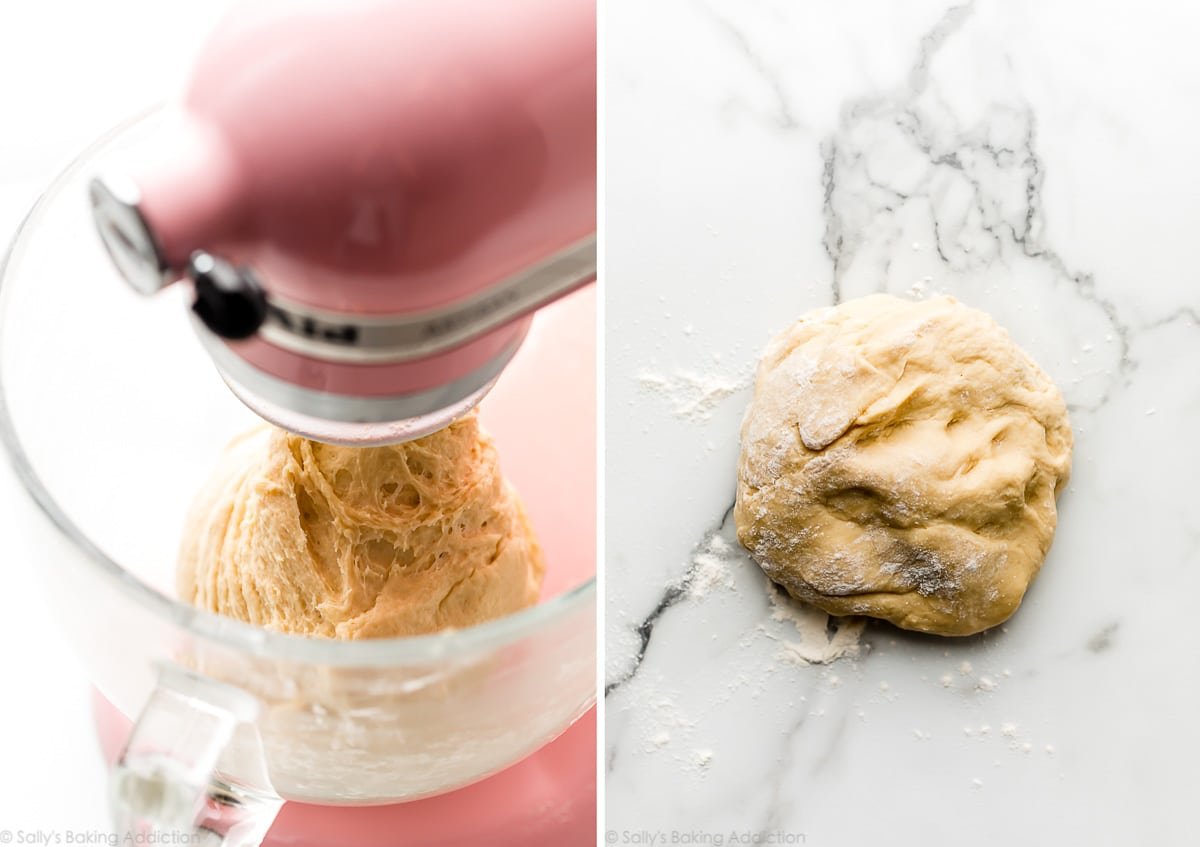
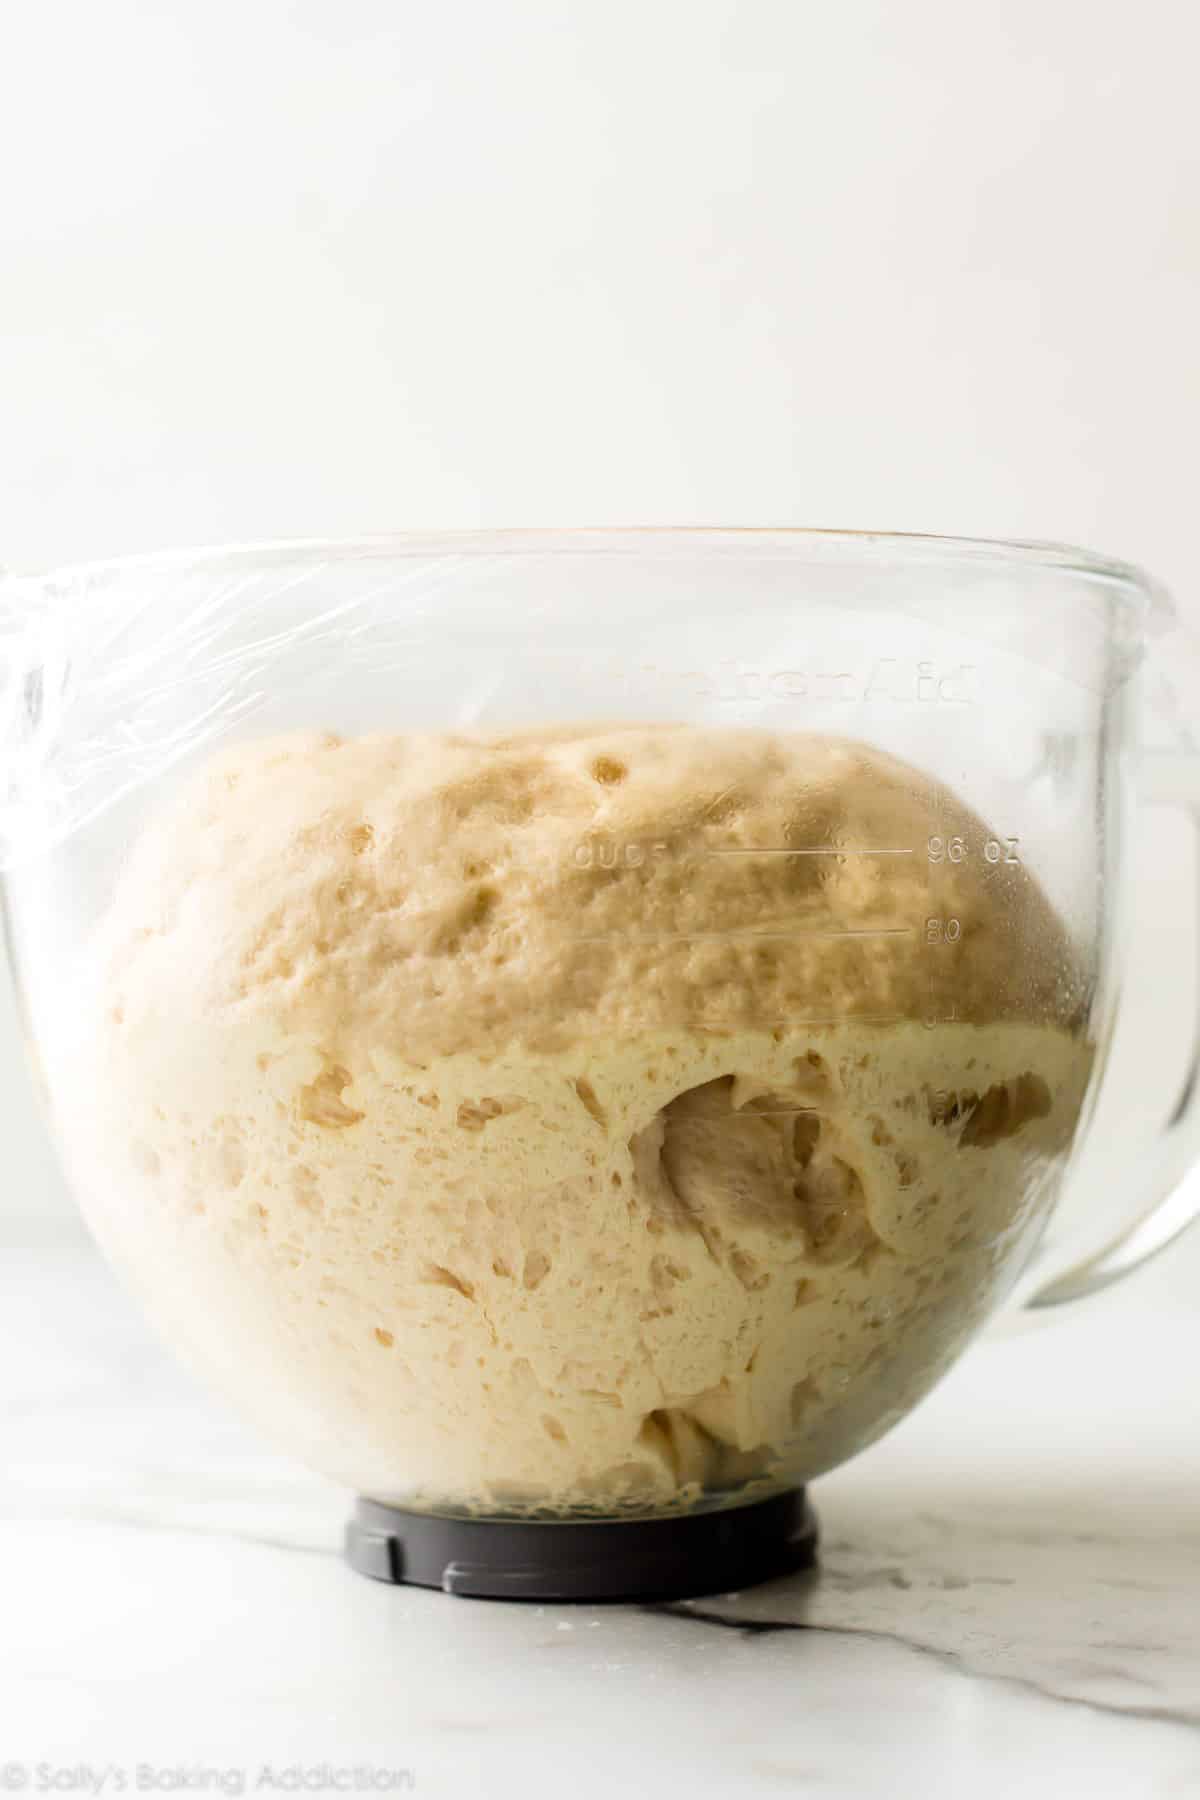
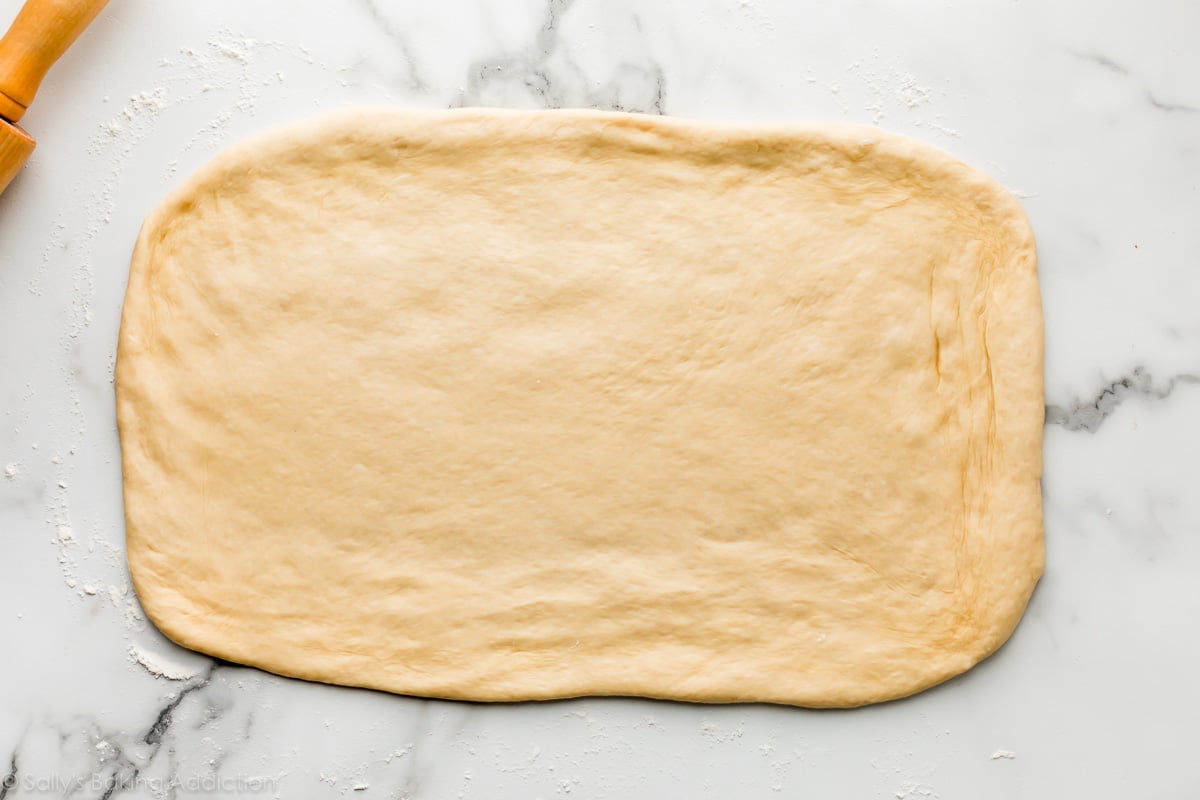
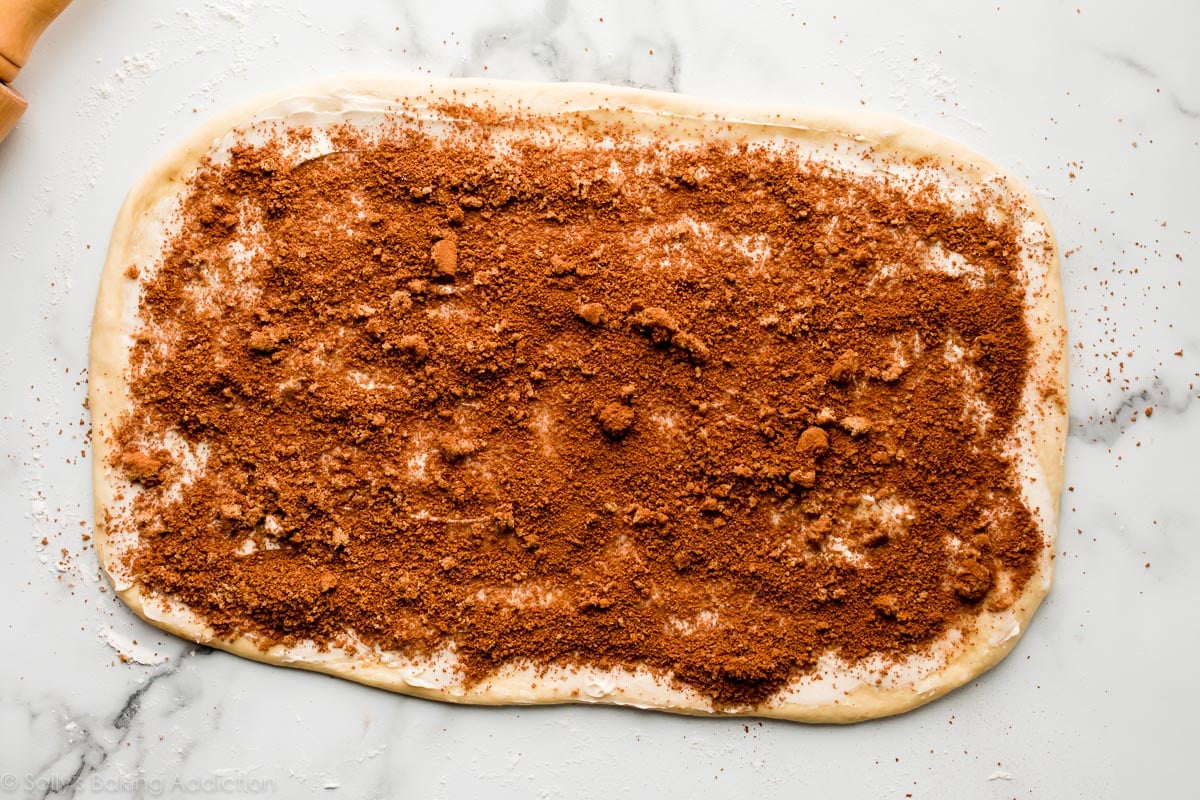
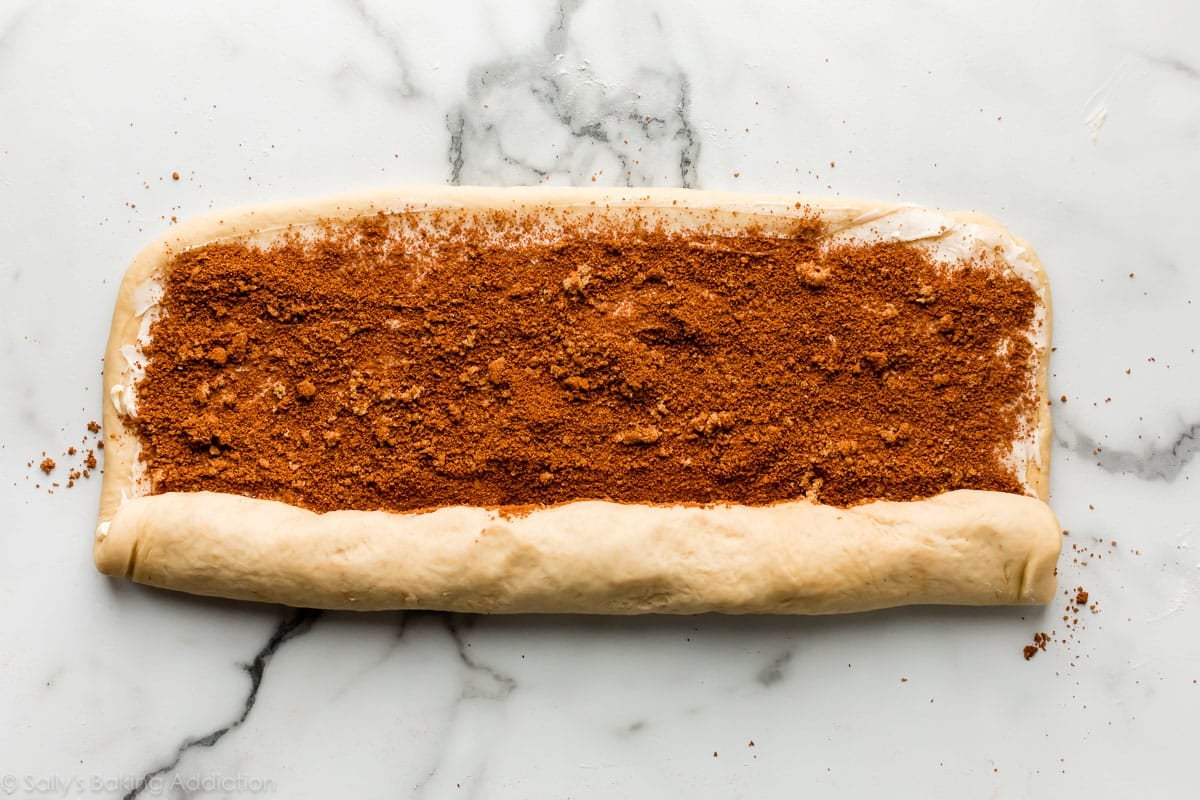
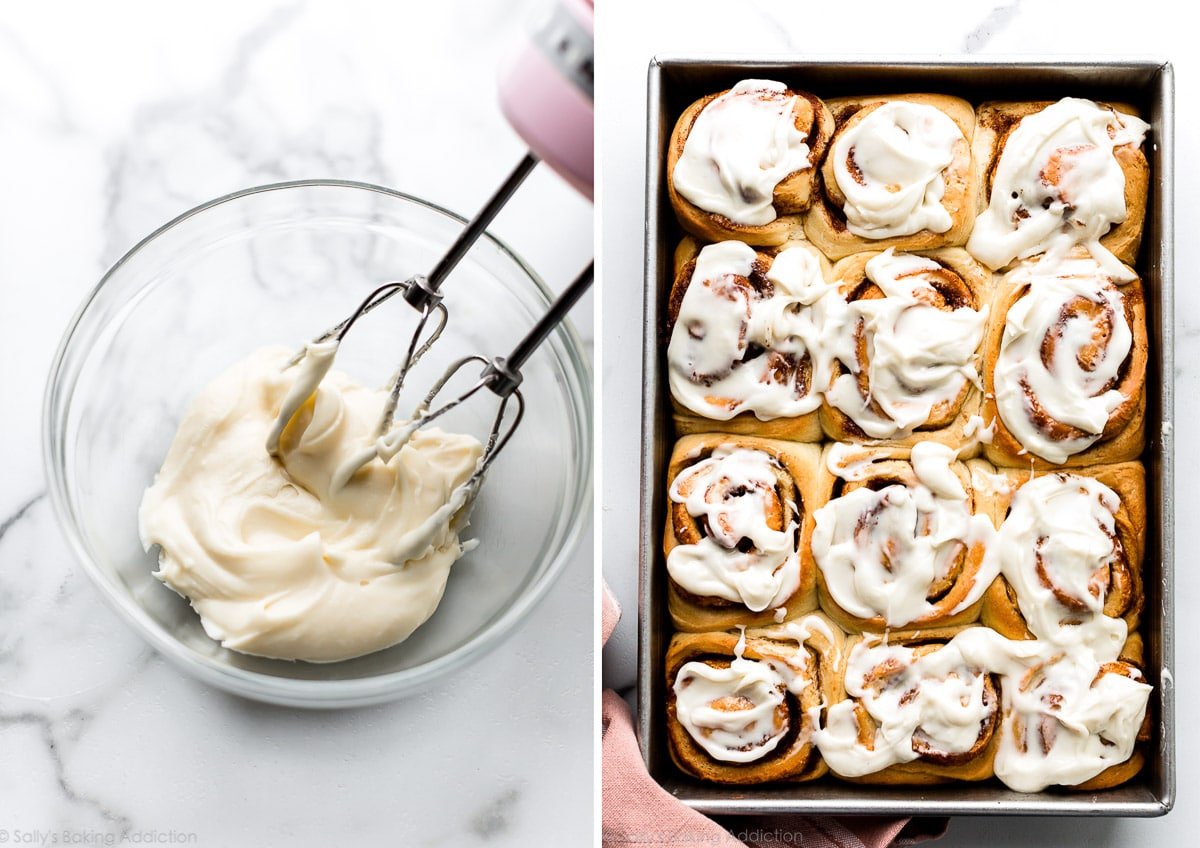
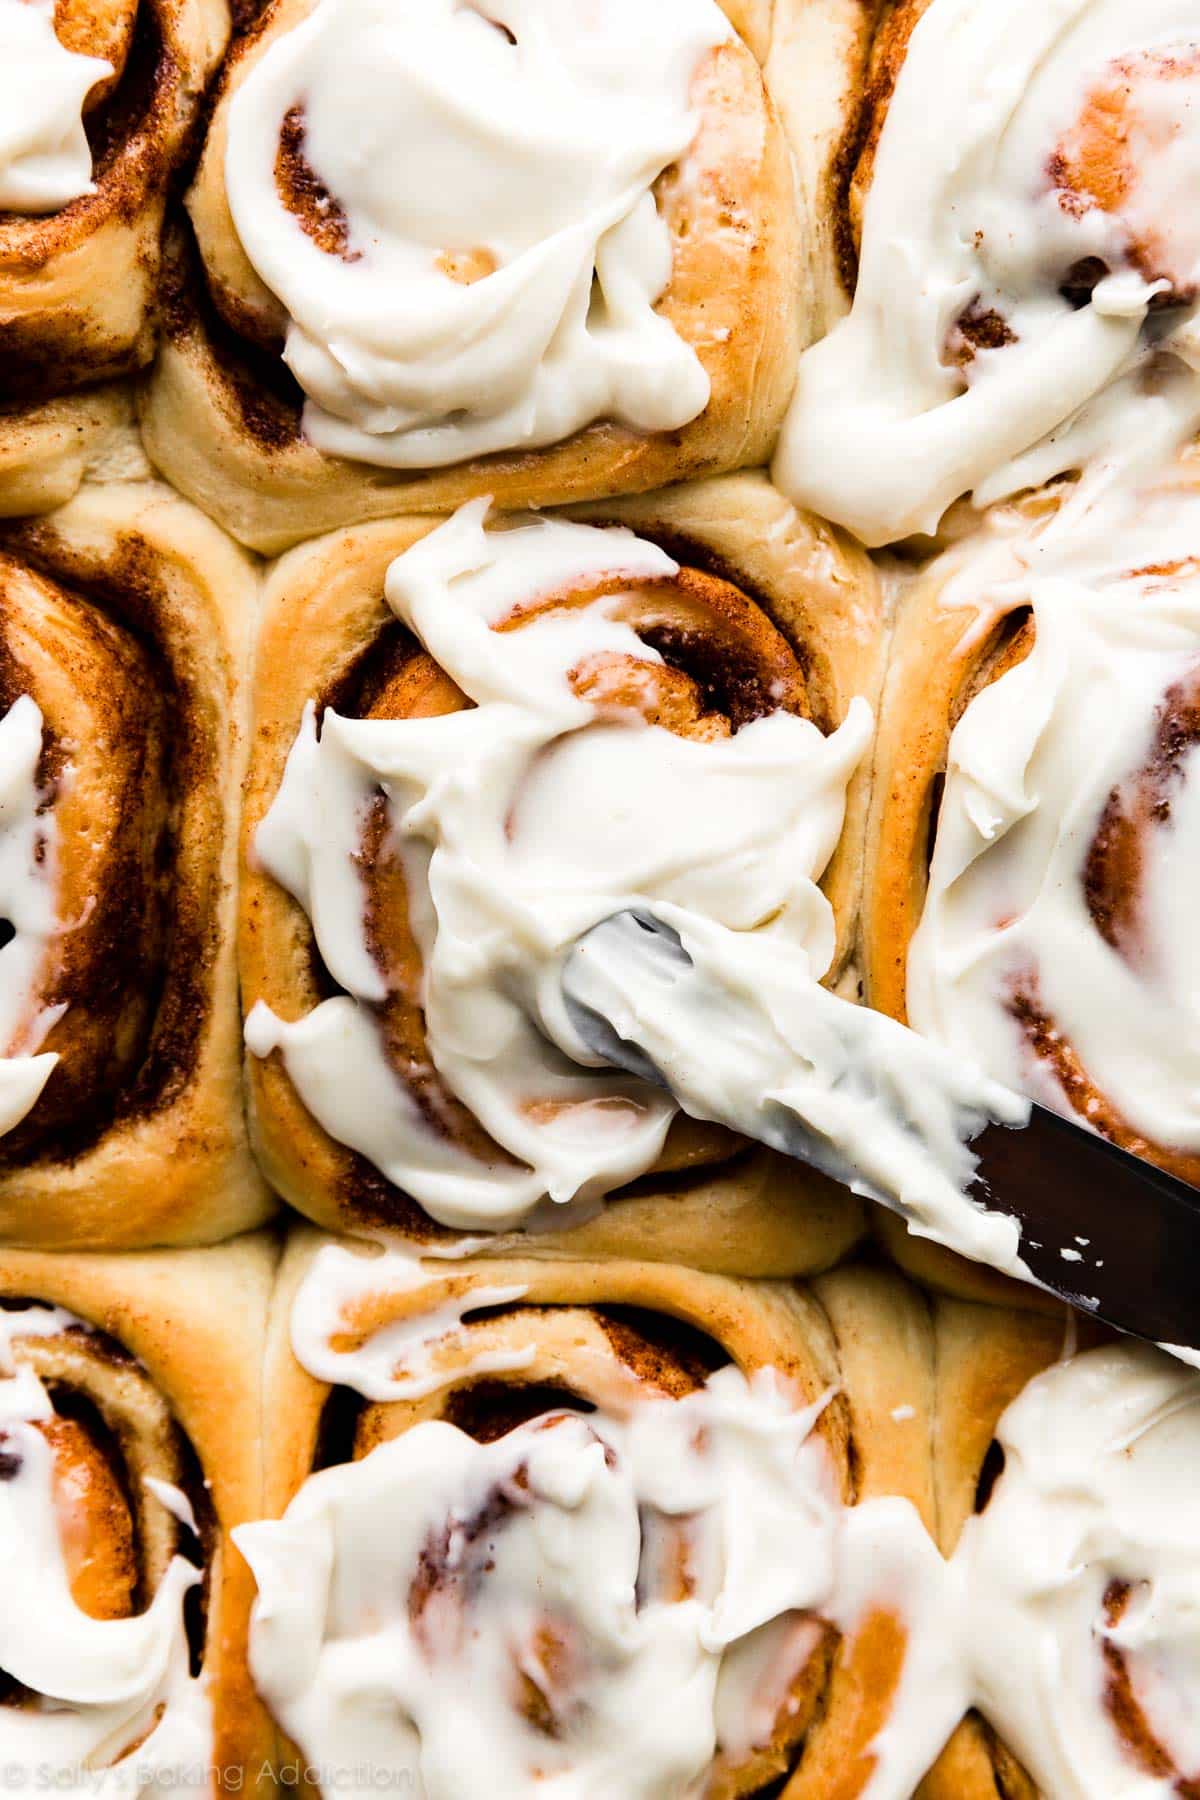
Here’s what you’re looking for after you let the warm milk, some of the sugar, and yeast sit for about 5-10 minutes. The top will be a little foamy: After the dough comes together, it will be a little soft and sticky—that’s normal. As explained in step 3 below, knead the dough on a floured counter or keep it in the mixer for kneading. If you’d like a visual of how to knead the dough by hand, you can watch the full video tutorial in my post on how to knead dough. What If I Don’t Have a Stand Mixer? If you do not own a mixer, you can mix the dough together with a large wooden spoon/silicone spatula. It will take a bit of arm muscle. A hand mixer works, but the sticky dough repeatedly gets stuck in the beaters. Mixing by hand with a wooden spoon or silicone spatula is a better choice. Let the dough rise until doubled in size: Punch the risen dough down and roll it out. Baker’s Tip: If the dough keeps shrinking as you roll it out, stop what you’re doing, cover it lightly, and let it rest for 10 minutes to relax the gluten. When you return to the dough, it should stretch out much easier. Spread softened butter on top, then sprinkle on a mixture of cinnamon and sugar (brown sugar or white granulated sugar). Roll it up: Use a very sharp knife to cut the roll into 12 rolls, each about 1.5 inches. Arrange in your greased baking pan, cover, then let the rolls rise until doubled in size and puffy, usually about 1 hour. The left photo is before rising and the right photo is after rising: Bake the rolls and then make the tangy cream cheese icing to smother on top. If cream cheese isn’t your favorite, you could top the rolls with vanilla icing, the brown sugar icing from these pumpkin donuts, maple icing from maple cinnamon rolls, or even the caramel icing from apple cinnamon rolls. Lots of options!
5 Success Tips
How to Freeze Homemade Cinnamon Rolls So They Still Taste Fresh
Let me share a tip I’ve learned after working with this dough for several years. You can prep the rolls and freeze them ahead of time so they still taste fresh.
Here’s how: Bake the rolls in step 9 for only about 10 minutes. Cool completely, then cover and freeze. To serve, take the rolls out of the freezer and place in the refrigerator overnight to thaw. Once thawed, finish baking them for about 15-20 minutes.
I often use this method when I gift cinnamon rolls to others—just copy/paste or write these freezing instructions down. This method is also helpful if you have company over, want to cut down on time, or are entertaining. I like to make these cinnamon rolls ahead when I’m hosting holidays like Easter. See more Easter brunch recipes, like savory quiche and frittata, to complete your menu.