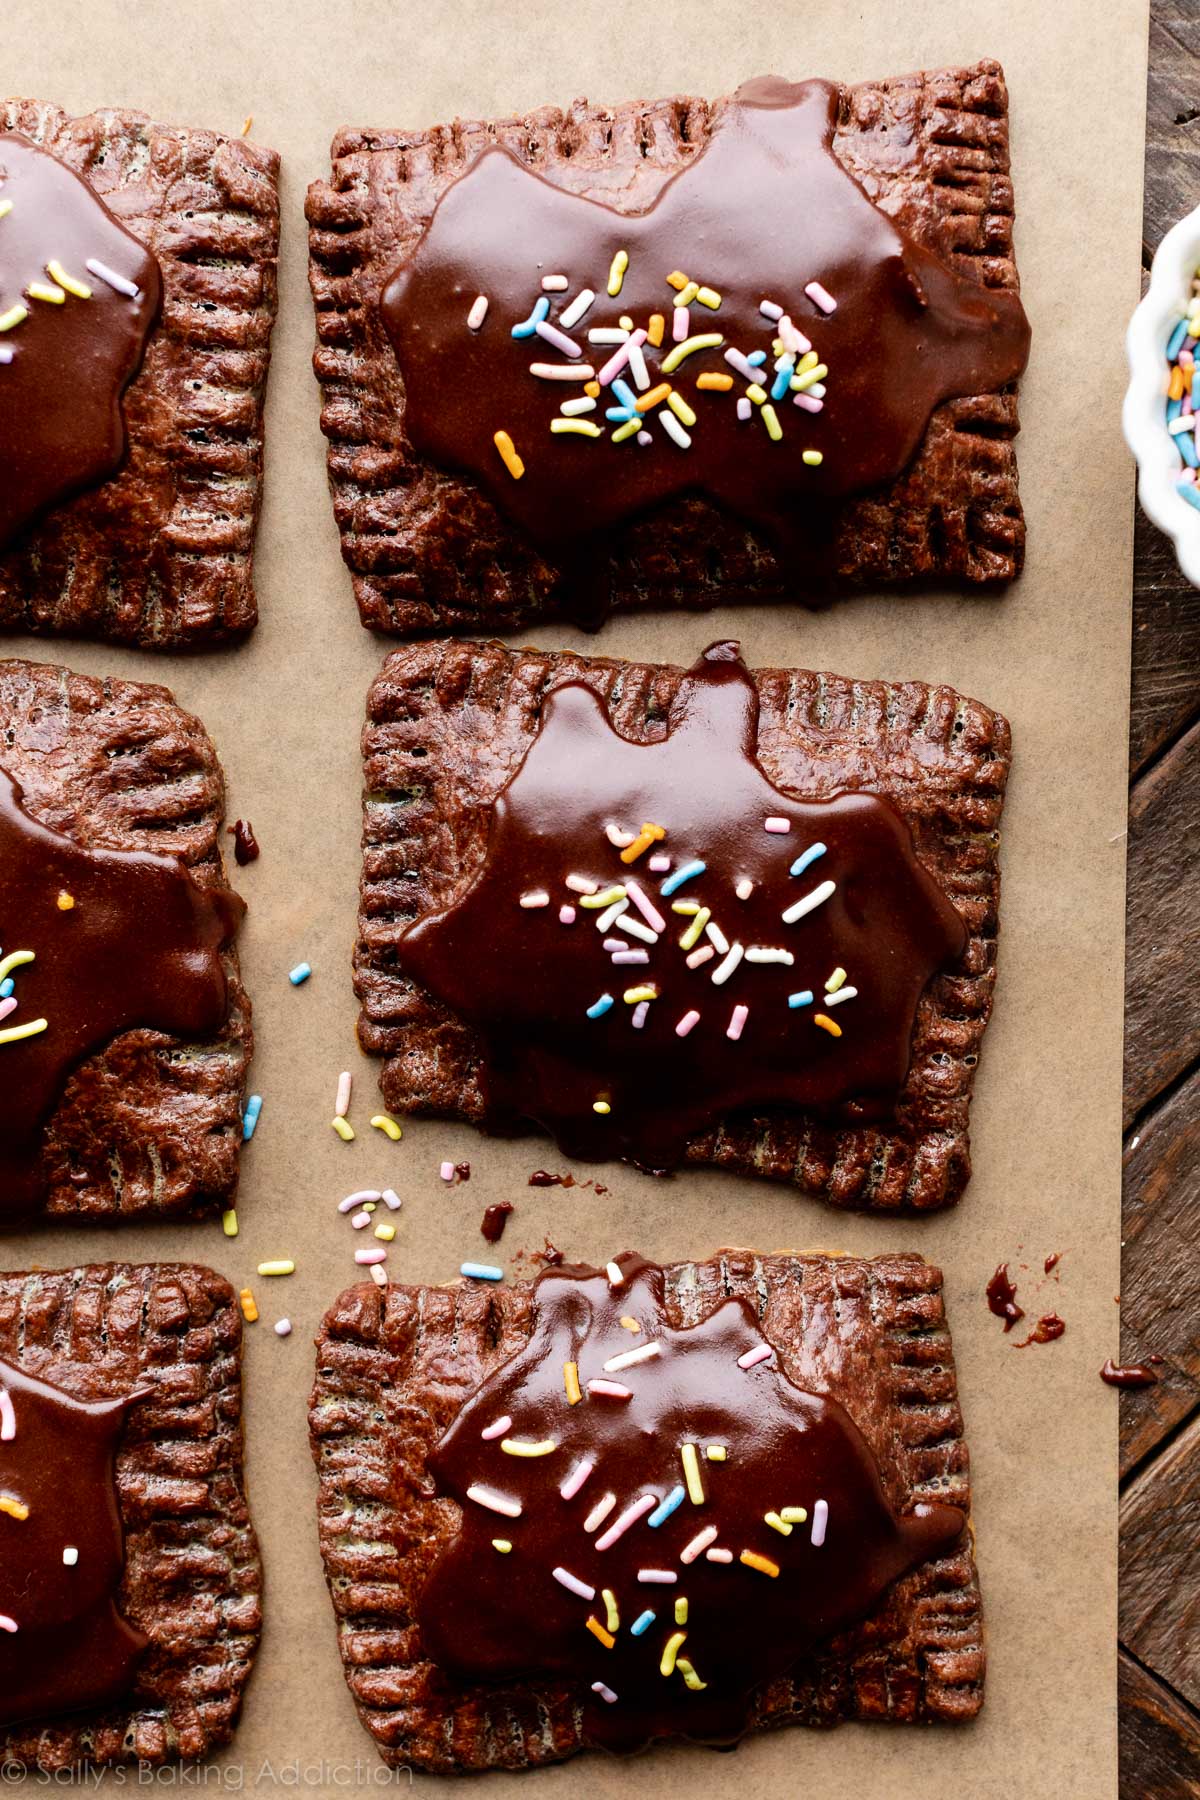
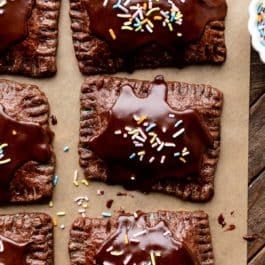
Pastry tart can refer to a handful of different baked goods like actual tarts made in a full size or mini tart pan, tarts made from puff pastry, or something like hand pies—which is what I consider today’s chocolate dessert recipe. They’re like store-bought pop tarts, but I don’t suggest putting them in the toaster to reheat. Whatever you call them, they’re perfect for anyone who LOVES chocolate.
These Fudge Chocolate Pastry Tarts Are:
Draped in chocolatey cocoa icing A homemade version of store-bought pop tarts Like these chocolate hand pies, but with a slightly different filling & topping Best after they have completely cooled An intermediate baking recipe and doable for most home bakers Definitely a dessert, but feel free to indulge for breakfast!
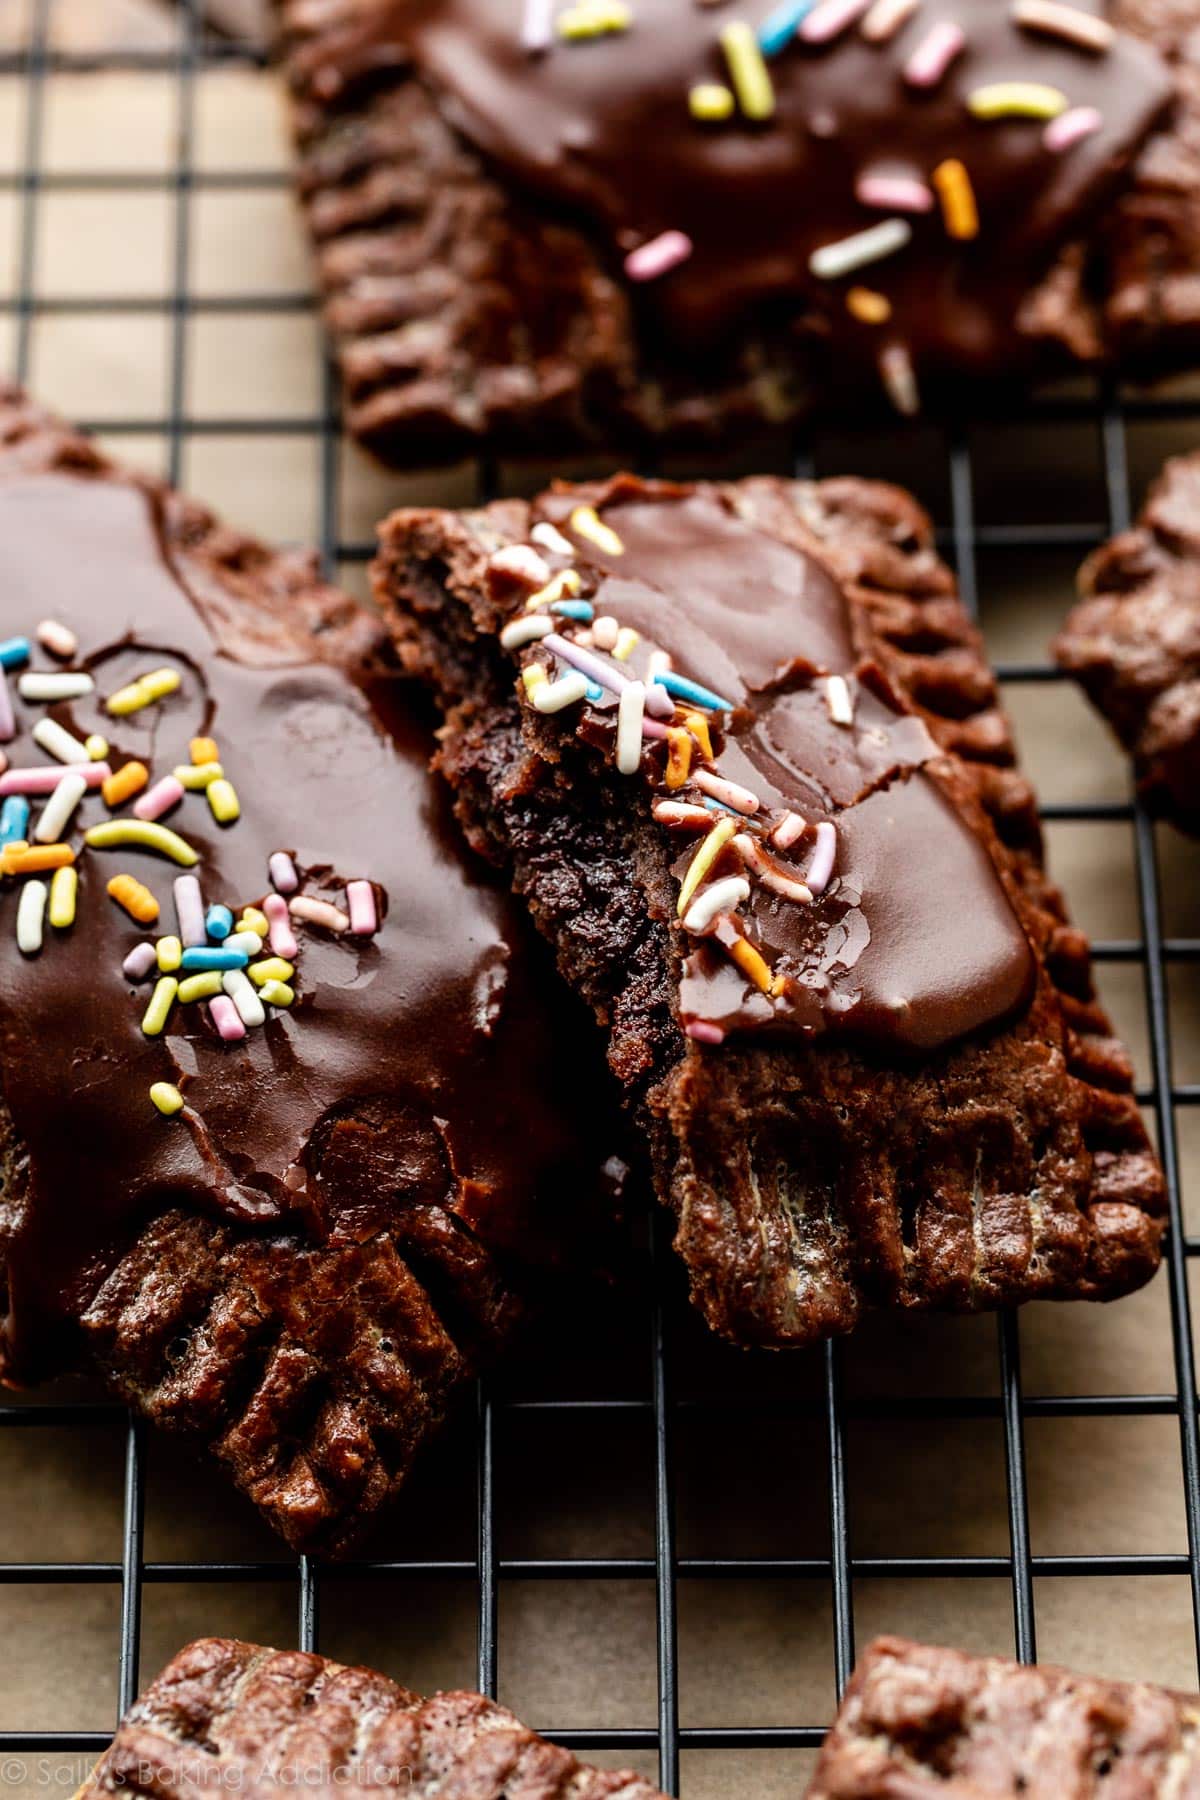
After completely cooling, the crust is deliciously crumbly, the filling has thickened, and the icing has set. If you have the self control, WAIT to eat one!
3 Parts to Homemade Chocolate Pop Tarts
There are 3 components to these homemade chocolate pop tarts and even though the ingredient list below looks long, the ingredients are mostly repeated in each part of the recipe. (For example, you use butter in all 3 components.) Here’s each part of the recipe: You need 11 ingredients total. Let me walk you through the steps so you have a better idea of the process. There is also a video tutorial in the recipe card below.
Chocolate Pie Dough
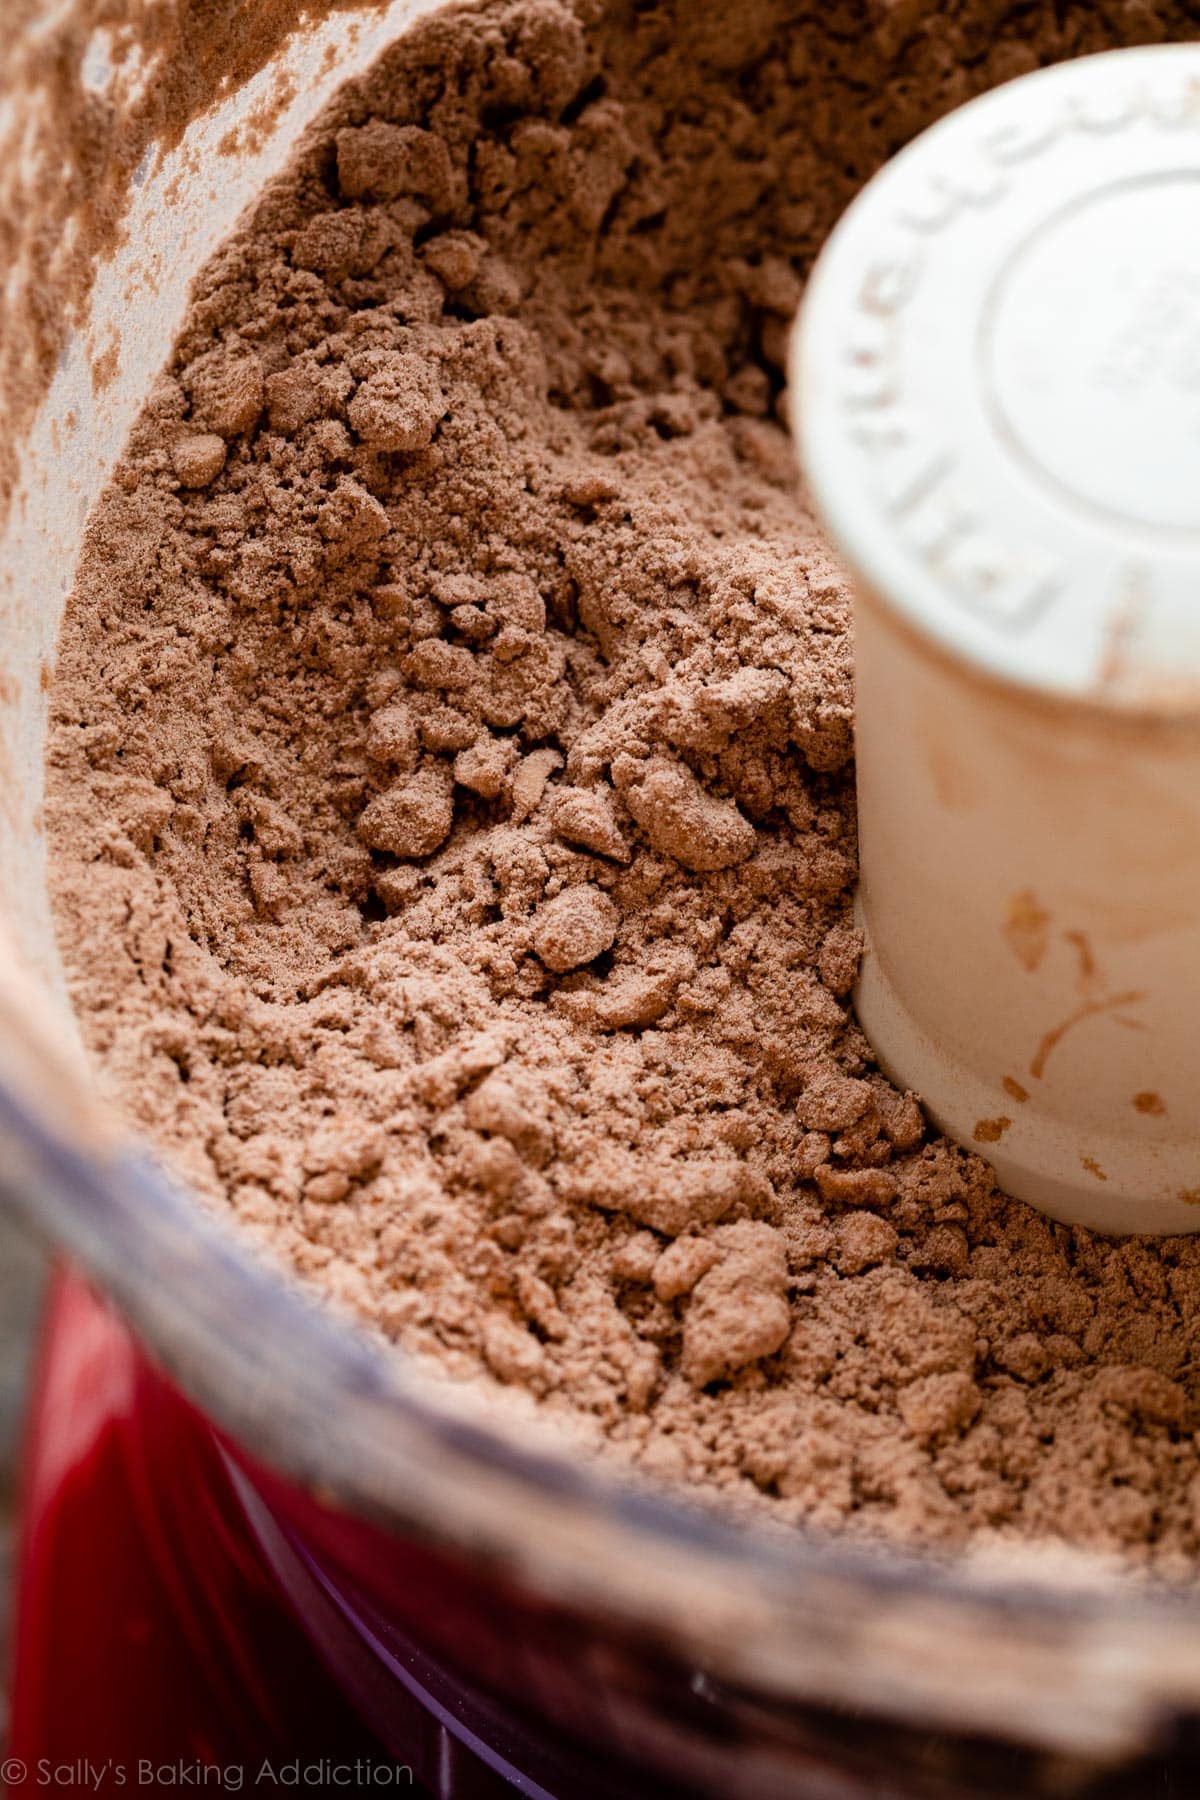
The envelope sealing in all of the fudge filling is chocolate pie crust and I recommend you make this first because the dough needs to refrigerate for at least 2 hours. This is an all butter chocolate pie dough, so you don’t need shortening which is a fat I like to combine with butter in my favorite pie crust recipe. I do have an all butter pie crust that I love as well and today’s recipe is basically a chocolate version of that. We’ll swap some flour for cocoa powder, reduce the salt, and use milk as the liquid. Since there’s no leavening, you can use either dutch-process or natural cocoa powder. (If you’re ever curious, here is the difference between dutch-process vs. natural cocoa powder.)
Tools for Pie Dough (affiliate links to products I use and love): A food processor makes the pie dough process easier and if you don’t have one, use a pastry cutter. A blender could work, but be VERY careful not to over-work this dough. You also need a rolling pin, sharp knife or pizza cutter for shaping the dough, and a pastry brush. Pie Dough Success Tip: For the most successful chocolate pie dough, make sure your butter and milk are VERY cold otherwise both will incorporate into the dough too quickly and you’ll be left with unworkable dough/paste.
Instead of chocolate dough, feel free to use my favorite regular pie crust or all butter pie crust.
Pie Dough Step Photos
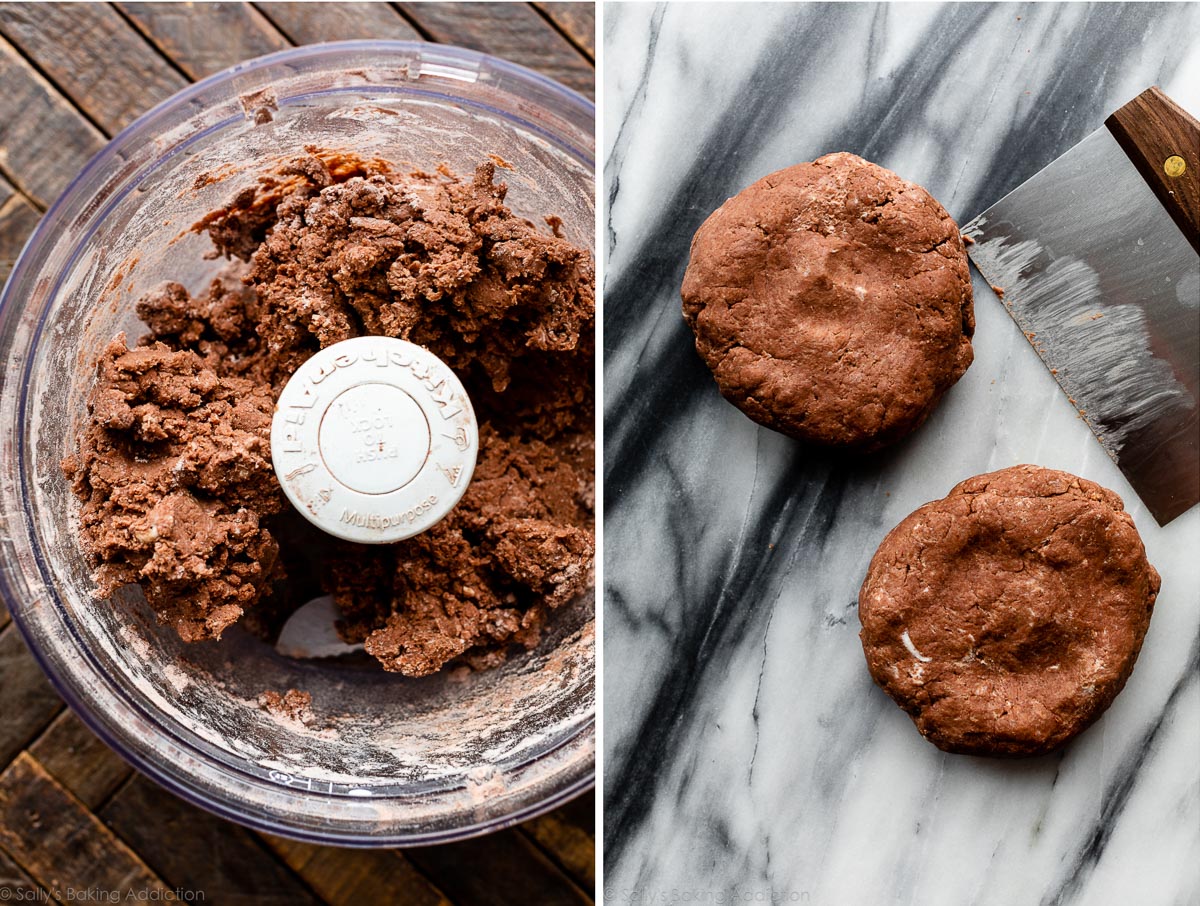
The full detailed recipe is below, but let me walk you through the step photos as they will be helpful especially when it comes to the dough. Using either a food processor or pastry cutter, pulse/cut your cold butter into a mixture of flour, cocoa powder, sugar, and salt. Just like regular pie dough, you want coarse butter crumbles coated with the dry ingredients:
Brownie Pie (blind bake as directed in that recipe) French Silk Pie (blind bake as directed) Nutella Tart (bake crust as directed in that recipe) Snickers Caramel Tart (bake crust as directed) Pecan Pie
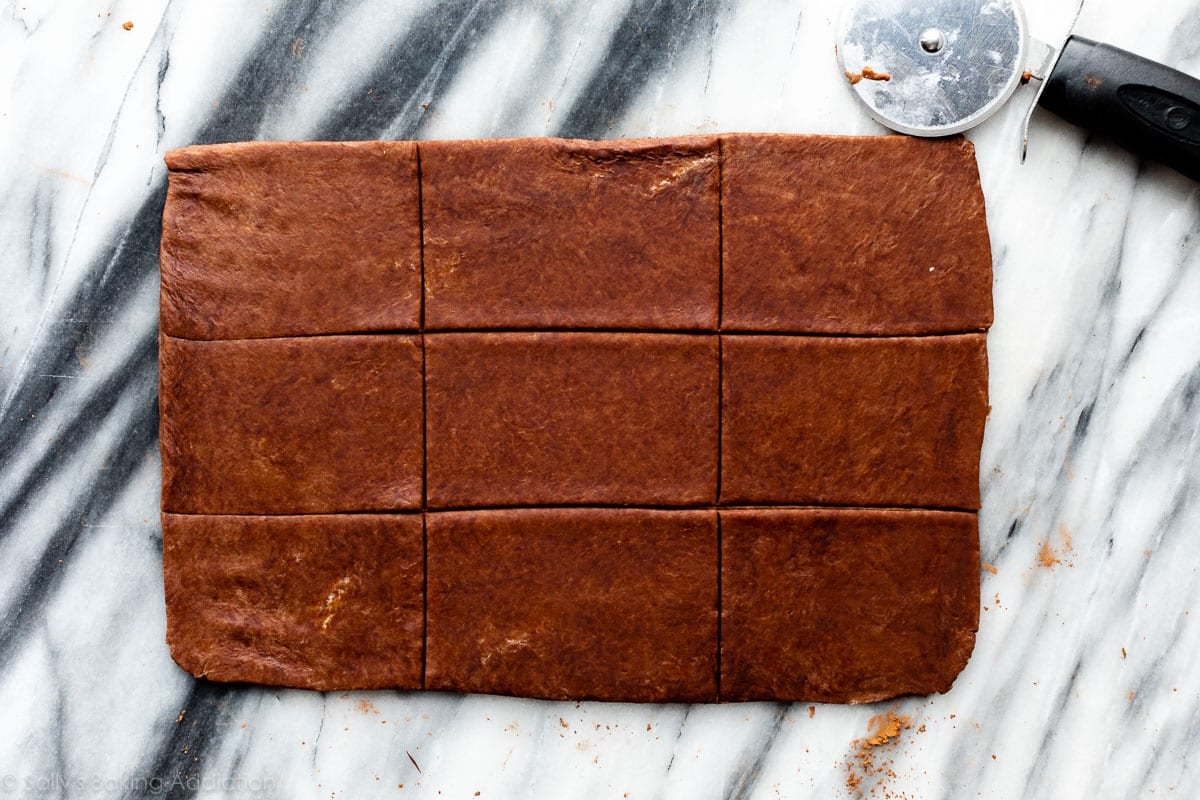
Slowly add the cold milk just until the dough clumps and comes together. Divide dough in half, flatten into discs, and then refrigerate both for at least 2 hours: Roll out each chilled disc into a 9×12-inch rectangle and use cocoa powder instead of flour to prevent the dough from sticking. Take your time with this because the dough is quite stiff. Then cut each rectangle into 9 3×4-inch rectangles. You’ll have 18 rectangles, which makes 9 pop tarts. Here is just 1 so you have an idea what it looks like: The shaped dough is ready to be filled and assembled. As instructed in the recipe below, have an egg wash handy because that’s the “glue” that adheres the top and bottom doughs together.
Fudge Filling
In my regular chocolate hands pies, we use chocolate ganache as the filling. In today’s recipe, we’re making a fudge filling that when baked and cooled—tastes like homemade brownies. My goal for the filling was to make a thicker, yet less rich chocolate ganache. It worked very well!
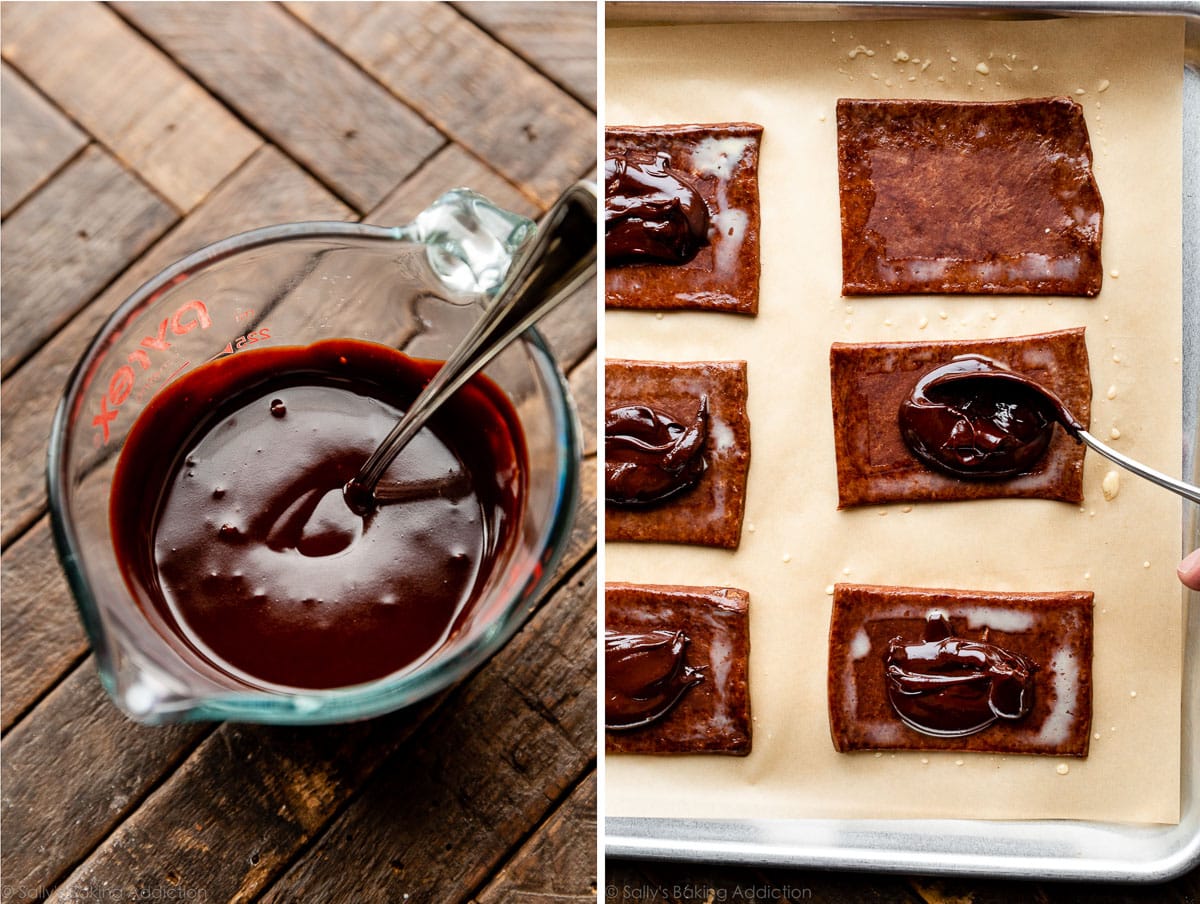
Make the fudge filling immediately after you prepare the pie dough because it needs to cool and thicken before you assemble the pop tarts. You need chocolate, milk, sugar, butter, and vanilla extract. Most of the ingredients come together on the stove.
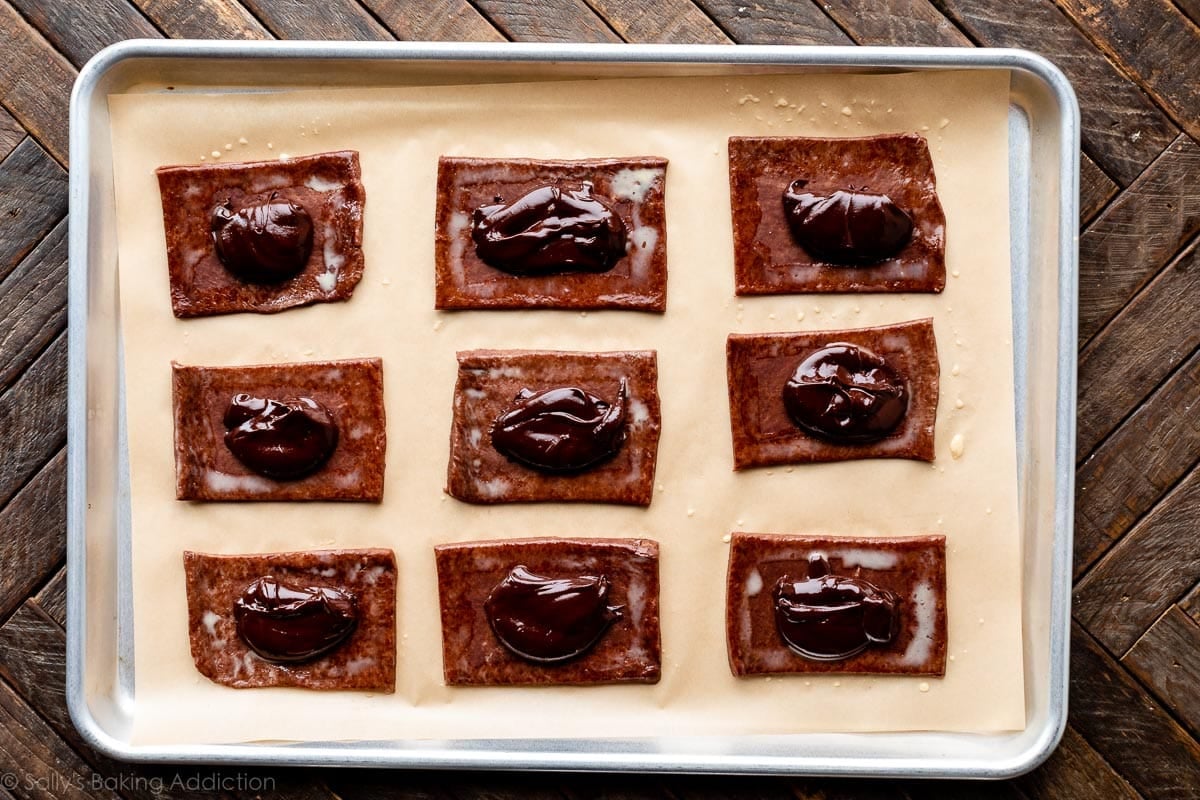
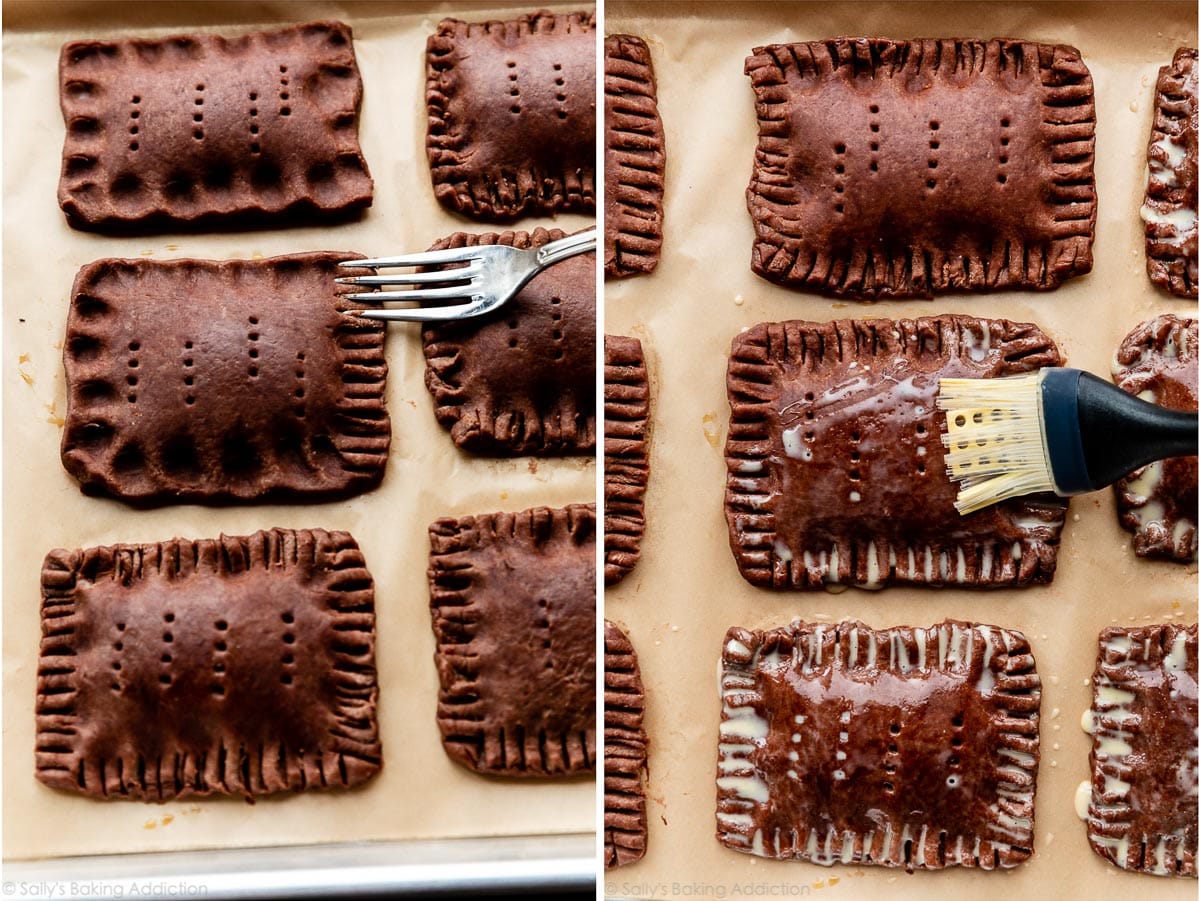
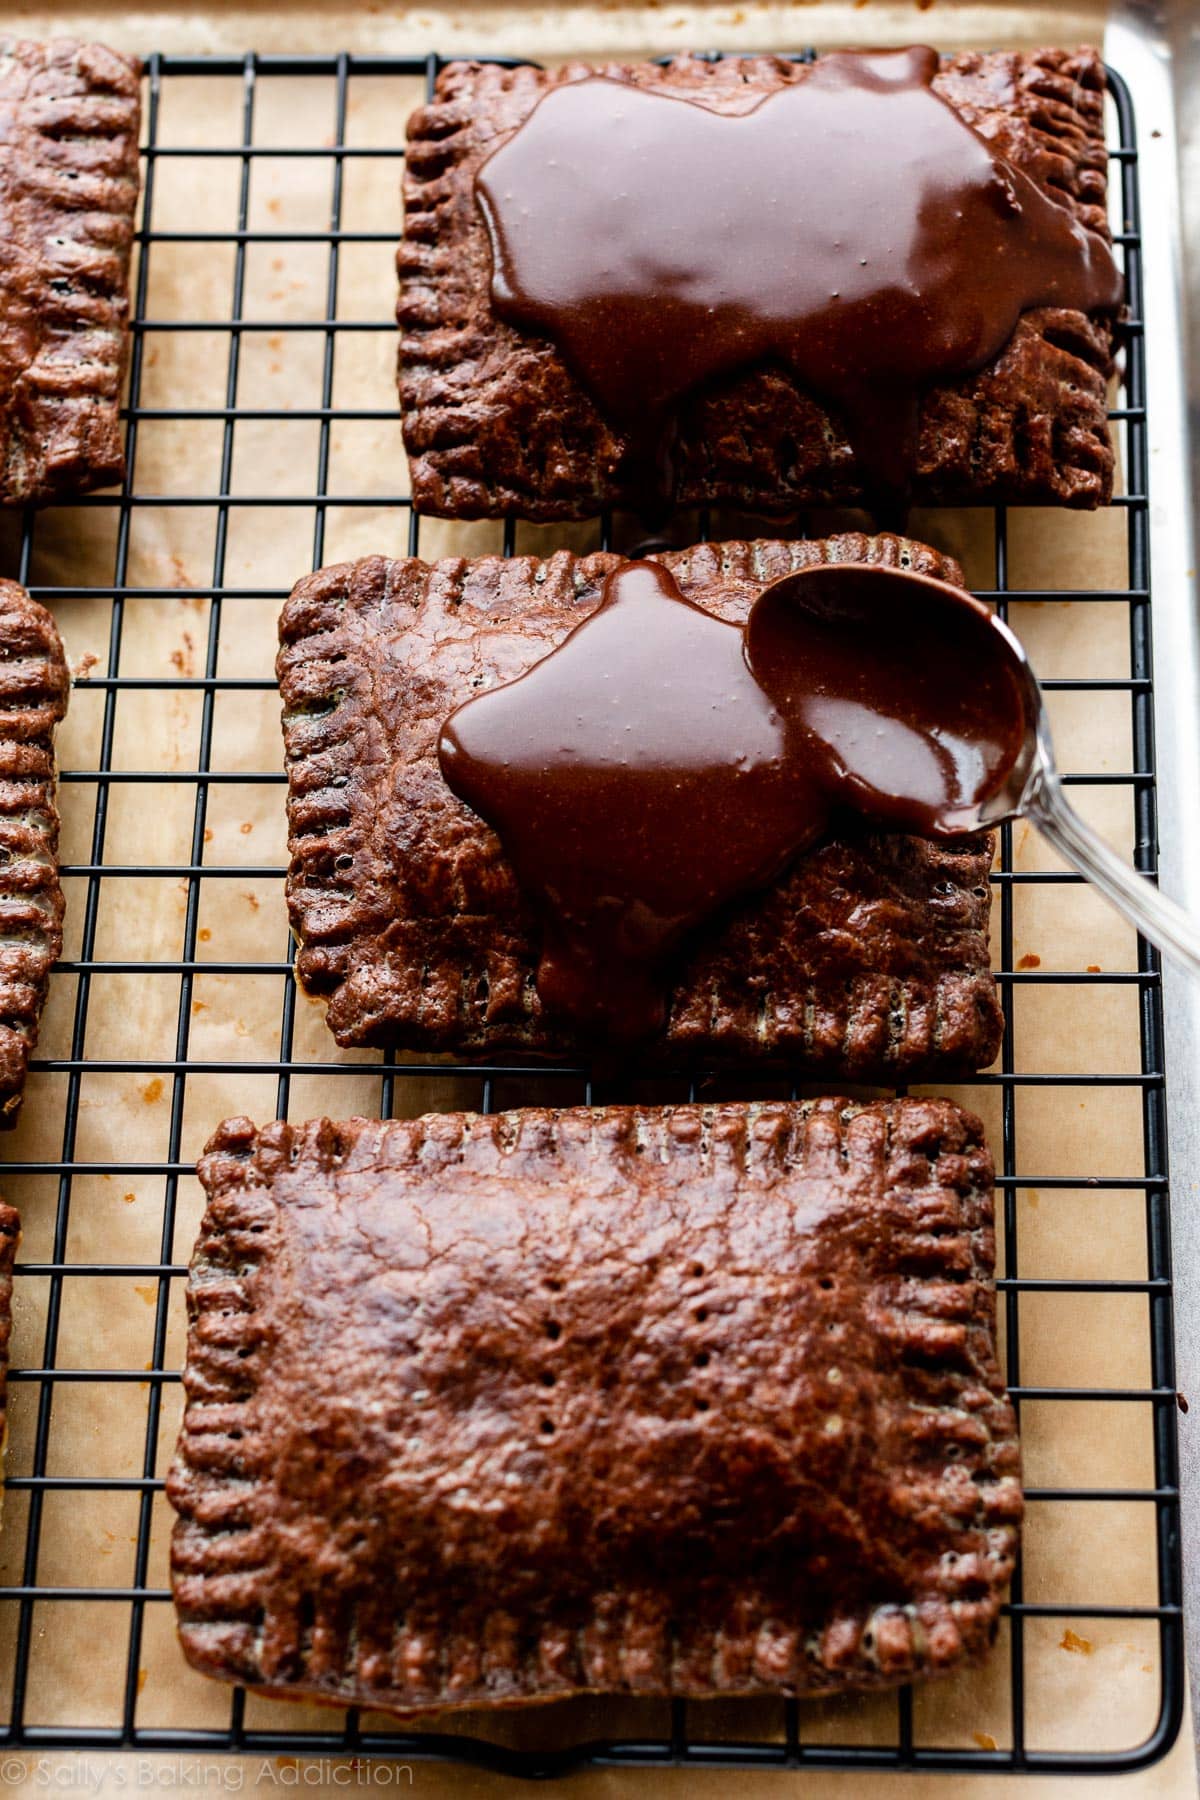
You end up with about 3/4 cup (180ml) fudge filling so each pop tart gets a heaping Tablespoon. Don’t forget the egg wash border around the bottoms. After spooning the fudge filling on the rectangles, lay the other set of pie dough rectangles on top of each and press your finger around the edges to slightly seal. Poke holes in the top pie crust with a fork or toothpick, which allows steam to escape. To finish assembling, crimp the edges with a fork (just like when we crimp pie crust) to ensure no filling spills out (if it does, it’s not a big deal). Brush with egg wash which gives the baked tarts their glistening sheen. As the chocolate pastry pop tarts bake, make the icing. You’re almost done!
Cocoa Icing That Sets
After the chocolate pastry tarts bake and slightly cool, spoon chocolate icing on top. When testing this recipe, I often went back and forth about the icing. Did I want a chocolate version of royal icing or a simple drizzle of melted chocolate? I ultimately decided on a sweet cocoa icing that—thanks to the butter—eventually thickens and sets. You need melted butter, hot water, confectioners’ sugar, cocoa powder, and vanilla extract. You can use milk instead of water, but I find that version doesn’t set as nicely. Feel free to skip the icing if desired.
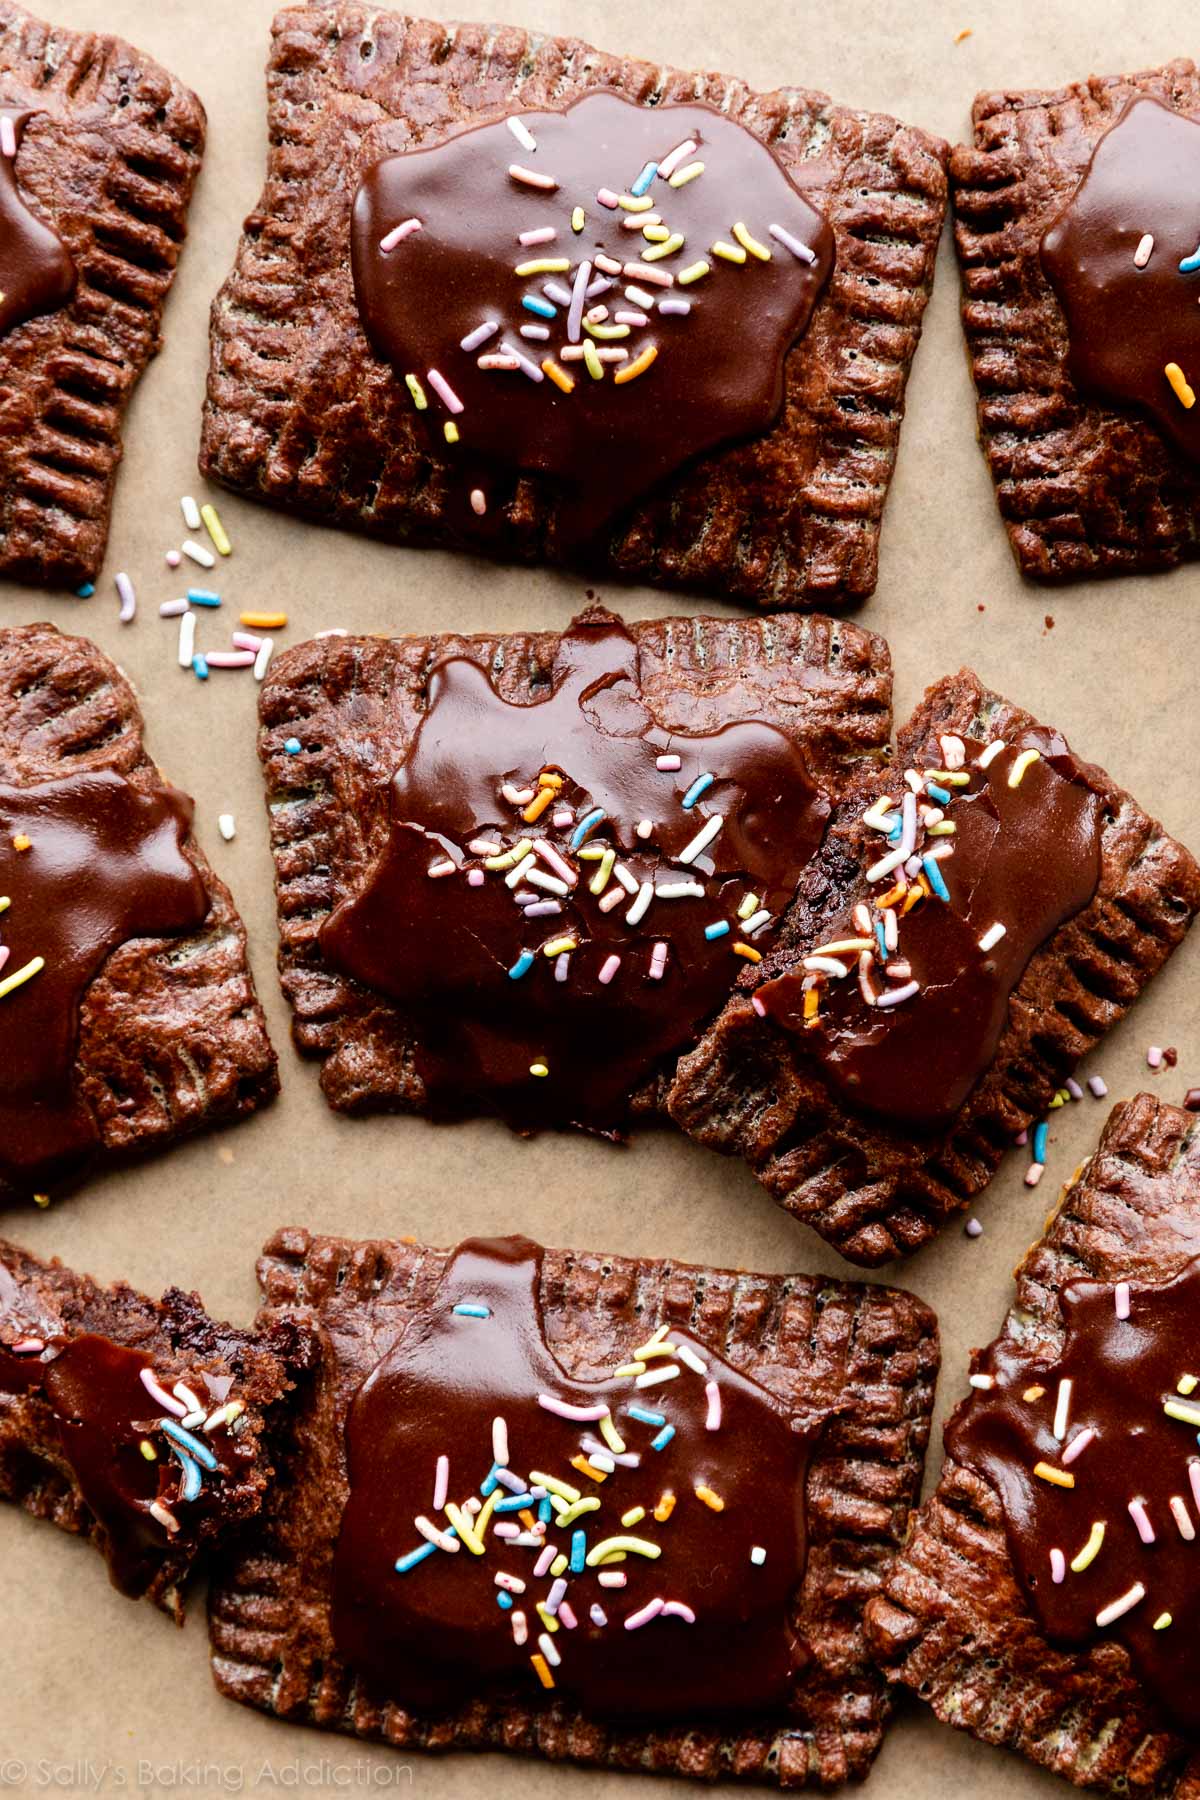
This would be a lovely icing to use on chocolate sugar cookies, but I don’t recommend using a piping tip because it’s quite drippy. You could use it for glazed doughnuts, too!
Sprinkles are the finishing touch, but you can skip them if desired. These pastry tarts are a homemade version of a fun childhood favorite and I hope you enjoy the process. (And end result!!!) For more takes on classic childhood treats, try my rice krispie treats, cream-filled chocolate cupcakes, mini animal cracker cookies, and oatmeal creme pies.
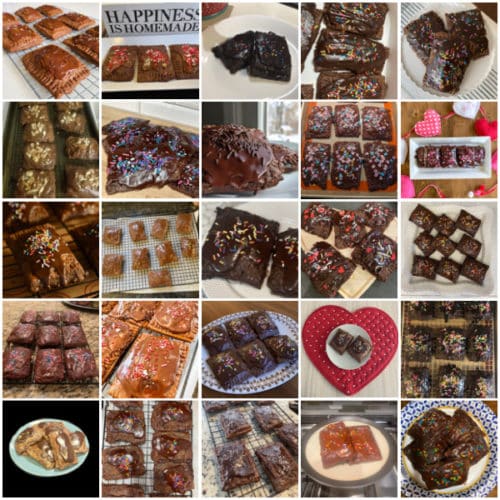
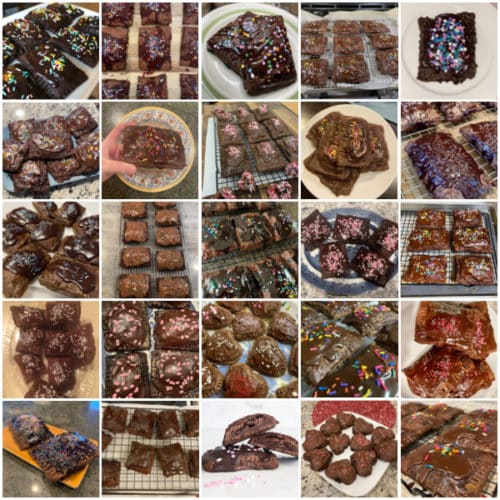
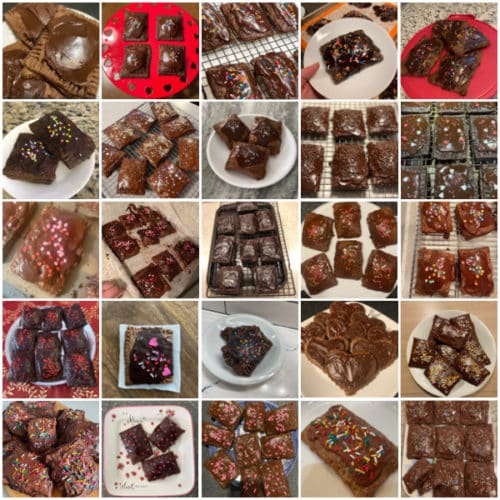
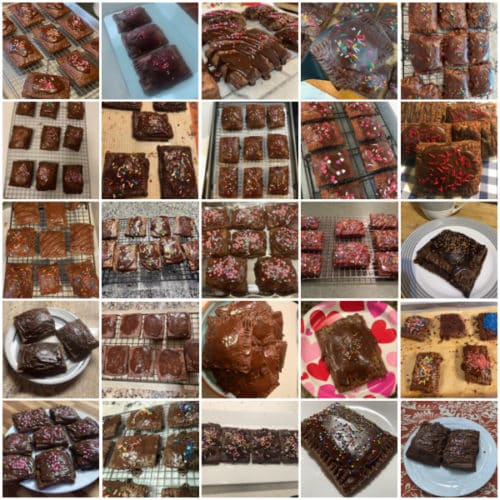
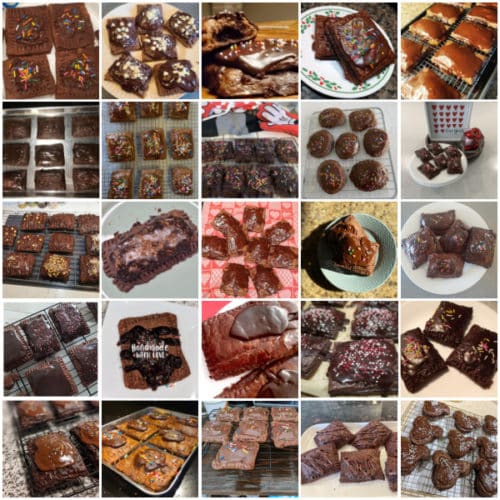
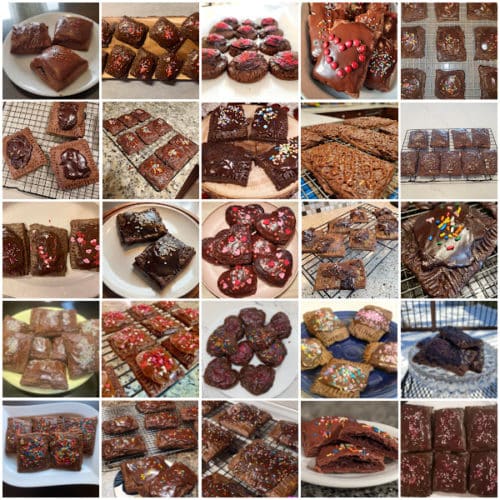
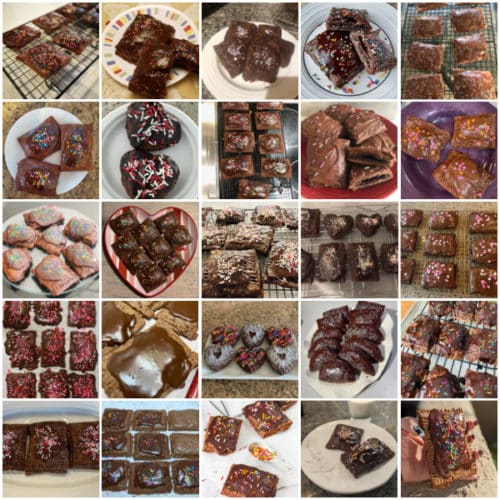
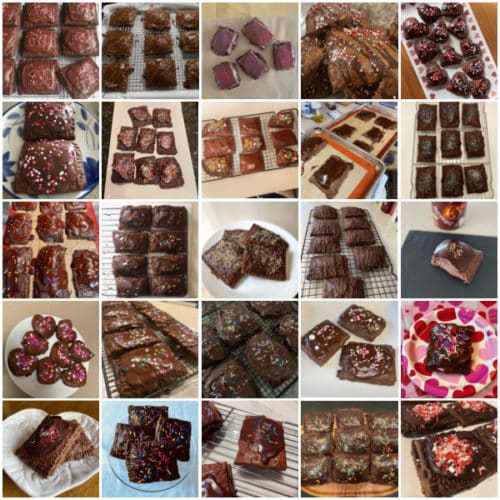
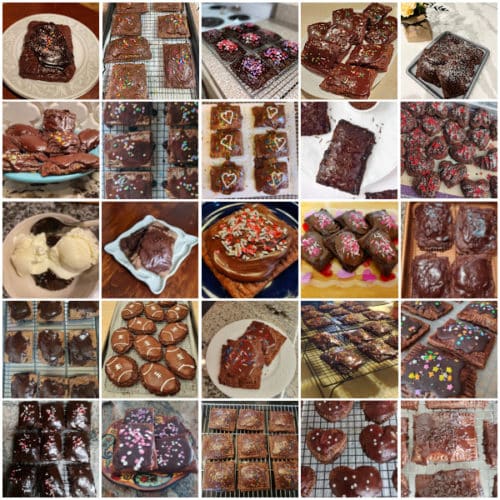
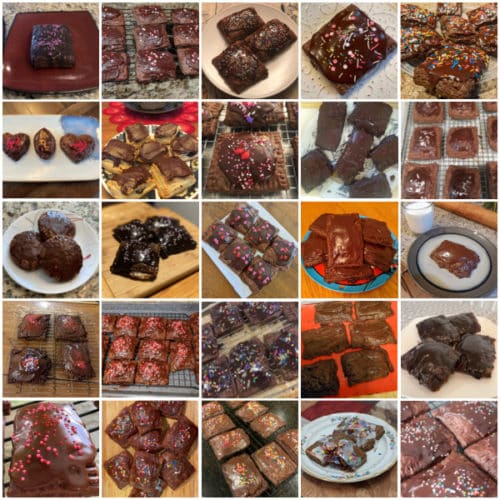
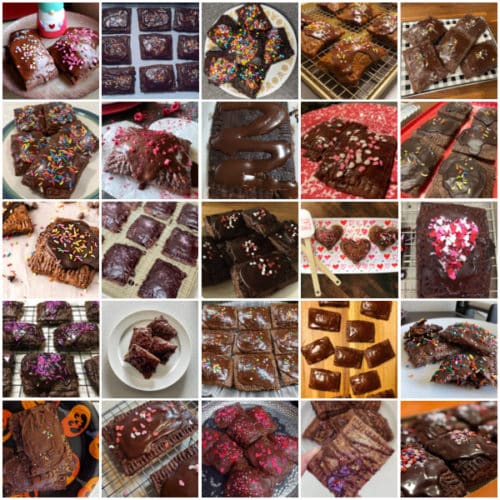
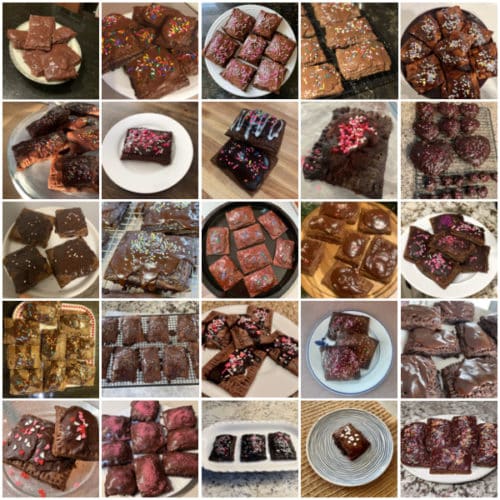
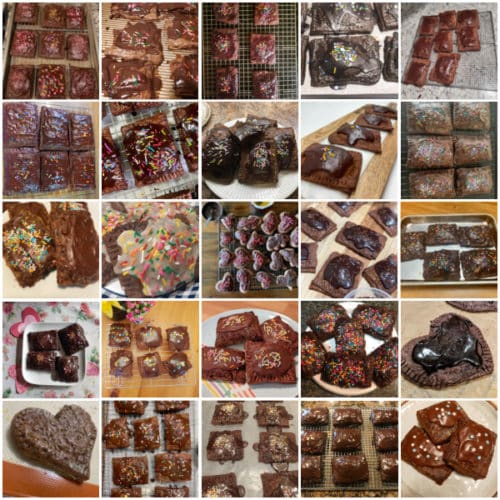
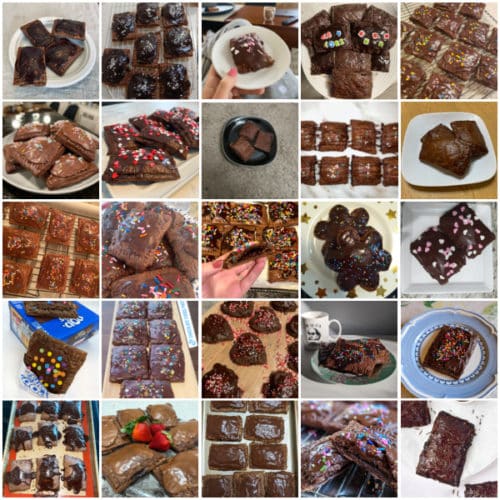
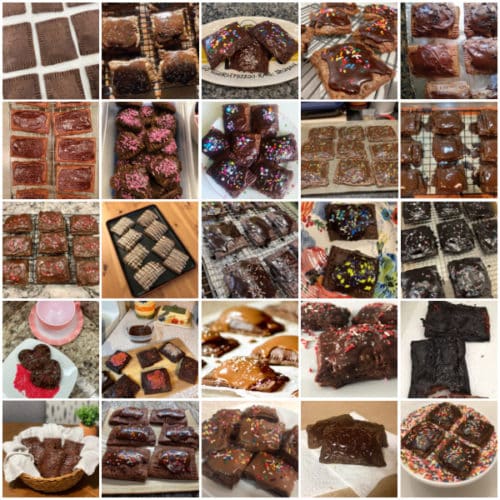
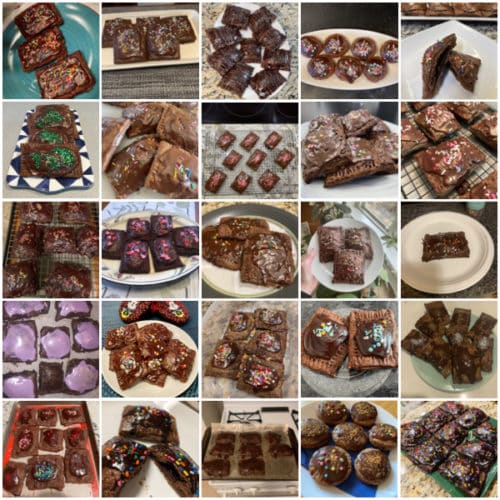
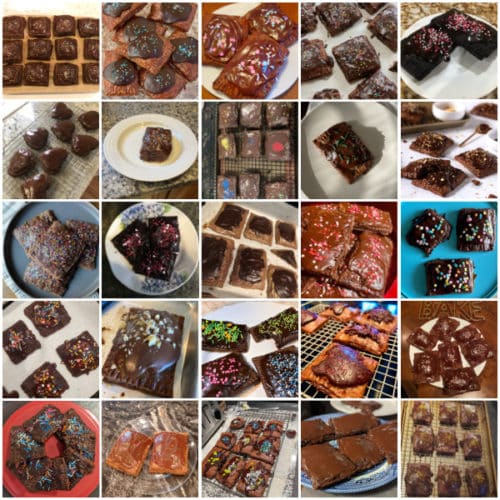
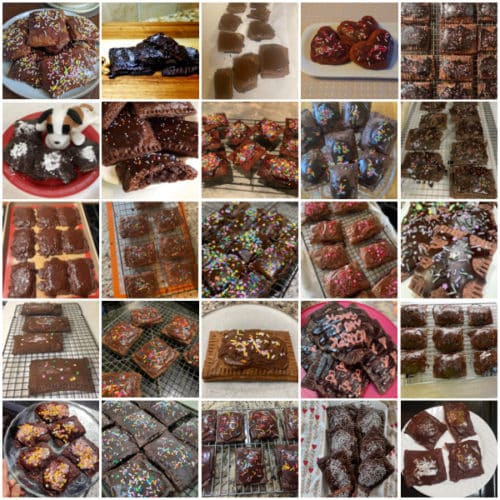
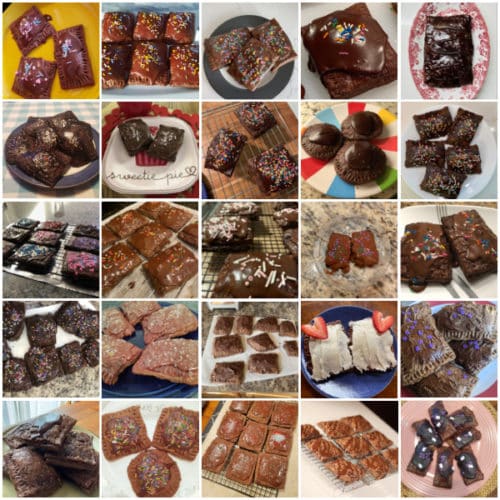
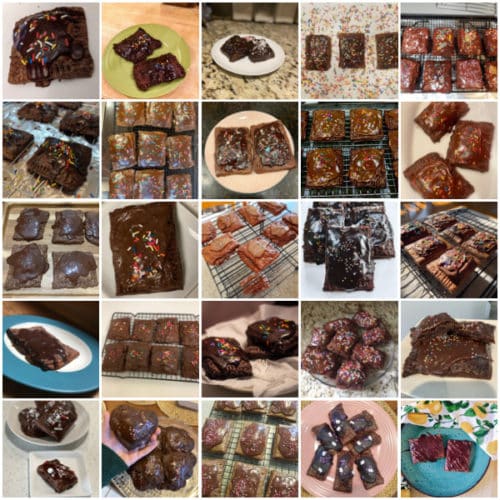
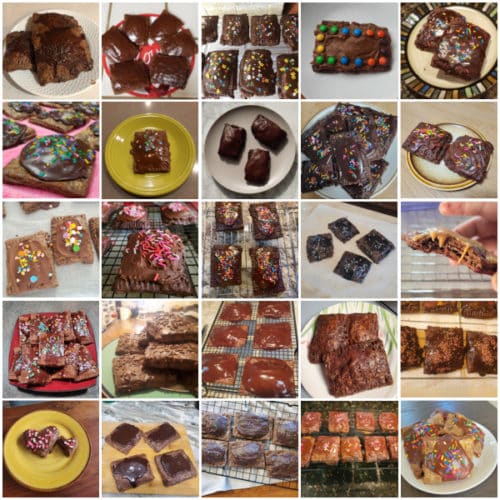
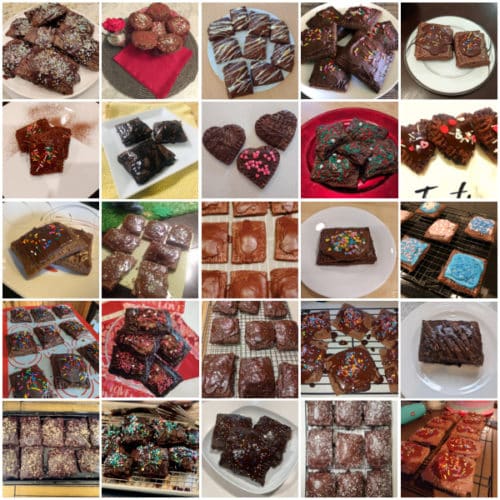
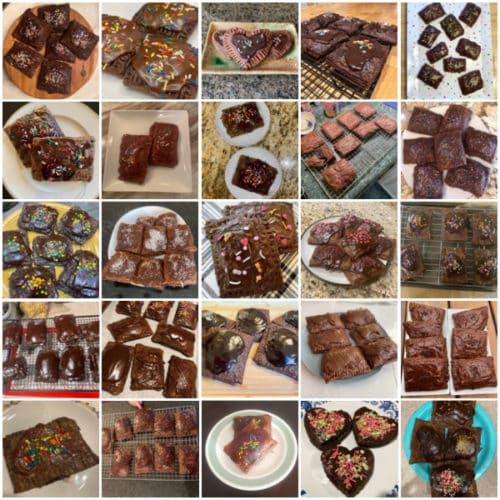
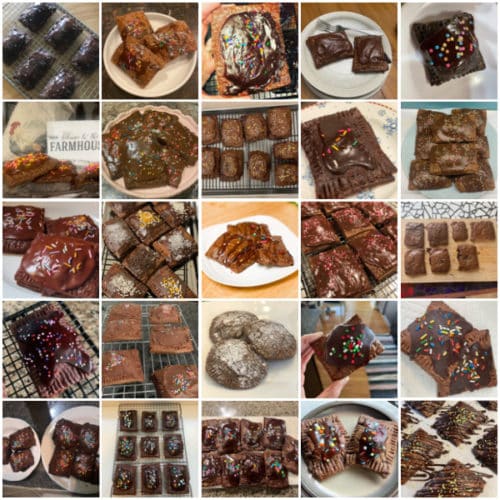
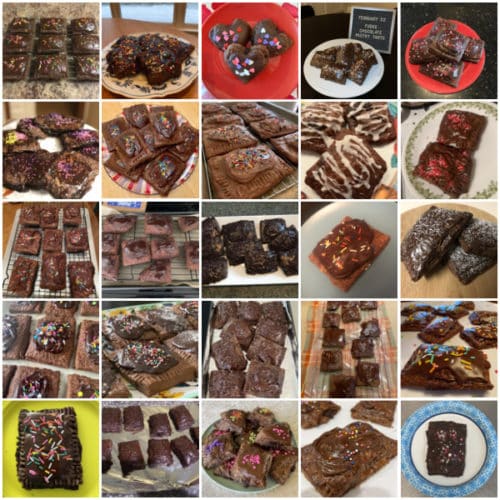
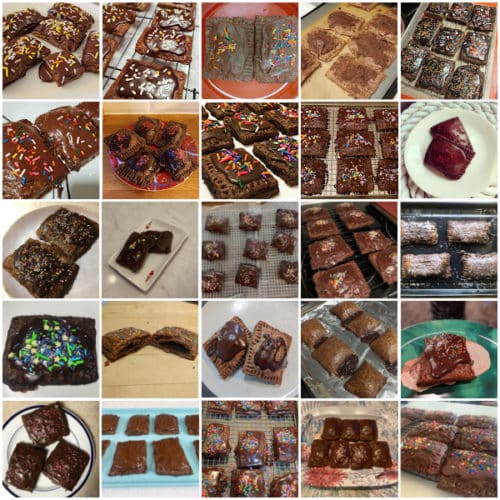
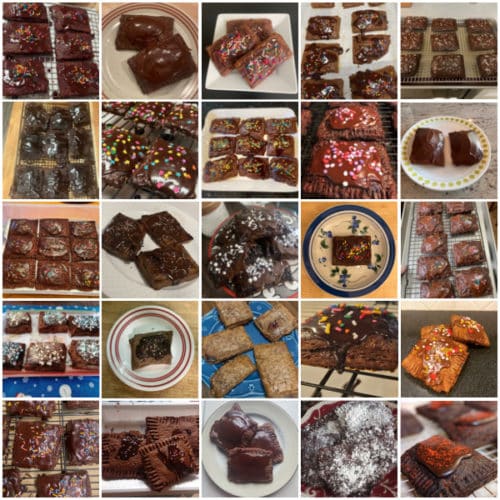
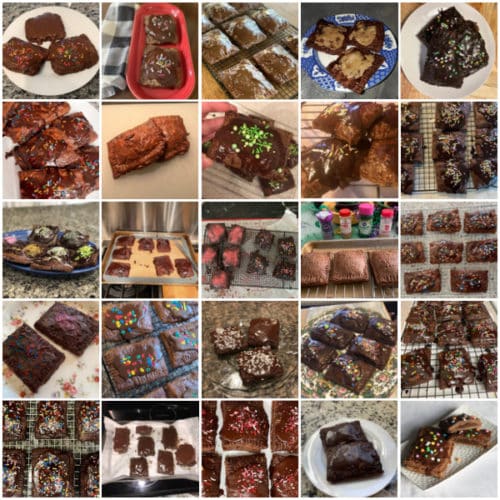
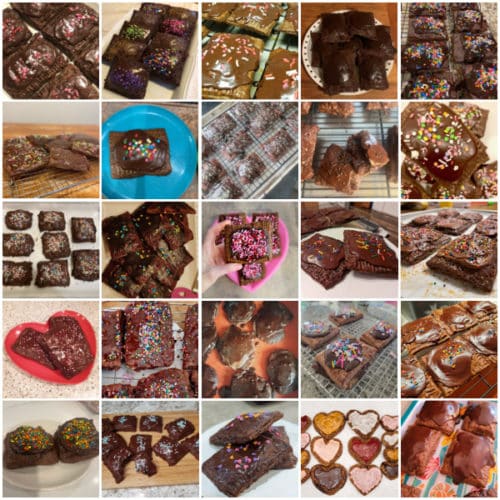
See Your Chocolate Pop Tarts!
Many readers tried this recipe as part of a baking challenge! Feel free to email or share your recipe photos with us on social media. 🙂