I originally published this recipe in 2016 and have since added new photos, a video tutorial, and have fine-tuned the process and recipe. See recipe notes for exact changes. This is a completely from-scratch banana cream pie recipe. You won’t find any box pudding mixes or artificial flavors hiding inside. Get ready for a blissful banana experience where you can truly taste the homemade difference. And it will graciously satisfy your heart, soul… and your tastebuds.
Here’s Why You Will LOVE This Banana Cream Pie
100% from scratch dessert recipe, and you can taste the difference. Creamy and undeniably rich. If custard is cooked properly, it’s sturdy and smooth. Flaky pie crust shell, or try a graham cracker crust. An optional sprinkle of cinnamon adds a special and flavorful touch. Perfect make-ahead dessert.
What Is Banana Cream Pie?
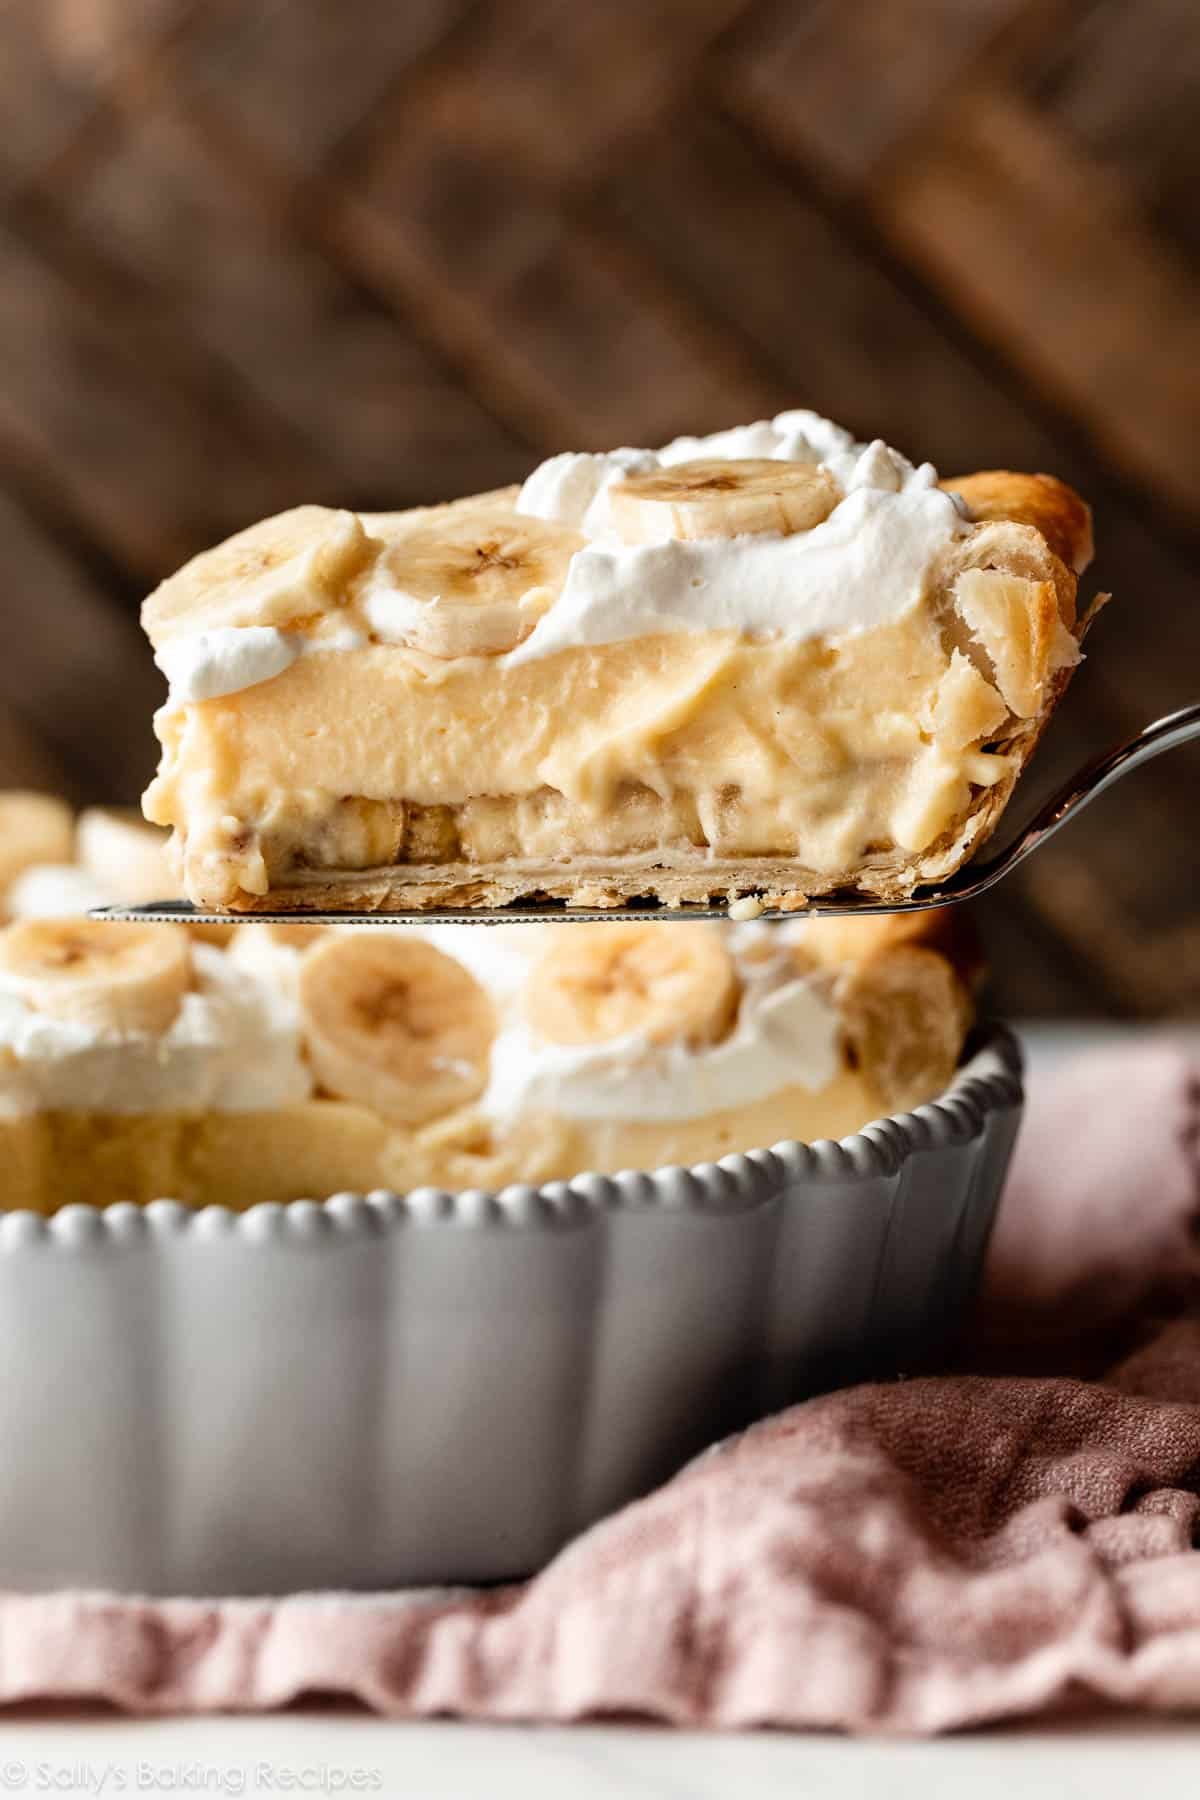
The combination of kitchen magic. 😉 Seriously, though, banana cream pie combines homemade pie pastry crust, fresh bananas, vanilla custard, and fluffy whipped cream. Let me walk you through each layer, so you’re fully prepared when it’s your turn to make it.
First, Bake Your Pie Crust
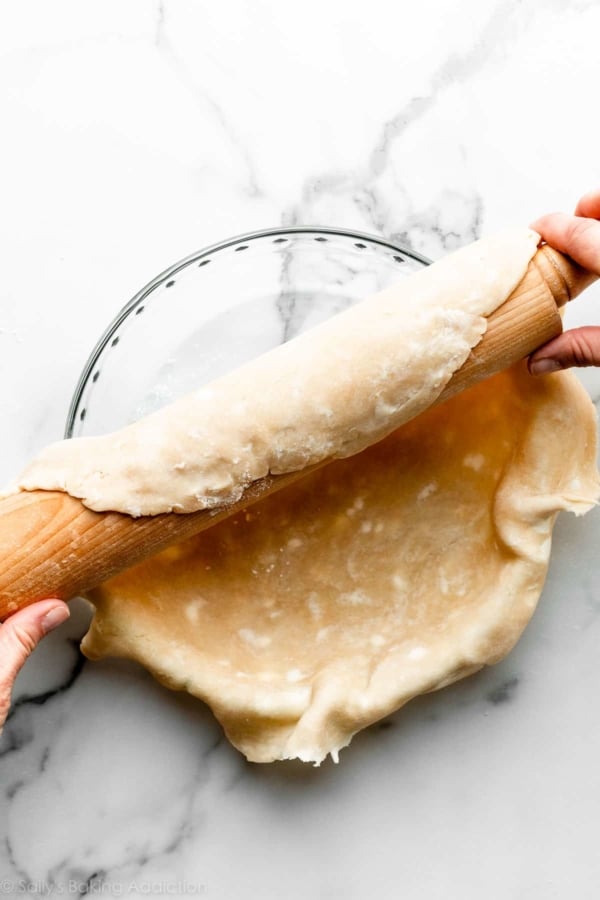
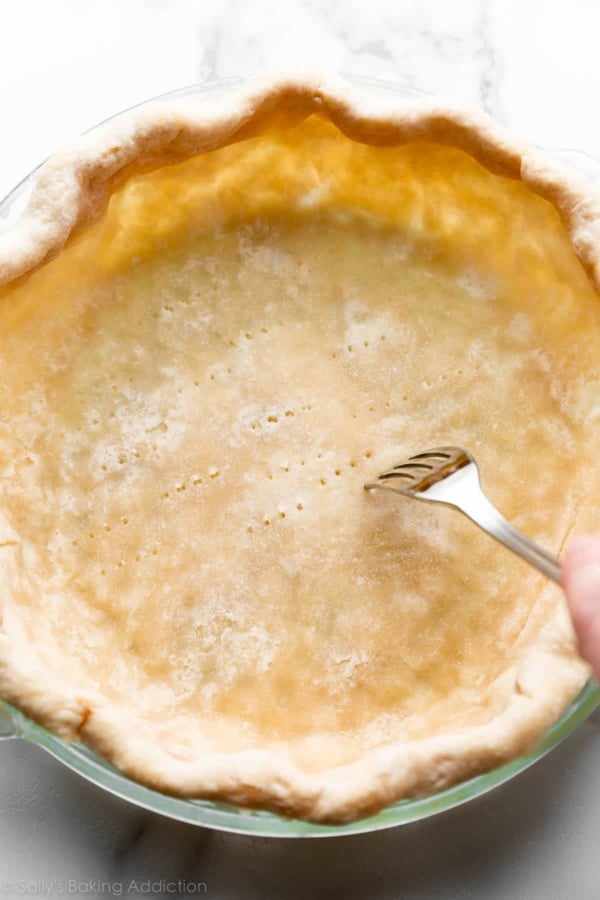
It’s helpful to review my how to blind bake pie crust tutorial before getting started. Blind baking a pie crust shell = baking it without a filling. Why do we do that? Well, if you have a no-bake pie filling like coconut cream pie or today’s banana cream pie, you need a baked pie crust. Start with homemade pie dough. I always use this pie crust recipe, or I have an excellent all butter pie crust option. To bake pie crust without a filling, you need to weigh it down to help prevent it from shrinking. I’m pretty loyal to these ceramic pie weights; they’re inexpensive and get the job done. You can also use dry beans. (Note: You’ll need 2 packs of the pie weights!) Here are the steps:
Make the pie dough ahead of time, and then refrigerate or freeze until you’re ready to make the pie. Pie crust must chill for at least 2 hours before rolling out. Roll it out, then fit into your 9-inch pie dish. Crimp or flute the edges. See my how to crimp and flute pie crust tutorial for helpful tips and visuals. Chill the shaped pie crust for at least 30 minutes. This prevents shrinking. Remember that pie dough must be cold when it hits the oven. Line with parchment paper, and then fill with pie weights. Bake until the edges are lightly brown, about 15 minutes. Remove pie weights, then prick the bottom with a fork. This lets air escape the bottom. Return crust to oven until the entire pie shell is golden brown. Cool pie shell completely. You can do this up to 3 days ahead of time!
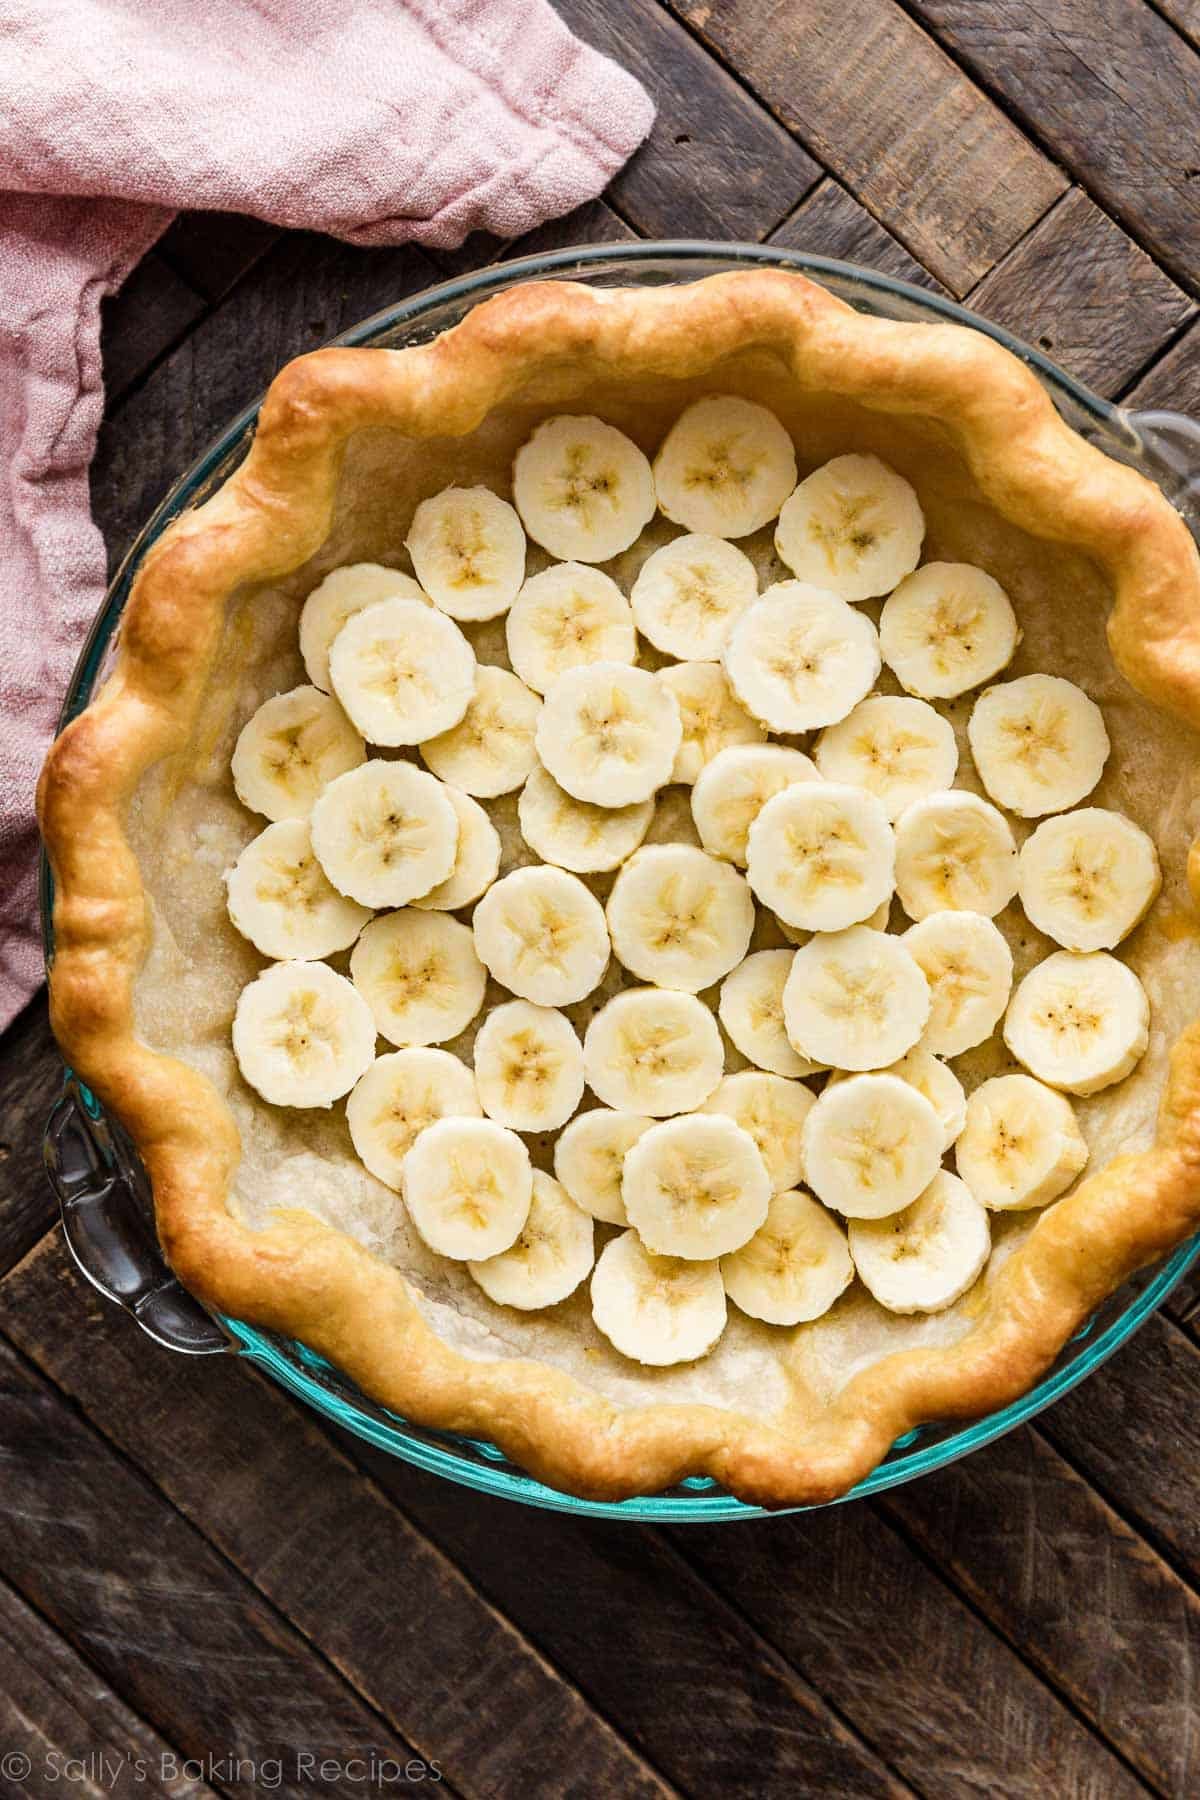
This baked pie crust “shell” is crispy, flaky, and ready for your banana cream filling.
Other Crust Options:
Now Let’s Work on the Filling
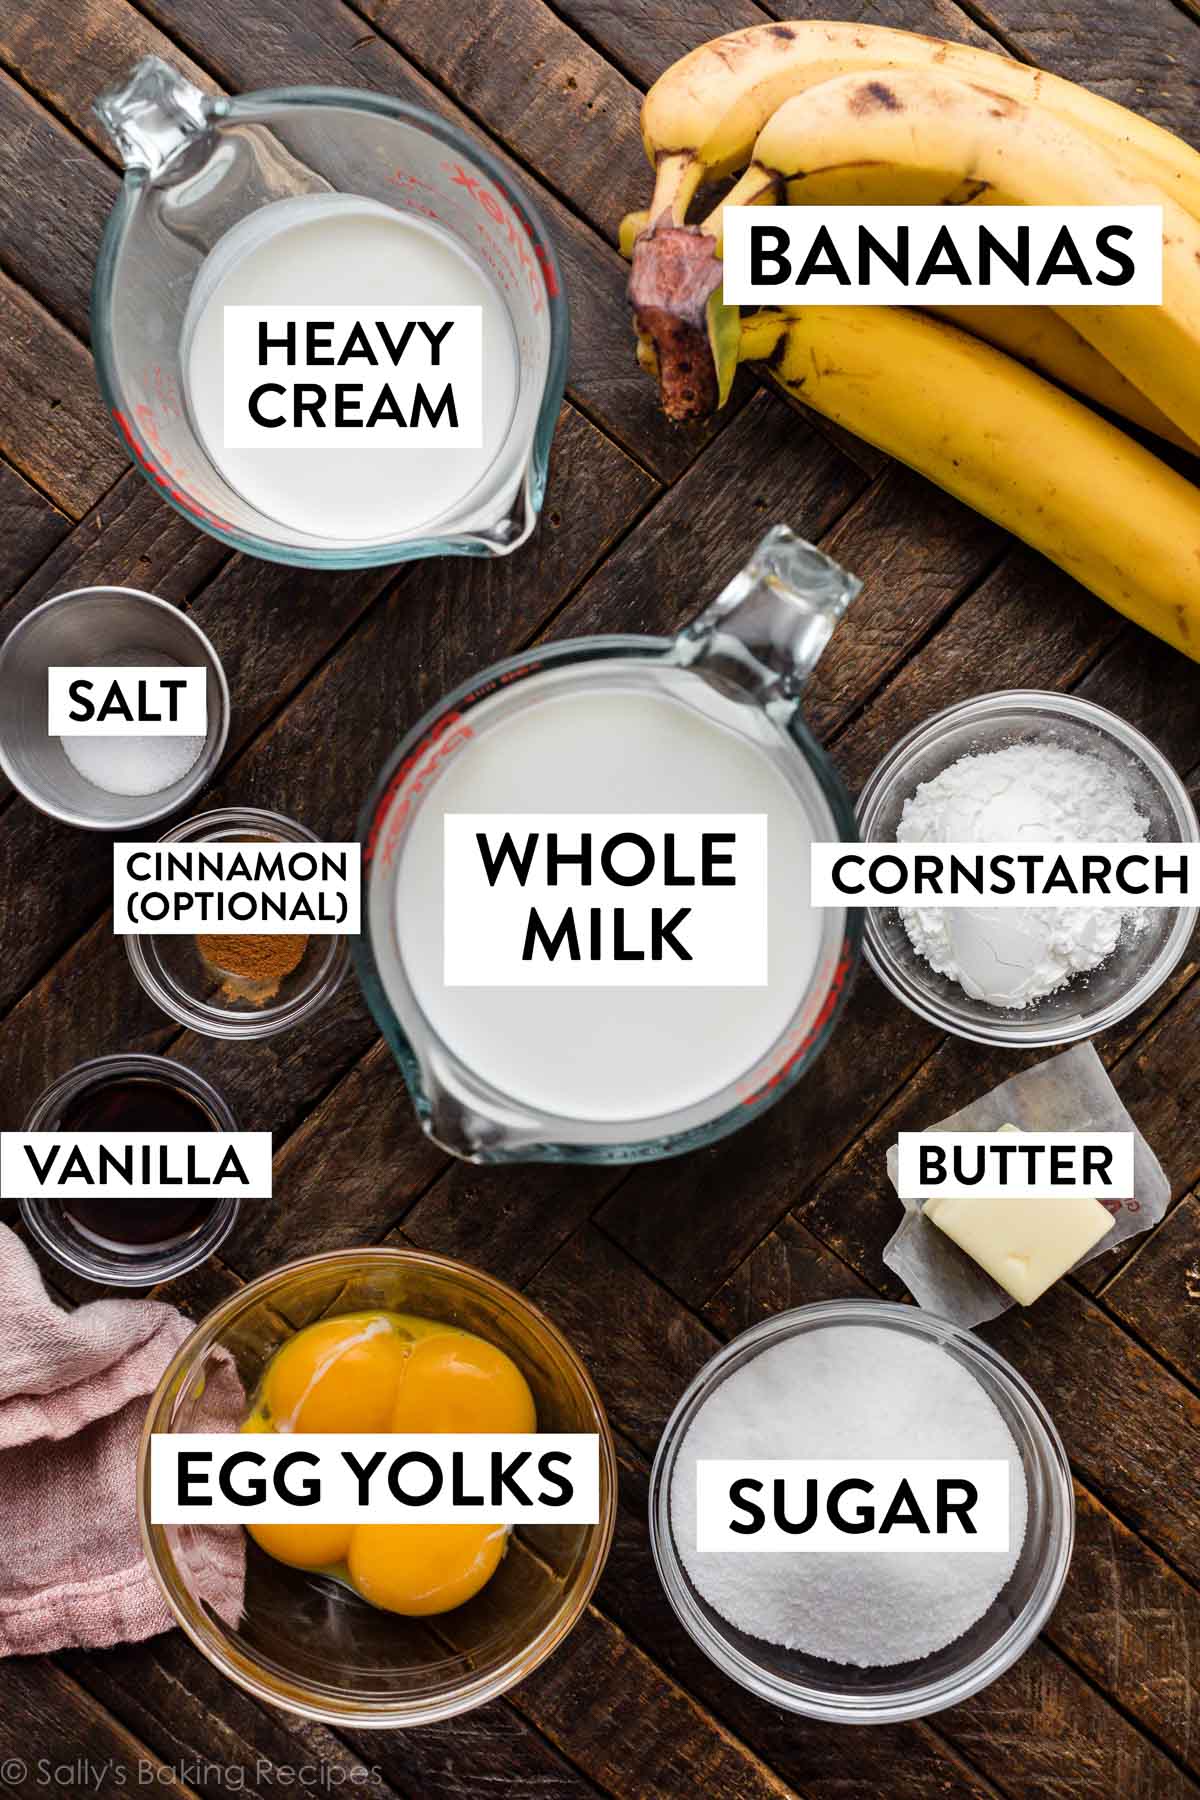
Here are the ingredients you need:
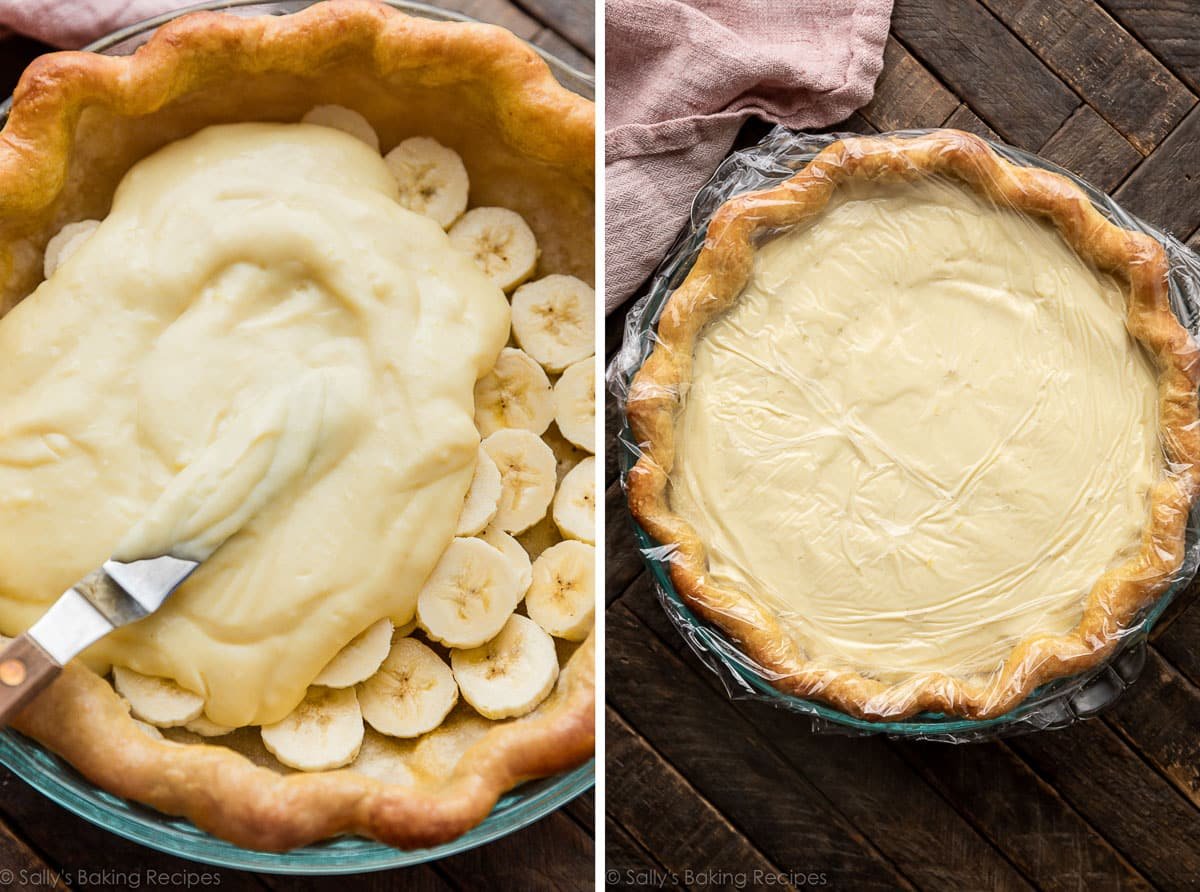
Layer in Your Banana Slices
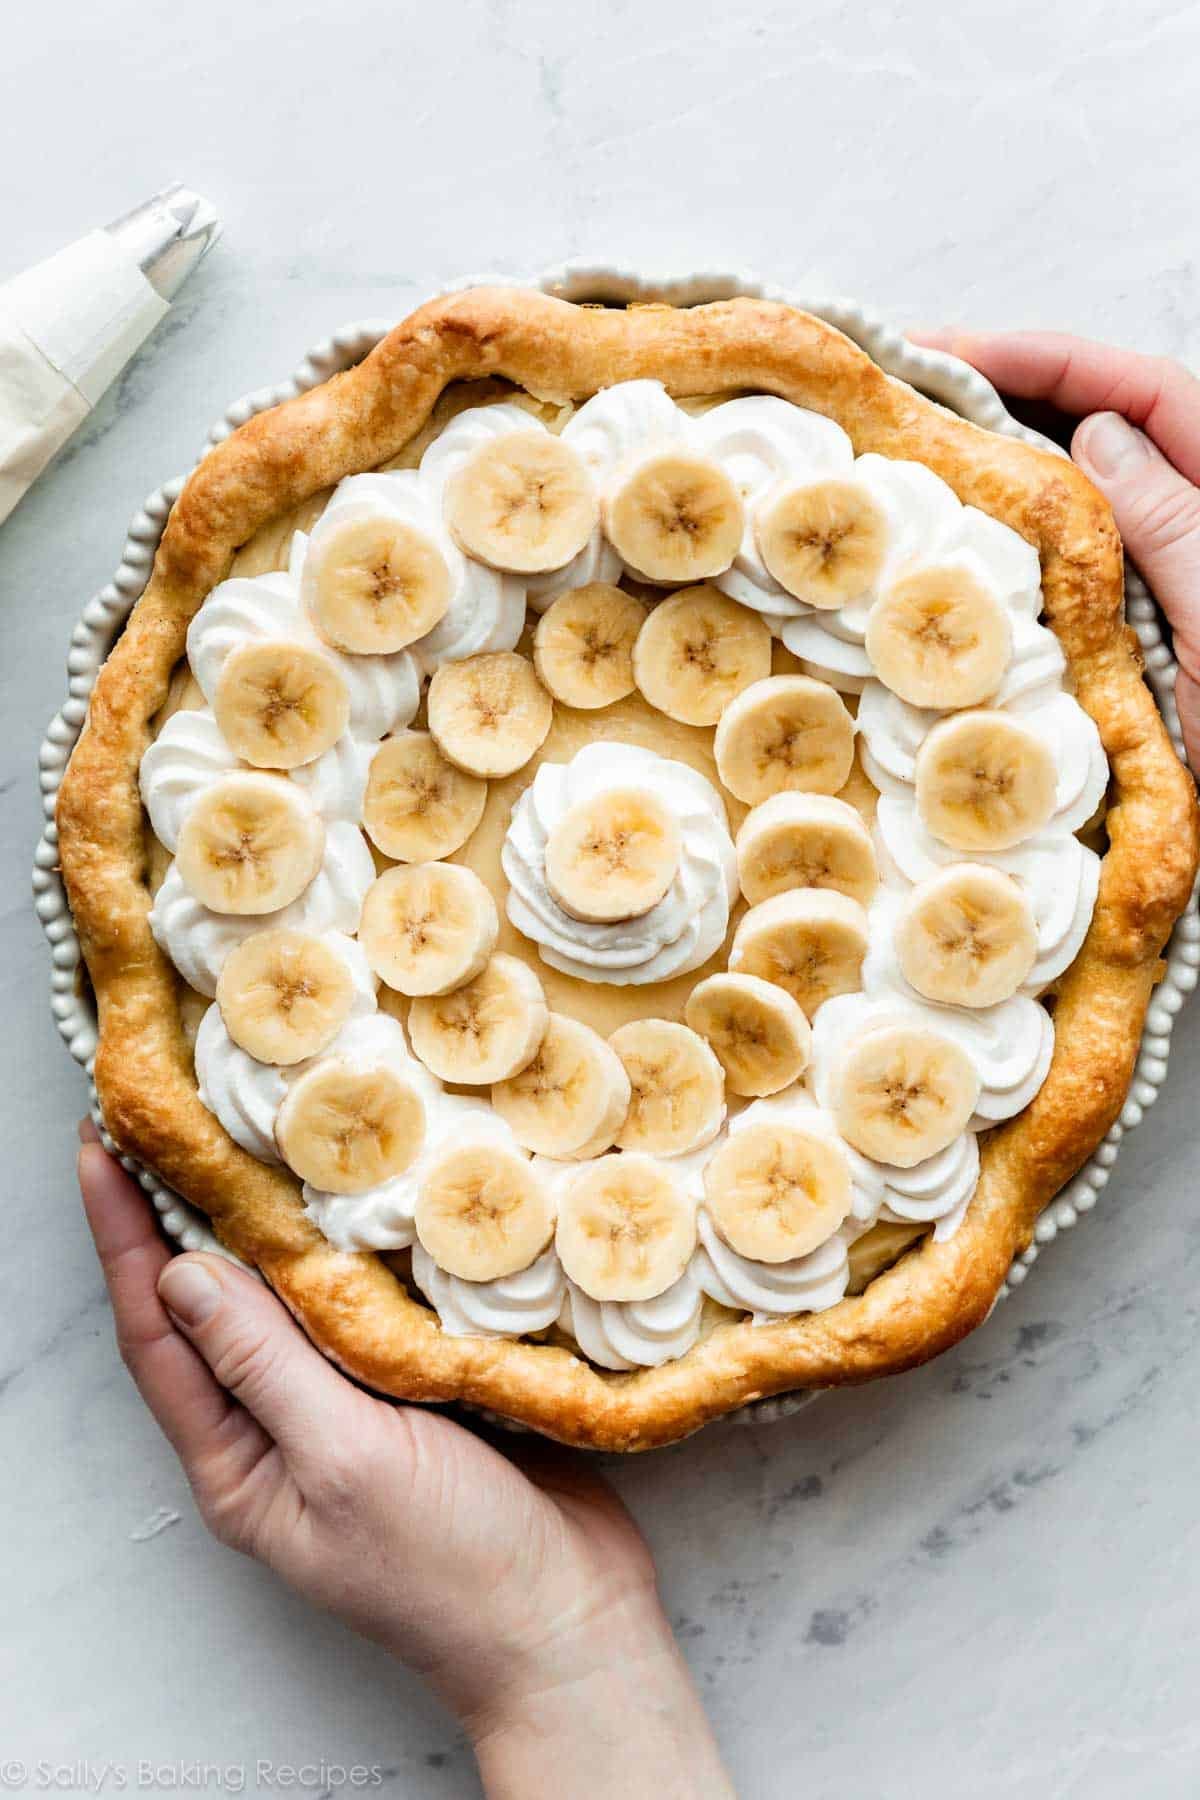
Layer banana slices into your baked pie crust shell. Sometimes I add a sprinkle of cinnamon on top of the banana slices. This is definitely a unique addition to BCP, but wow!!! It tastes unbelievable. I didn’t add it to the pictured pie, but taste testers and readers who have tried it usually rave about it. Success Tip: Don’t use overly ripe bananas because they can seep liquid and break your thick custard filling. Save your brown spotty bananas for banana bread, and use the yellow ones for banana cream pie. I squeeze in as many banana slices as I can:
Homemade Custard Filling
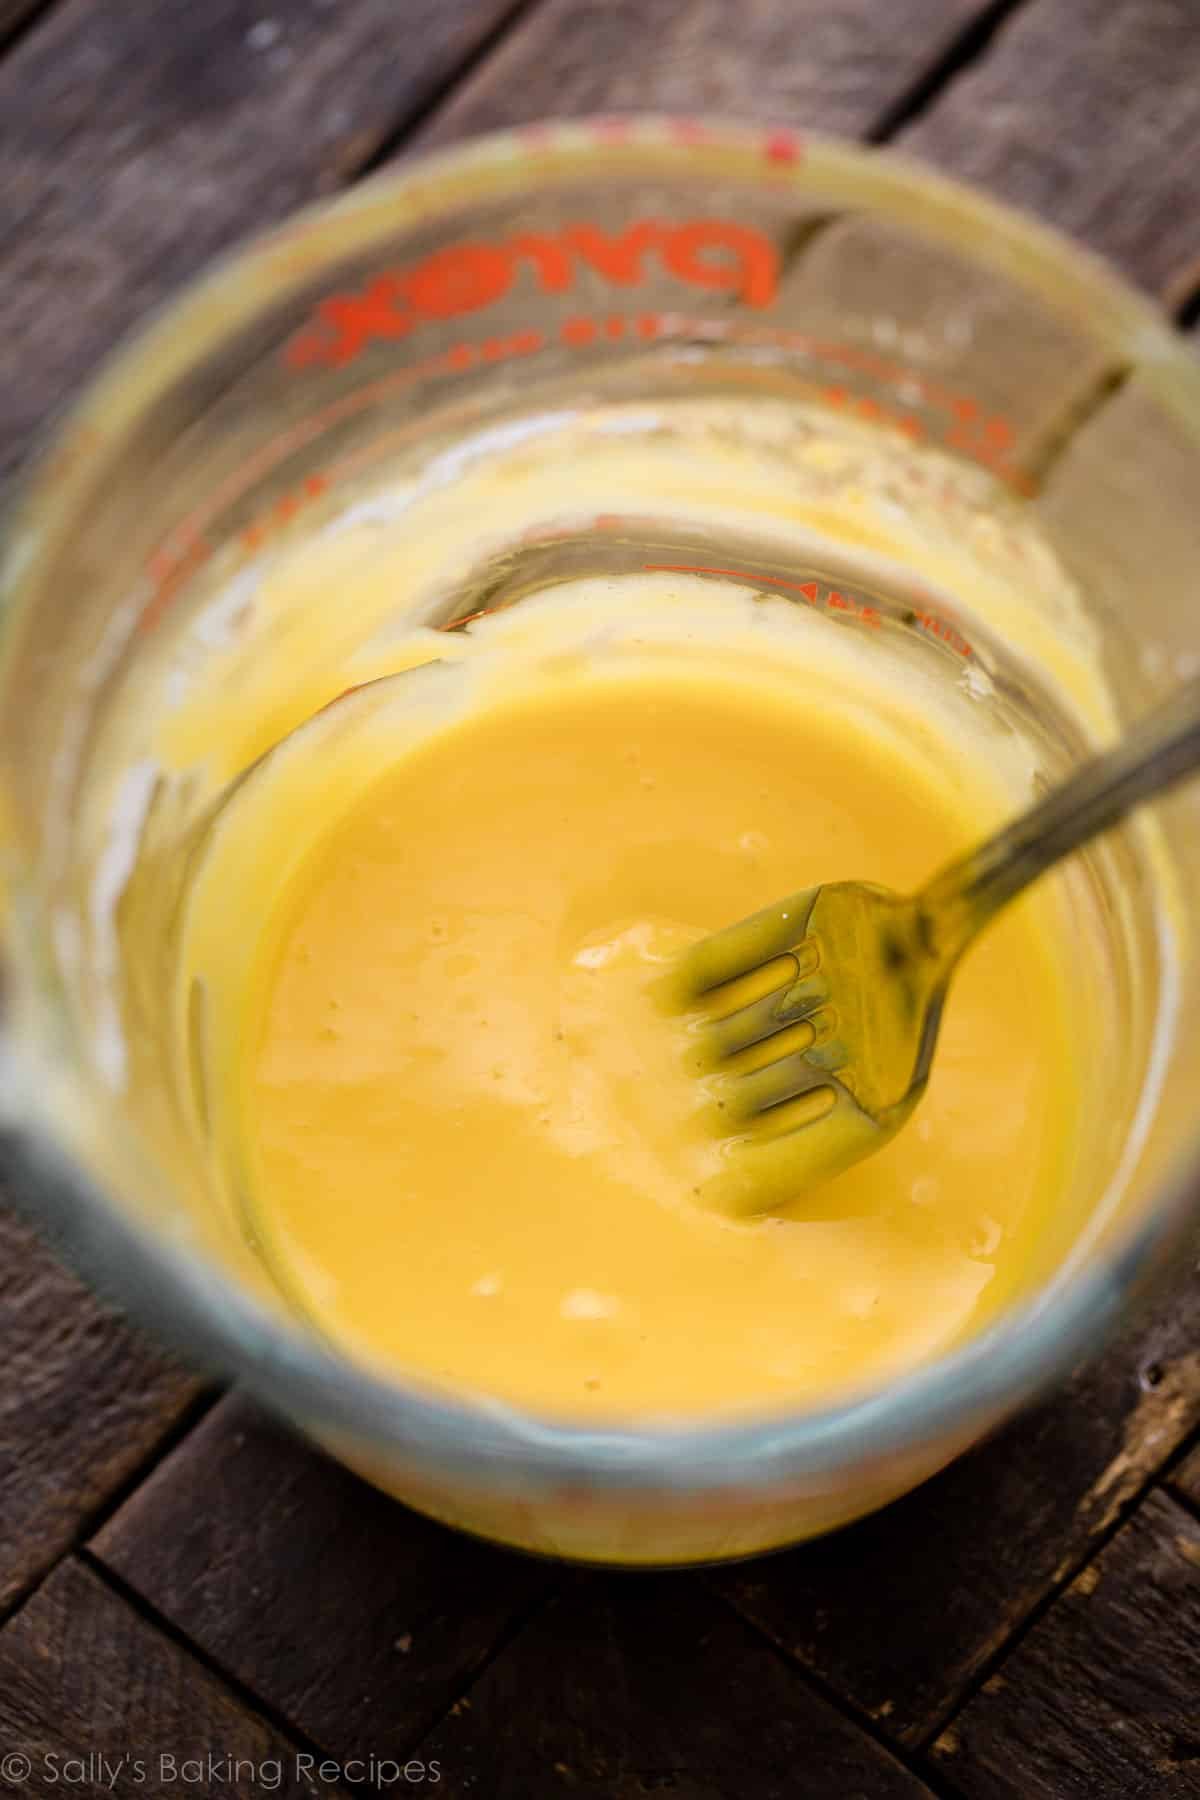
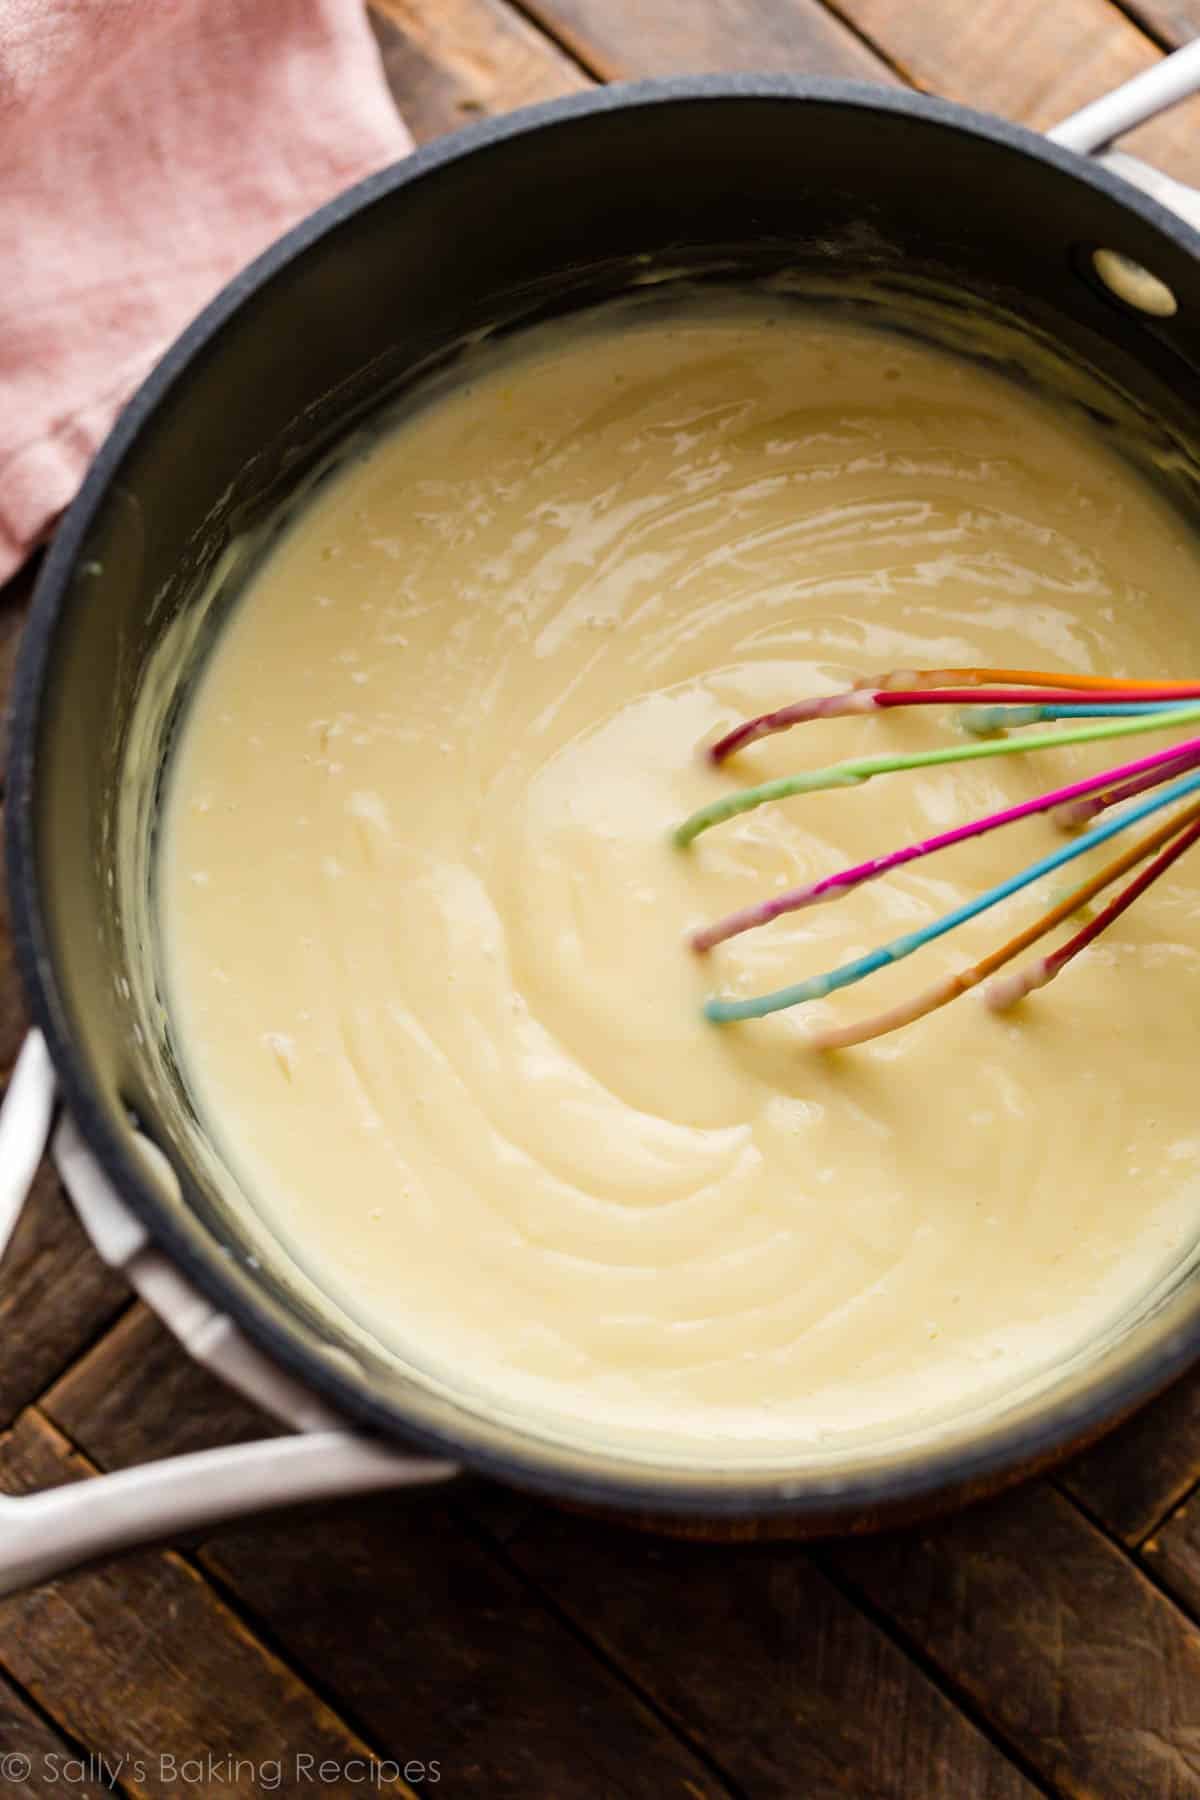
I’m here to squash any fears that you may have about from-scratch custard. It’s actually pretty easy—if you know how to whisk, you can make it. If you’ve ever made coconut cream pie, mocha chocolate pudding pie, homemade dirt pudding, pastry cream, or even mille-feuille, the process will look familiar. You’ll need sugar, whole milk, heavy cream (also needed for the whipped cream topping), and egg yolks. For flavor, you’ll add vanilla and butter. For thickening, you’ll use cornstarch. (The egg yolks and cream help, too.) The first step is to mix egg yolks and cornstarch together: I usually do this with a fork in a liquid measuring cup, because we’ll eventually pour this into the cooking milk mixture. Heat whole milk, cream, sugar, and a little salt on the stove. Once the milk/cream/sugar is gently simmering, slowly stream and whisk a little of this milk mixture into the egg yolk/cornstarch mixture. This is called tempering. The slow and steady stream of warm milk is bringing the egg yolks’ temperature up without scrambling them. Then stream and whisk the heated egg yolk mixture into the rest of the milk/cream/sugar on the stove. Cook on low, and let it begin to bubble, which happens pretty quickly. Whisk it while it pops and bubbles for just 1 minute. Remove from heat, then stir in the vanilla and butter, and allow to slightly cool. The custard will be smooth, rich, and silky: Do you notice little bits of egg yolks in your custard? You may not have tempered them slowly enough. Remember to very slowly stream and whisk some of the cooking milk mixture into the egg yolk/cornstarch mixture, and then very slowly stream and whisk it back into the pot. Whisk constantly. If your best efforts still result in a few chunks, you can strain the finished warm custard through a fine mesh sieve. Or just leave it—you can’t really taste it.
How to Ensure Your Banana Cream Pie Sets
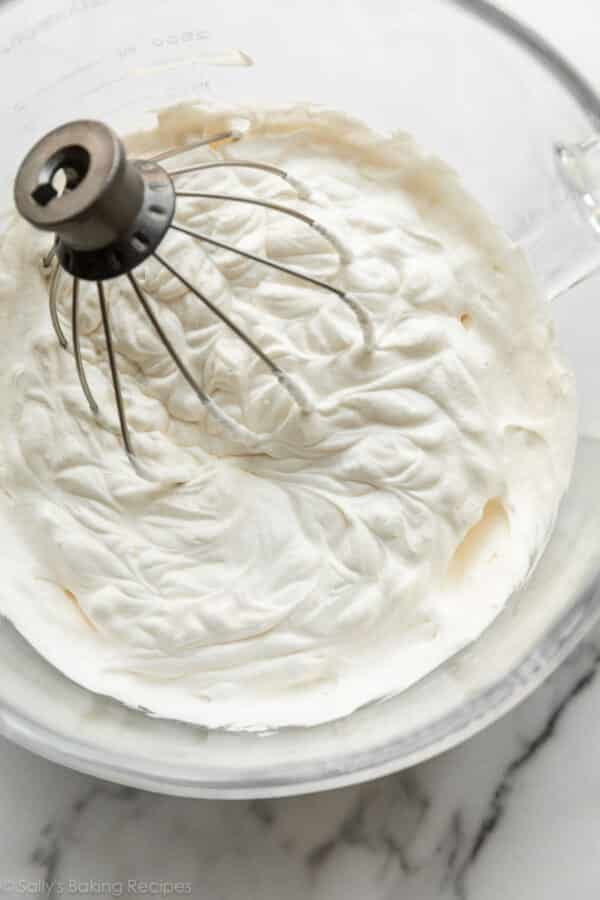
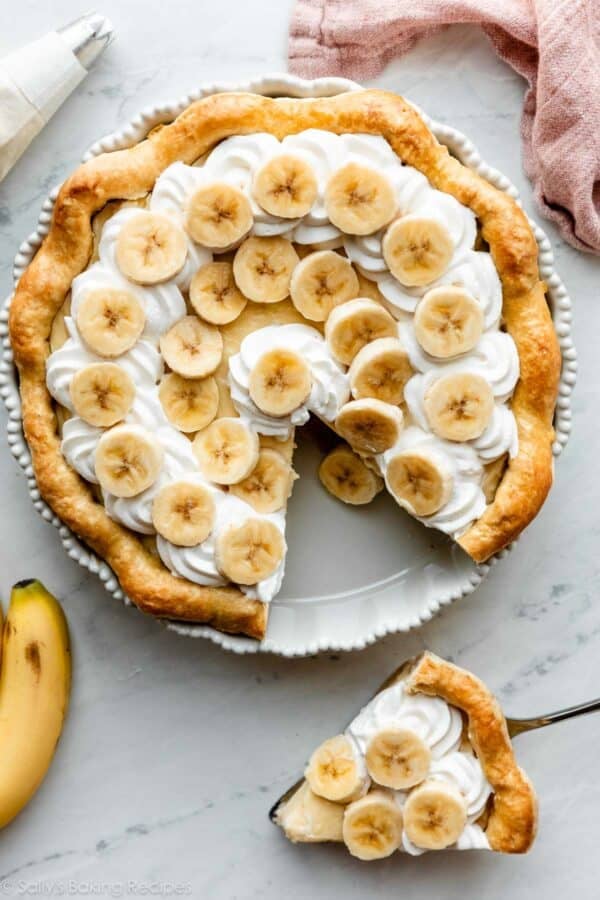
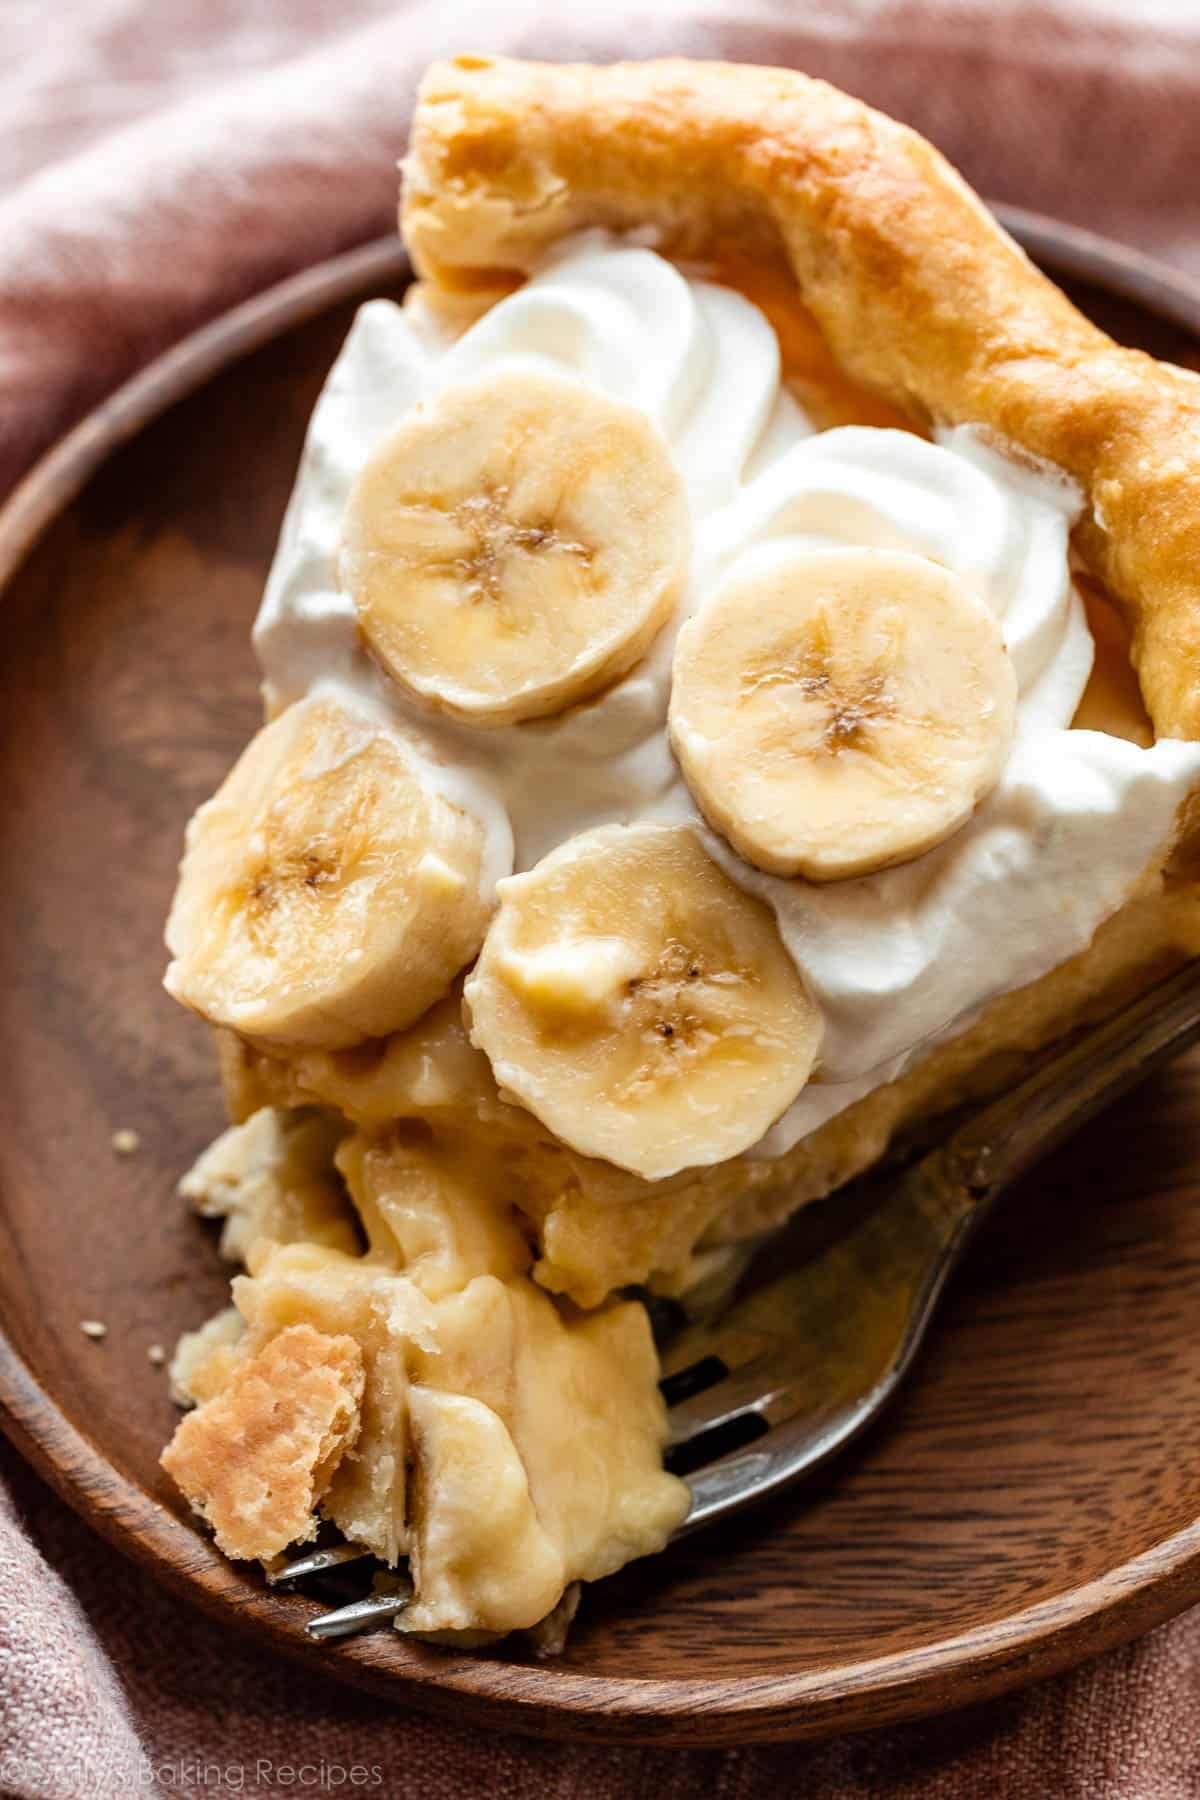
With 4 egg yolks, 4 Tablespoons of cornstarch, and some heavy cream, you can be certain this custard sets into a pretty sliceable texture. Be sure to whisk it on the stove often, and let it bubble and cook long enough for the heat to help bind the cornstarch to the fat. (1 minute is plenty.) Spread the vanilla custard filling over the banana slices, cover with plastic wrap right on the surface to prevent a skin from forming, then refrigerate the pie for at least 4 hours and up to 1 day. This is a make-ahead dessert. You can make the pie dough in advance and bake the pie crust shell in advance. You can also refrigerate your assembled (but not garnished) banana cream pie for up to 1 day, with the plastic wrap right on top of the surface. And you can make the whipped cream topping in advance, but don’t add it until right before, or up to 1 hour before serving. So if you’re looking for Easter dessert recipes or hoping to make this pie for a special celebration, be sure to plan ahead. You don’t want to decorate the pie with banana slices in advance because they’ll brown. (A brush of lemon juice can extend their freshness by a couple hours, but will affect their flavor.) Right before, or up to 1 hour before, serving, top the pie with homemade whipped cream. You can decorate it any which way—a thick layer of whipped cream like this banoffee pie, or pretty piped dollops or swirls like the pictured pie. I use Wilton 1M piping tip to pipe it. You could also use up your leftover egg whites and top it with this marshmallow meringue topping, and toast it with a kitchen torch! When ready to serve, add banana slices on top. I usually go heavy on the sliced banana garnish. I love texture in desserts, and banana cream pie doesn’t usually deliver on that front. But with lots of banana slices, we’ll get there. Now savor every flaky, creamy, fluffy bite as it melts in your mouth, because you deserve to. You made this all from scratch!