Using this simplified method and a handful of basic ingredients, you’ll be amazed that you can make puff pastry from scratch within just a few hours. Whenever I make and bake this dough, I’m still stunned with the outcome! You’ll enjoy using this dough wherever you use a single pie crust or store-bought puff pastry. Next you’ll find some details, step-by-step photos, plus there’s a video tutorial in the recipe if that’s helpful too. All of this will help set you up for success when it’s your turn to try it!
What is Rough Puff Pastry?
Rough puff pastry is also known as quick pastry and become really popular with professionals and home bakers because you get bakery-style puff pastry without precise shaping and laminating butter with dough. Cookbook author and chef Claire Saffitz has a wonderful recipe for it. The trick is to work large pieces of cold butter into dry ingredients and hydrate it all with ice cold water (as if you were making pie crust). Sometimes bakers grate butter into the mix or use a food processor. There’s lots of ways to make rough puff pastry. With this recipe, I stick with cold cubes of butter and use my hands to rub the butter into the flour mixture. Your hands are your best tool and method here because it’s nearly impossible to over-mix the dough this way. If the dough is over-mixed and you break down the butter too much, you’ll lose layers.
Can I use a food processor, pastry cutter, or other mixer? I do not recommend it. These tools slice down the butter too much and you’ll lose a lot of flaky layers. I tried and it’s not worth it because the result is closer to a greasy pie dough than a layered puff pastry. (Still good, but not the goal here.)
Rough Puff Pastry Details
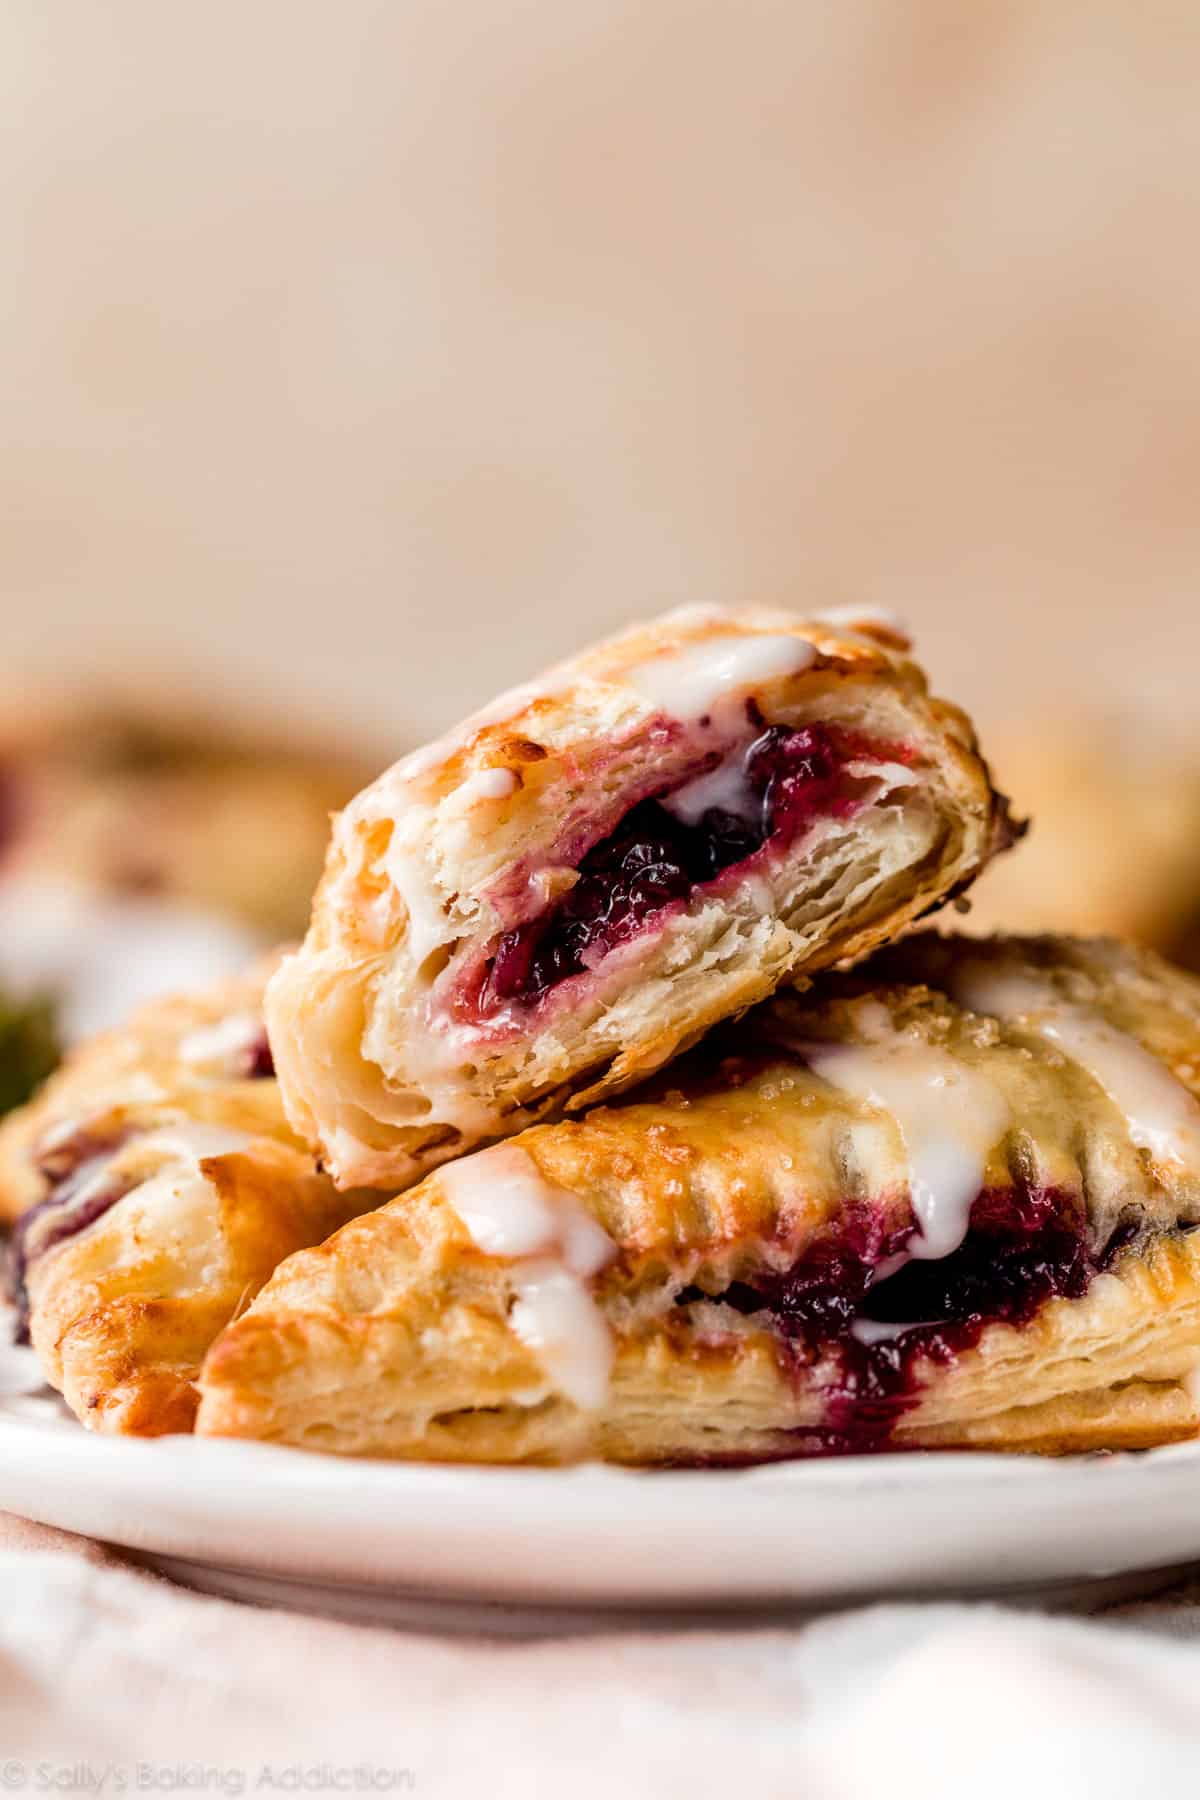
Taste: Buttery, hardly sweetened, a little salty. Texture: Ahh, the best part. Each bite has oodles of crispy, crackly layers of light and buttery pastry. This pastry is one of the FLAKIEST doughs I’ve ever worked with and comes close to croissants territory. (But made in a fraction of the time!) Ease: I categorize this as an intermediate baking recipe. While it’s not nearly as involved as homemade croissants, it’s certainly not as easy as using store-bought frozen puff pastry. You need to flatten and fold the dough 6x, but there’s no chilling between each time so the recipe moves quicker than traditional homemade puff pastry. Time: The dough requires 2 separate refrigeration steps, but the 2nd one is only 15 minutes. You can easily make this dough in a few hours or over the course of 2 days. I always appreciate make-ahead dough where you have plenty of options in terms of timing. You can also freeze the dough, too.
How Is This Different From Pie Crust and Yeasted Pastry Dough?
Pie crust, while buttery and flaky, is not nearly as light, doughy, and crisp as this shortcut puff pastry. Yeasted pastry dough, such as something we can use for croissants, croissant bread, or a blueberry cream cheese pastry braid, contain yeast. This recipe simply relies on big chunks of cold butter (lots of it) and folding.
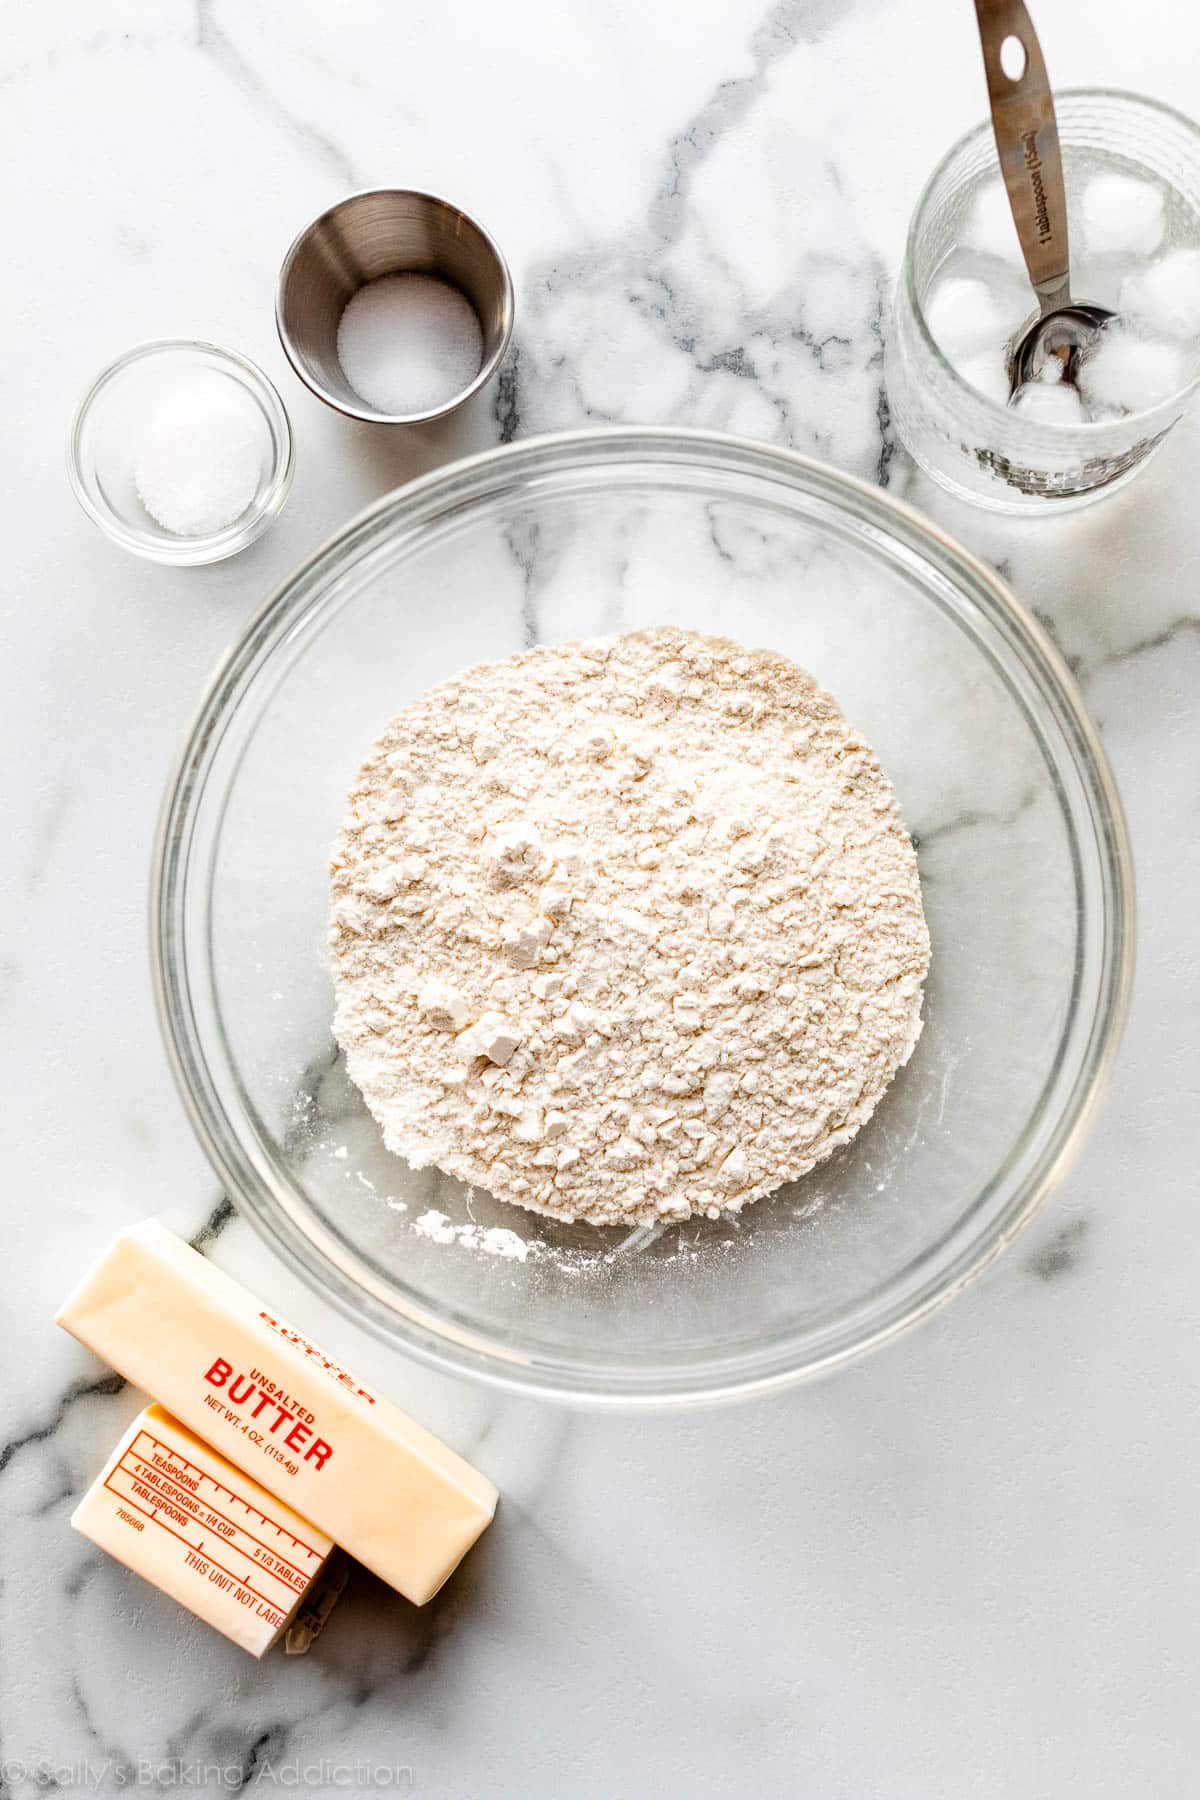
Just 5 Ingredients in the Rough Puff Dough
This shortcut pastry dough comes together with flour, sugar, salt, cold butter, and cold water.
Why do the butter and water have to be cold? It’s important for the butter to stay cold so it doesn’t melt and soak up all the flour. We want the butter to stay solidified as we roll, shape, fold, and flatten this dough because if it melts before baking, you lose all the flakes. Game over. You see, when the butter melts in the oven, it creates steam and that steam separates the dough into multiple flaky layers. Cold butter is what makes cheddar biscuits and scones flakey too!
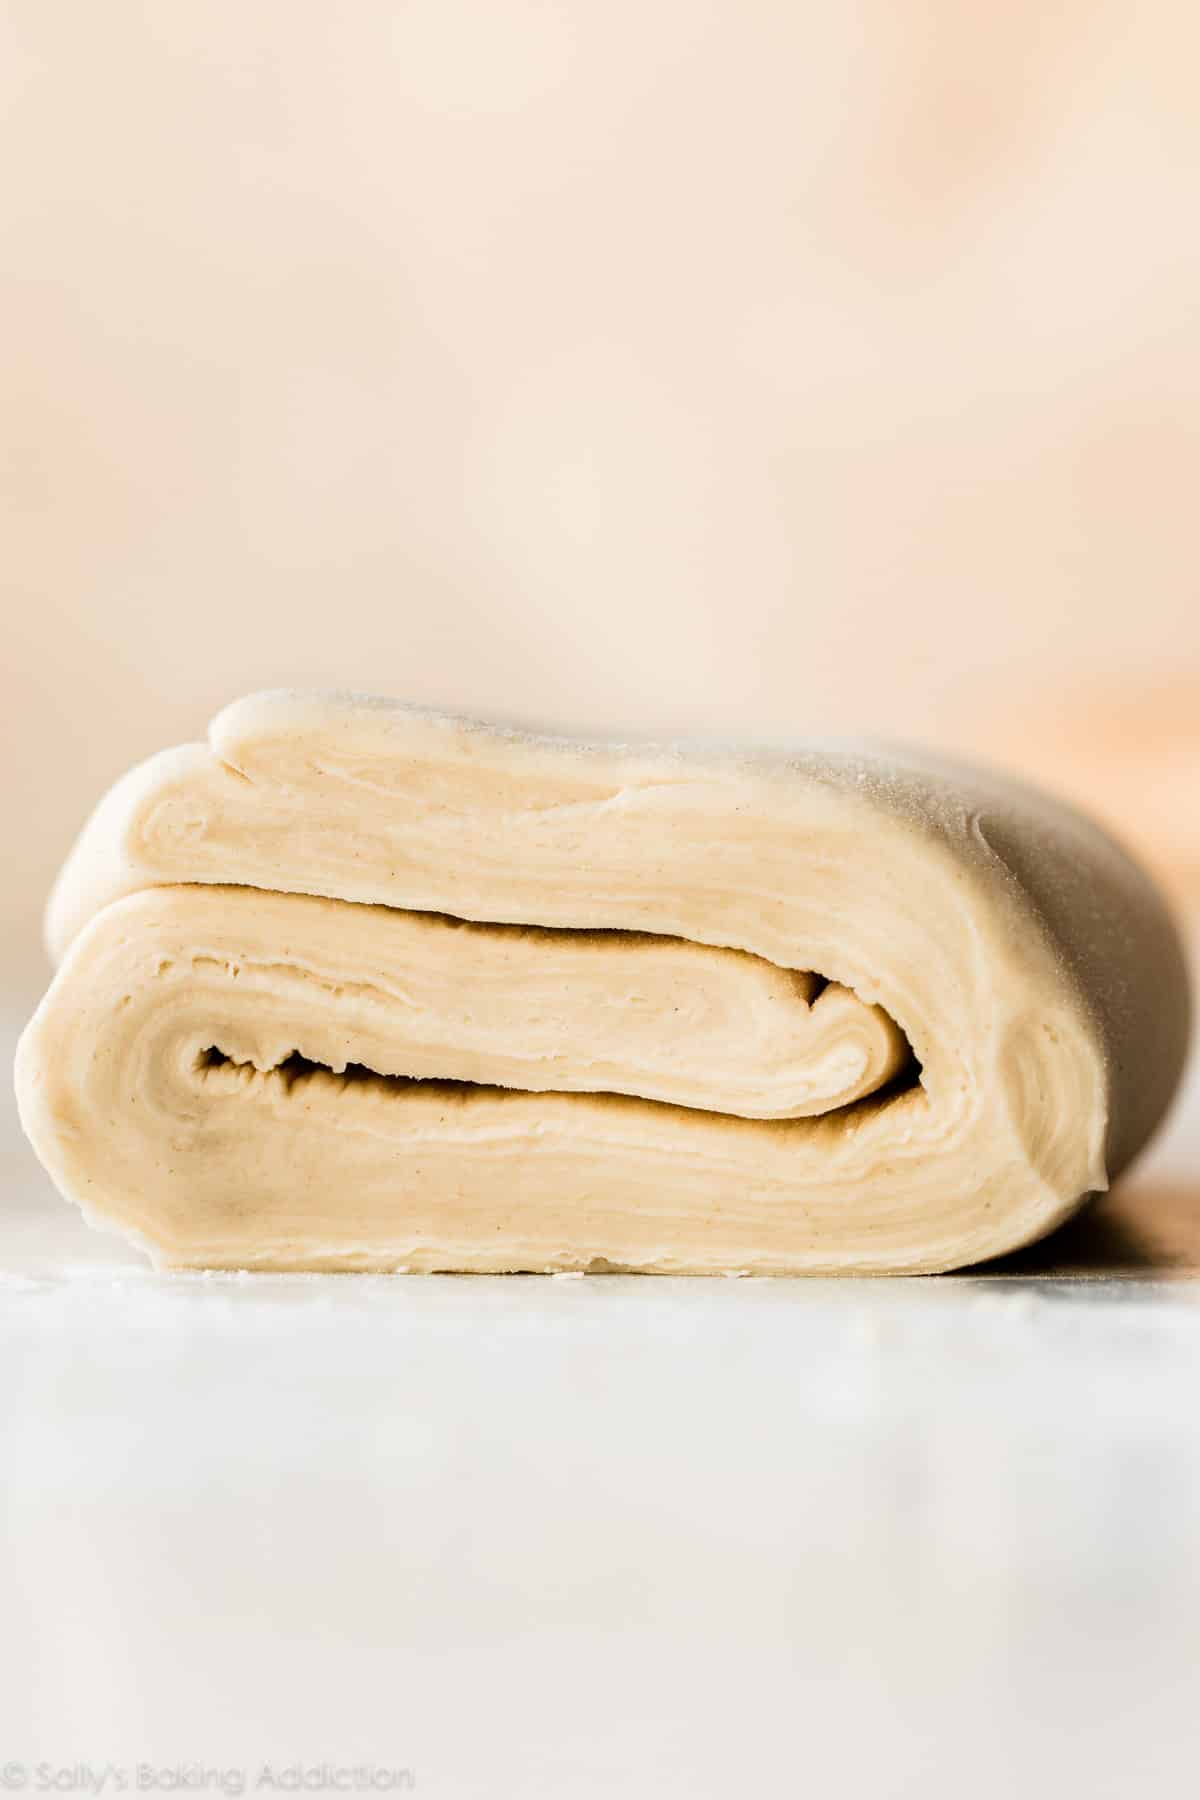
Rolling & Folding
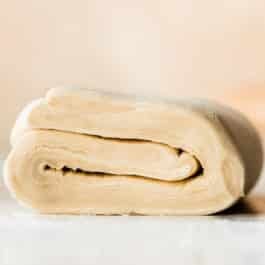
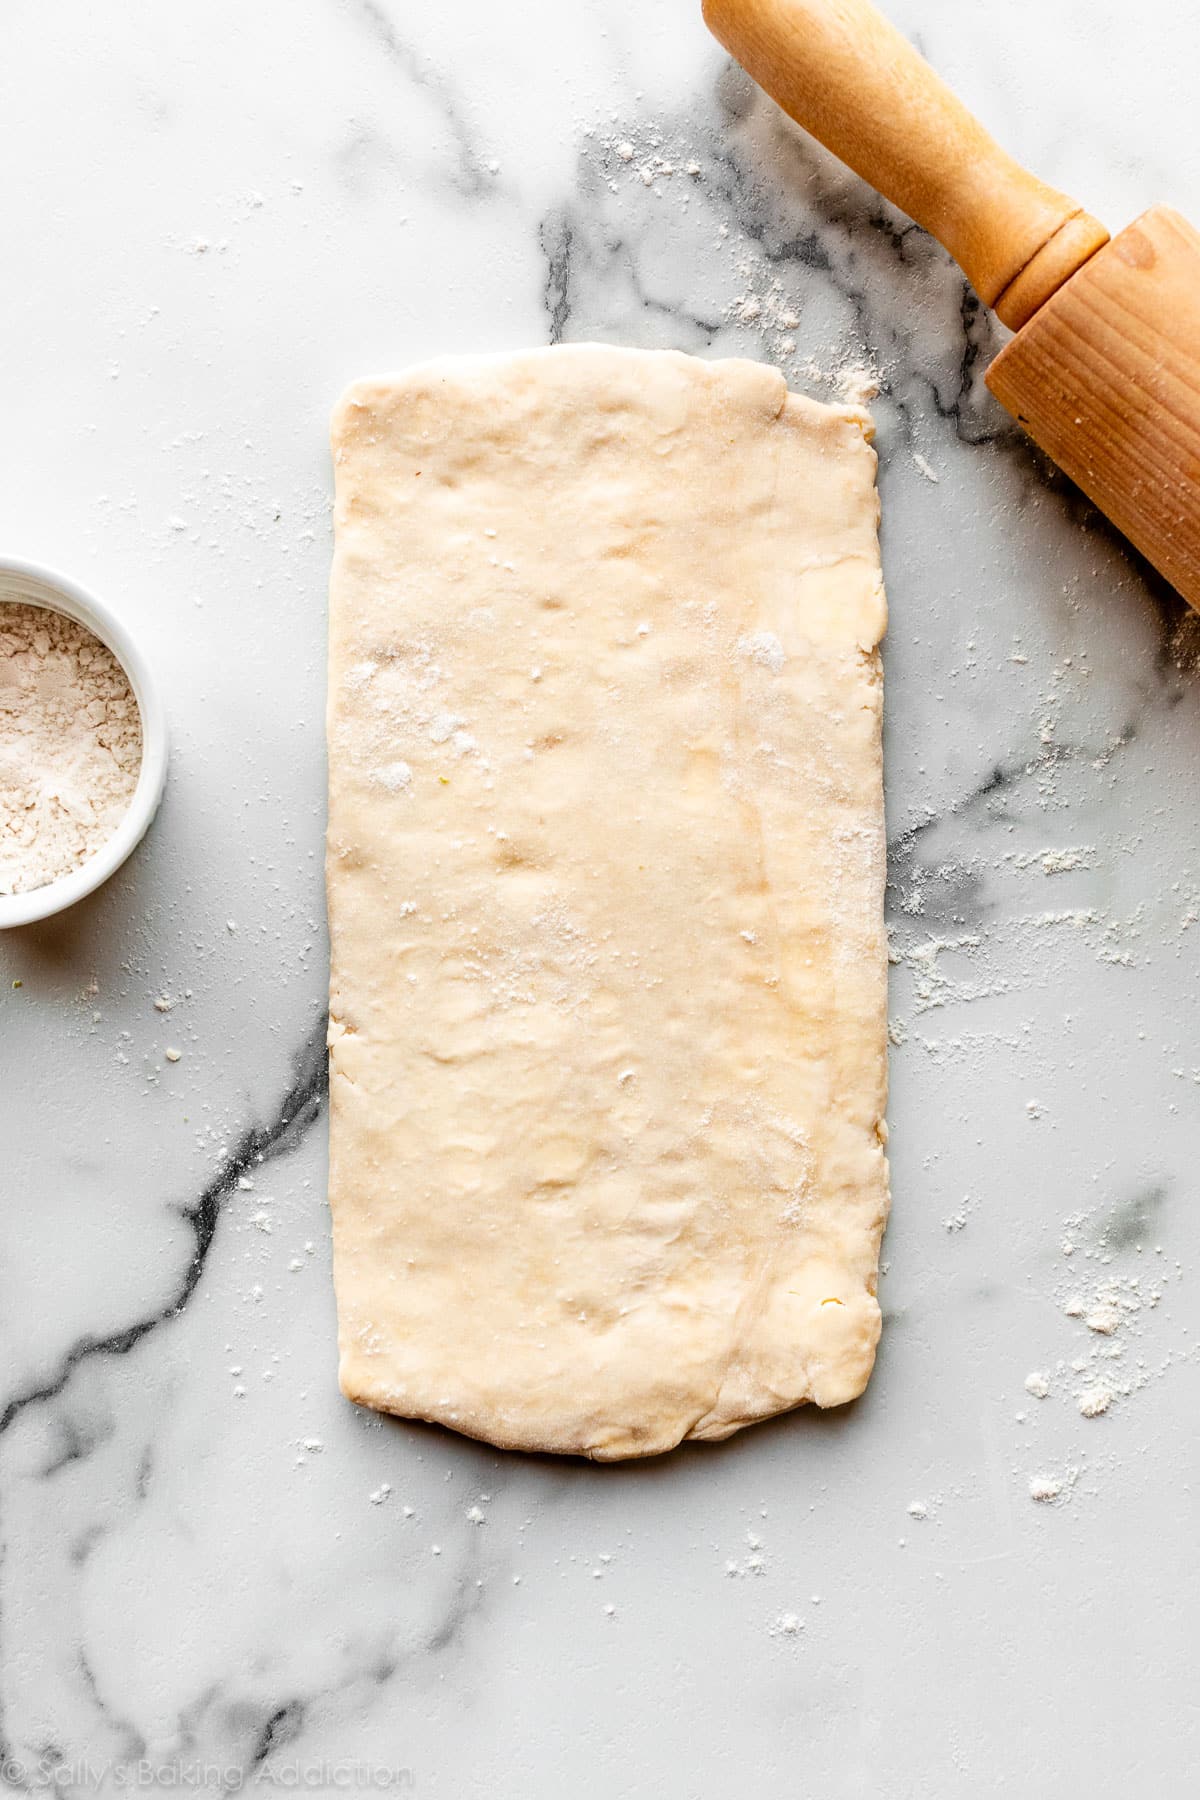
Step by step photos of this process are below the recipe. After you prepare the dough and chill it in the refrigerator for at least 2 hours (1st refrigeration), you will begin rolling it out with a rolling pin and folding it like a business letter, rolling it out again, folding again, and so on. You will roll + fold it a total of 6 times before refrigerating again for at least 15 minutes (2nd refrigeration). The photo below shows what the center of your dough looks like after all the rolling and folding. *Note that I sliced a sliver off the end so I could show you this!
Uses for This Rough Puff Dough
After the 2nd refrigeration, you can use this dough for:
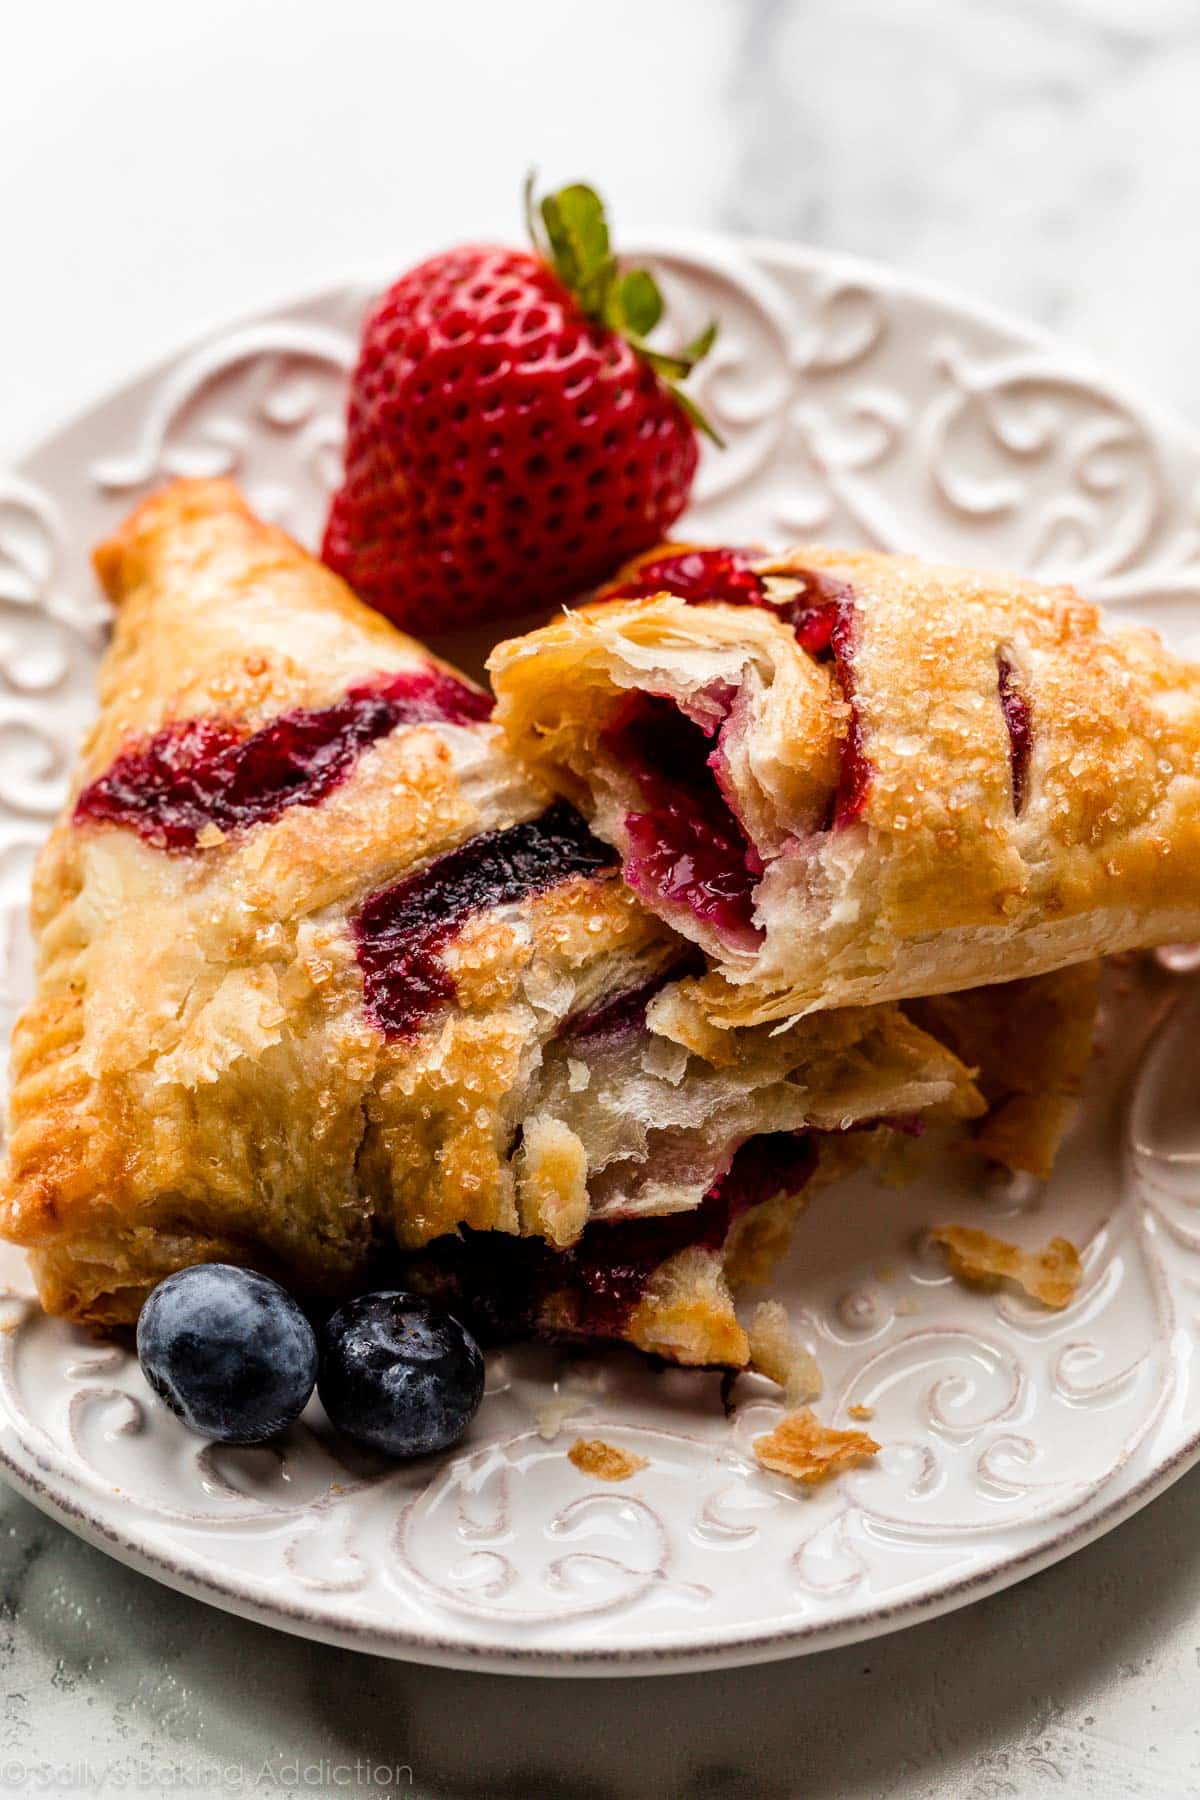
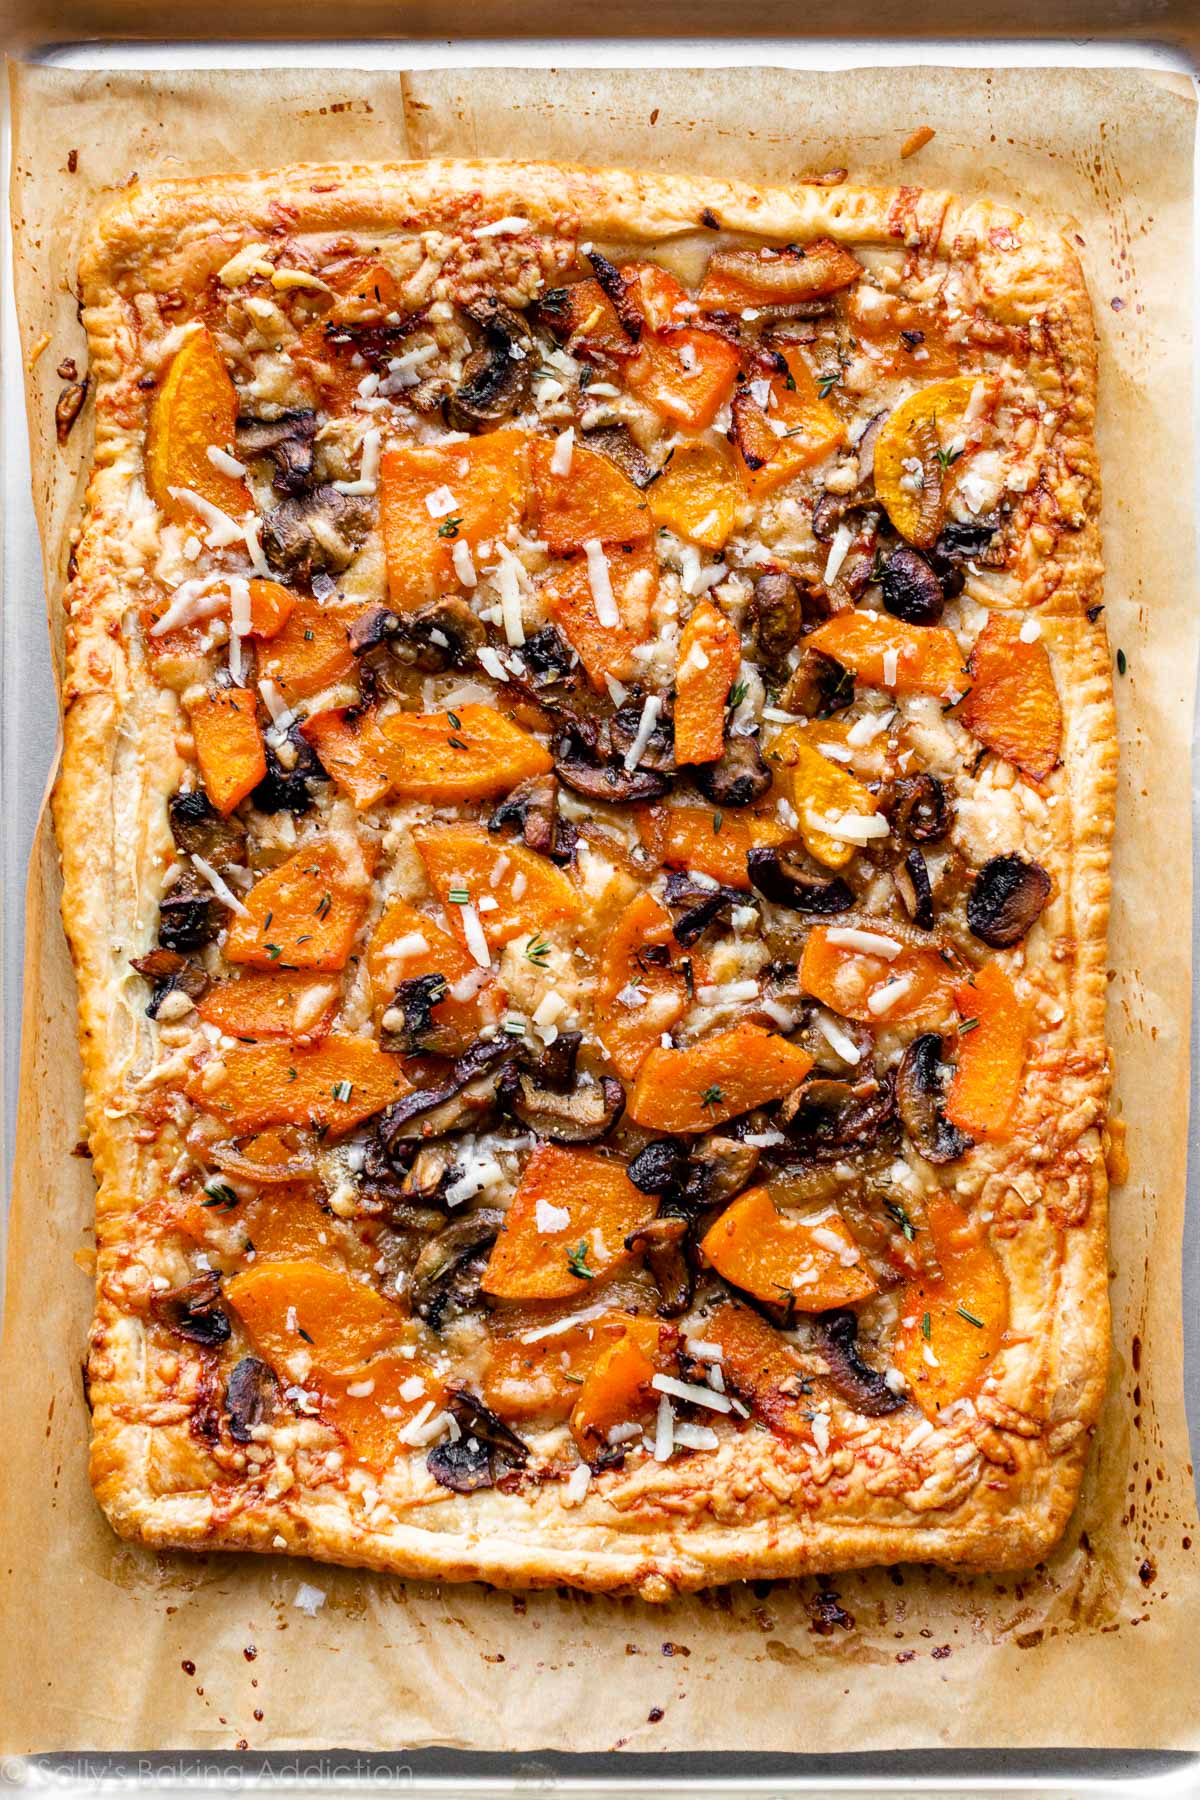
Honey Pear Tart Cinnamon Spice Palmiers Any recipe calling for 1 box (1 pound; 2 sheets) store-bought puff pastry Berry Turnovers (pictured above and below) Cranberry Brie Puff Pastry Tarts Caramel Apple Turnovers Butternut Squash & Mushroom Tart Mushroom Puff Pastry Tarts Mille-feuille
To use as pie crust: You can use this pastry dough as pie crust in a recipe that calls for a single crust 9-inch pie. Roll dough out into a 12-inch circle before fitting into your 9-inch pie. Though all pie recipes are different, it would definitely be best to blind bake this dough with pie weights before adding a filling. Choose pie recipes that already call for blind baking and have a thicker filling. This would be excellent as the crust for quiche.
Step-by-Step Photos
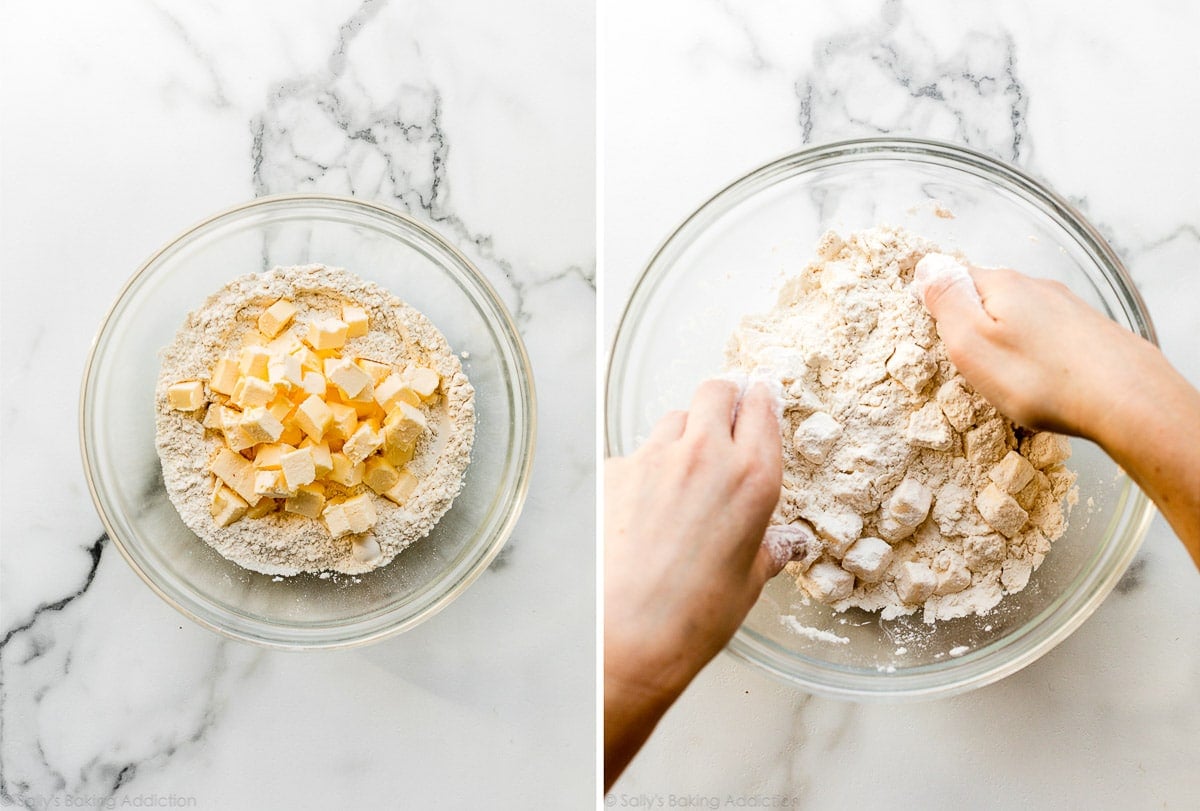
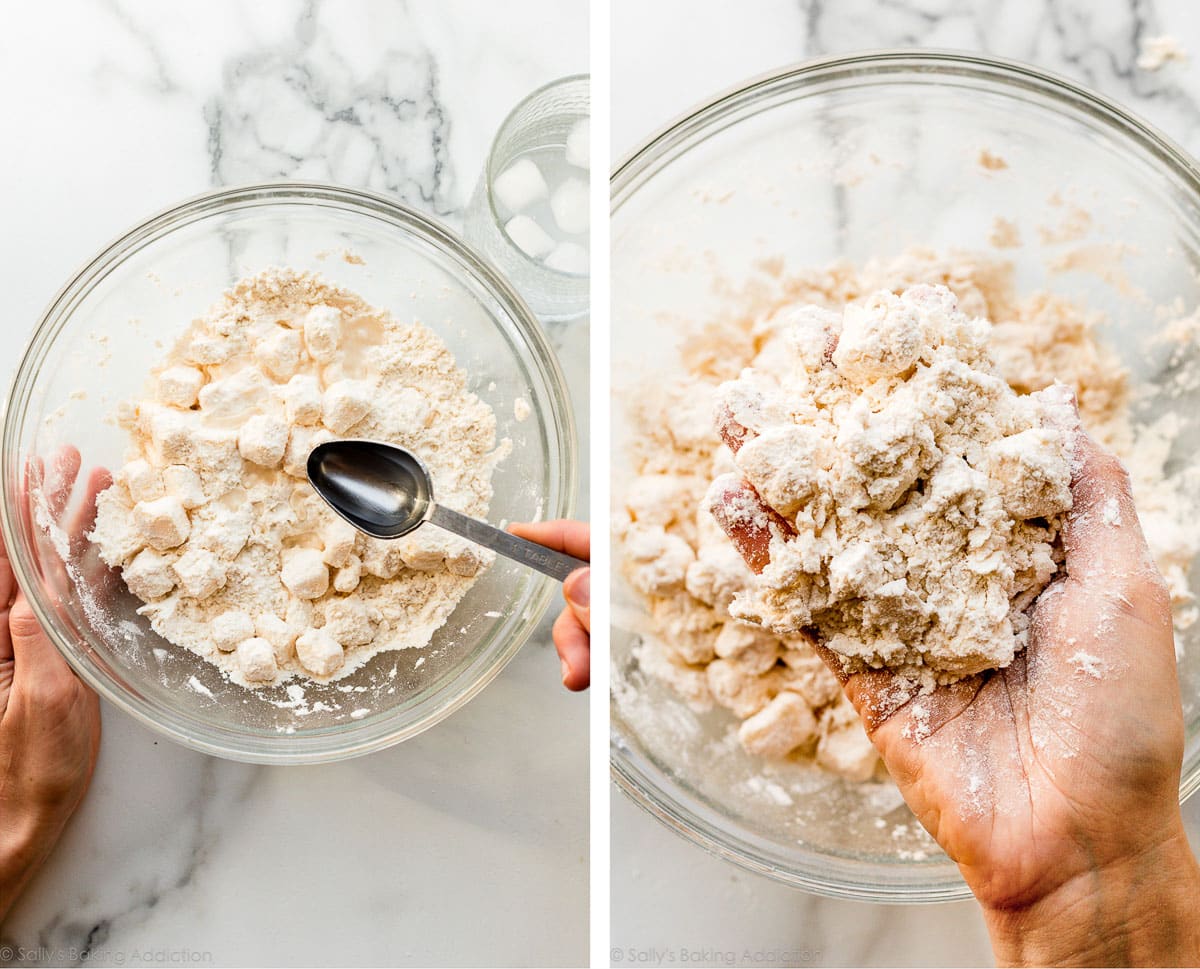
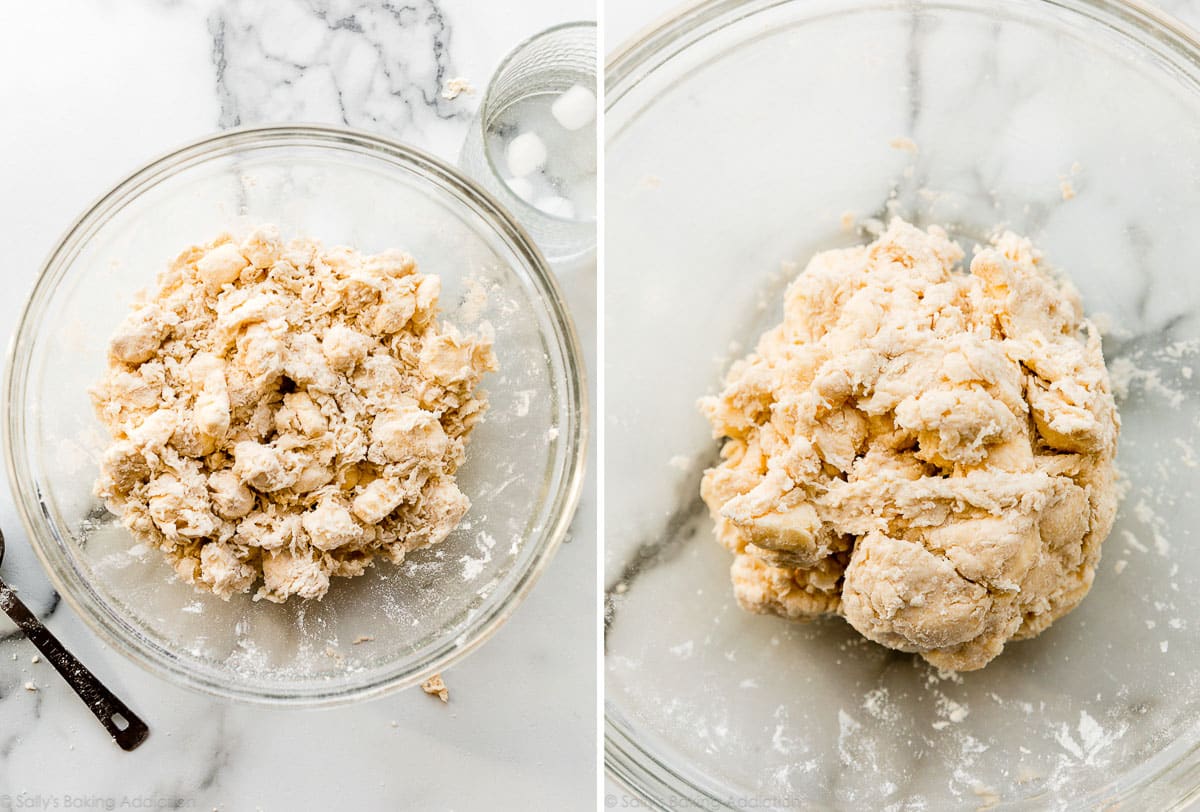
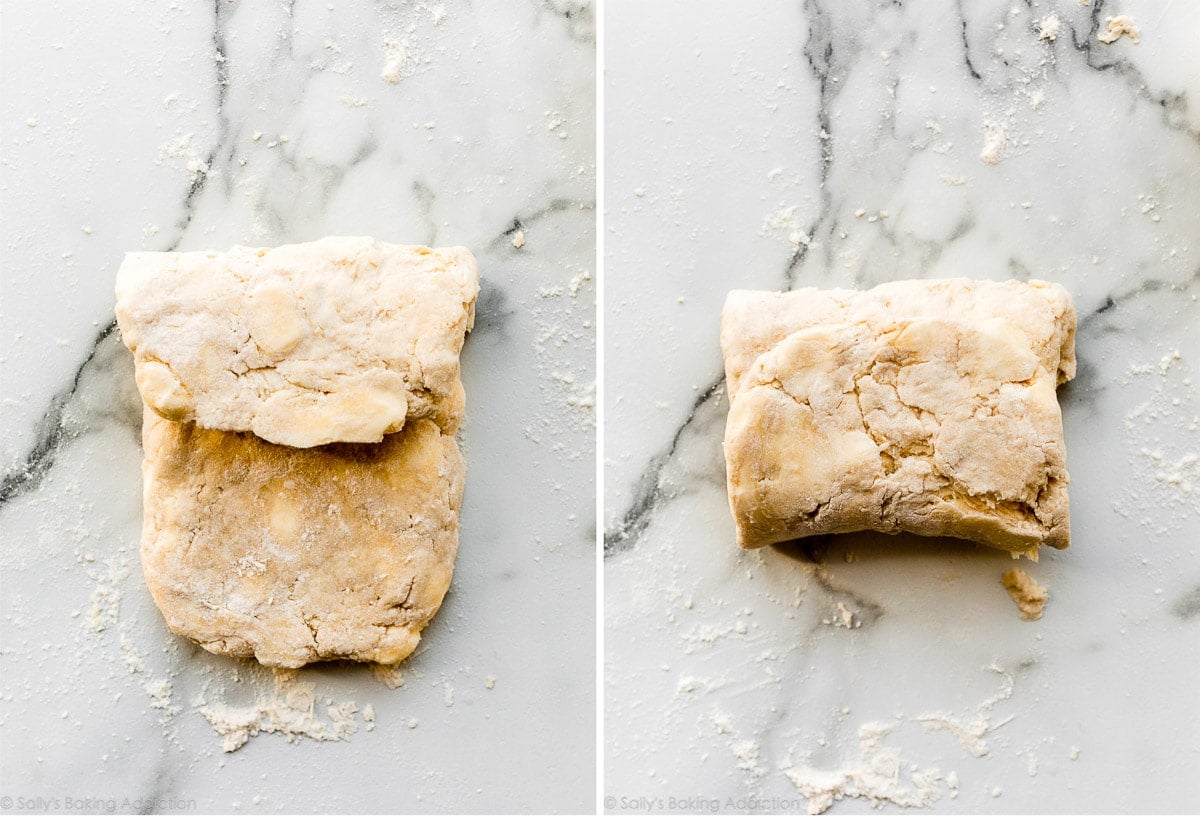
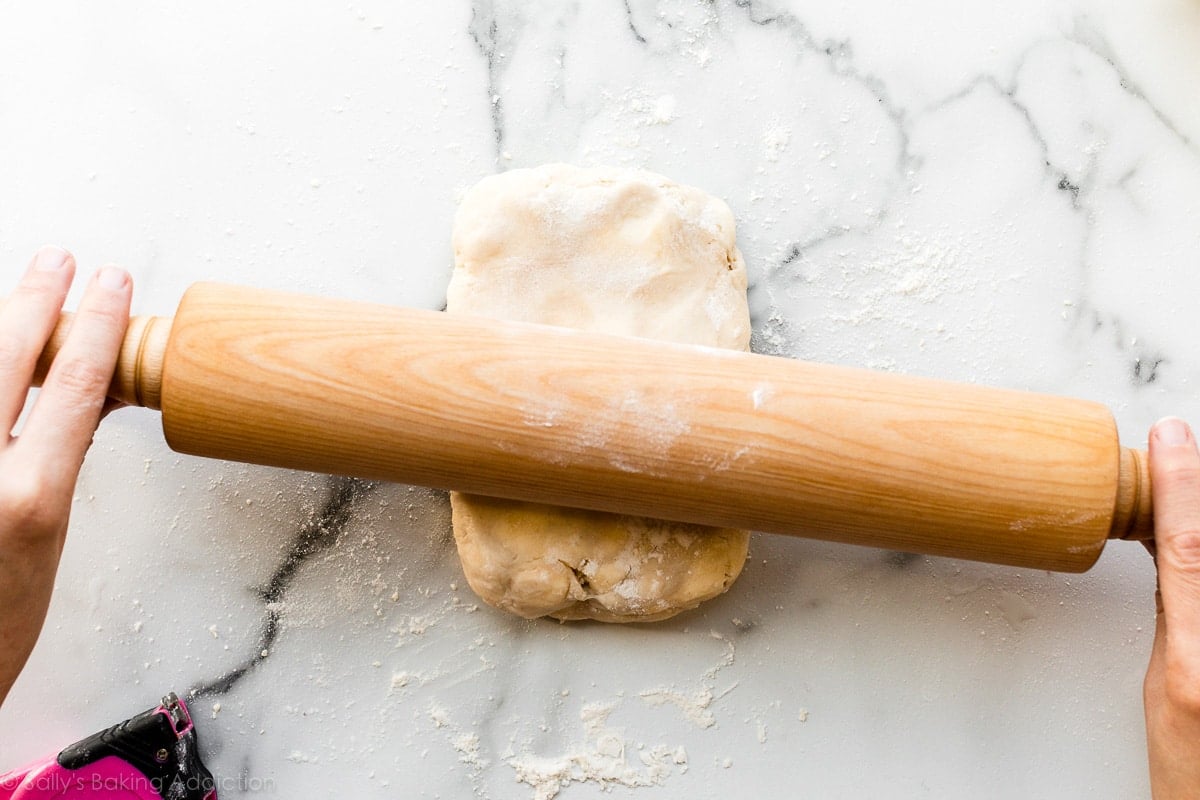
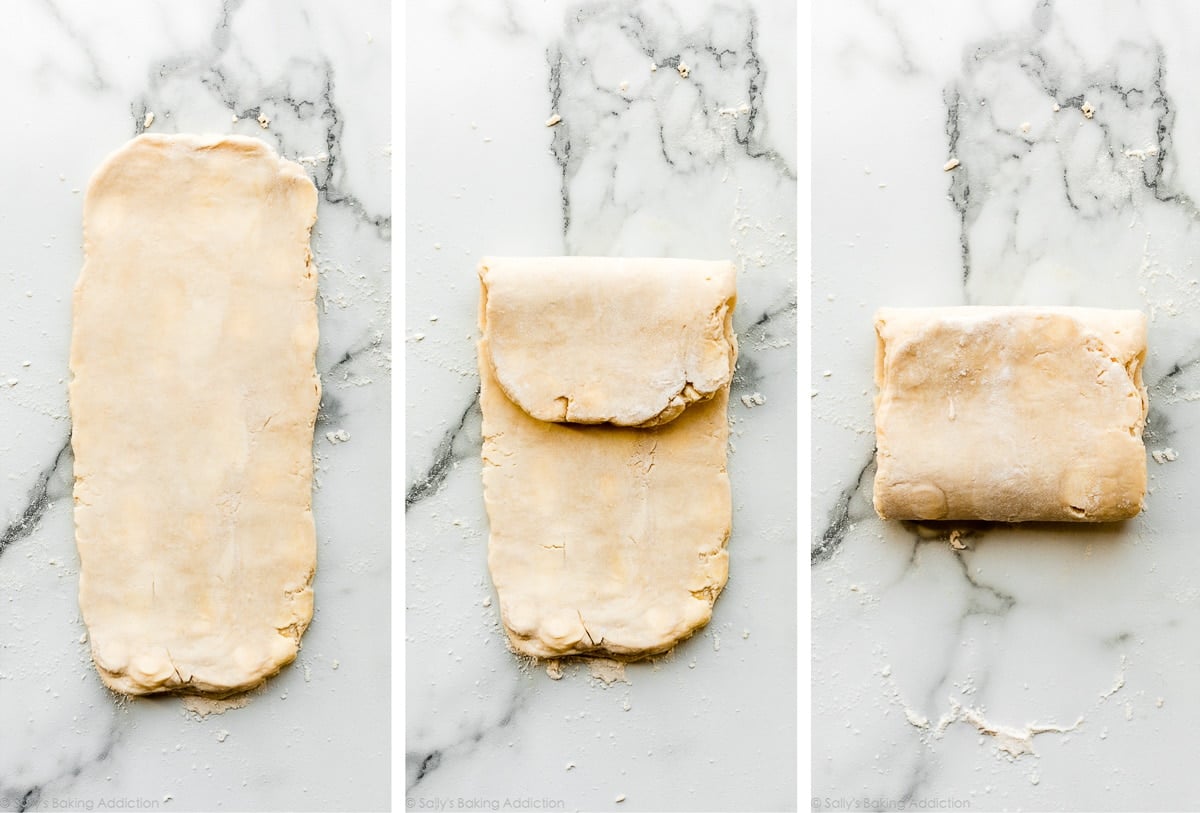
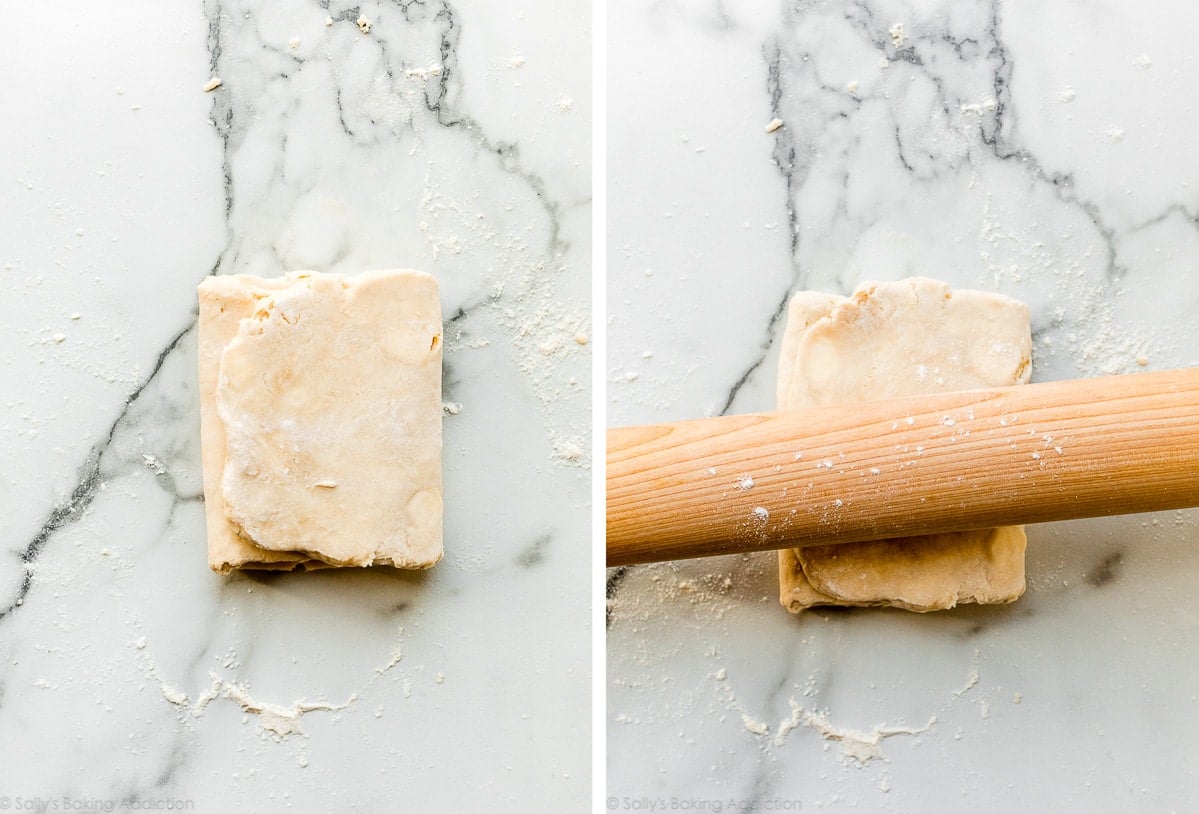
The following photos show the bowl of dry ingredients with the cold and cubed butter on top. In the right photo, you can see me gently tossing the flour and butter together. In this step, I’m briefly/barely rubbing the butter into the flour to start combining them. This step is only possible if the butter is very cold because if the butter is warm, you’ll end up with paste. At this point, as you can see in the photo on the left below, the butter is still in large cubes/chunks. That’s great! Now let’s add the ice cold water 1 Tablespoon at a time, using our hands to toss it all together. (Note that I usually start with 2 Tablespoons of water before I begin tossing together.) You can use a spatula or spoon for tossing, but I really do recommend your hands so you get a good feel of the dough. Photo below left: Continue adding the ice cold water and tossing the mixture together after each has been added. As the dough begins to hydrate after about 4 Tablespoons of water, you can start lightly squeezing or clumping the dough together with your hands to help bring it together. Mixture will still be very shaggy, as you can see. See the photo below on the right? You only need 6-8 Tablespoons of ice cold water to get to this point. Do not add any more or any less. If your dough reaches this point before adding 6 Tablespoons of water, your butter was likely too warm. You can continue with the recipe with less water, but the dough will not be as flaky. Pour the shaggy clump of dough out onto a lightly floured work surface, as you can see in the photo on the left below. There will still be large chunks of butter. Begin patting it down with your hands until it’s about 3/4 – 1 inch thick, about a 5×8 inch rectangle: As shown in the photos below, fold the dough into thirds as if you were folding a business letter. This is exactly how we fold biscuits dough, too! 1st refrigeration: Now use your hands to gently flatten and smooth out any cracks in your dough “business letter” then wrap it in plastic wrap, aluminum foil, parchment paper, or place in a sealed container, and refrigerate for at least 2 hours and up to 24 hours. Now it’s time for the rolling pin. Remove dough from the refrigerator and begin rolling out. You’re going for a 1/2 inch thick, about a 6 inch wide and 12 inch tall rectangle. The exact dimensions are not important, but the thickness is. Fold the rectangle into thirds like a business letter: Turn it clockwise or counter clockwise, then grab your rolling pin again: Repeat this 5 more times, for a total of 6 rolling out + folding sessions. Success Tip: If the dough “business letter” is so thick or impossible to roll out, cover it with a clean kitchen towel and let it rest for 5 minutes before trying again. The butter just needs to slightly soften. Lightly flour your work surface whenever necessary. After the 6th time, you may not be able to see visible chunks of butter anymore. (If you do, that’s fine. If you don’t, that’s also fine.) 2nd refrigeration: Fold the dough into a business letter, wrap tightly, and then chill for at least 15 minutes and up to 24 hours. Now you can use it in your recipe such as homemade palmiers or this butternut squash and mushroom tart.