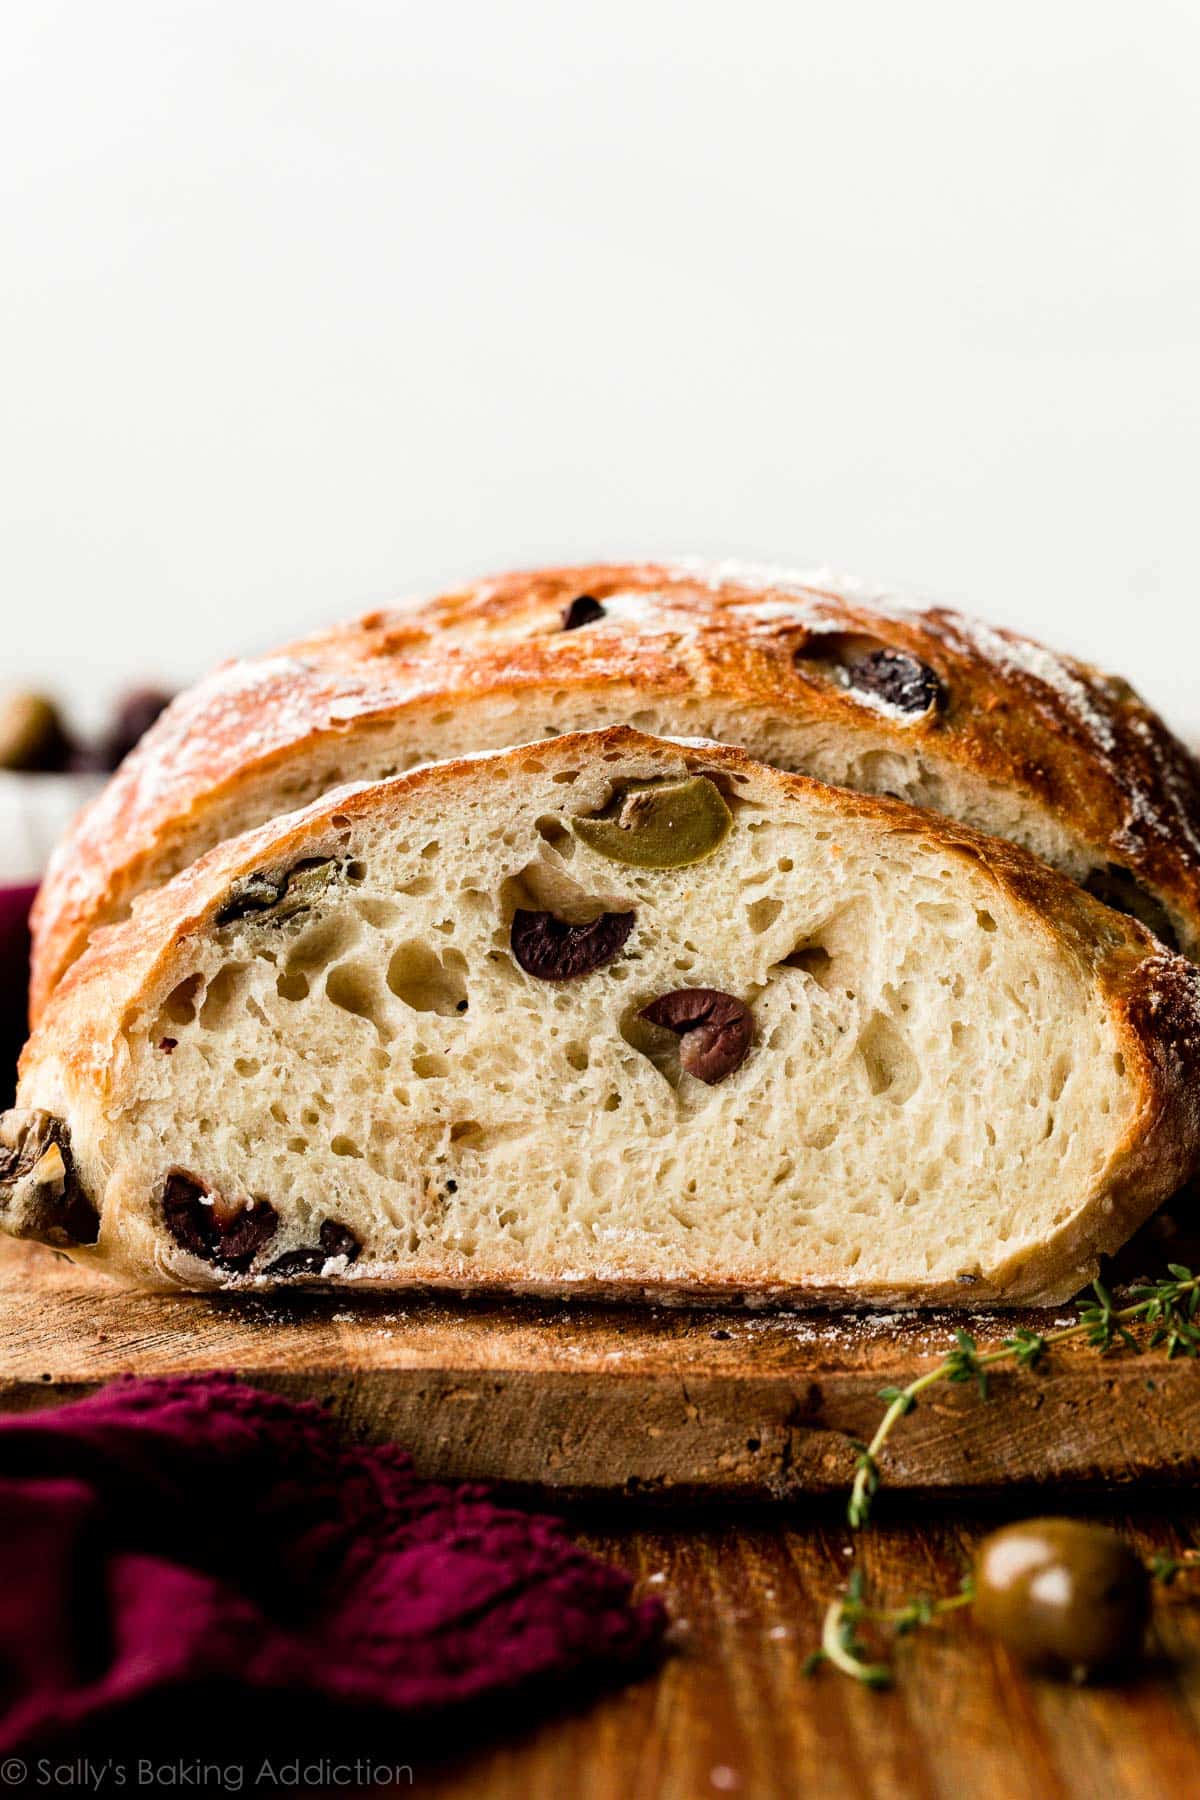
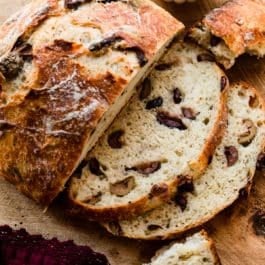
Another homemade yeast bread to love! Don’t let your eyes fool you… the dark speckles in today’s bread are not chocolate chips and raisins. They’re olives! This recipe is based off of my homemade artisan bread, a wonderfully easy and widely popular no-knead bread that’s fit for both beginners and experts. (Note that I bake this bread at a slightly lower oven temperature because the olives can burn.)
A Flavorful Bread Recipe for Beginners
Today’s olive bread basically makes itself, so if you’re nervous to try homemade bread, this recipe is a great introduction. Even though the recipe is easy, the bread does NOT skimp on flavor. It’s just a simple way of baking homemade bread inspired by the no-knead technique originating from bread expert Jim Lahey. Here’s why it’s so simple:
Only 7 ingredients Absolutely no kneading (just like homemade English muffins!) Zero complicated shaping No mixer required 90% of the time is totally hands off Can bake in a dutch oven or on a baking sheet
Plus, you can make it in 4 hours or let the dough rest in the refrigerator for up to 3 days (great make-ahead recipe!). Once you realize how easy it is to prepare salty, herby, garlicky olive bread, you’ll find any excuse to bake it.
Key Ingredients You Need & Why
Today’s Mediterranean-inspired bread is an egg free baking recipe and dairy free recipe. Here are the ingredients you need:
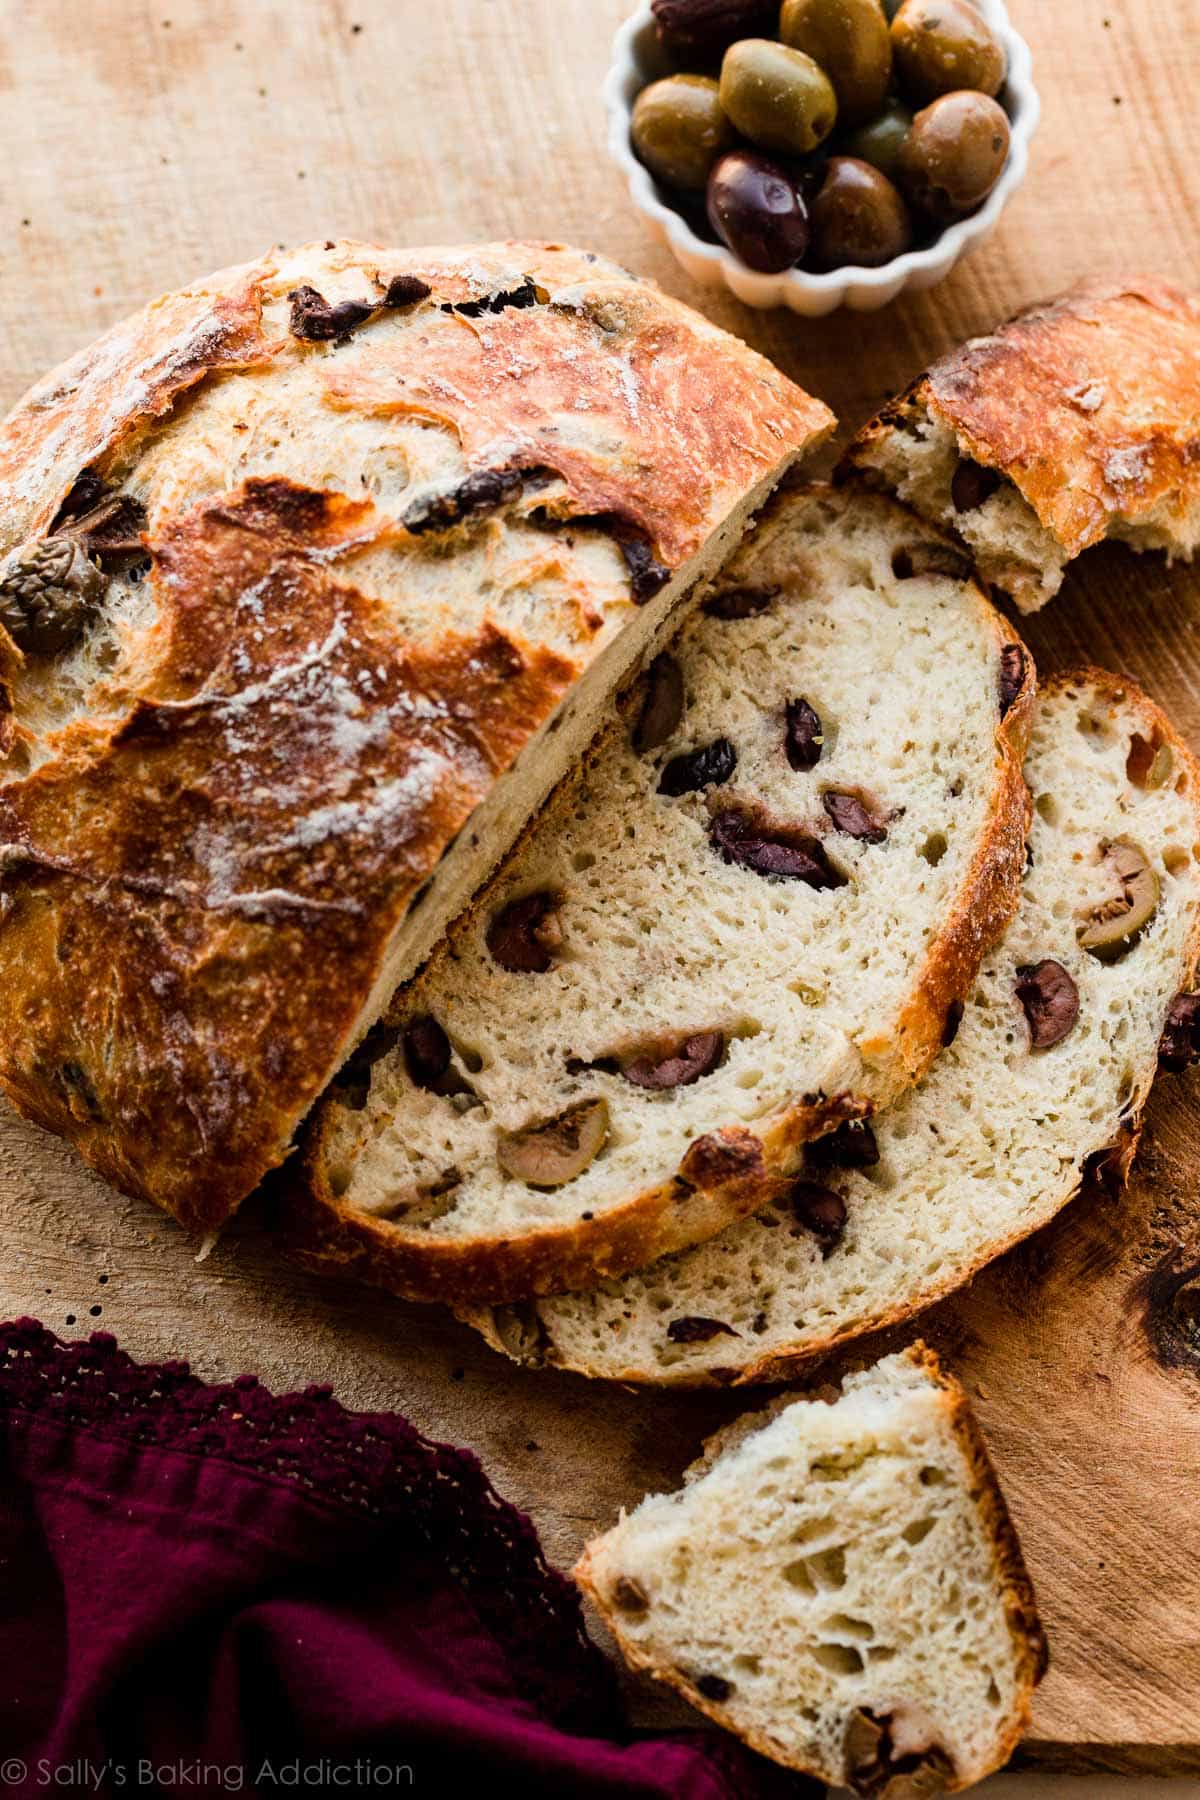
Best Olives to Use
Kalamata olives are excellent in this bread, but you can use a medley of olives. I’ve made it both ways. Whatever you use, give the olives a rough chop.
Let Me Show You How to Make This Olive Bread
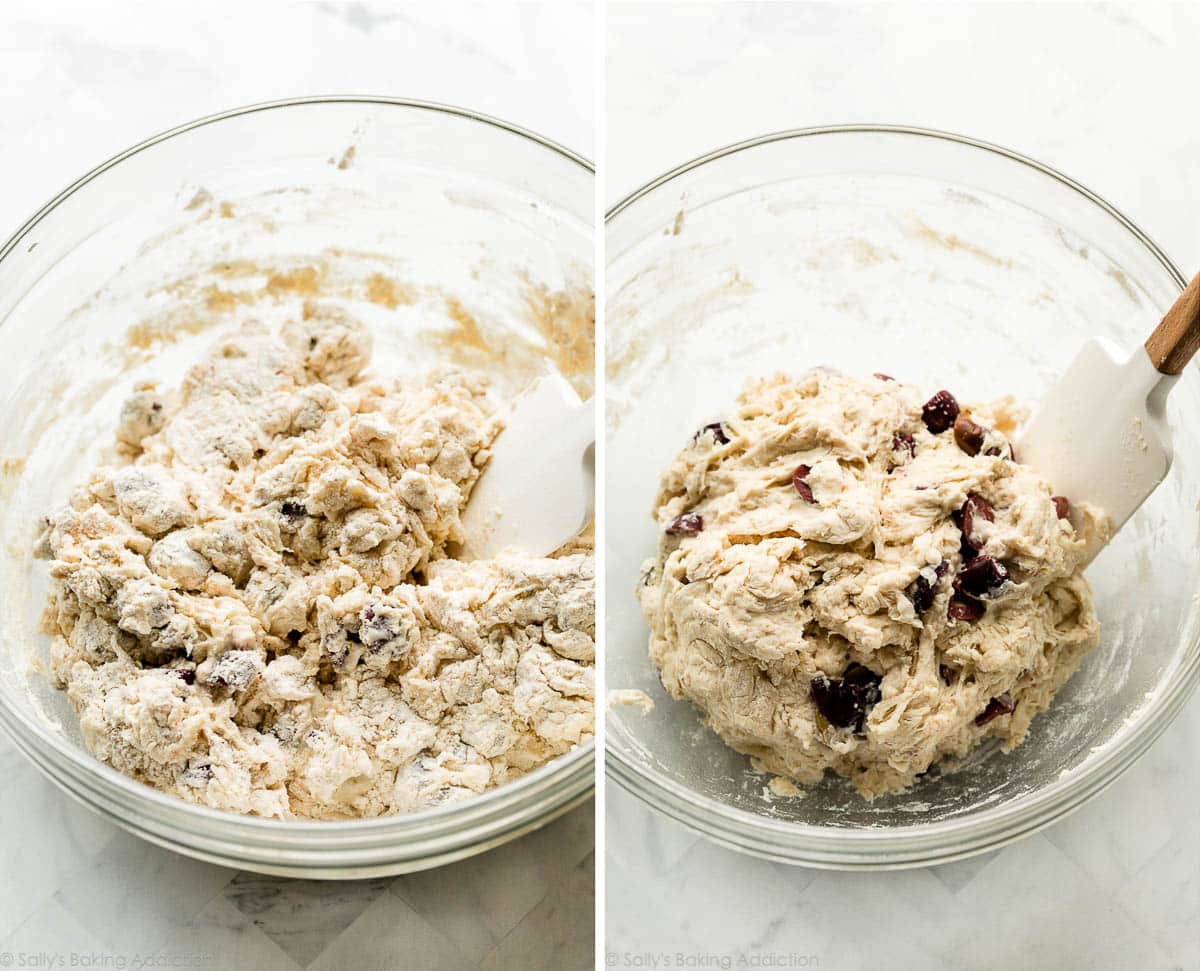
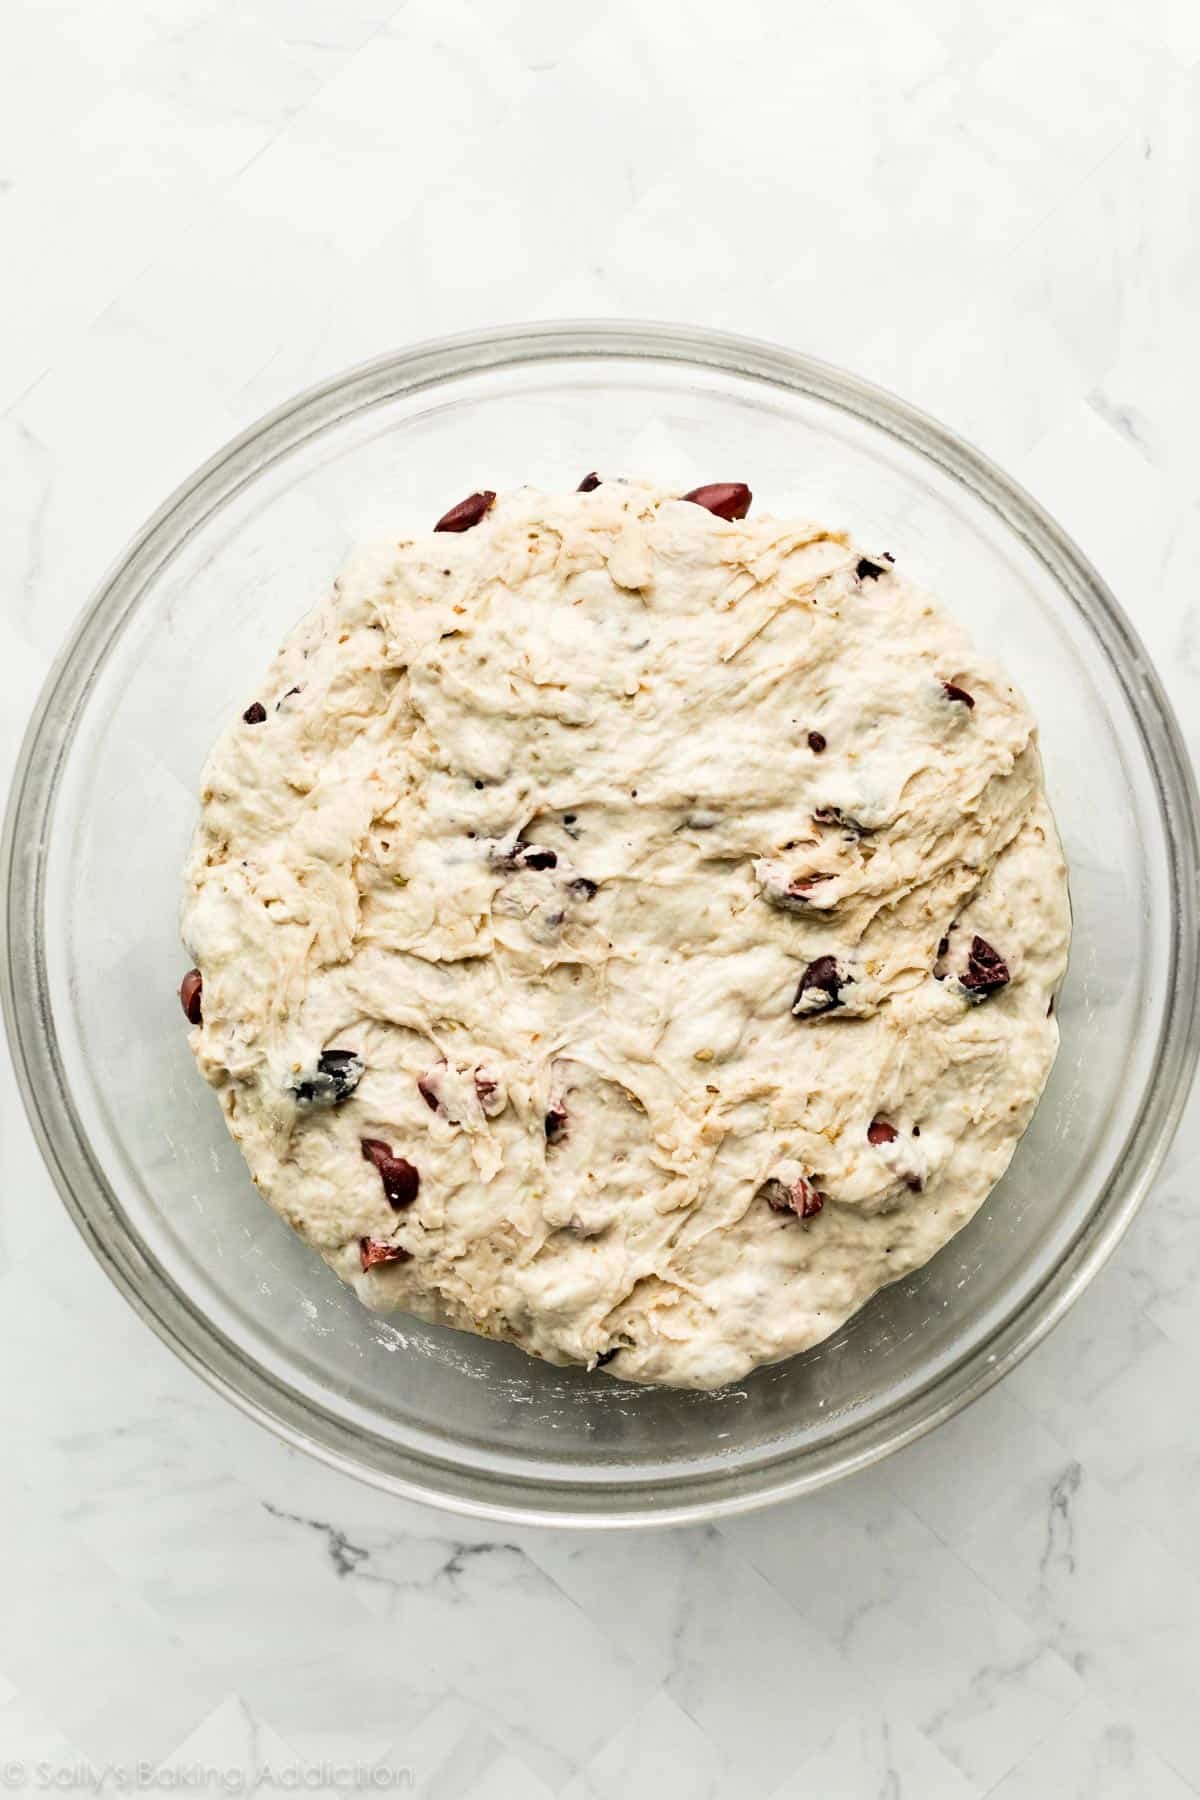
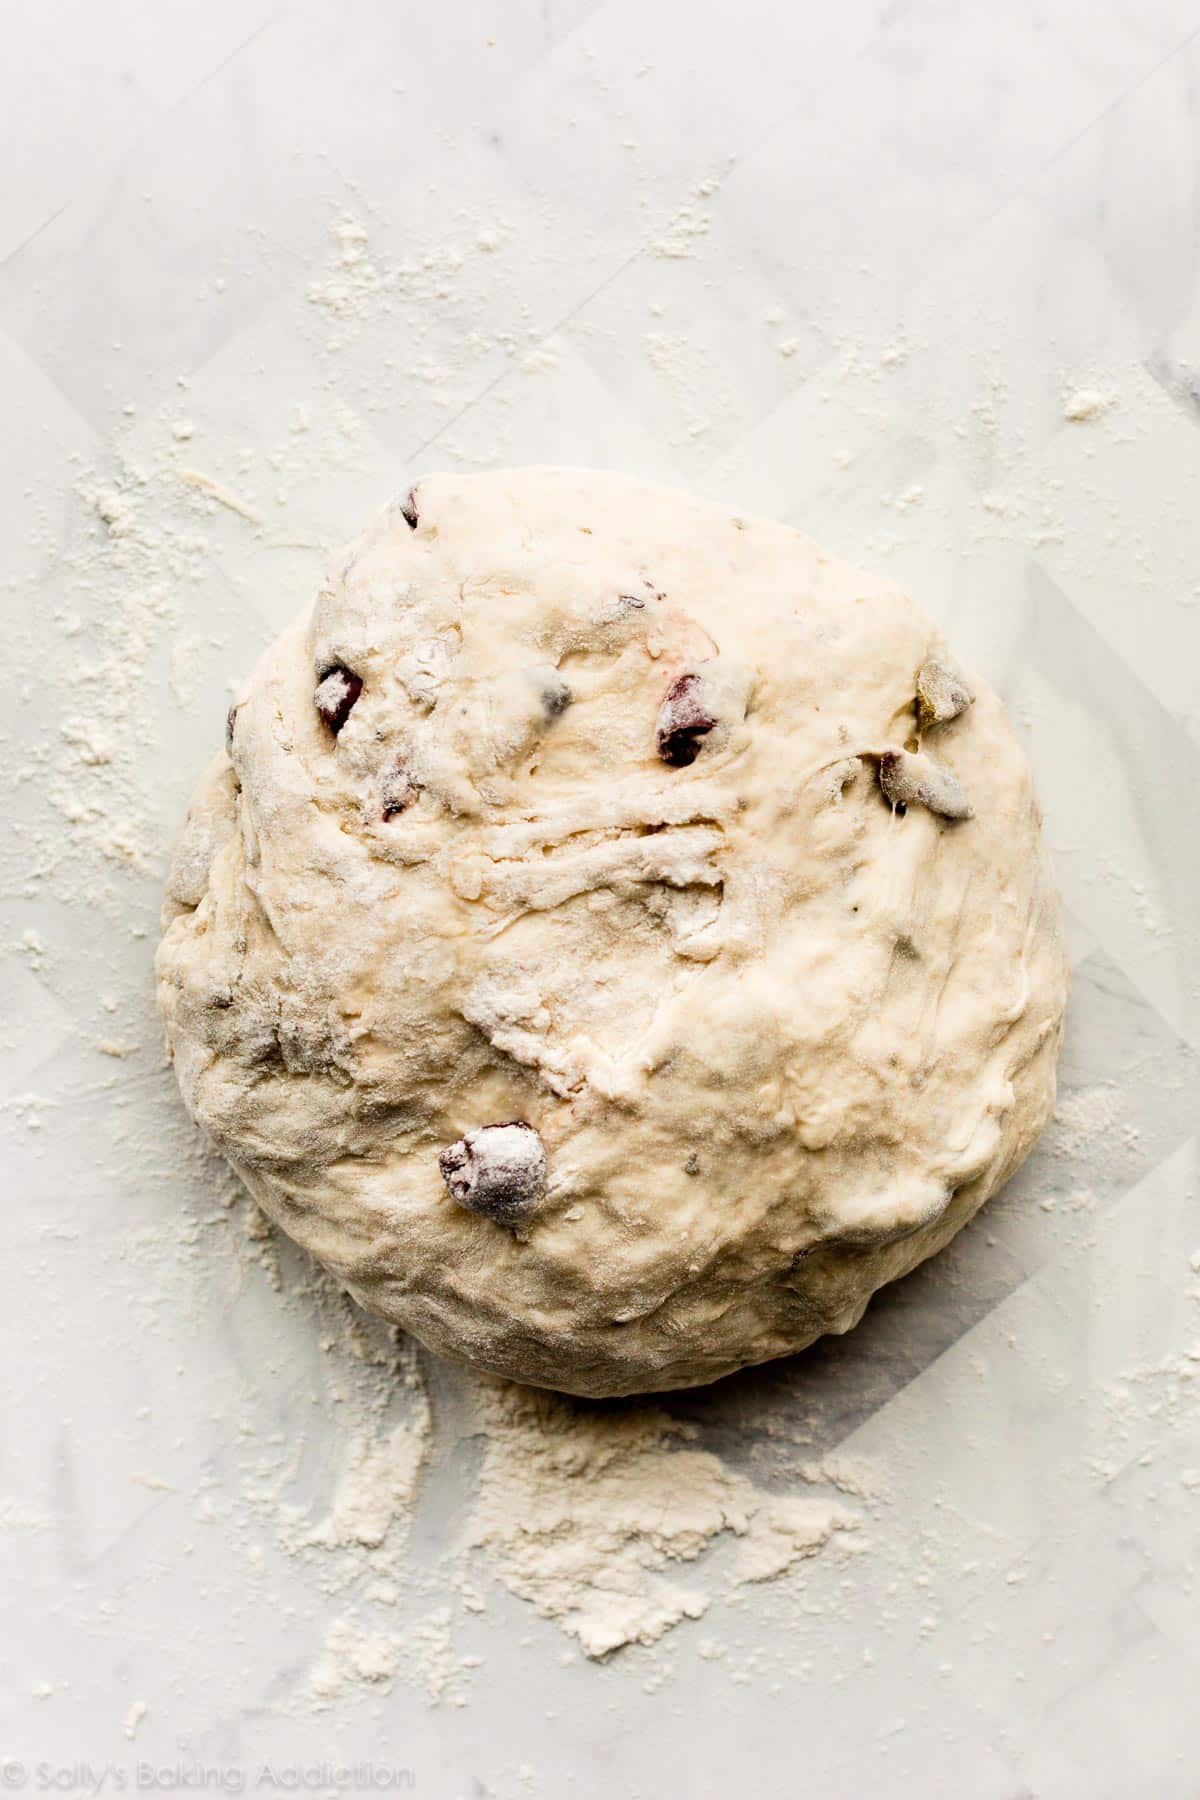
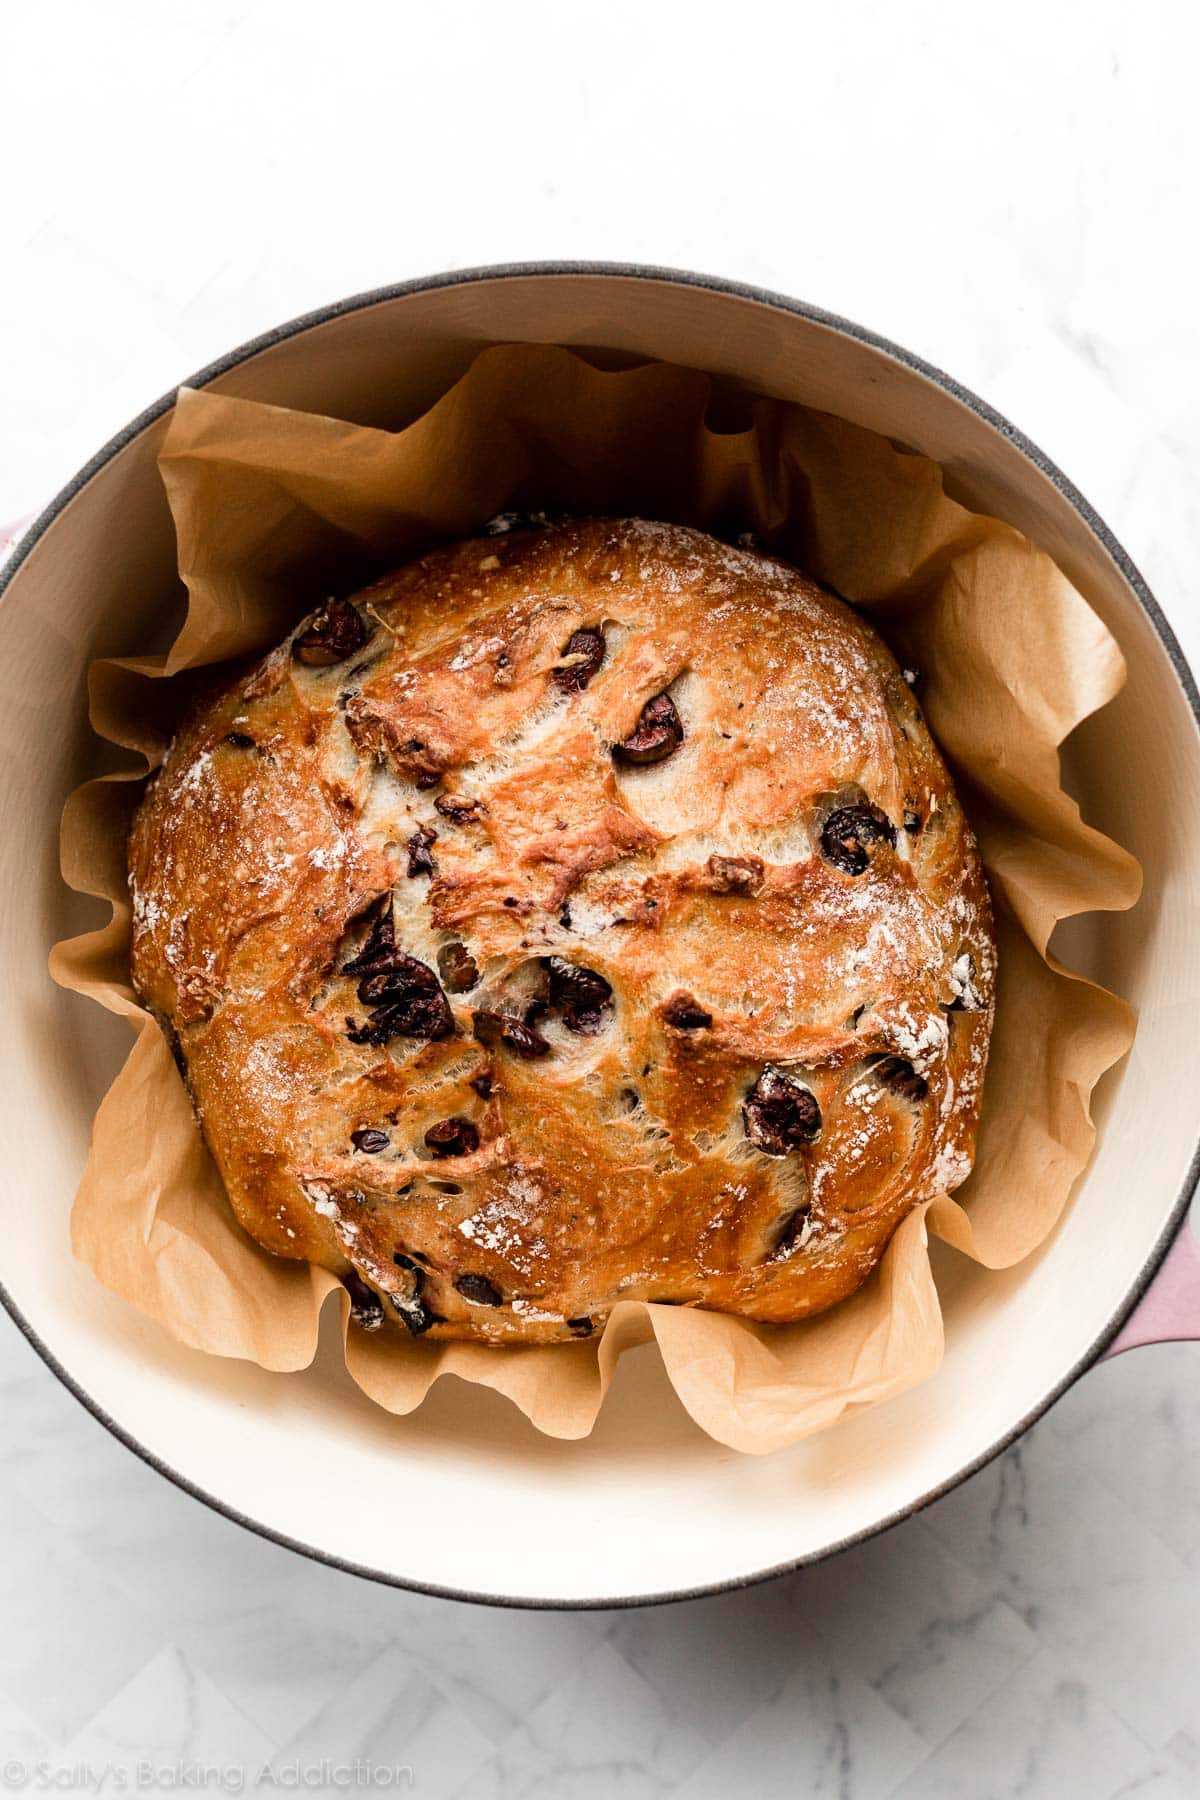
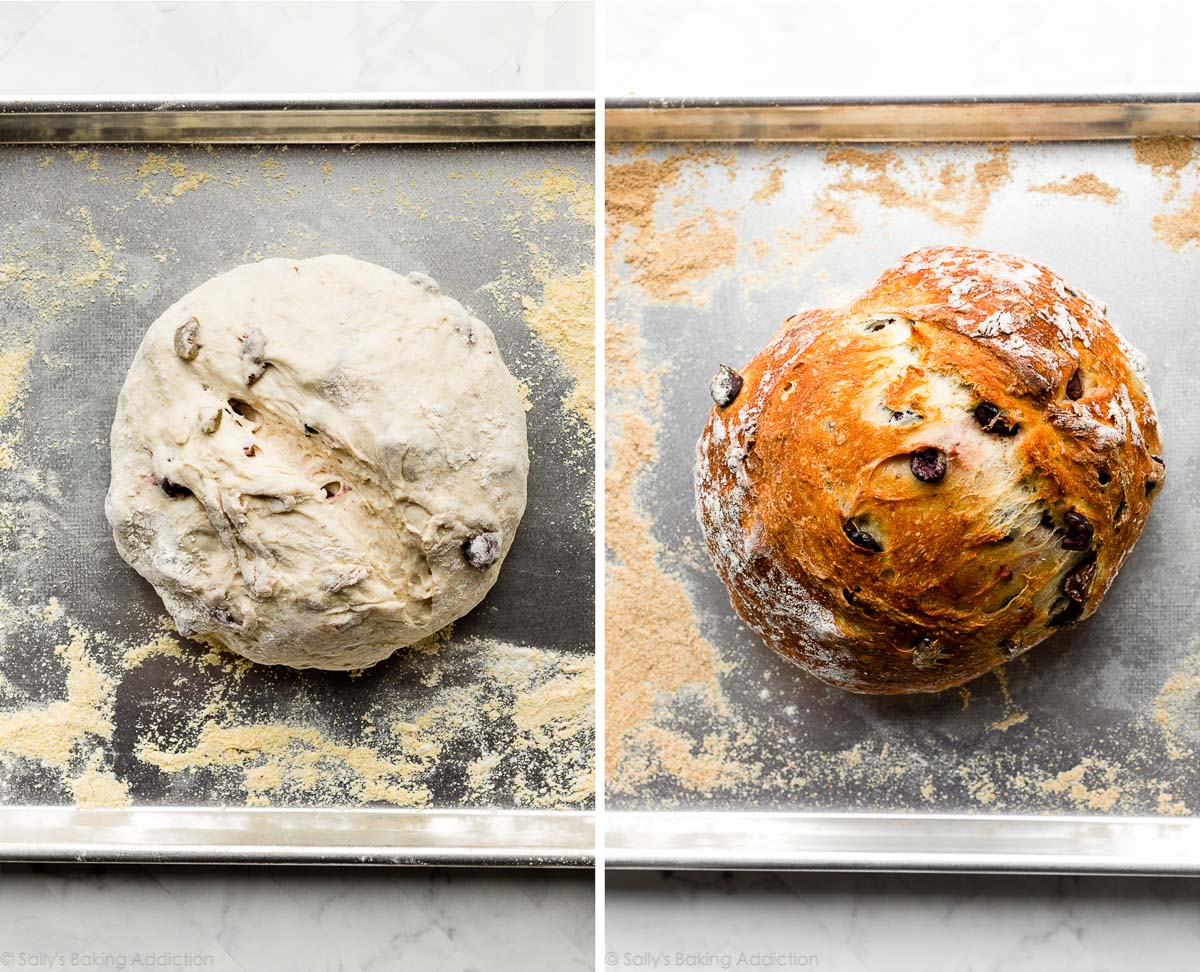
Mix the dry ingredients together and then mix in the chopped olives and water. At first the dough will seem very dry and shaggy and you’ll question if it will even come together. (See above!) Use a spatula at first and then switch to your hands to ensure all of the flour is moistened. The dough is a little sticky after it’s thoroughly mixed. Let it rise. Cover the dough and let it rise at room temperature for about 2–3 hours. You can immediately continue with step 4 below (gently shaping before baking) or refrigerate the dough for up to 3 days. For best flavor, I strongly recommend refrigerating the risen dough even if it’s just for a couple hours. After the dough rises and rests in the refrigerator, use generously floured hands to shape the dough into a round boule or ball-like shape: Now it’s time to choose between a dutch oven or baking sheet. This bread isn’t picky!
Use a Baking Sheet or Dutch Oven
You can use either. Baking the olive bread in a covered dutch oven traps steam inside the pot, creating that perfect crust. If you plan to bake a lot of bread in the future, you won’t regret picking up a dutch oven. If you don’t have a dutch oven, a nonstick large baking sheet is best. Let me explain both ways: Whichever you use, don’t forget to score the dough with a bread lame or sharp knife. Scoring allows the wet, airy dough to “breathe” as it rises and bakes. Dutch oven method: Baking sheet method: The bread is unbelievable when it’s fresh from the oven—warm, crispy, crusty, and soft inside!
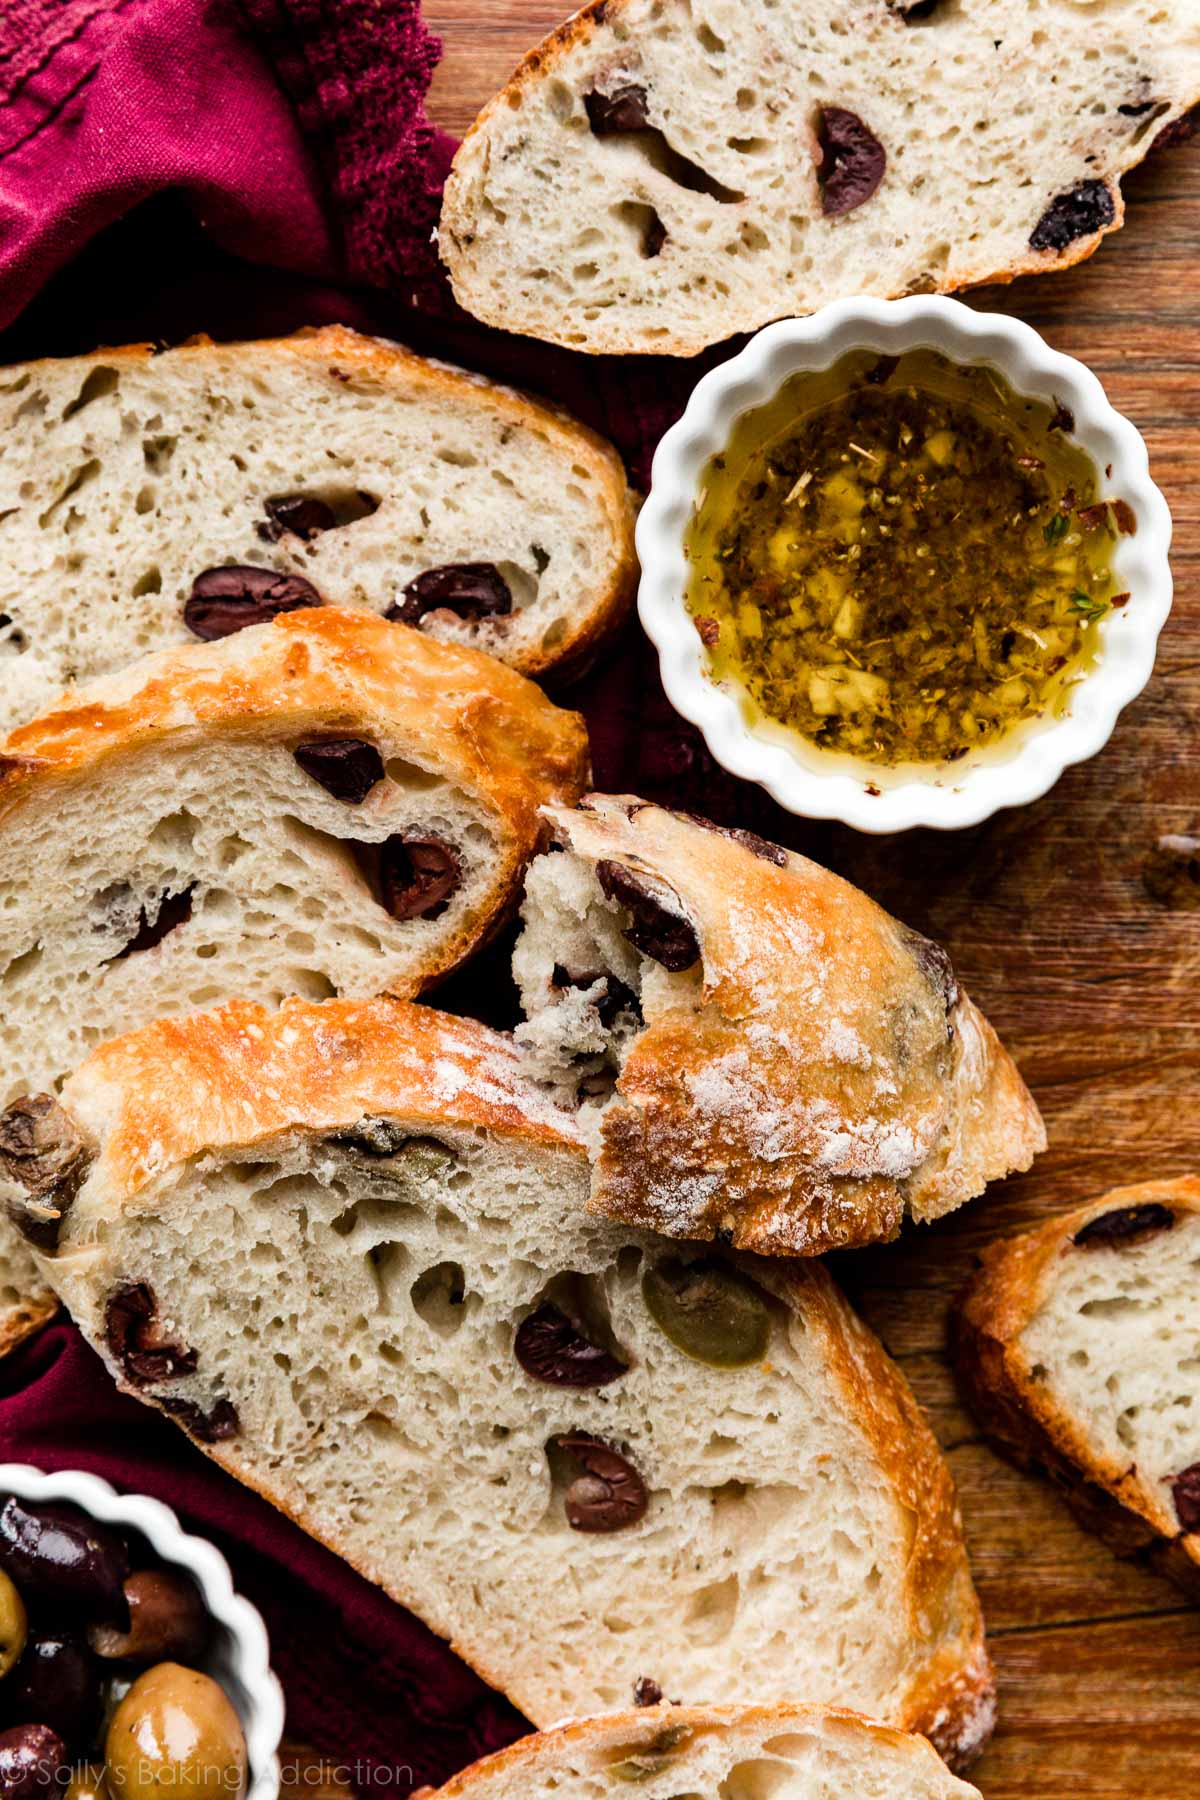
What Can I Serve With This Olive Bread?
Honestly, it’s fantastic plain. But I usually mix together a super easy + flavorful dipping oil: 3 Tablespoons (45ml) extra virgin olive oil and 2 minced cloves of garlic plus a sprinkle each of red pepper flakes, fresh or dried thyme, dried oregano, salt, and pepper. The bread would also be delicious paired with homemade pesto. Serve your olive bread alongside a charcuterie or cheese platter, or with any Mediterranean-style fare. I love it with a big Greek salad and have even served it with minestrone soup, pesto shrimp, chicken meatballs, and lemon thyme chicken. (The chicken dish has so much sauce for soaking! Lemon thyme chicken is another excellent option.)