Flecked with espresso and flavored with pure vanilla, this is my favorite crème brûlée recipe. The brilliantly creamy custard can only be reached by cracking through a crisp caramelized sugar ceiling. The textural difference between the two layers is unbelievable and separates this dessert from every other. Simply put, crème brûlée tastes like luxury and has always been a baking bucket list recipe for me, and for good reason. One reader, Mary, commented: “My husband keeps inviting people over to our house for dessert so I can make this for them. I asked for a torch for Christmas so I could learn how to make it. This is the second recipe I’ve tried, and it’s a keeper. Tonight will be my 3rd time making this recipe since Valentine’s Day. Save this recipe FOREVER. ★★★★★“ The GREAT news is that you don’t need to dine at a fancy restaurant for the best crème brûlée experience. Not many realize how easy it is to make at home, especially for occasions like Valentine’s Day, Mother’s Day, Father’s Day, anniversaries, etc.
Overview: How to Make Crème Brûlée at Home
The full printable recipe is available below, but let me walk you through the process so you can understand the steps before beginning. That’s it… you’re done. Yes, it really is this easy.
Crème Brûlée Success Tips
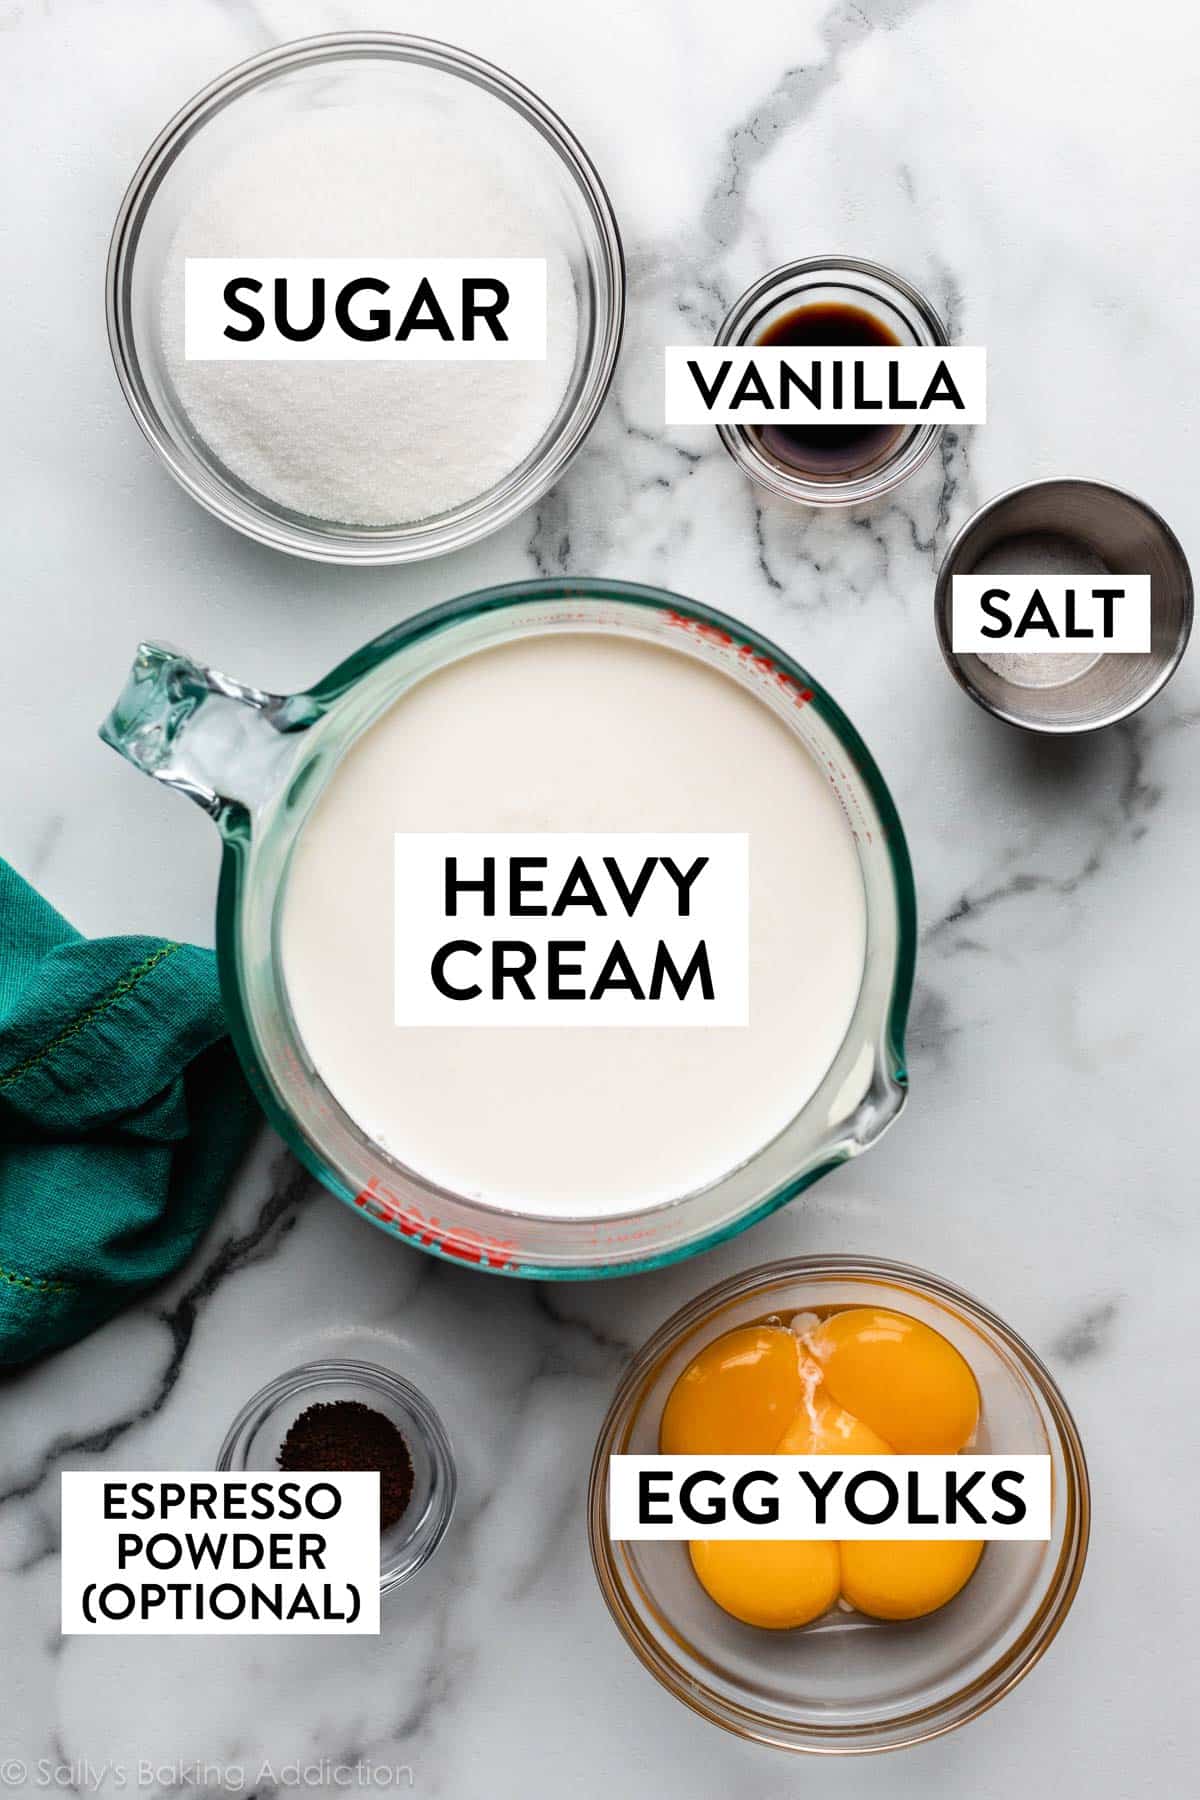
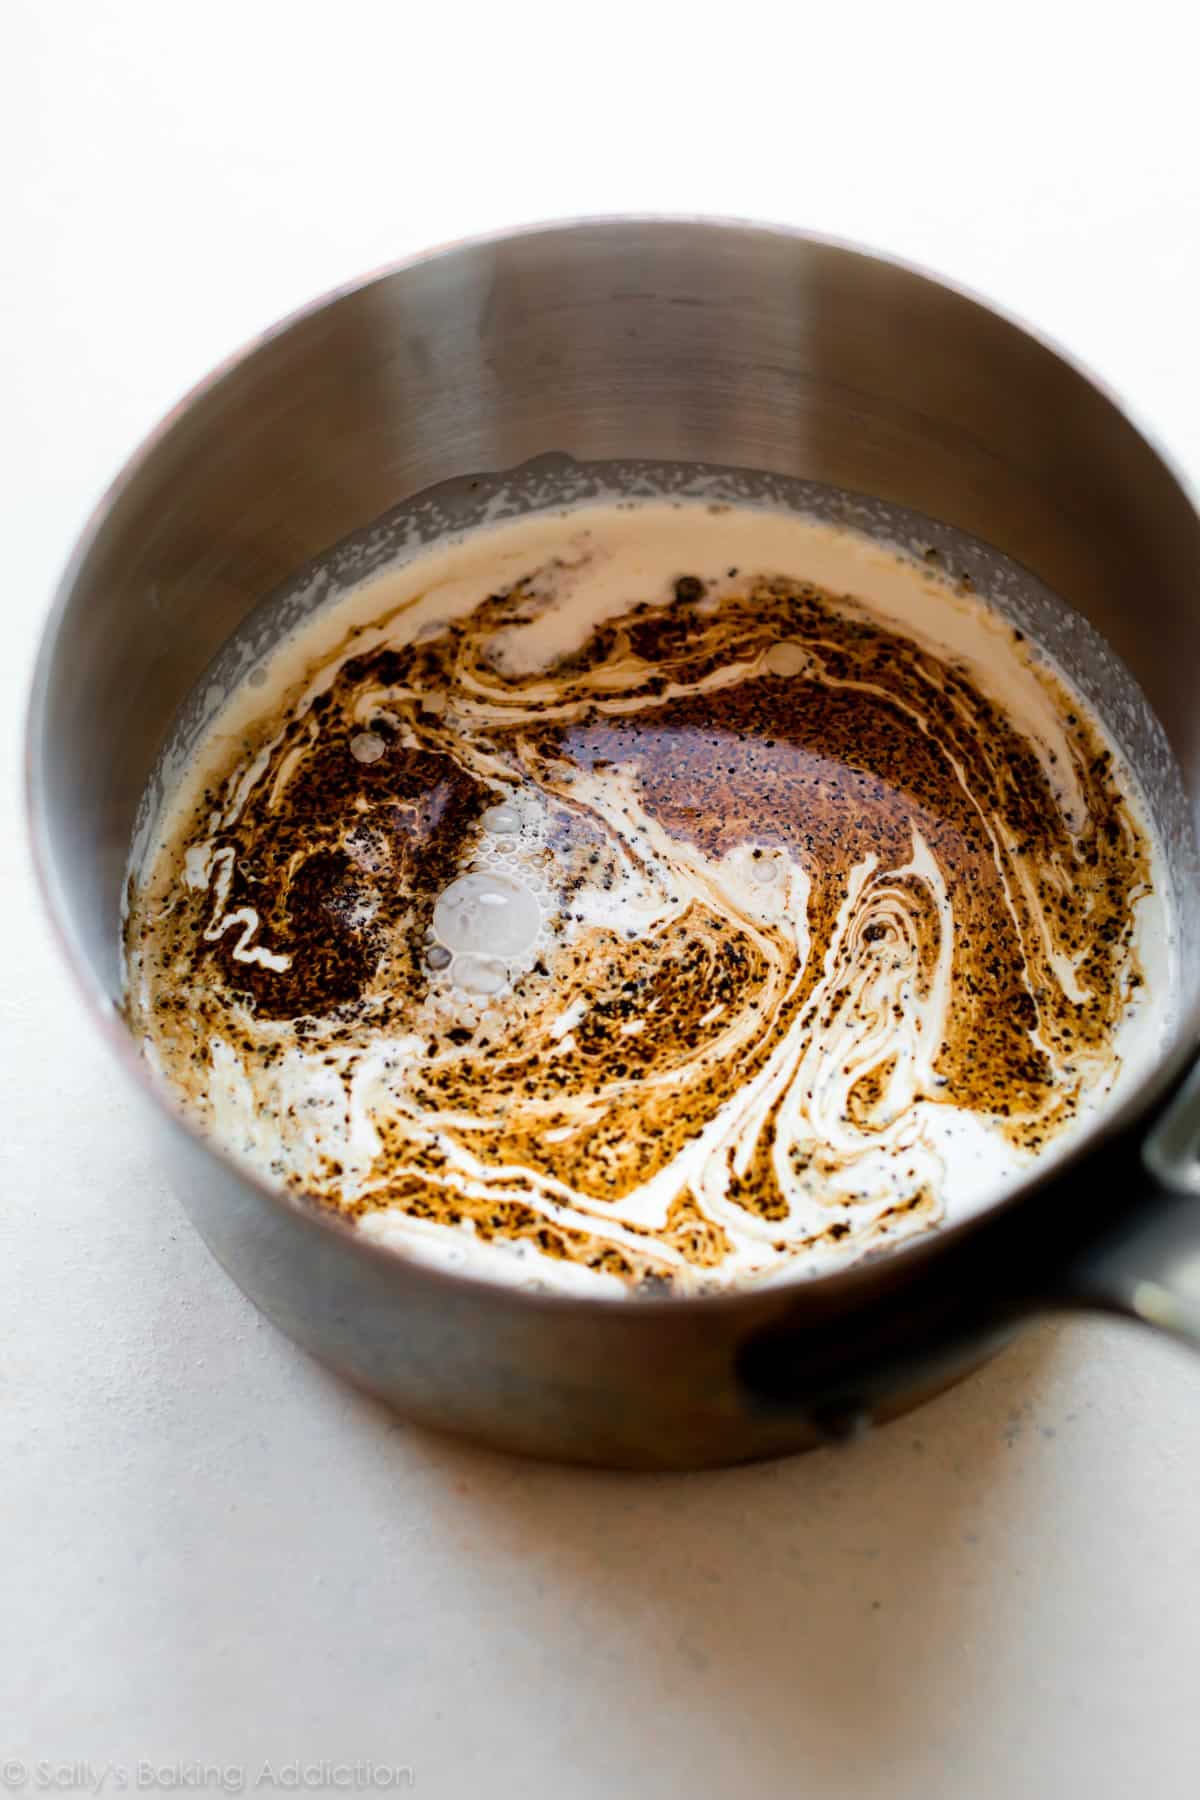
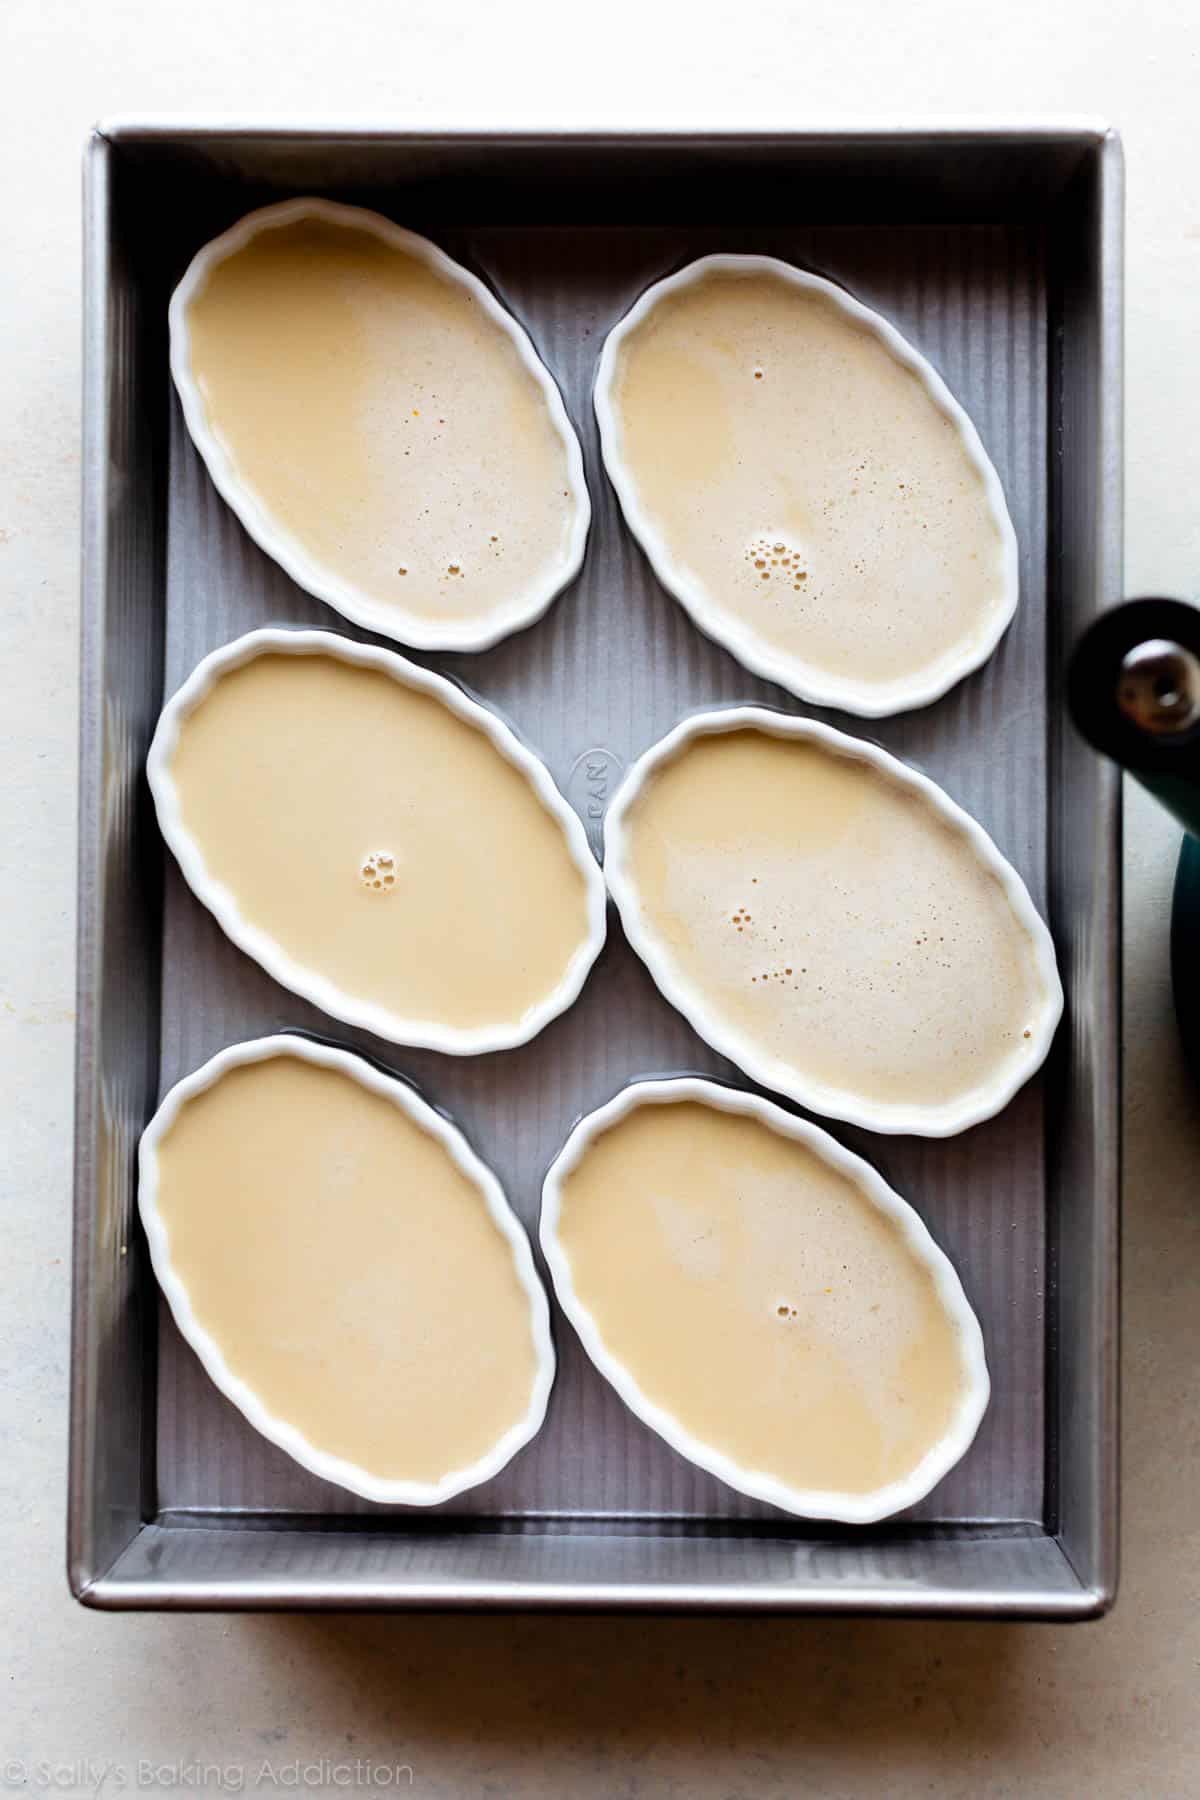
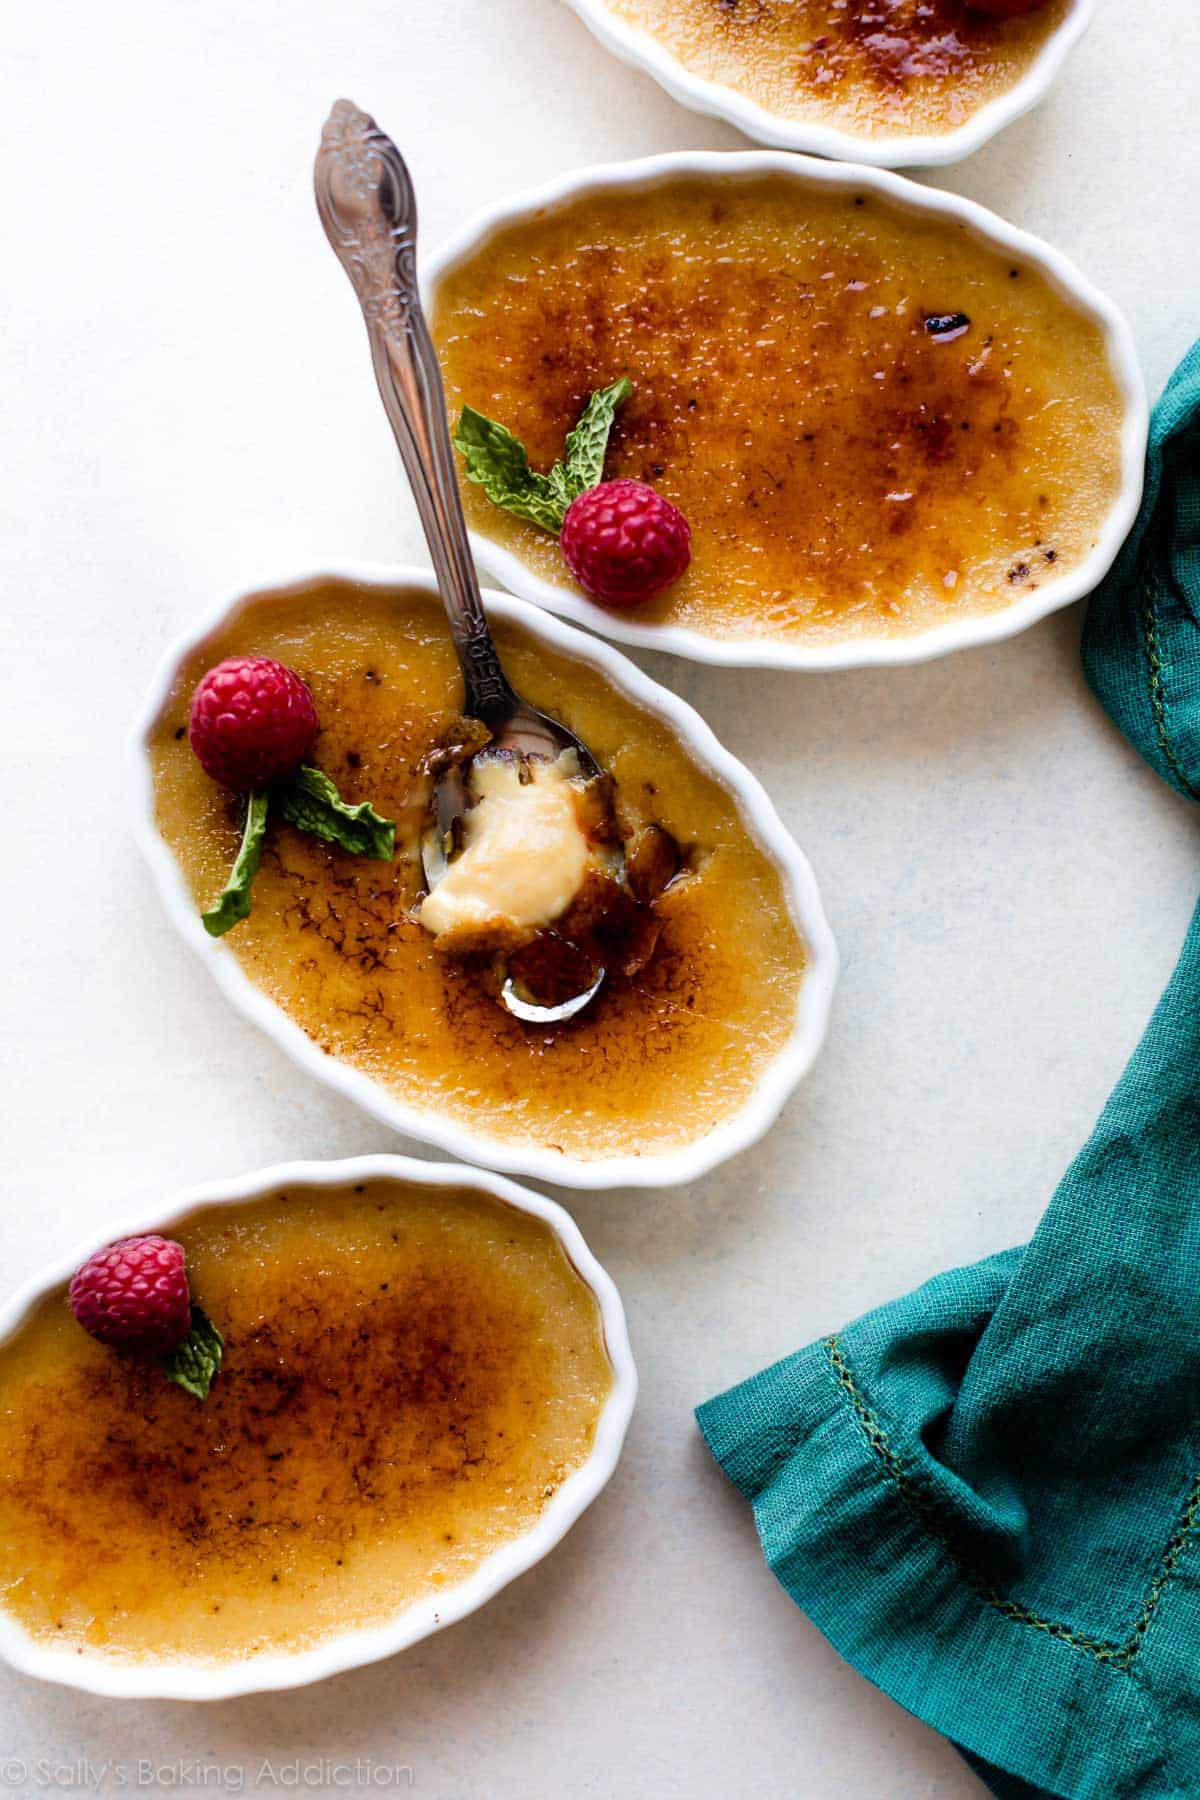
Best ratio: Heavy cream and egg yolks are the key ingredients in crème brûlée. It took a little bit of testing to figure out the best ratio, but I loved 5 egg yolks with 3 cups of heavy cream the most. This produces a VERY creamy and lush crème brûlée. Save the leftover egg whites and add them to omelets and scrambled eggs the next few mornings. Temper egg yolks: If you’ve never done it before, tempering egg yolks is nothing to fear—all you’re doing is slowly raising the temperature of the egg yolks so they don’t scramble. Whisk some of the warm heavy cream into the egg yolks + sugar, then whisk it all into the pot of warm heavy cream. You can watch me temper the egg yolks in the video tutorial. Should I strain it? Straining the custard before cooking it is, in my opinion, optional. If you notice the custard is thick with any lumps, definitely use your sieve to strain it before baking. Shallow ramekins: Serve crème brûlée in individual ramekins. The small ramekins ensure the custard cooks evenly, though you could use a large wide ceramic dish instead. See my recipe note below. I love using individual wide, shallow ramekins so there is more surface area for the caramelized sugar! I suggest these oval ramekins or these circle ramekins. (This recipe yields about 8 crème brûlées so you’ll need 2 sets of the oval ramekins OR you can bake the extra custard in other ramekins you may have.) Water bath: Place the ramekins in a large baking dish (I used a 9×13-inch baking pan), pour the custard in each, then fill the pan with hot water. The water bath creates a moist and humid environment for the crème brûlée, which is imperative for their texture. (Same story for lemon pudding cakes.) A regular hot oven typically produces rubber-y tasting crème brûlée with cracked surfaces. Best bake time: You will likely over-bake the crème brûlée your first time. That’s what my friend told me before I began my crème brûlée adventures. They key, he said, is to look for a jiggly center. The edges will be set, the centers will jiggle like jello. (Anyone ever watch My Best Friend’s Wedding with Julia Roberts? Crème brûlée can never be jell-o. YOU could never be jell-o.) For a more accurate answer, use an instant read thermometer. They’re done when the thermometer registers 170°F (77°C).
By the way… my friend was right, I over-baked them my first try. The next few tries, pictured in this post, are texture perfection. You want that creamy custard. Learn from my mistake and take those custards out of the oven early.
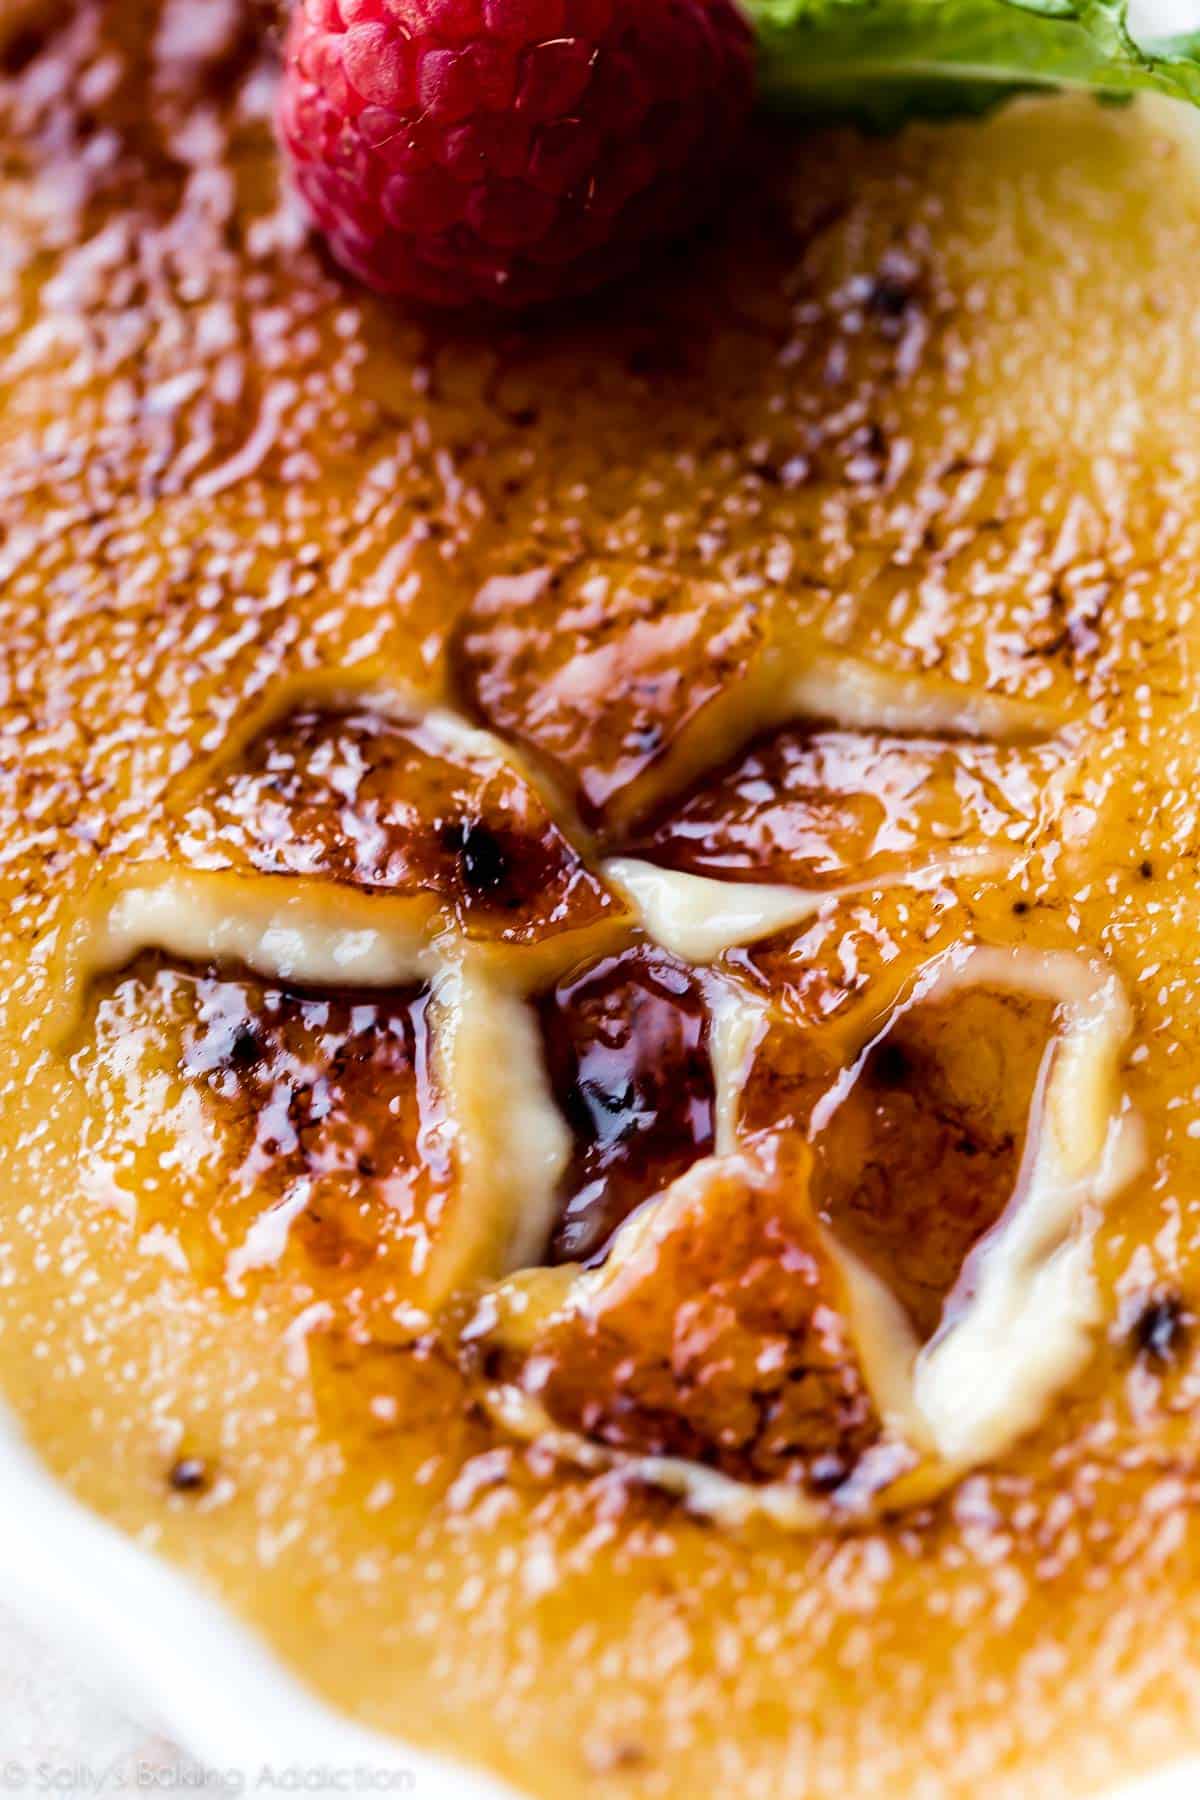
Burnt Sugar Topping
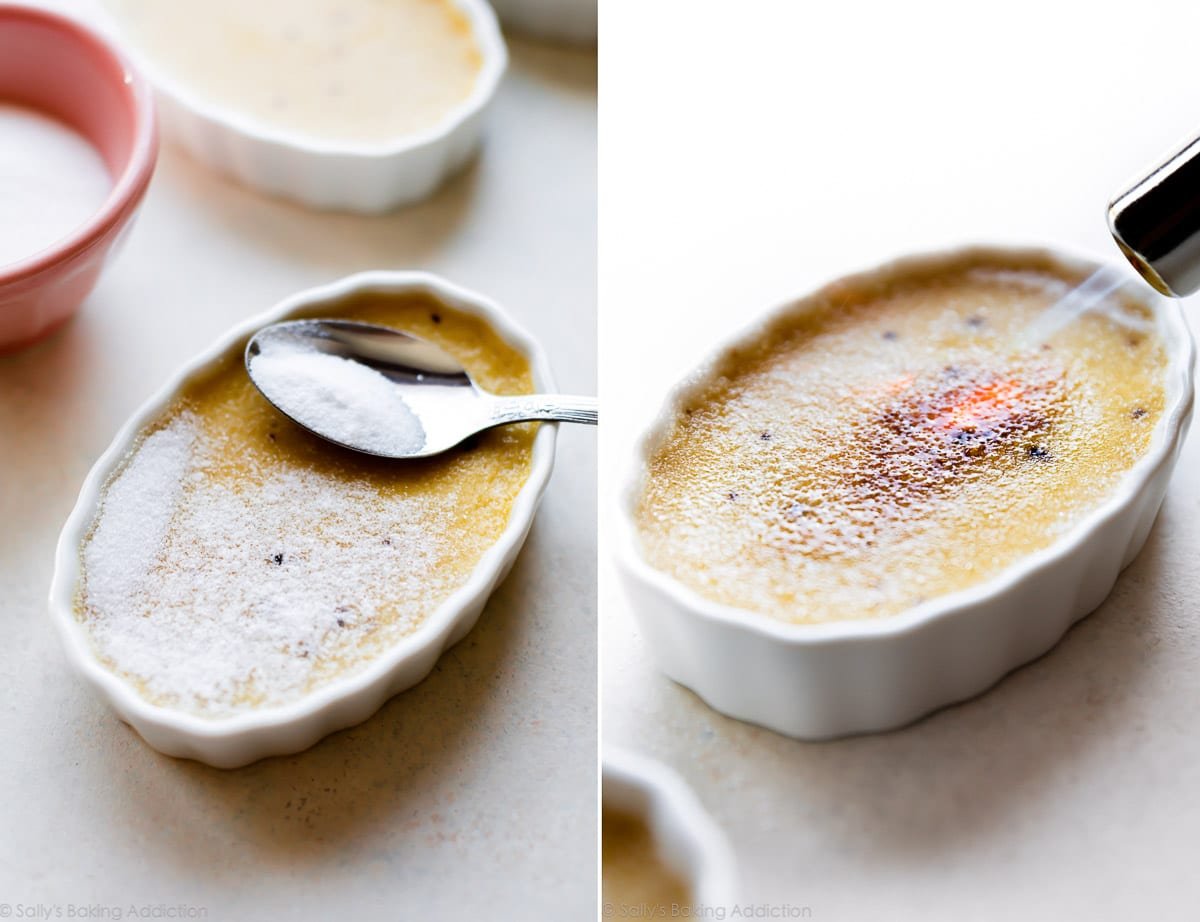
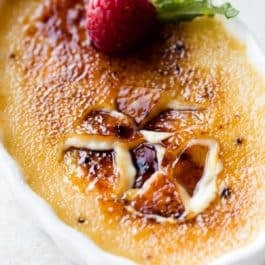
Crème = cream. Brûlée = burnt. Burnt cream. So as many times as I say “caramelized sugar” it’s really burnt sugar. It’s the CRUNCH on the CREAM and it’s so so tasty! After the custards bake, cool, and chill, it’s time for that special finishing touch. All we’re doing here is sprinkling the surface with granulated sugar. Some recipes insist on superfine sugar for the topping and some recipes call for coarse sugar. I tested the recipe with both, but ended up just using regular granulated sugar– the same sugar we’ll use in the custard themselves. It produced a thick and sturdy caramelized sugar topping, just the kind we want! One important note: Cover the entire surface with a thin layer of granulated sugar. No exposed custard. When applied to heat, the cooled custard will curdle.
Kitchen Torch or Oven Broiler?
For caramelizing, you need intense heat. A kitchen torch is magic. Kitchen torches are surprisingly inexpensive and the couple times a year that I need it, I’m glad I have one. It really makes a difference. Other recipes where I use my kitchen torch:
S’mores Brownie Cupcakes Brownie Baked Alaska No-Bake S’mores Cake S’mores Tartlets
See my recipe notes for using the oven broiler instead. Burnt sugar on creamy custard = simple beauty and decadence. Doesn’t this make you feel fancy? We should be wearing pearls and eating our crème brûlées with crystal spoons while sitting on our gold thrones calling each other on our diamond encrusted phones talking about how fancy we are. Bonus: Crème Brûlée is always a favorite for those in need of gluten free dessert recipes!