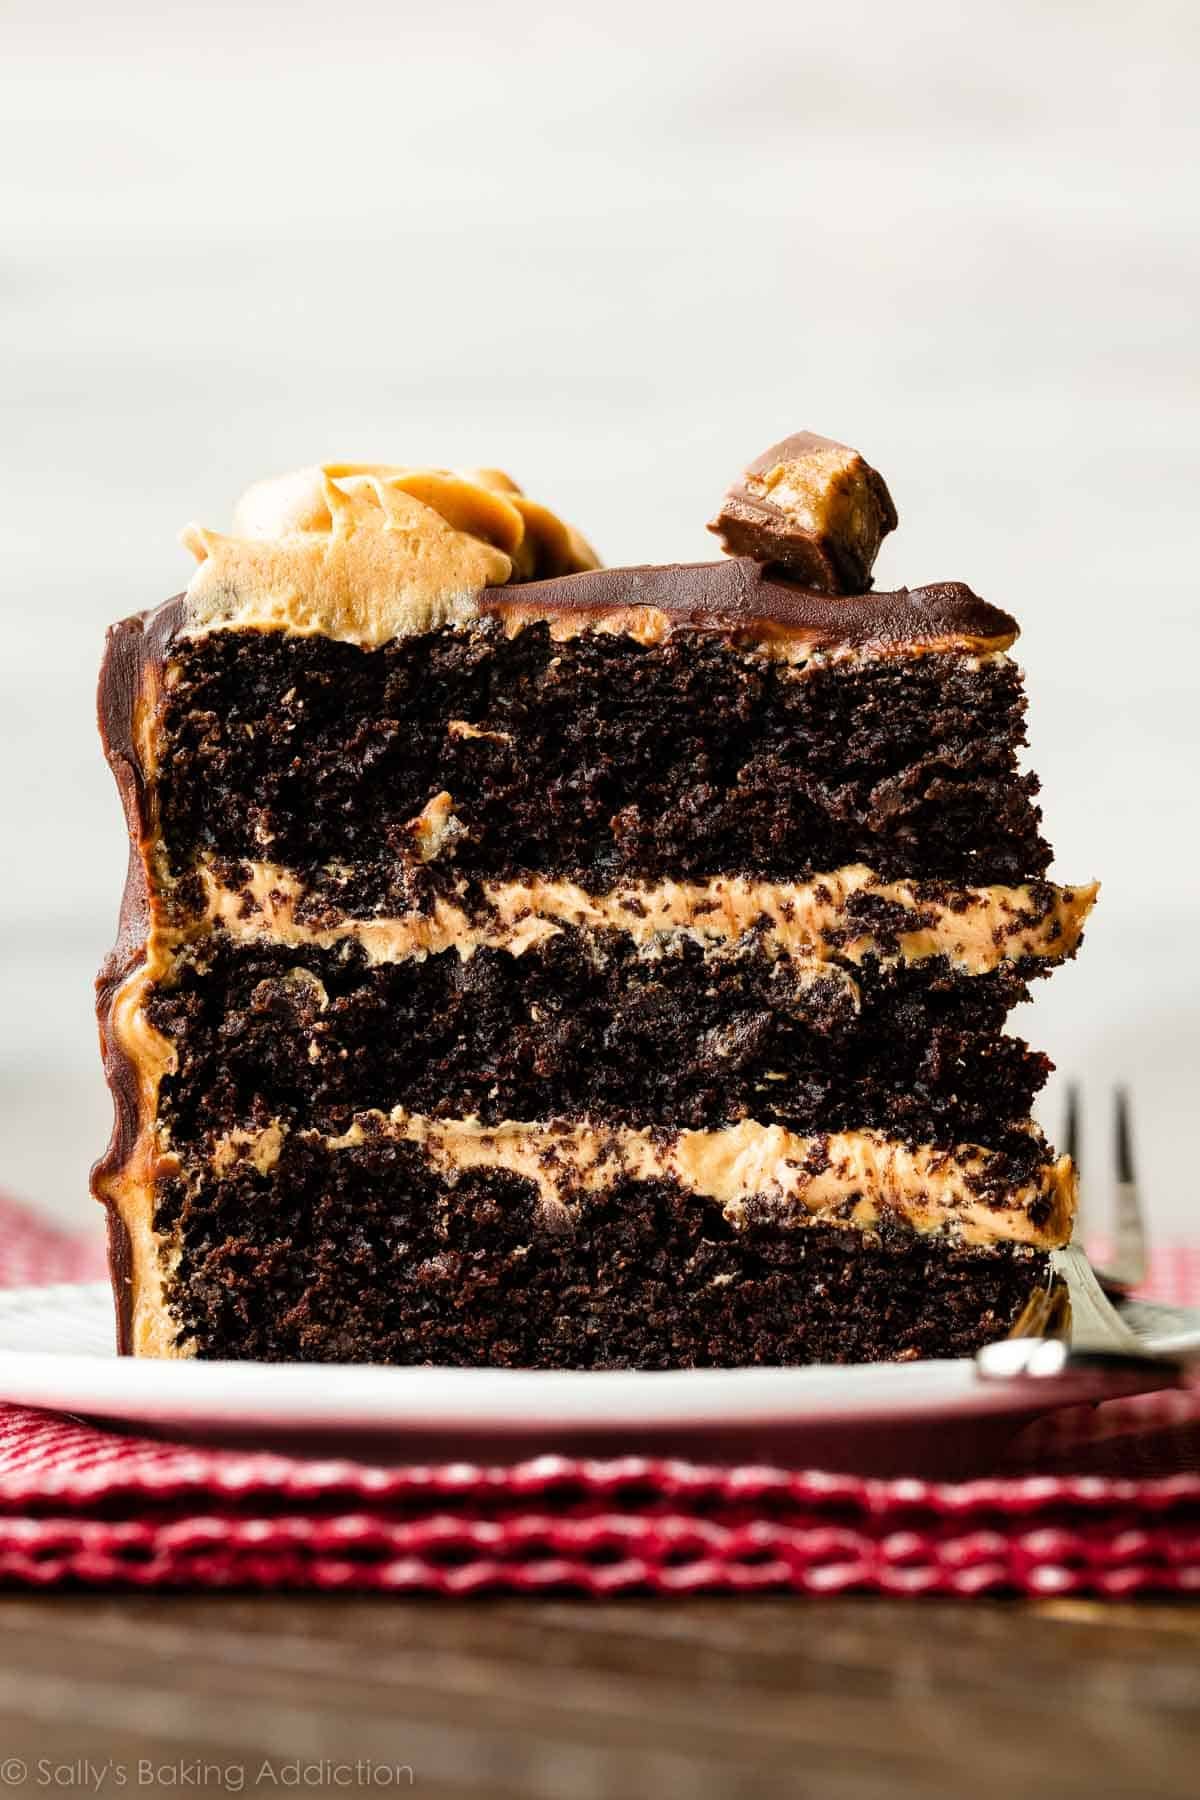
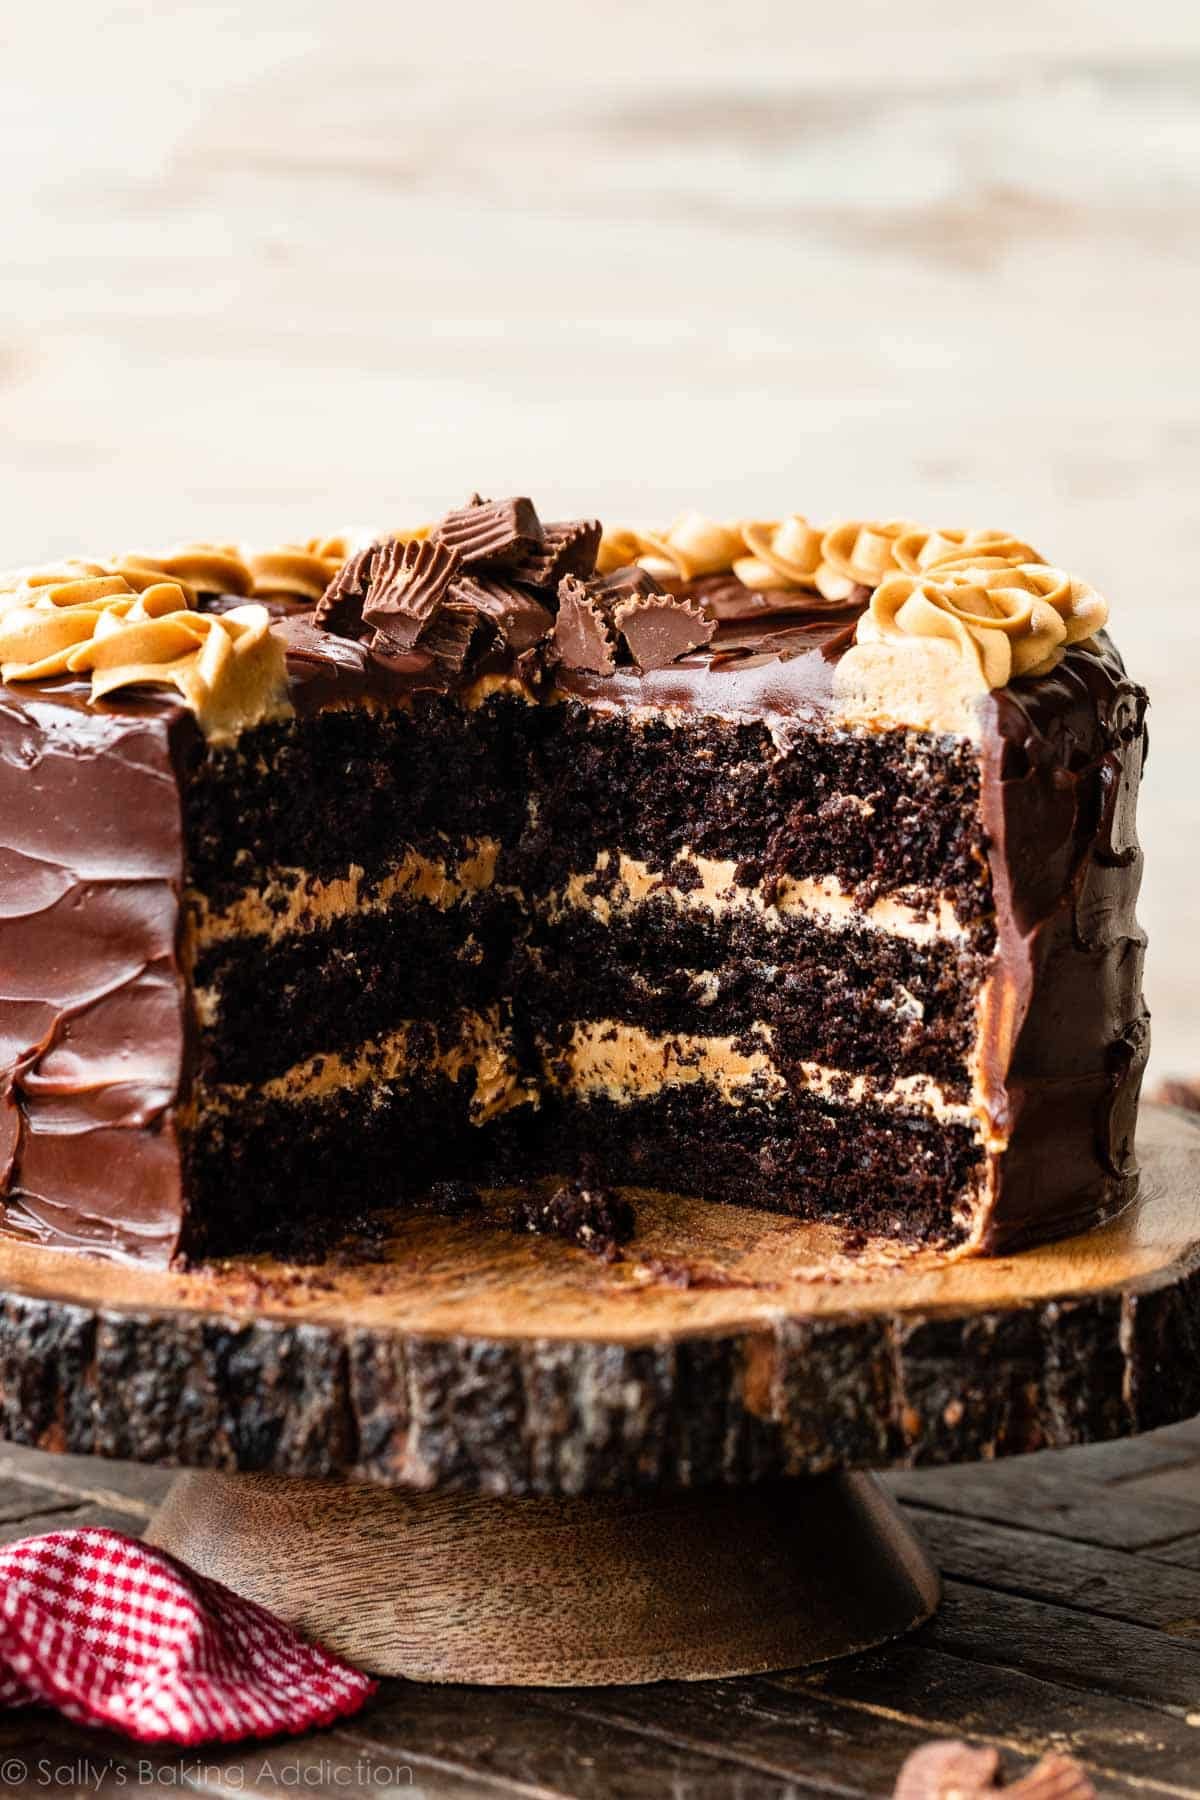
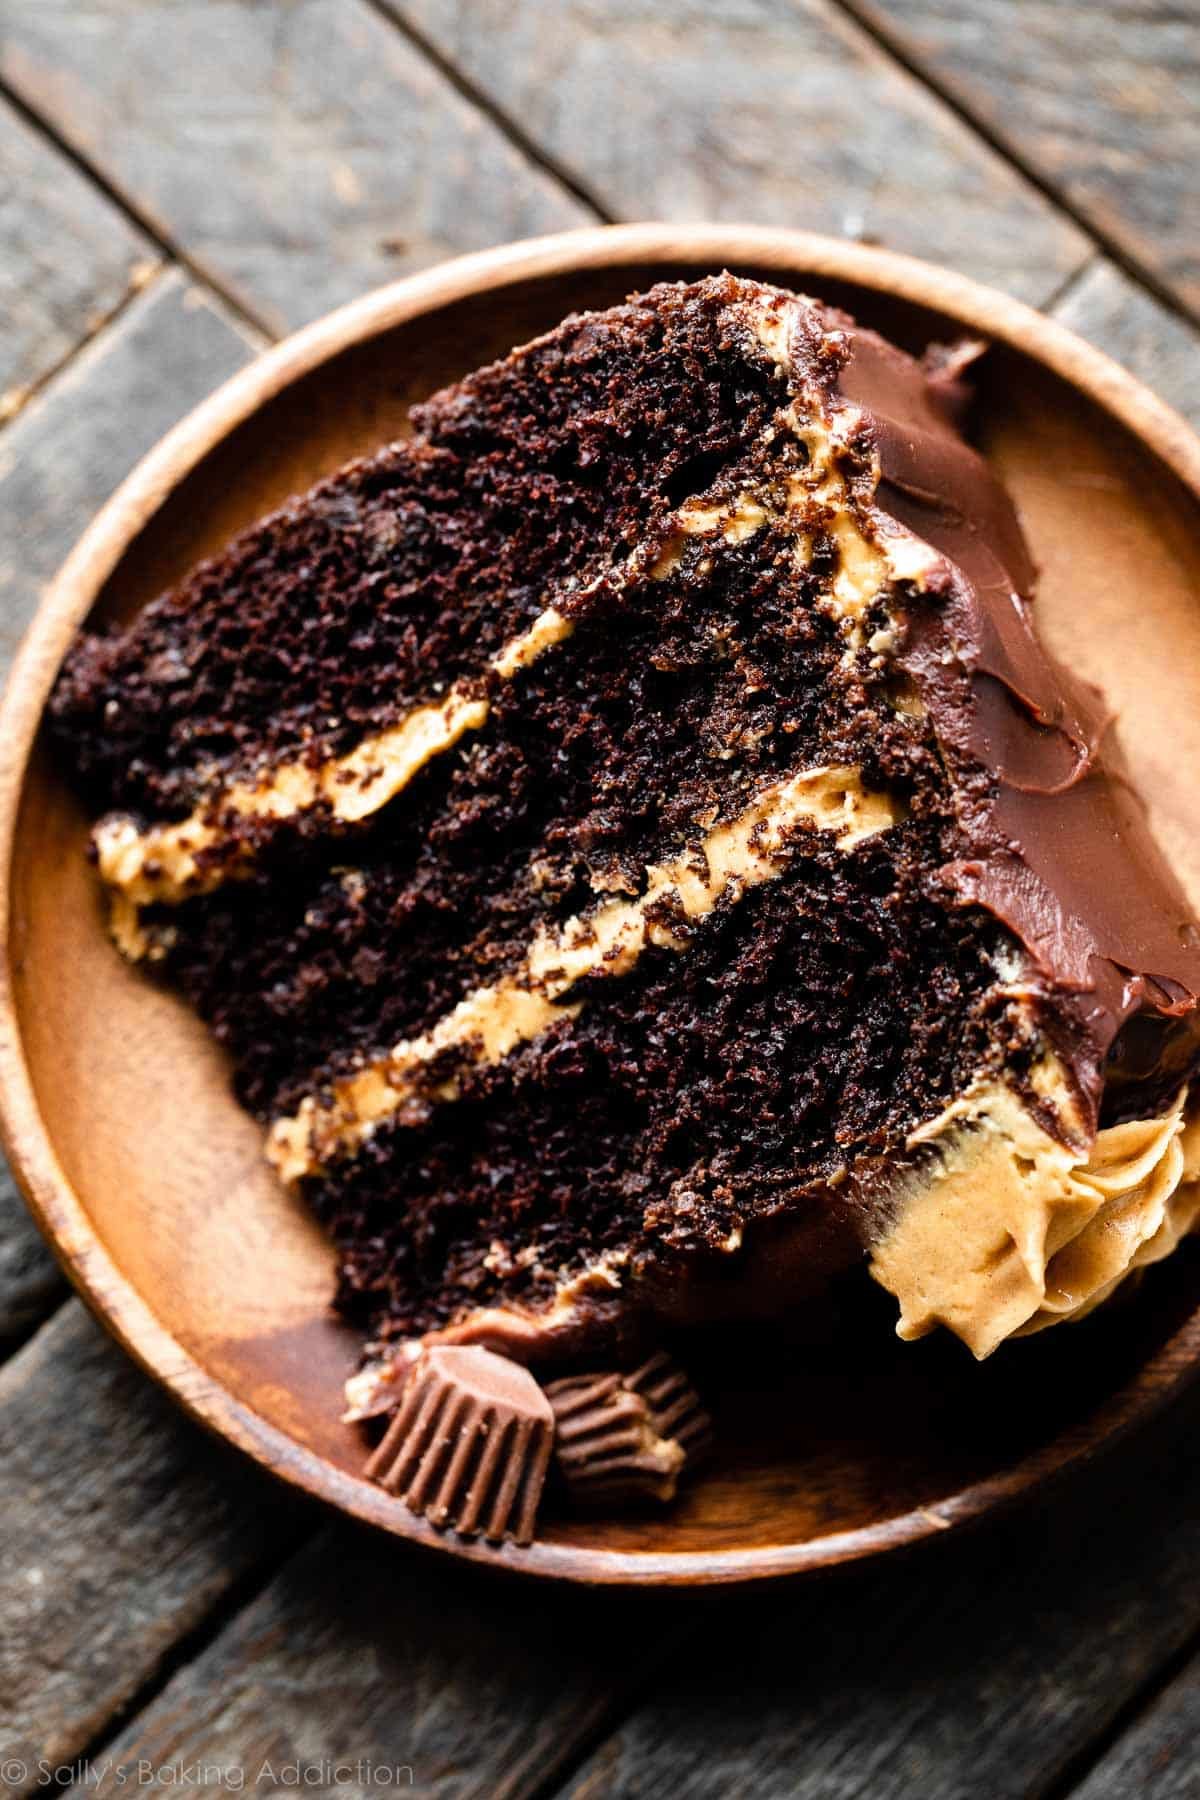
Meet our newest most eligible bachelor: the dark chocolate peanut butter cake. This cake is rich. Like, ultra-rich. I think the term “filthy rich” might even apply here.
A Cake With Serious Chocolate Flavor
How to Assemble & Decorate This Chocolate Peanut Butter Cake
I’m NOT a professional cake decorator and with all of my layer cakes, I prefer simplicity. Let me share how I stack and decorate this beauty:
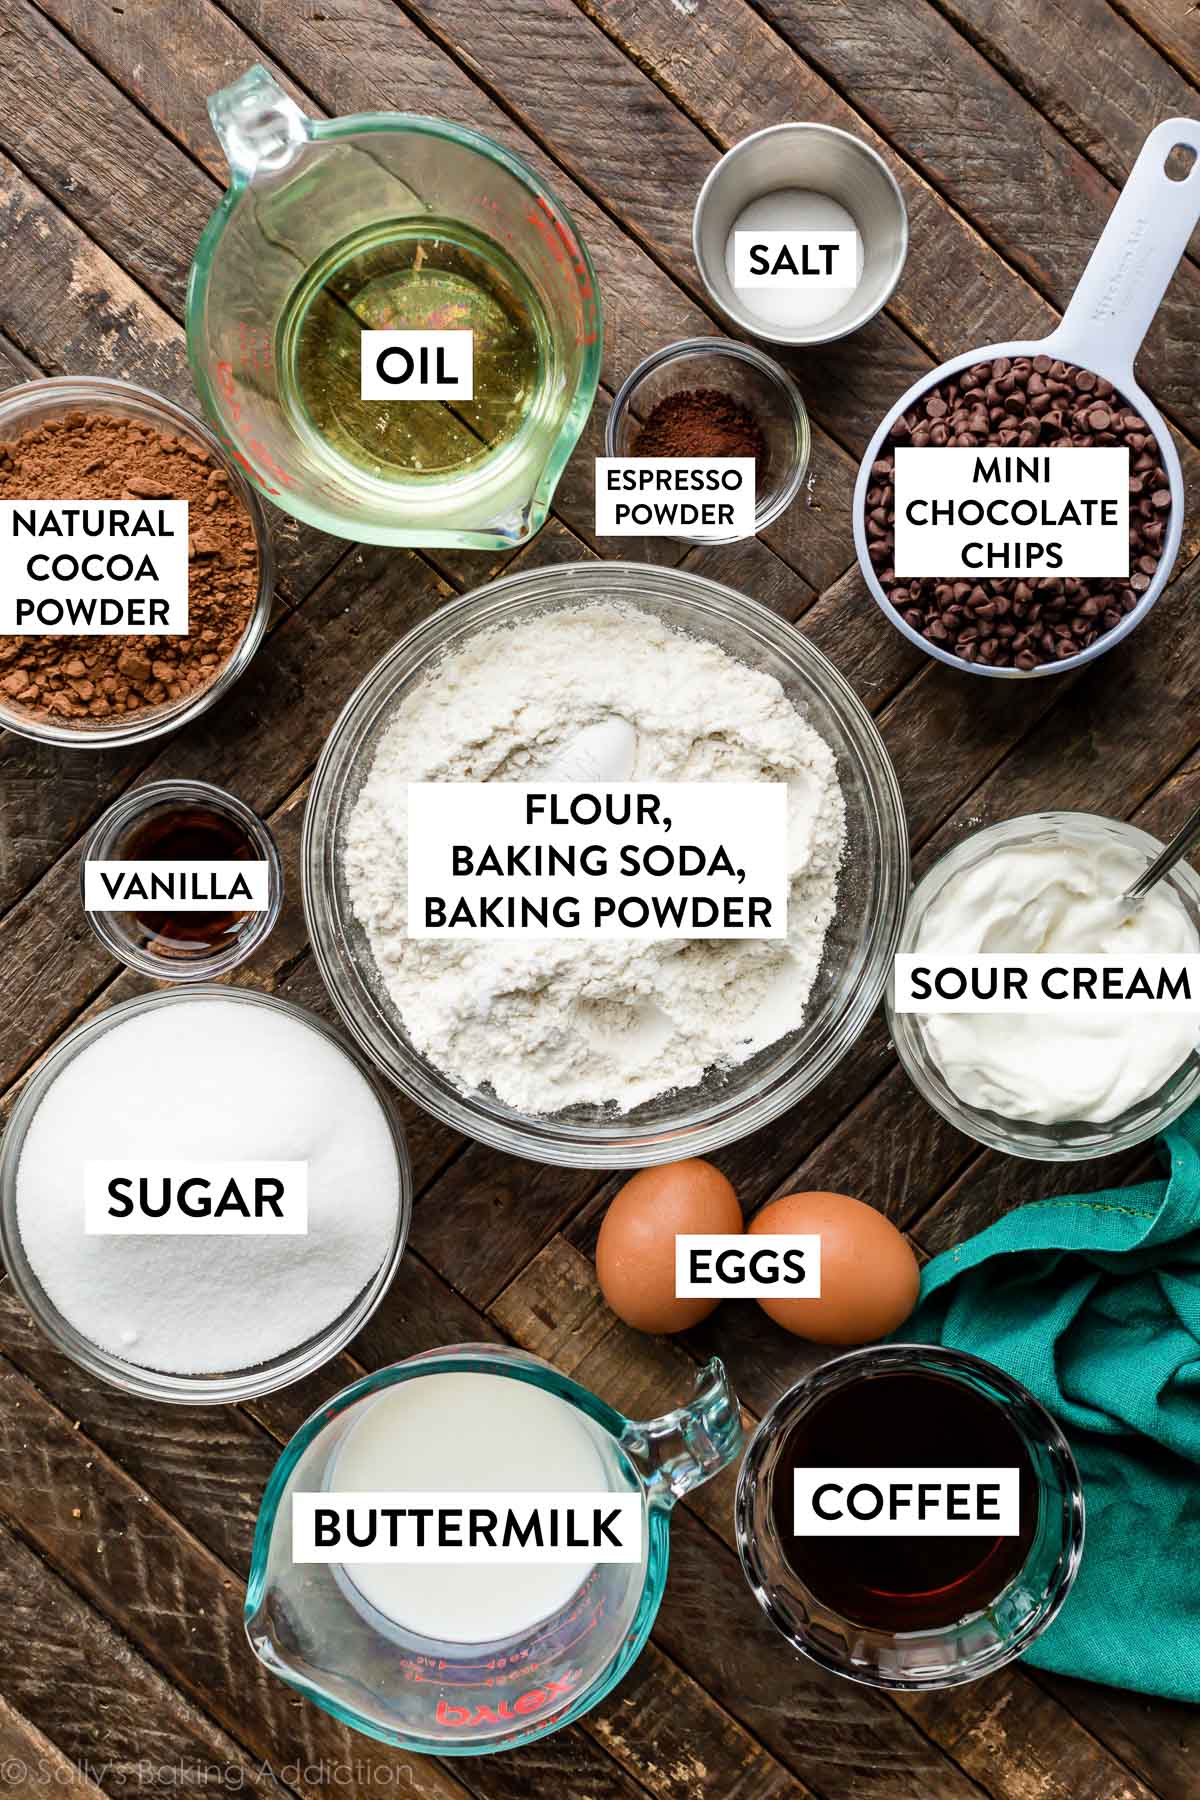
Why hot liquid? The hot liquid encourages the cocoa powder to bloom and dissolve.
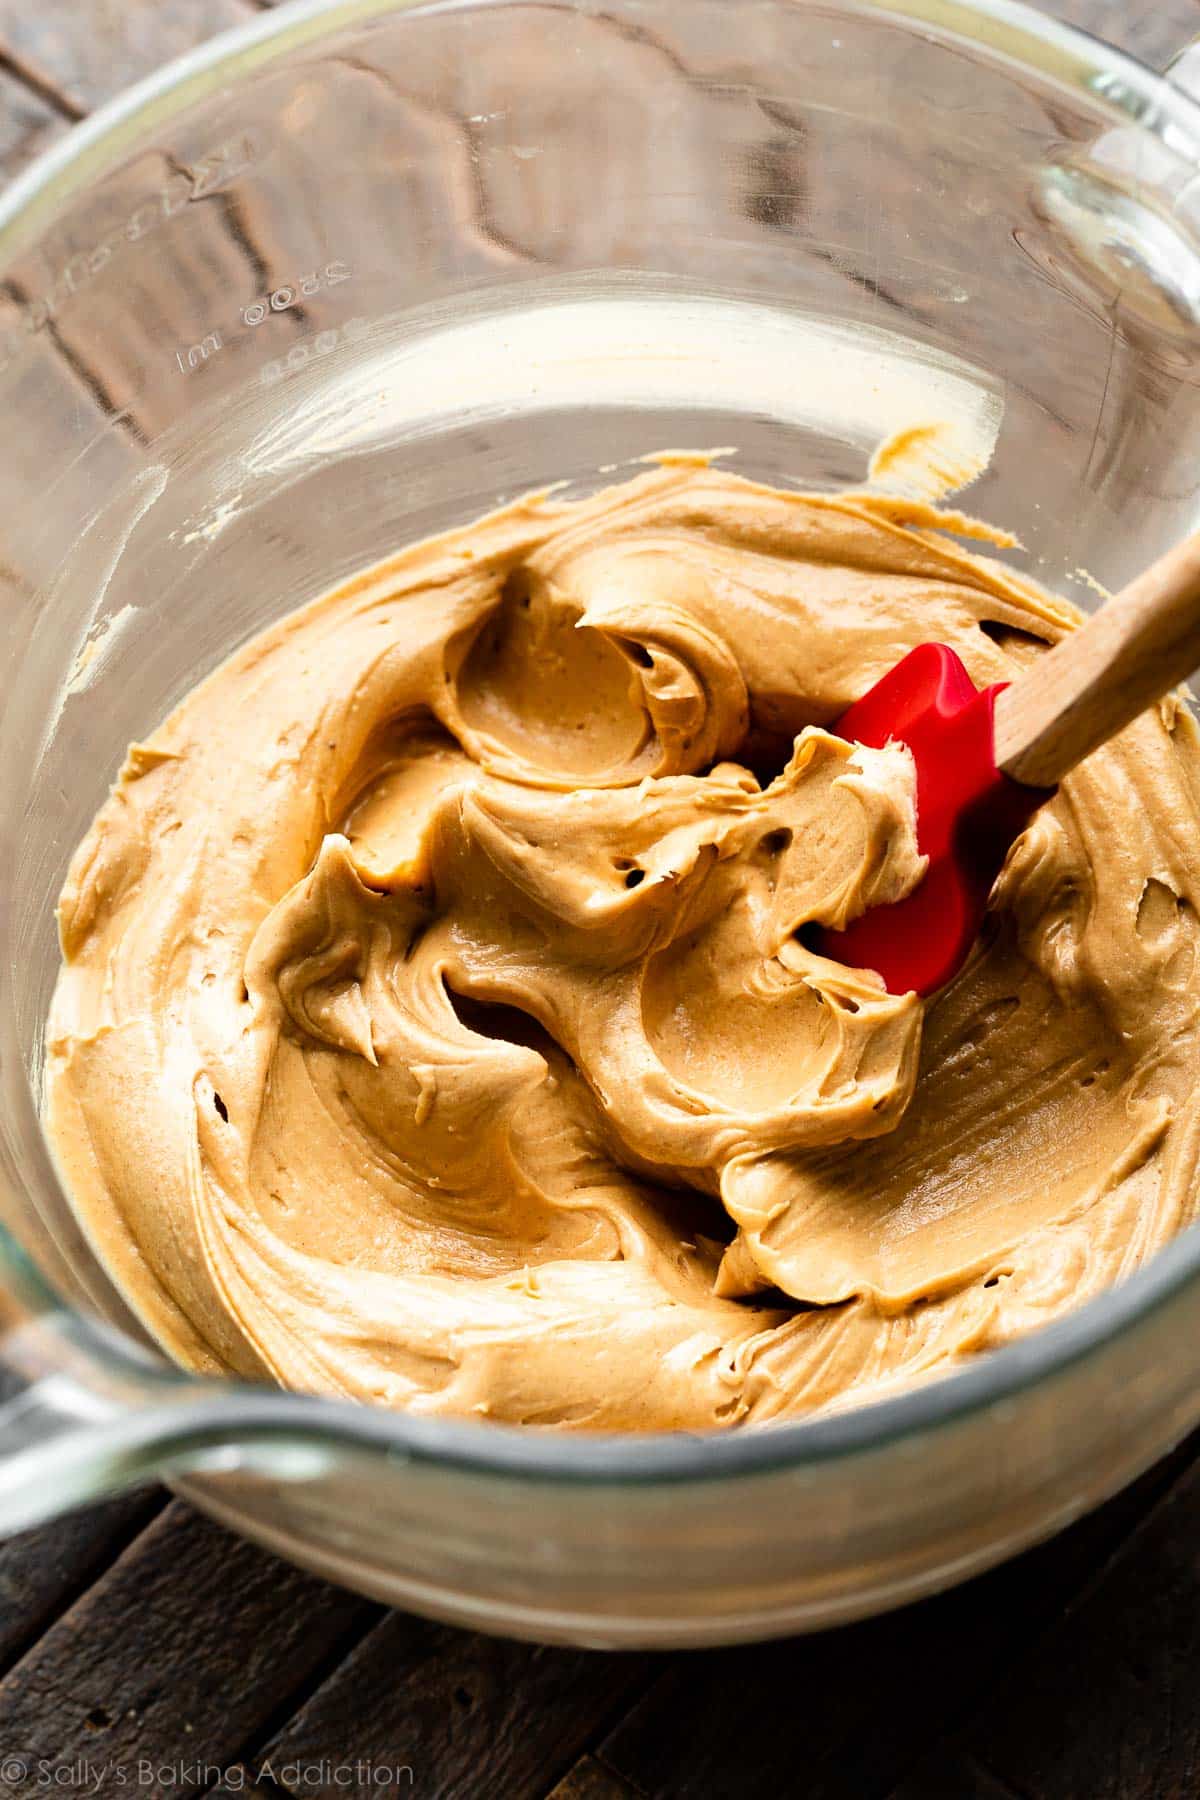
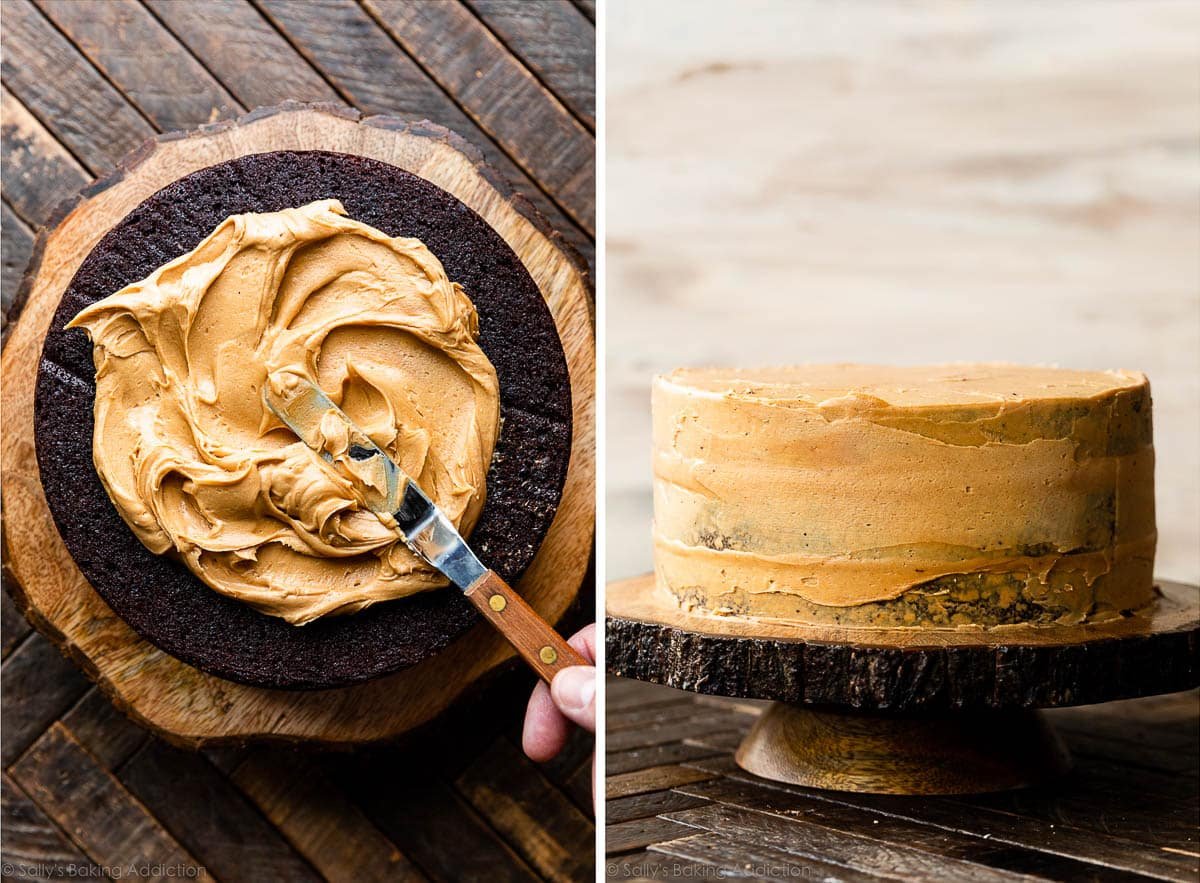
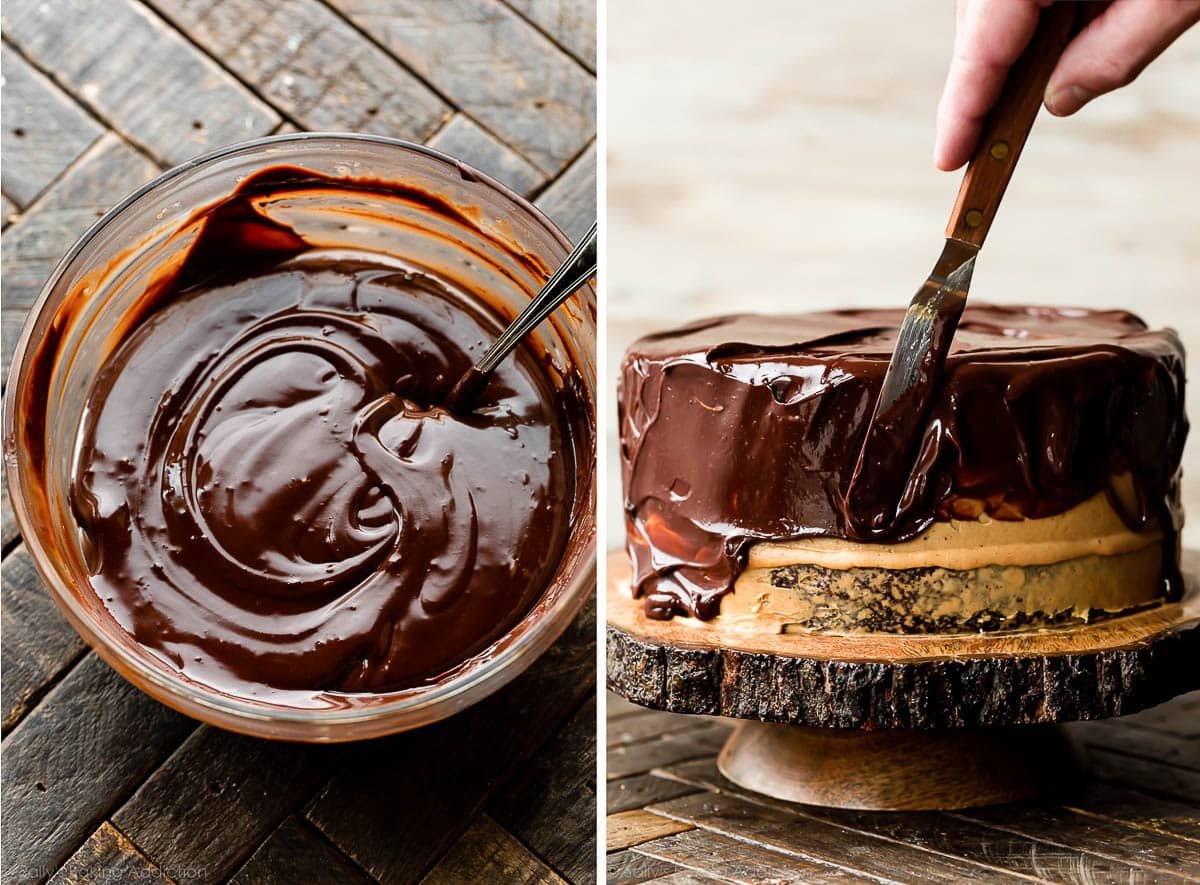
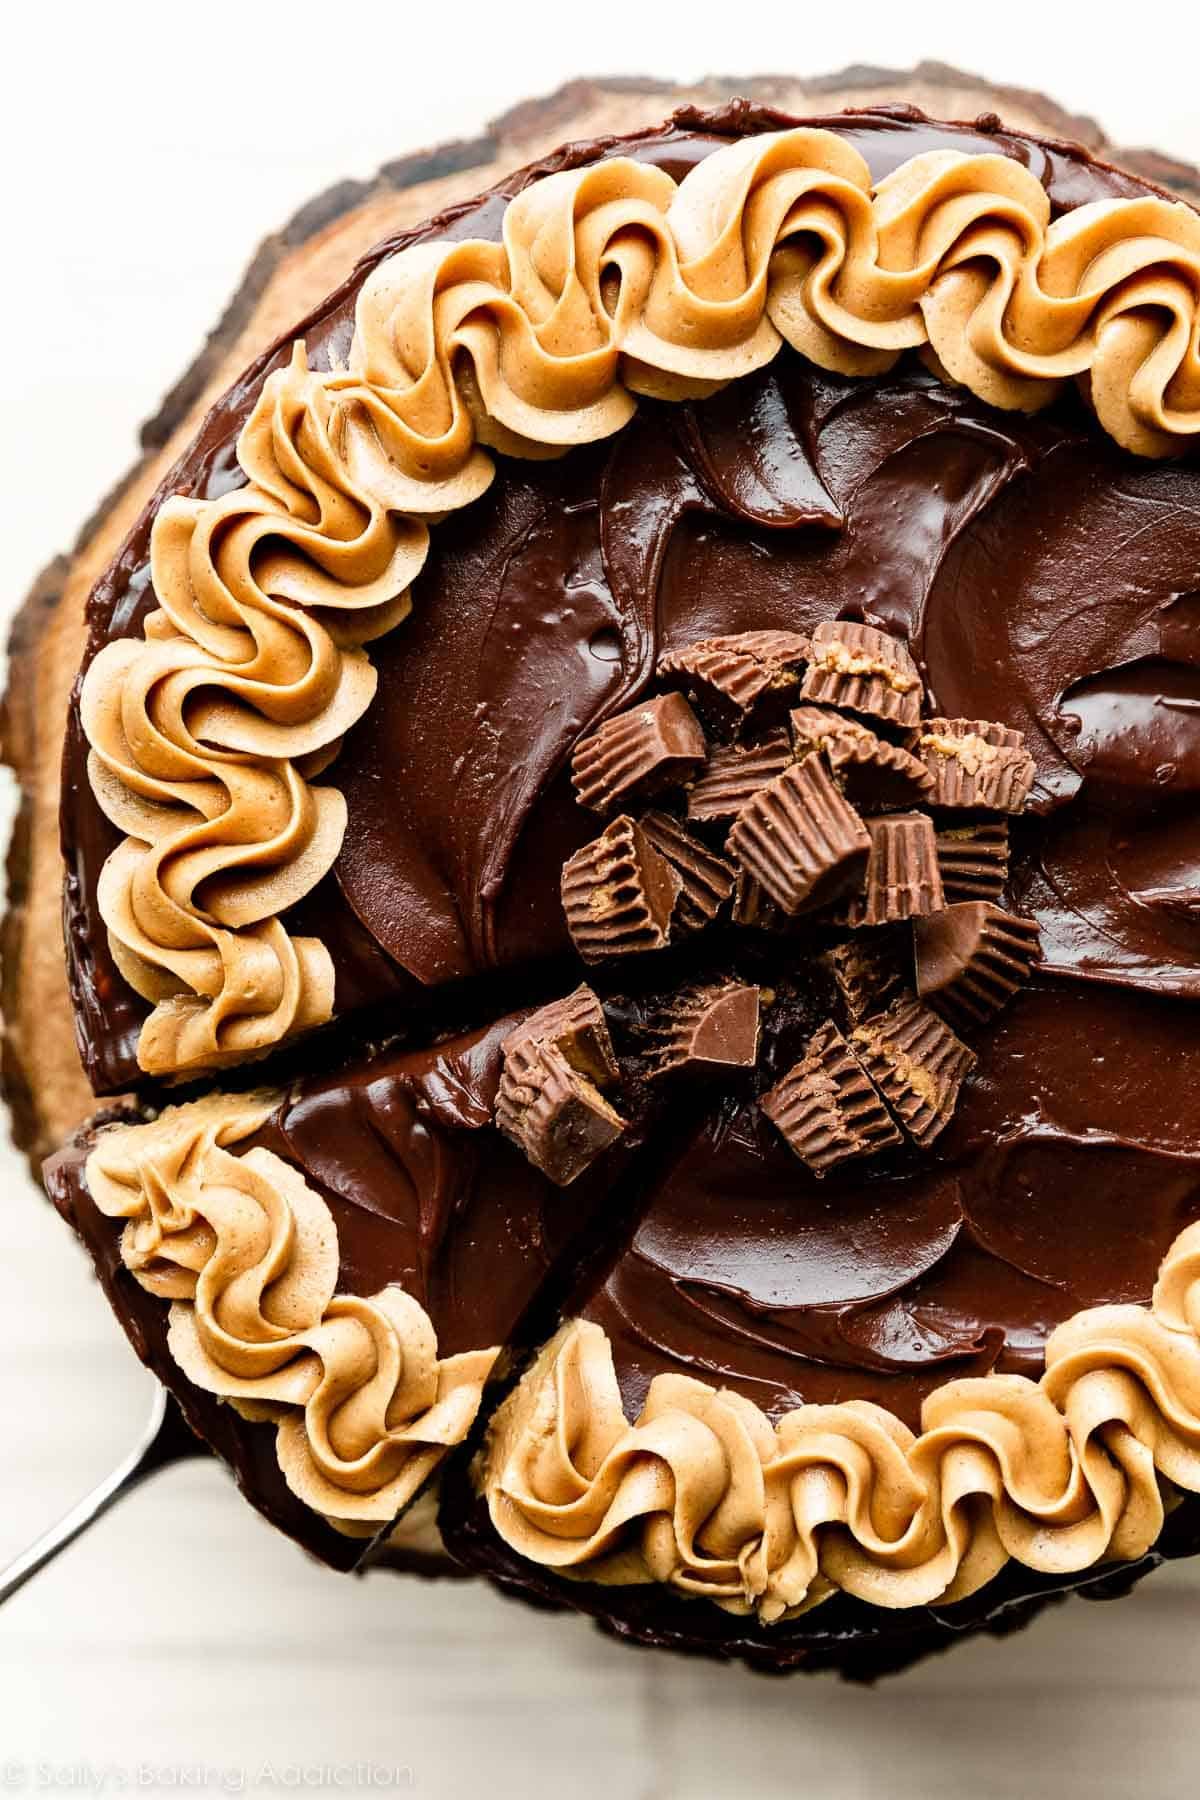
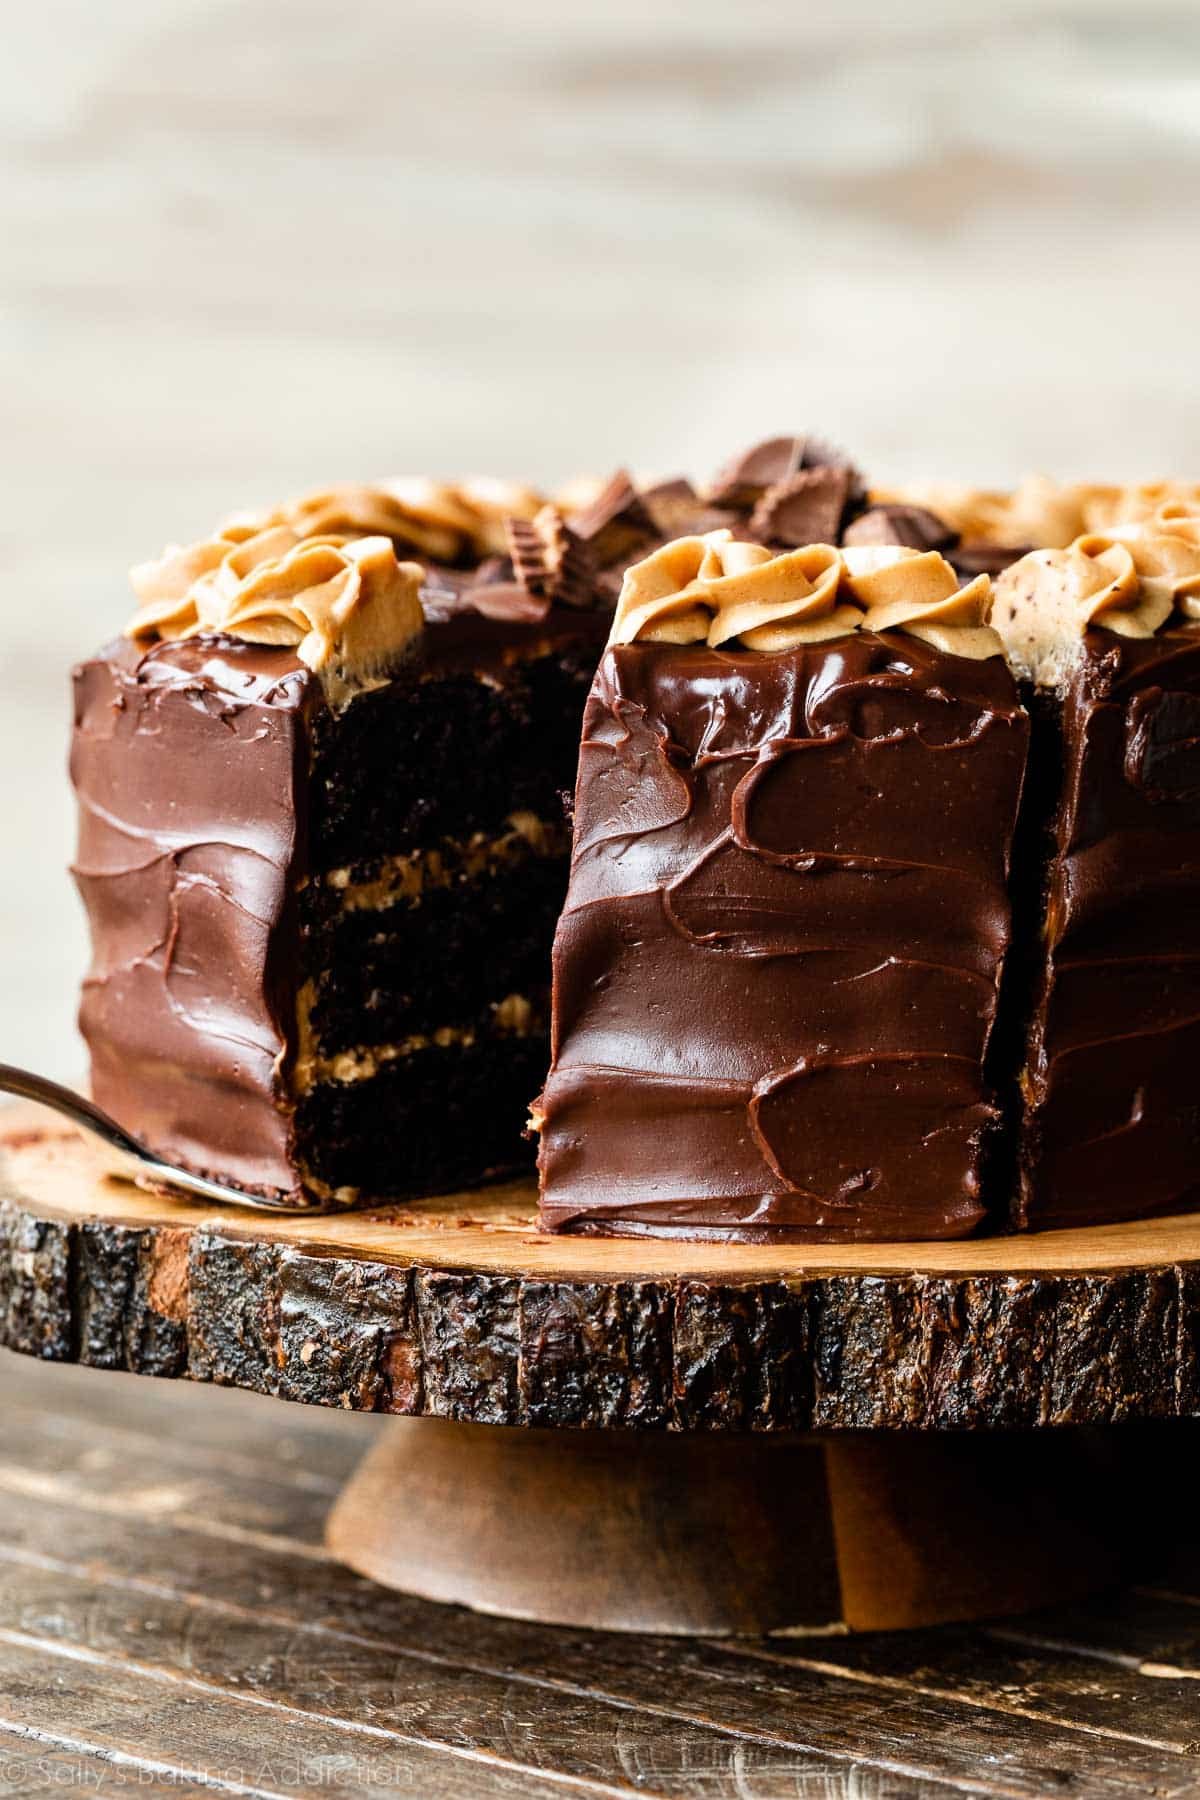
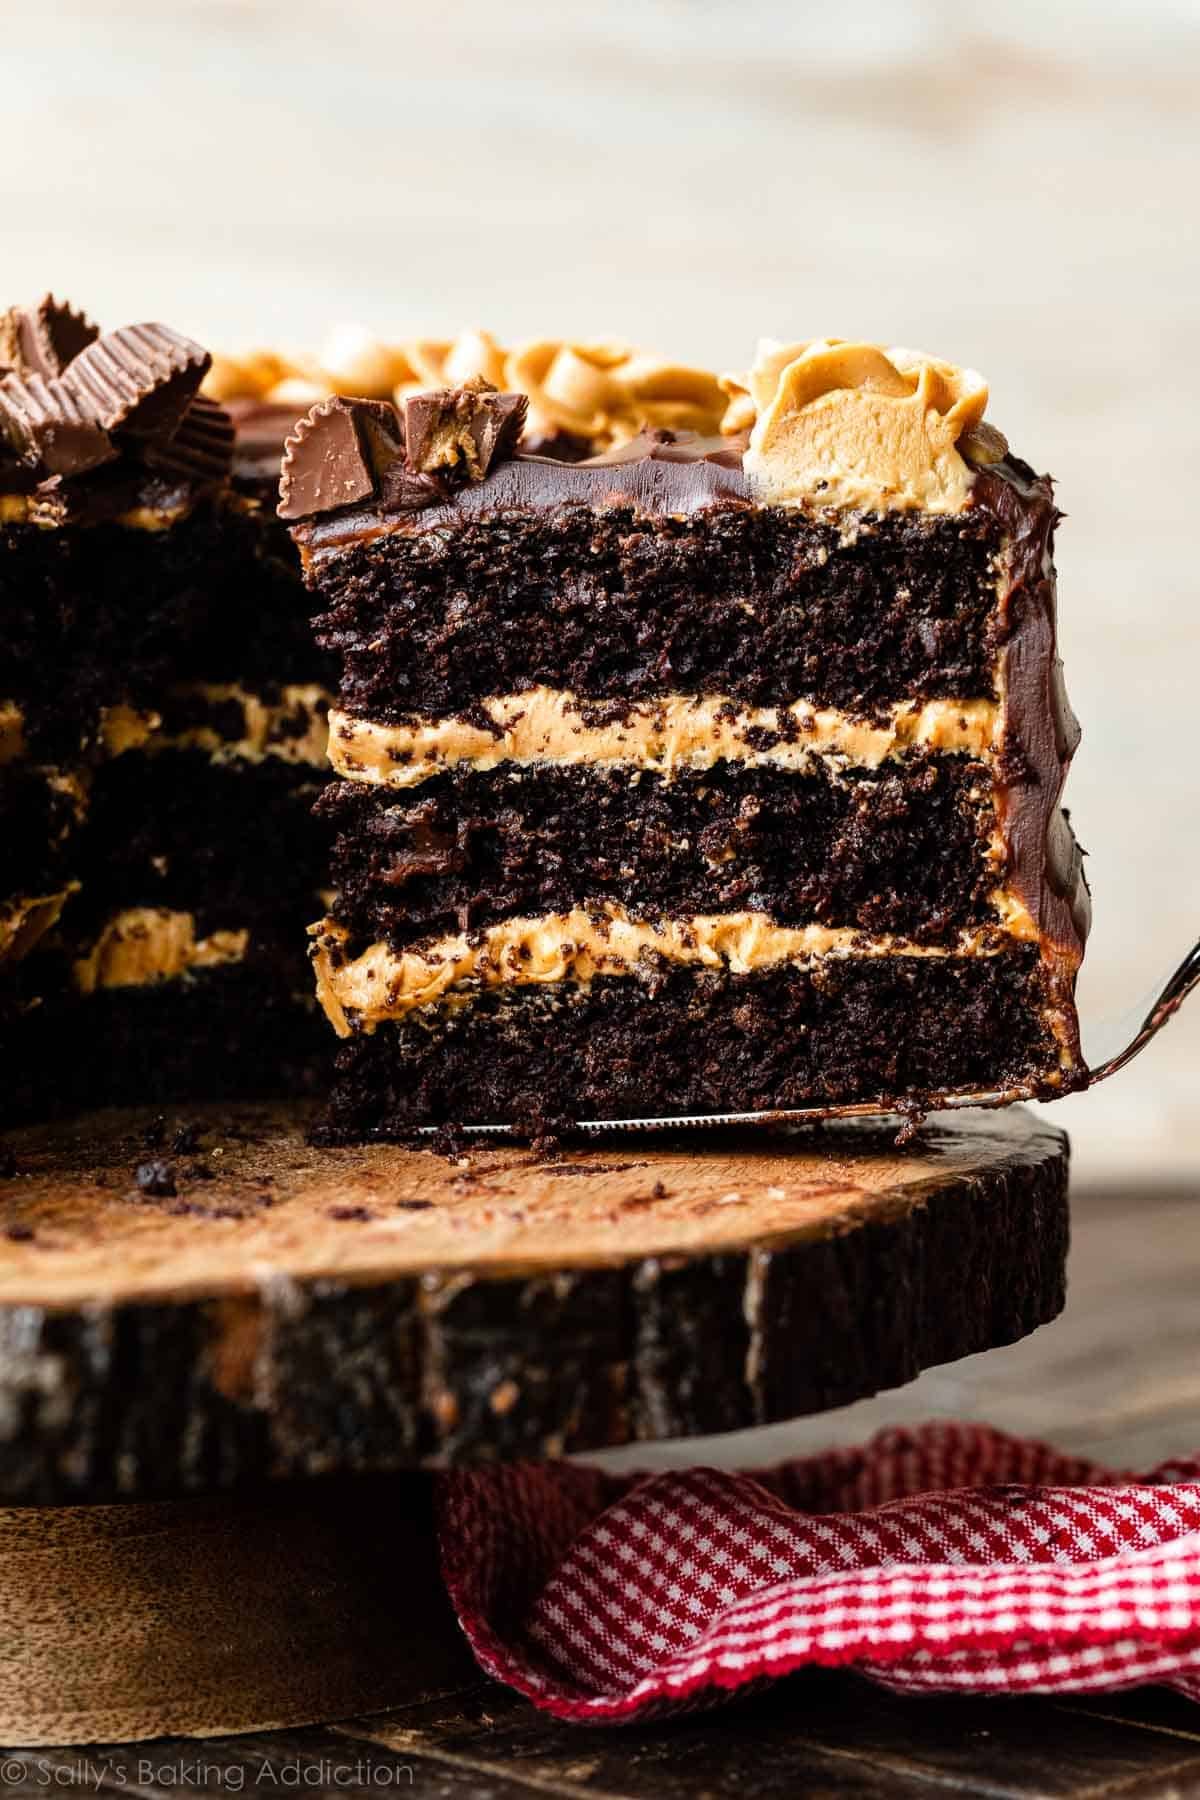
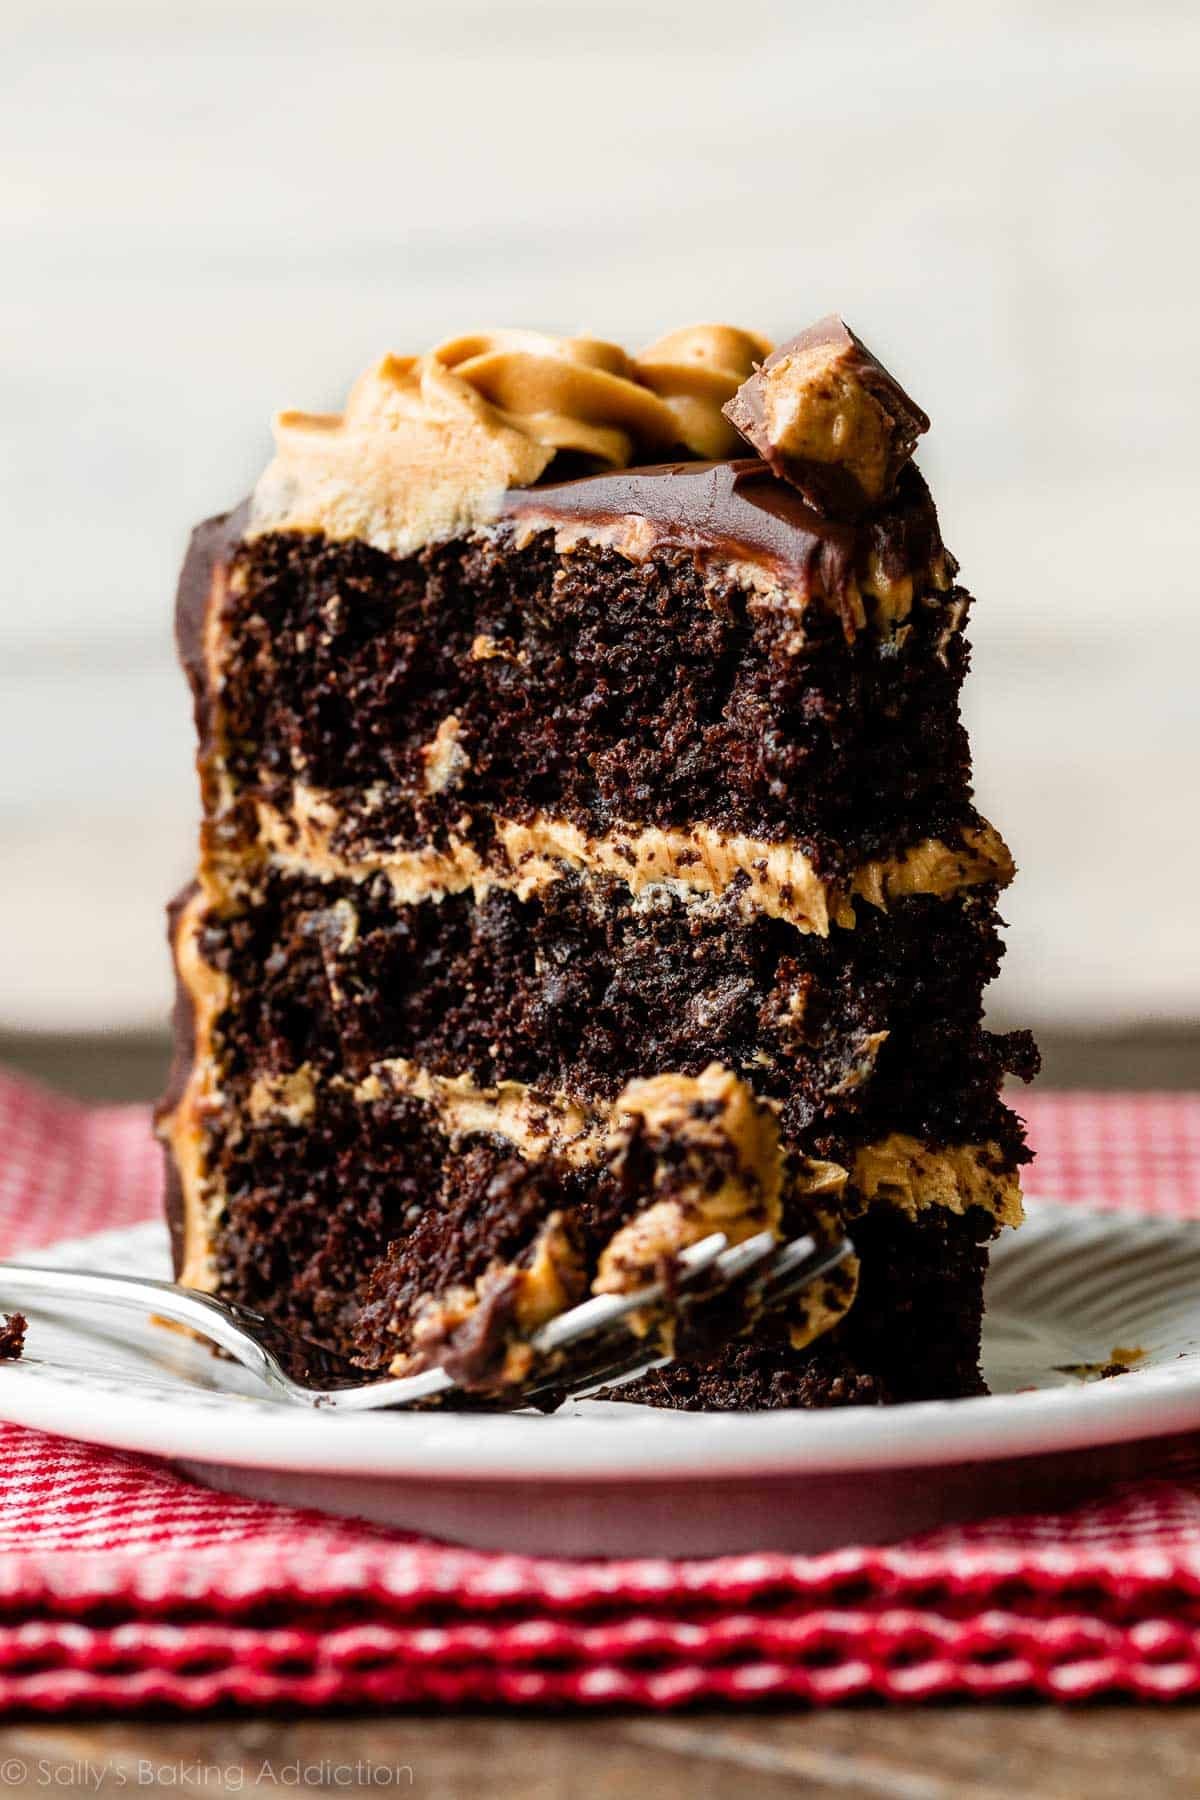
Chocolate chips take the chocolate flavor to the next level, and, as I mentioned above, they also supply phenomenal texture. Toss them in a little flour before folding into the batter. You’ll end up with 3.5–4 cups (about 850g), which is enough frosting for filling, crumb-coating, and some basic piping on the exterior. This frosting has incredible peanut butter flavor because it’s packed with nearly 2 cups of it! There’s no other way to make it. 😉 #1 Success Tip: Wait 20–30 minutes for the ganache to thicken before pouring or spooning onto the cake, which is convenient because you also have to wait for the crumb-coated cake to chill. As you can watch in the video tutorial below, a chilled cake helps set or solidify the ganache as you’re applying it, which helps prevent major drips/big messes. Assemble: Place the bottom cooled cake layer on your cake stand or serving plate. Using a large icing spatula or small offset spatula, evenly cover the top with about 1 cup of peanut butter frosting. Top with 2nd cake layer and another 1 cup of frosting. Top with the third cake and then spread a thin layer of the peanut butter frosting on top and around the sides as a crumb coat. Run a bench scraper around the cake to smooth it out. Refrigerate the cake for at least 30 minutes and up to 3 hours to set the crumb coat. Decorate: Pour slightly cooled chocolate ganache on top, then, once again, run a bench scraper around the sides to smooth it out. Finally, fill a piping bag (reusable or disposable) with the remaining peanut butter frosting and pipe around the edges of the cake. I use Wilton 1M for the piped detail. If desired, you can finish off this chocolate peanut butter bombshell with peanut butter cups. If you’re just learning how to use piping tips, my piping tips guide is a helpful resource, and don’t miss these complete lists of cake success tips and cake decorating tools. Now it’s your turn! Swoooon.
Recommended Tools
Stand Mixer or Handheld Mixer 3 9-inch Cake Pans (8-inch also works, but I recommend 9-inch for this cake) Parchment Paper Rounds Large Icing Spatula and/or Small Offset Spatula Cake Turntable (optional, I don’t use one for this) Bench Scraper Piping Bag (disposable or reusable) & Wilton 1M Piping Tip Cake Carrier for storing and transporting