See my vanilla cake pops recipe, too. I originally published this recipe in 2018 and have since added new photos and a video. Chocolate cake + chocolate frosting + colorful sprinkles = the most adorable treat! Today we’re making chocolate cake pops because, after I shared my vanilla cake pops, I received so many requests for a chocolate version! Your wish is my command. This recipe was a Sally’s Baking Challenge back in 2018, and readers have loved them over the years: By the way, if you’ve ever eaten store-bought cake pops—these taste totally different. They’re from scratch. There’s no cake mix, there’s no canned frosting. You can actually TASTE the homemade. One reader, Jen, commented: “This recipe was great! Made them for my son’s birthday party and had multiple people ask for the recipe! My son even said they were better than Starbucks! ★★★★★” I have plenty of step-by-step photos, a video tutorial, and lots of success tips today because I want you to understand every instruction before it’s your turn to make them. After all, the process isn’t difficult—you’re literally just baking a chocolate cake and making frosting and then mixing them together. But things just get a little particular when it comes to rolling, lollipop-sticking, and dunking/dipping. If you can make bread bowls, you can handle cake pops. (They’re more fun to eat too… sprinkles!)
How to Make Chocolate Cake Pops
Since we’re ditching box cake mix and canned frosting, we’ll need to take a little extra time to prep both from scratch. Here’s an overview of the process: Quick tip: Whenever I make cake pops from scratch, I always begin the night before. I make the cake, cover it, and let it sit out at room temperature overnight. I also prepare the frosting, cover, and refrigerate. This way everything’s ready to go the next day.
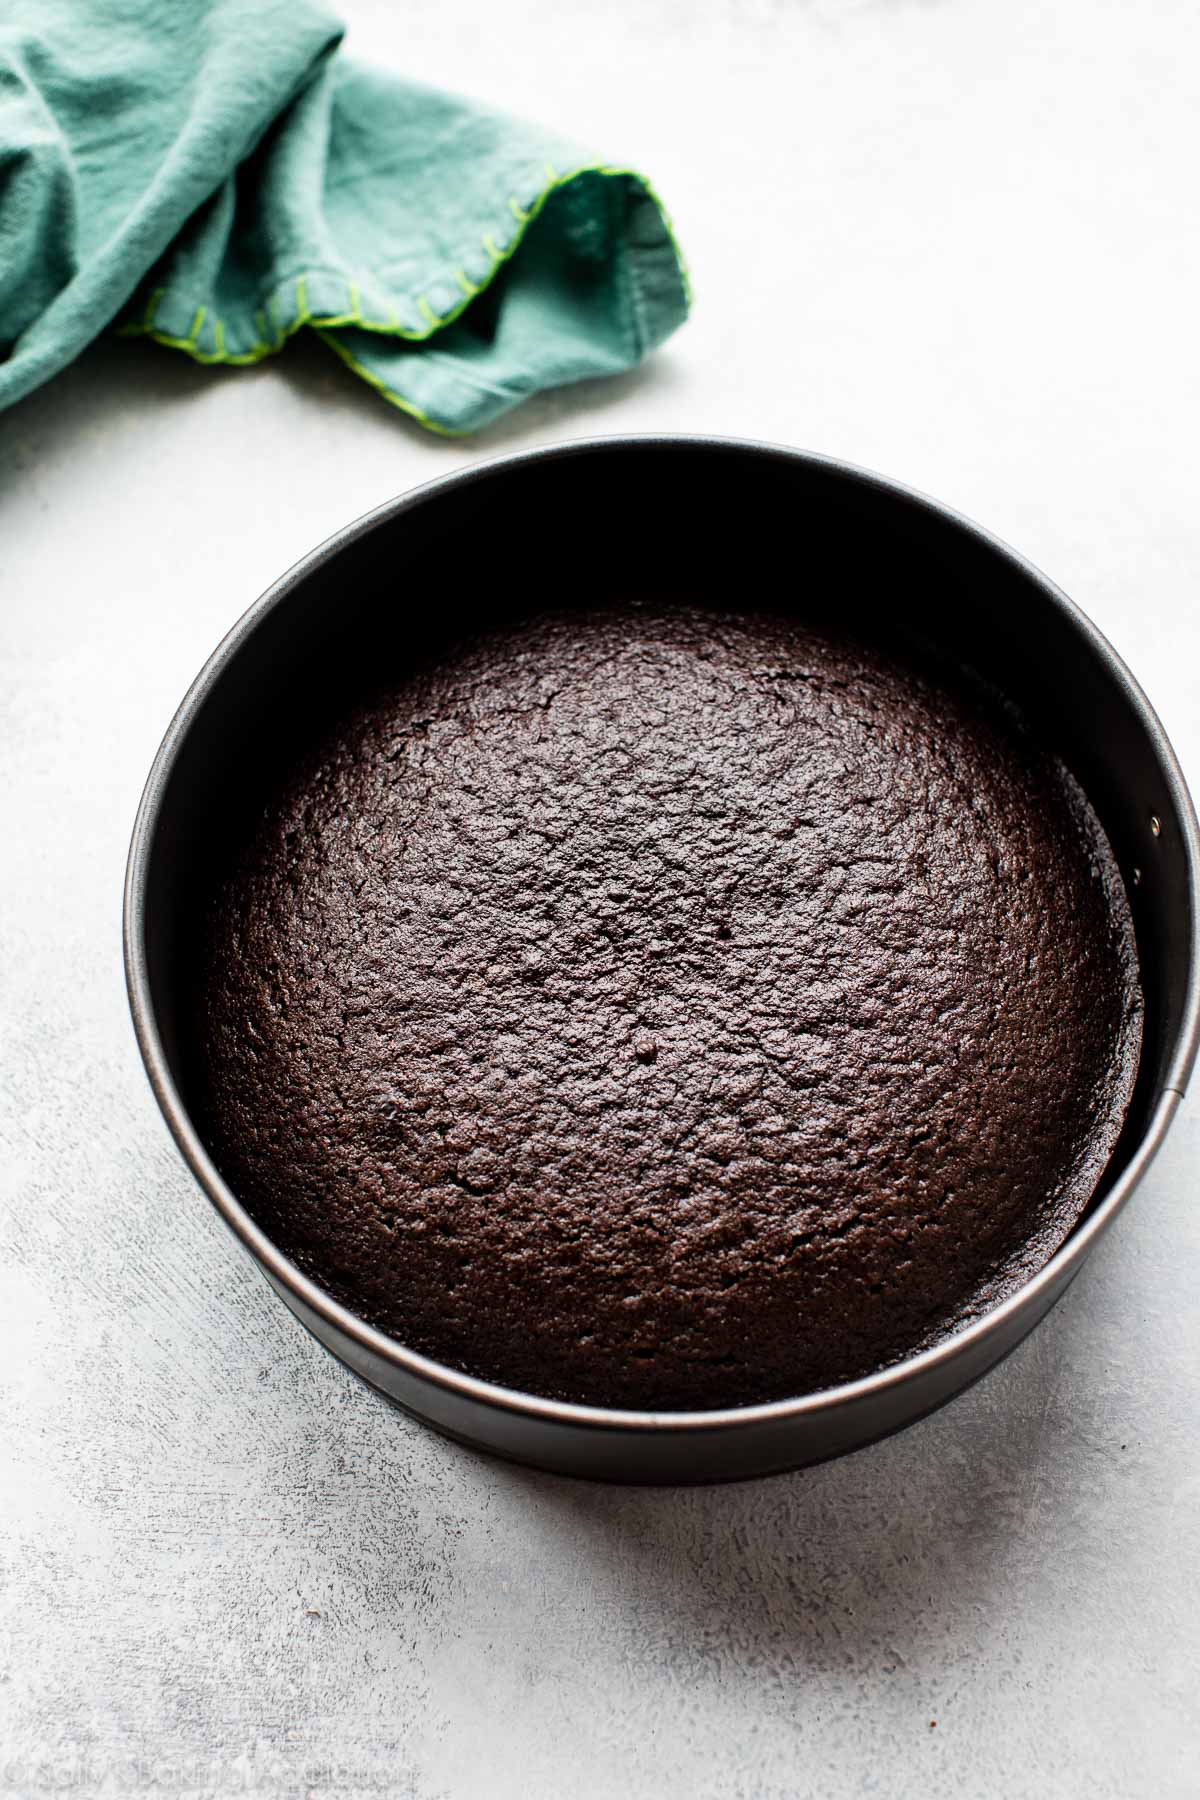
Make a 1-Layer Chocolate Cake
It might seem like the switch from vanilla cake pops to chocolate cake pops is easy. Replace some flour with cocoa powder, right? And vanilla frosting with chocolate frosting? I wish! Chocolate is a complicated soul and requires a little finesse; that’s why my vanilla cake and chocolate cake recipes are so different! I baked a few single-layer chocolate cakes before stopping with this one. By the way, you can totally enjoy this chocolate cake on its own. If you ever need a single-layer chocolate cake—use this recipe. It’s so good. Deep and dark chocolate flavor. Super moist. Super rich. Top with chocolate buttercream, whipped cream, peanut butter frosting, or red wine chocolate ganache. The first few began with creamed butter + sugar. My favorite chocolate cakes and cupcakes typically rely on oil for the fat because (1) moisture and (2) the flavor of butter really isn’t necessary because chocolate overpowers it anyway. My initial thought with cake pops, however, was that I needed a slightly drier cake to get the best texture for cake pops (because it will be mixed with frosting). Well this was just a huge mess from the start, because dry cake is gross.
That being said, you’ll need oil for the cake. And a few other basics like cocoa powder, sugar, flour, and eggs. Hot water is also a must. The hot liquid encourages the cocoa powder to bloom and dissolve. When I make chocolate cake, I usually reach for hot coffee (instead of hot water) because coffee accentuates the chocolate favor—but that’s not as crucial here, because we’re just crumbling the cake and mixing with chocolate frosting.
What was a little more difficult than testing the perfect single-layer chocolate cake was figuring out how much frosting I needed. Too much frosting and the cake pops are wet and greasy, while too little frosting means there isn’t enough to bind the cake crumbles. After lots of trial and error, I finally found the perfect amount… and it’s not much, because the chocolate cake is already so moist. Crumble the cake into the bowl of frosting, and yes, you’ll feel very weird doing this. You just made this beautiful chocolate cake and will now break it up into a bowl of frosting. Because that’s what cake pops are—cake crumbs and frosting. Once the two are mixed together, it’s time to roll the mixture into balls. This part is EASY. I found the chocolate cake pops much easier to roll into balls than my vanilla version. This mixture is just sooo smooth! Your hands will get a little sticky, but just roll with it. 😉
Tips for Homemade Chocolate Cake Pops
Success Tip #1: Make Smaller Cake Pops: If you roll the cake pops too large, they’ll wobble off the lollipop stick because they’re too heavy. You need 1 Tablespoon of the cake pop mixture per ball (about 20g). No more, no less. You’ll end up with 40 of them. Quite a lot—but these freeze beautifully! And you can gift them to anyone and everyone. Who doesn’t love a homemade cake pop? These cake balls need to chill in the refrigerator before we pop ’em on a lollipop stick. Why? They’re much too delicate right now; they’ll completely fall apart. Which reminds me… you do NOT have to make these as pops. You can make them truffle-style by simply rolling them and coating in chocolate (just like how we make Oreo balls). Either way you enjoy them, chill the cake balls before coating. I just place them on a lined baking sheet and refrigerate them for a couple hours.
Speaking of chocolate, you can dunk the cake balls into melted chocolate (white or semi-sweet), which is what I prefer for best taste, but that’s pretty expensive. And you need a good amount for all 40 cake pops. Instead, you can use candy melts/candy coating, and I give both options in the recipe below, along with notes for each choice.
Success Tip #2: To ensure the cake ball stays secure on the lollipop stick, dip one end of the stick into the melted chocolate coating first (just about 1/2 inch down), and then insert the coated end into the center of the cake ball. This helps the cake ball adhere to the lollipop stick. Success Tip #3: A 2-cup glass liquid measuring cup is the perfect depth for dipping the cake pops. If I’m using melted chocolate, like I did in these photos, I melt it in a double boiler then spoon a little at a time into the measuring cup. I don’t like dipping right into the whole pot of melted chocolate. Let the melted chocolate cool down for about 5 minutes before you dip the cold cake balls into it. (Otherwise the coating might crack as it dries.) Success Tip #4: The best way to allow the coating to dry and set—without ruining the perfectly round cake pops—is to place them right-side-up in a large styrofoam block or even a box. I used a box, as pictured below, for this batch. I just poked little holes into it. Easy and cheap. If you’re topping with sprinkles (always recommended!), add them now before the chocolate sets. Cake pops dry/set within an hour or so. Enjoy!
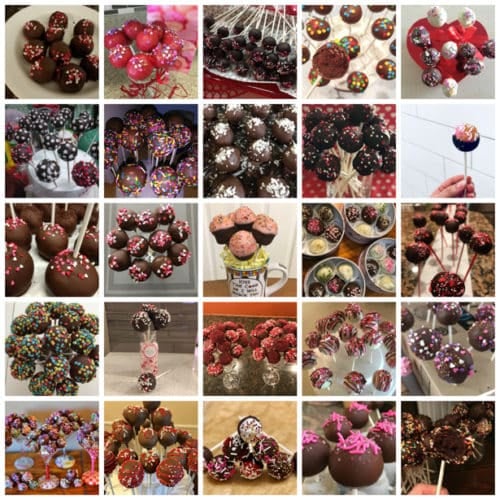
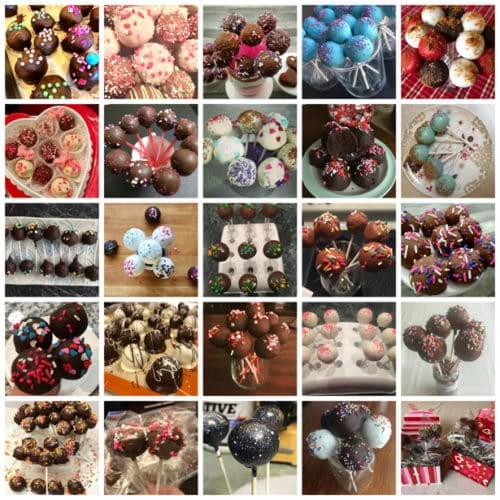
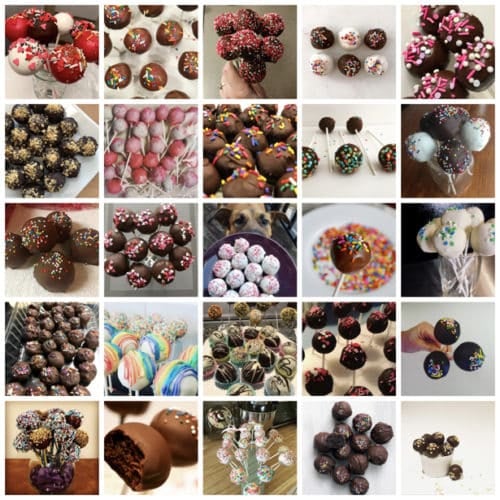
See Your Chocolate Cake Pops!
Many readers tried this recipe as part of a baking challenge! Feel free to email or share your recipe photos with us on social media. 🙂